IntelliJ IDEA is currently, probably, the most popular IDE for Java projects. Among many cool features, one of the most useful is that it allows to format our code in a completely customized way. In this example, we will see how it works.
For this tutorial, we have used:
- IntelliJ IDEA 2016.2.2 Community Edition (free and open source).
- Linux Mint 18.
You can download the IDE from the official JetBrains website, available for Linux, Windows and MacOS.
You may skip project creation and jump directly to the beginning of the example below.
1. Project creation
If it is the first time you open IntelliJ IDEA, you will see that it suggests you to create a new project. Otherwise, create a new file selecting “File/New/Project“.
In the new window, you have to select “Java” as the project type, and then select the SDK for the project, as shown in the image below.
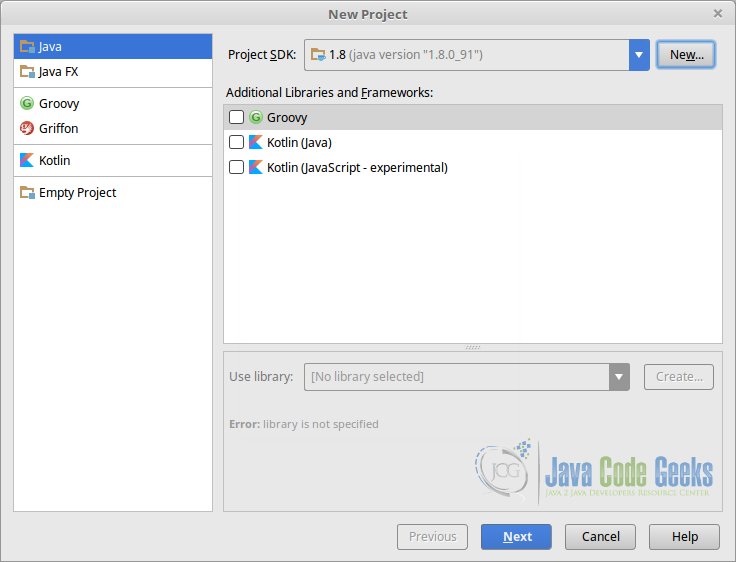
Then, just select the name for the project, and finish the creation.
2. Sample code
Before anything, let’s create a sample code. It doesn’t even have to make sense, it’s just to see how the code formatting works.
For example, we could create a couple of dummy classes like the following:
Bar.java
package com.javacodegeeks.intellij.formatcode;

public class Bar {

public void bar() {
System.out.println("bar");
}
}
Foo.java
package com.javacodegeeks.intellij.formatcode;

public class Foo {

private Bar bar;

public Foo(Bar bar) {
this.bar = bar;
}

public void callBar() {
bar.bar();
}
}
3. Formatting the code
The most easy way to reformat the code is with the shortcut: Ctrl + Alt + L (or also Ctrl + Windows Key + Alt + L, useful for Linux users that have the Ctrl + Alt + L shortcut for locking the screen.
So, if we use the shortcut for example, Bar.java, it will look now like:
Bar.java
package com.javacodegeeks.intellij.formatcode;

public class Bar {

    public void bar() {
        System.out.println("bar");
    }
}
Note that IntelliJ IDEA hasn’t asked us how it should format the code. It has just formatted it following the default options, which may not be suitable for everyone. Let’s see how we can custom the formatting settings.
3.1. Format options
The options for formatting the code are defined in “File/Settings/Editor/Code Style”. Under this last option, there’s a code style scheme for different file types, but we will just look for the Java ones.
The code style options are categorized in the following categories:
- Tabs and indents: the configuration for the indentation, i.e., the indentation of the code blocks. You can also choose to use the tab character, or several spaces.
- Spaces: this section allows to configure the white spaces before and after the control structures and operators, for almost every possible option. For example, to set a white space before the opening curly brace
{, after commas in method definitions/calls, the assignment operation=, and a large etc. - Wrapping and braces: similar to the previous one, but in this case wrapping the lines, for control structures curly braces, method calls, etc.
- Blank lines: here we can configure the number of blank lines between different “sections” of the code, for both the minimum blank lines to apply, and for the maximum lines to keep. We can, for example, the configure the number of lines for before and after the imports, the lines between each method declaration, after the class header, etc.
- JavaDoc: for the code documentation. For setting the options for the alignment of the parameter descriptions and blank lines, among others.
- Arrangement: here there are two different sections:
- Grouping rules: how to make groups. We can configure to set together the getters and setters, the overridden methods, and the dependent methods.
- Matching rules: for ordering the fields, methods, etc. depending on their modifiers. An example is shown in the 2nd image.
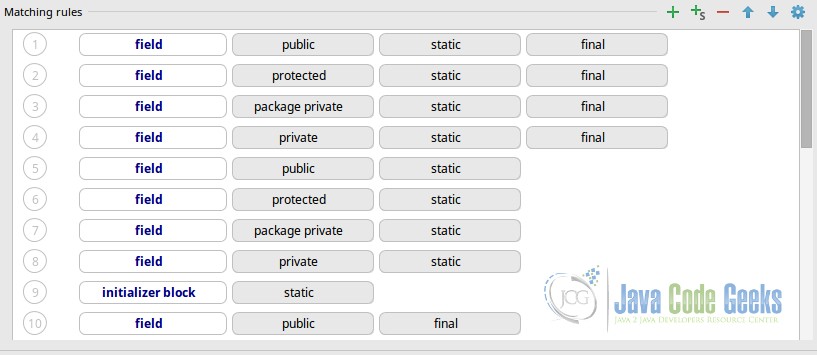

This means that, if we reformat the code with this options, inside the class, in the first “position” would go the fields matching public, static and final modifiers; in the second, the fields matching protected, static and final; and so on.
For rearranging the code, the code formatting shortcut won’t work; we have to select “Code/Rearrange code” option. So, for example, if we would have the following code:
Foo.java
package com.javacodegeeks.intellij.formatcode;

public class Foo {

    protected static final int b = 2;
    private static final int c = 3;
    public static final int a = 1;
}
After rearranging, the resulting code would be:
Foo.java
package com.javacodegeeks.intellij.formatcode;

public class Foo {

    public static final int a = 1;
    protected static final int b = 2;
    private static final int c = 3;
}
3.2. Formatting markers
For some reason, we may want to keep chunks of code away from the IntelliJ IDEA formatter. IDEA allows to ignore code pieces using formatting markers.
To use them, we first have to enable then, in “File/Settings/Editor/Code Style“, in “Formatter Control” section. There, we have to choose the markers. By default, the markers are @formatter:on and @formatter:off, that have to be used in an inline comment.
So, for example, returning to our original Foo.java class, using the markers:
Foo.java
package com.javacodegeeks.intellij.formatcode;

public class Foo {

private Bar bar;

//@formatter:off
public Foo(Bar bar) {
this.bar = bar;
}
//@formatter:on

public void callBar() {
bar.bar();
}
}
If we format the code, the result would be:
Foo.java
package com.javacodegeeks.intellij.formatcode;

public class Foo {

    private Bar bar;

//@formatter:off
public Foo(Bar bar) {
this.bar = bar;
}
//@formatter:on

    public void callBar() {
        bar.bar();
    }
}
4. Summary
This tutorial has shown how works the IntelliJ IDEA code formatter, seeing how we can format our code with a simple shortcut, and also customizing the code style to apply in a very complete way, from white spaces and line wrappings, to JavaDoc and code arrangement.
