This is an article about Flask Python Web App Framework.
You can also check the video below:
1. Introduction
Flask is a popular open-source web framework. It is used for creating web applications in python. It was created by POCCO (International group of python enthusiasts) Lead Armin Ronacher.
2. Flask Web App Framework
Flask is a microframework based on the Jinja2 web template engine and WSGI toolkit. WSGI is a web server gateway interface. It is a web application development standard using python. It acts as an interface between the web app and the webserver. Jinja2 engine is used for adding web template for a dynamic web page.
2.1 Prerequisites
Python 3.6.8 is required on windows or any operating system. Pycharm is needed for python programming.
2.2 Download
Python 3.6.8 can be downloaded from the website. Pycharm is available at this link.
2.3 Setup
2.3.1 Python Setup
To install python, the download package or executable needs to be executed.
2.4 IDE
2.4.1 Pycharm Setup
Pycharm package or installable needs to be executed to install Pycharm.
2.5 Launching IDE
2.5.1 Pycharm
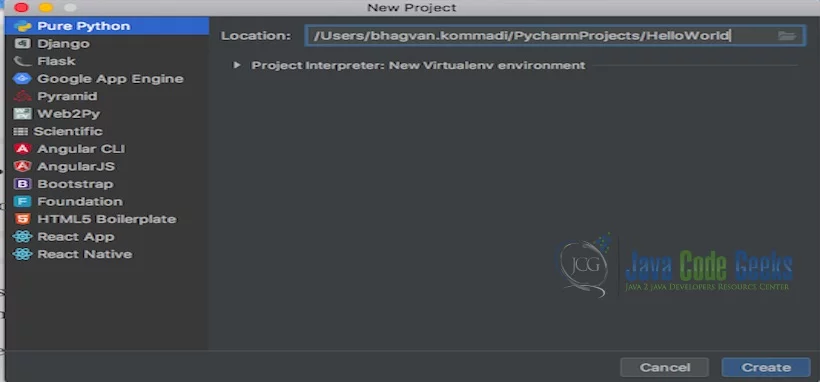
Launch the Pycharm and start creating a pure python project named HelloWorld. The screen shows the project creation.
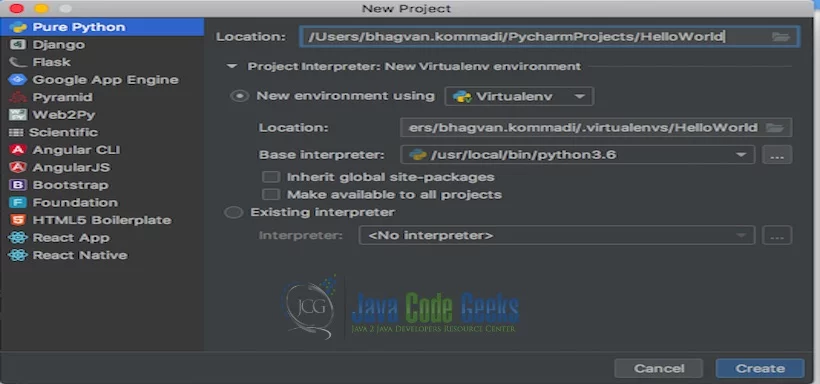
The project settings are set in the next screen as shown below.
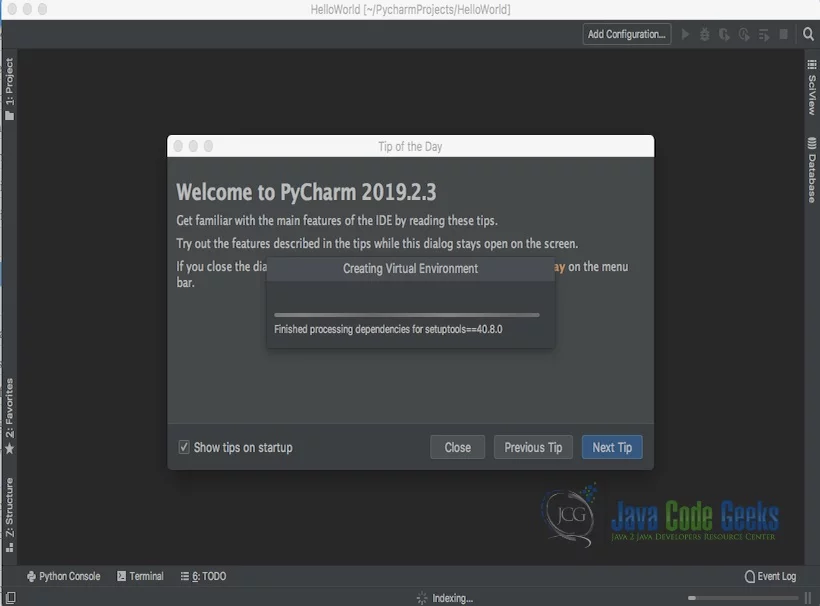
Pycharm welcome screen comes up shows the progress as indicated below.
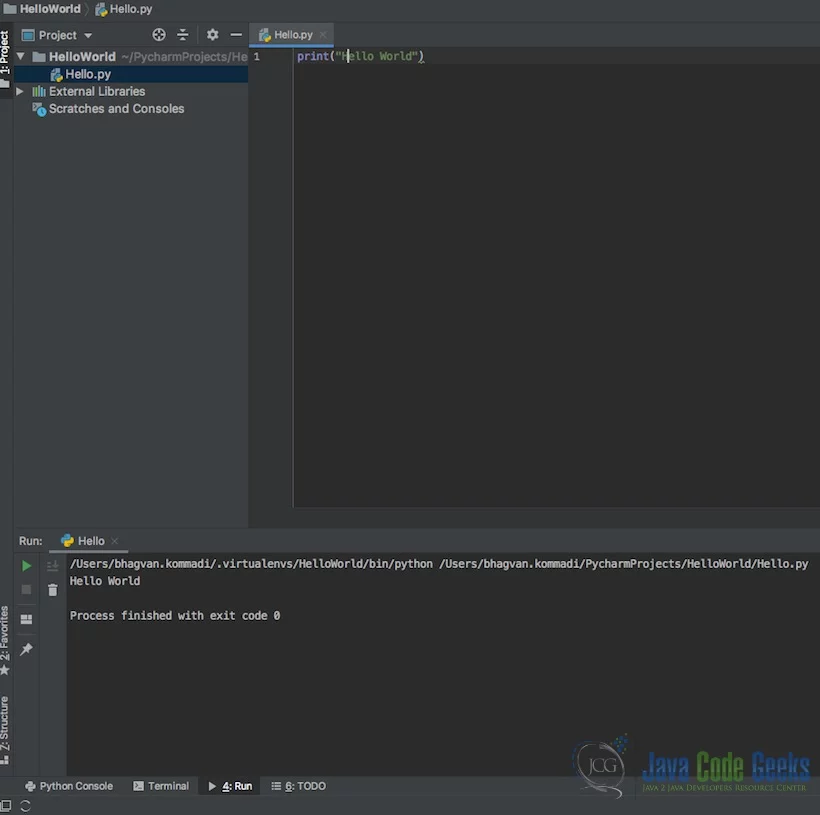
You can create a Hello.py and execute the python file by selecting the Run menu.
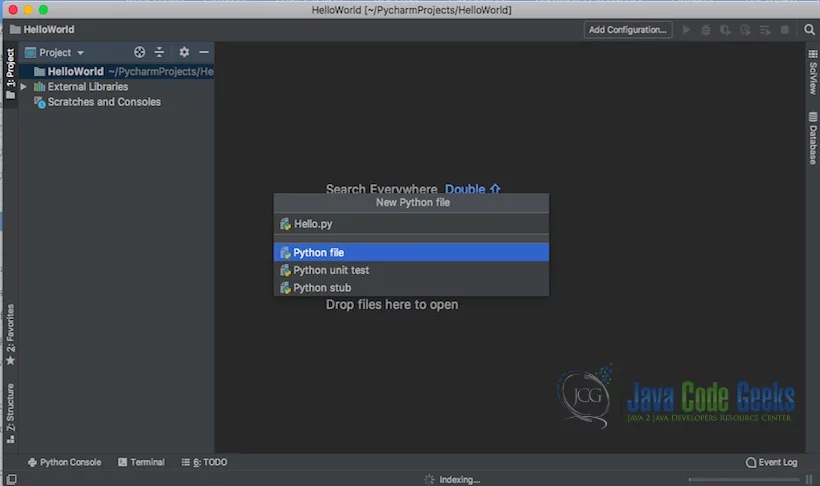
The output message “Hello World” is printed when the python file is Run.
2.6 Flask configuration
To configure Flask, you need to install virtualenv. Virtualenv is used for handling more than one python virtual environments.
The command below is used for installing virtualenv :
VirtualEnv installation
pip3 install virtual env
The output of the above commands is shown below:
Vrtual Env setup
apples-MacBook-Air:flask bhagvan.kommadi$ pip3 install virtualenv
Collecting virtualenv
  Downloading virtualenv-20.4.2-py2.py3-none-any.whl (7.2 MB)
     |████████████████████████████████| 7.2 MB 851 kB/s
Collecting filelock=3.0.0
  Downloading filelock-3.0.12-py3-none-any.whl (7.6 kB)
Collecting distlib=0.3.1
  Downloading distlib-0.3.1-py2.py3-none-any.whl (335 kB)
     |████████████████████████████████| 335 kB 774 kB/s
Requirement already satisfied: importlib-metadata>=0.12; python_version < "3.8" in /usr/local/lib/python3.7/site-packages (from virtualenv) (1.6.0)
Requirement already satisfied: six=1.9.0 in /usr/local/lib/python3.7/site-packages (from virtualenv) (1.15.0)
Requirement already satisfied: appdirs=1.4.3 in /usr/local/lib/python3.7/site-packages (from virtualenv) (1.4.4)
Requirement already satisfied: zipp>=0.5 in /usr/local/lib/python3.7/site-packages (from importlib-metadata>=0.12; python_version virtualenv) (3.1.0)
Installing collected packages: filelock, distlib, virtualenv
Successfully installed distlib-0.3.1 filelock-3.0.12 virtualenv-20.4.2
apples-MacBook-Air:flask bhagvan.kommadi$
The following commands are used for creation and activation of the environment:
VirtualEnv Creation & Activation
mdkir flask
cd flask
virtualenv flaskenv
source flaskenv/bin/activate
The output of the above commands is shown below:
Output
apples-MacBook-Air:flask bhagvan.kommadi$ mkdir flask
apples-MacBook-Air:flask bhagvan.kommadi$ cd flask
apples-MacBook-Air:flask bhagvan.kommadi$ virtualenv flaskenv
created virtual environment CPython3.7.7.final.0-64 in 3002ms
  creator CPython3Posix(dest=/Users/bhagvan.kommadi/Desktop/JavacodeGeeks/Code/flask/flask/flaskenv, clear=False, no_vcs_ignore=False, global=False)
  seeder FromAppData(download=False, pip=bundle, setuptools=bundle, wheel=bundle, via=copy, app_data_dir=/Users/bhagvan.kommadi/Library/Application Support/virtualenv)
    added seed packages: pip==21.0.1, setuptools==52.0.0, wheel==0.36.2
  activators BashActivator,CShellActivator,FishActivator,PowerShellActivator,PythonActivator,XonshActivator
apples-MacBook-Air:flask bhagvan.kommadi$ source flaskenv/bin/activate
(flaskenv) apples-MacBook-Air:flask bhagvan.kommadi$
Flask can be installed by using the command below:
Flask installation
pip3 install flask
The output of the above commands is shown below:
Flask installation Output
(flaskenv) apples-MacBook-Air:flask bhagvan.kommadi$ pip3 install flask
Collecting flask
  Downloading Flask-1.1.2-py2.py3-none-any.whl (94 kB)
     |████████████████████████████████| 94 kB 600 kB/s
Collecting Jinja2>=2.10.1
  Downloading Jinja2-2.11.3-py2.py3-none-any.whl (125 kB)
     |████████████████████████████████| 125 kB 814 kB/s
Collecting click>=5.1
  Downloading click-7.1.2-py2.py3-none-any.whl (82 kB)
     |████████████████████████████████| 82 kB 654 kB/s
Collecting Werkzeug>=0.15
  Downloading Werkzeug-1.0.1-py2.py3-none-any.whl (298 kB)
     |████████████████████████████████| 298 kB 762 kB/s
Collecting itsdangerous>=0.24
  Downloading itsdangerous-1.1.0-py2.py3-none-any.whl (16 kB)
Collecting MarkupSafe>=0.23
  Downloading MarkupSafe-1.1.1-cp37-cp37m-macosx_10_9_x86_64.whl (16 kB)
Installing collected packages: MarkupSafe, Werkzeug, Jinja2, itsdangerous, click, flask
Successfully installed Jinja2-2.11.3 MarkupSafe-1.1.1 Werkzeug-1.0.1 click-7.1.2 flask-1.1.2 itsdangerous-1.1.0
(flaskenv) apples-MacBook-Air:flask bhagvan.kommadi$
Using Flask framework, you can build web application. The code below shows an example in Flask.
Flask example
from flask import Flask

app = Flask(__name__)

@app.route('/')
def home():
    return "Running Flask example";

if __name__ =='__main__':
    app.run(debug = True)
The command below executes the above code snippet:
Flask example
python3 flaskexample.py
The output of the executed command is shown below.
Flask example
(flaskenv) apples-MacBook-Air:flask bhagvan.kommadi$ python3 flaskexample.py
 * Serving Flask app "flaskexample" (lazy loading)
 * Environment: production
   WARNING: This is a development server. Do not use it in a production deployment.
   Use a production WSGI server instead.
 * Debug mode: on
 * Running on http://127.0.0.1:5000/ (Press CTRL+C to quit)
 * Restarting with stat
 * Debugger is active!
 * Debugger PIN: 981-329-817
You can access the web application at http://localhost:5000. The snapshot below shows the web application in the web browser.

2.7 Connecting the database in Flask
You can use SQLite3 python module to develop web applications with database.
An example creating customers database is shown below in the code :
Customers Database
import sqlite3

con = sqlite3.connect("customers.db")
print("Customers Database opening")

con.execute("create table Customers (customerid INTEGER PRIMARY KEY AUTOINCREMENT, name TEXT NOT NULL, email TEXT UNIQUE NOT NULL, address TEXT NOT NULL)")

print("Customer Table created successfully")

con.close()
The command below executes the above code snippet:
Customers Database
python3 CustomerData.py
The output of the executed command is shown below.
Creating Customers Database
(flaskenv) apples-MacBook-Air:flask bhagvan.kommadi$ python3 CustomerData.py
Customers Database opening
Customer Table created successfully
(flaskenv) apples-MacBook-Air:flask bhagvan.kommadi$ ls
CustomerData.py	customers.db	flaskenv	flaskexample.py
(flaskenv) apples-MacBook-Air:flask bhagvan.kommadi$
You can create an web application for adding customer records and viewing customer records. The code below shows the web application.
Customers Script
from flask import *
import sqlite3

app = Flask(__name__)

@app.route("/")
def index():
    return render_template("index.html");

@app.route("/add")
def add():
    return render_template("addCustomer.html")

@app.route("/savedetails",methods = ["POST","GET"])
def saveDetails():
    msg = "msg"
    if request.method == "POST":
        try:
            name = request.form["name"]
            email = request.form["email"]
            address = request.form["address"]
            with sqlite3.connect("customers.db") as con:
                cur = con.cursor()
                cur.execute("INSERT into Customers (name, email, address) values (?,?,?)",(name,email,address))
                con.commit()
                msg = "Customer successfully Added"
        except:
            con.rollback()
            msg = "We can not add the Customer to the list"
        finally:
            return render_template("success.html",msg = msg)
            con.close()

@app.route("/view")
def view():
    con = sqlite3.connect("customers.db")
    con.row_factory = sqlite3.Row
    cur = con.cursor()
    cur.execute("select * from Customers")
    rows = cur.fetchall()
    return render_template("viewCustomer.html",rows = rows)
The web pages referred in the code above are in the templates folder. The command below executes the above code snippet:
CRM Web application
python3 Customer.py
The output of the executed command is shown below.
Running CRM Webapp
(flaskenv) apples-MacBook-Air:flask bhagvan.kommadi$ python3 Customer.py
 * Serving Flask app "Customer" (lazy loading)
 * Environment: production
   WARNING: This is a development server. Do not use it in a production deployment.
   Use a production WSGI server instead.
 * Debug mode: on
 * Running on http://127.0.0.1:5000/ (Press CTRL+C to quit)
 * Restarting with stat
 * Debugger is active!
 * Debugger PIN: 981-329-817
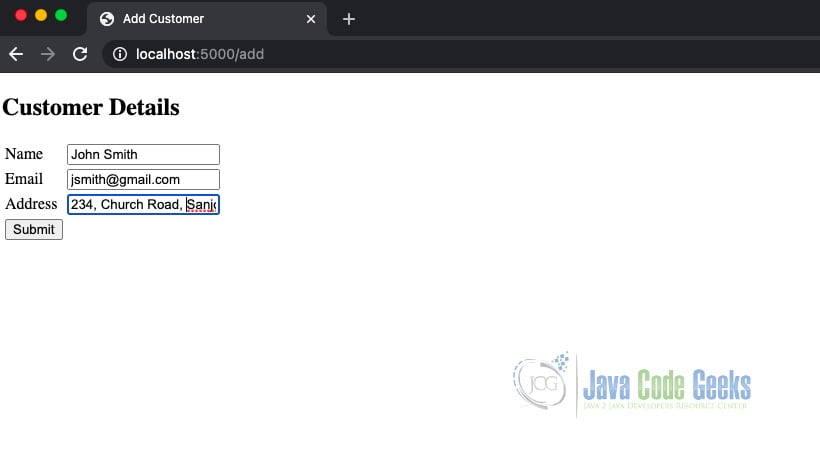
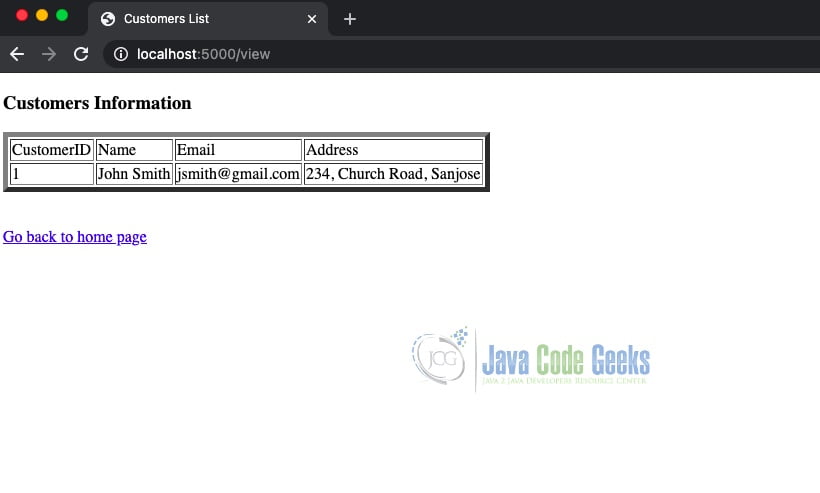
You can check http://localhost:5000 on your browser. The images below the web pages.

You can click on Add Customer to add customer
The output of the above form submission is shown below:
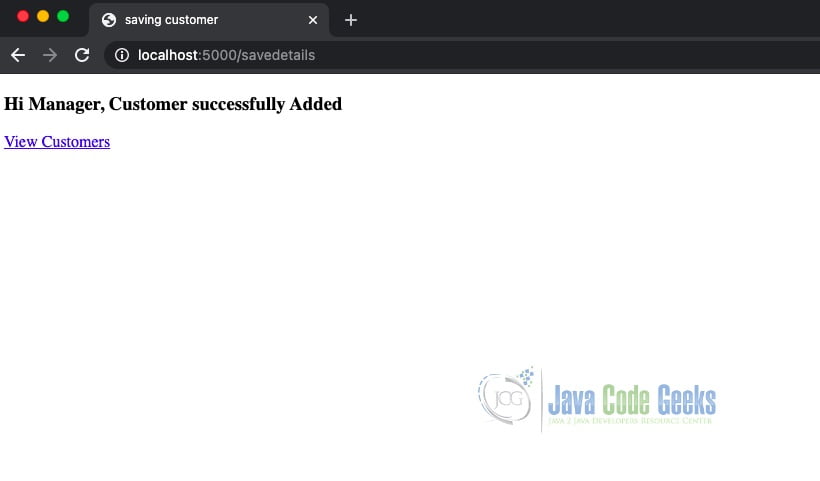
You can click on View Customers to see the records.
2.8 Defining objects in Flask
In flask, Flask object implements a WSGI application. It is used for the name of the module or application package. Flask Object is the central registry for views, URL, rules, templates, and their configuration. Model object is extended by new Database objects. Flask SQLAlchemy package is used for modelling the relationships. Each database object will have attributes and relationships.
2.9 Model relationships
You can use the SQL Alchemy python module for using relational databases and modeling data-intensive web applications. In 2005, SQLAlchemy was developed by Mike Bayer. It has support for databases such as MySQL, PostgreSQL, Oracle, MS-SQL, SQLite, and others. It has an ORM mapper and you can use object-oriented code instead of raw SQL. Flask SQLAlchemy python extension has methods to use SQL Alchemy
The command used for installing flask SQLAlchemy is shown below:
Customers Database
pip3 install flask-sqlalchemy
To use different databases, the configuration examples are shown below:
Customers Database
# database URI for MySQL using PyMysql driver 'mysql+pymysql://root:pass@localhost/my_db'
# database URI for PostgreSQL using psycopg2 'postgresql+psycopg2://root:pass@localhost/my_db'
 # database URI for MS-SQL using pyodbc driver 'mssql+pyodbc://root:pass@localhost/my_db'
 # database URI for Oracle using cx_Oracle driver 'oracle+cx_oracle://root:pass@localhost/my_db'
Model is a class for database table which inherits from db.Model. You can create a Author class as shown below:
Authors Model
class Author(db.Model):
   id = db.Column('author_id', db.Integer, primary_key = True)
   name = db.Column(db.String(100))
   city = db.Column(db.String(50))
   addr = db.Column(db.String(200))
   pin = db.Column(db.String(10))

def __init__(self, name, city, addr,pin):
   self.name = name
   self.city = city
   self.addr = addr
   self.pin = pin
To model complex relationships, let us start off with one to one relationship. Author has Identity information. The code below shows the one to one relationship.
Author and Identity
class Author(db.Model):
   __tablename__ = 'authors'
   id = db.Column('author_id', db.Integer, primary_key = True)
   name = db.Column(db.String(100))
   city = db.Column(db.String(50))
   addr = db.Column(db.String(200))
   pin = db.Column(db.String(10))
class Identity(db.Model):
    __tablename__ = 'identity'
    id = db.Column(db.Integer(), primary_key=True)
    license_number = db.Column(db.String(255), nullable=False)
    renewed_on = db.Column(db.Date(), nullable=False)
    expiry_date = db.Column(db.Date(), nullable=False)
    author_id = db.Column(db.Integer(), db.ForeignKey('authors.id'))
Let us see now, one to many relationship. You can create Hashtag and Article models as shown in the code below:
HashTag and Article
class Category(db.Model):
    __tablename__ = 'categories'
    id = db.Column('id', db.Integer, primary_key = True)
    created_on = db.Column(db.DateTime(), default=datetime.utcnow)
    articles = db.relationship('Article', backref='Category')

class Article(db.Model):
    __tablename__ = 'articles'
      id = db.Column('id', db.Integer, primary_key = True)
    updated_on = db.Column(db.DateTime(), default=datetime.utcnow, onupdate=datetime.utcnow)
    category_id = db.Column(db.Integer(), db.ForeignKey('categories.id'))
You can model many to many by adding hashtags to category and articles. The code below shows the modelling.
HashTag and Article
class Category(db.Model):
    __tablename__ = 'categories'
    id = db.Column('id', db.Integer, primary_key = True)
    created_on = db.Column(db.DateTime(), default=datetime.utcnow)
    article_hastags = db.Table('article_hashtags',
    db.Column('article_id', db.Integer, db.ForeignKey('articles.id')),
    db.Column('hashtag_id', db.Integer, db.ForeignKey('hashtags.id'))
)

class Hashtag(db.Model):
    __tablename__ = 'hashtags'
    id = db.Column('id', db.Integer, primary_key = True)
    created_on = db.Column(db.DateTime(), default=datetime.utcnow)
    articles = db.relationship('Article', backref='Hashtag')

class Article(db.Model):
    __tablename__ = 'articles'
      id = db.Column('id', db.Integer, primary_key = True)
    updated_on = db.Column(db.DateTime(), default=datetime.utcnow, onupdate=datetime.utcnow)
    category_id = db.Column(db.Integer(), db.ForeignKey('hashtags.id'))
2.10 Initializing the database
You need flask migrate package for database initialization. The command for installing flask migrate is as below:
Customers Database
pip3 install flask-migrate
You can create database initialization for our CRM application
Customers Database
from flask import Flask
from flask_sqlalchemy import SQLAlchemy
from flask_migrate import Migrate

app = Flask(__name__)
app.config['SQLALCHEMY_DATABASE_URI'] = 'sqlite:///customers.db'

db = SQLAlchemy(app)
migrate = Migrate(app, db)

class Customer(db.Model):
    customerid = db.Column(db.Integer, primary_key=True)
    name = db.Column(db.String(128))
    email = db.Column(db.String(128))
    address = db.Column(db.String(128))
You can create a migration repository with command below:
Customers Database
flask db init
You can generate the first migration using the below command :
Customers Database
flask db migrate -m "Initial migration."
You can add this to your version control and apply when needed using the command below:
Customers Database
flask db upgrade
2.11 Flask requests
Flask python library has a request object which can be subclassed. It is a subclass of Request. The request object is used for sending data from the source to the destination. HTTP methods are used for accessing the data on the server-side. The request object has attributes such as Form, args, Cookies, files, and method. The requests package has methods for creating HTTP requests in python. It has features to handle validating headers and JSON serialization. This library helps in verifying the SSL Certificate. requests library has features such as max_retries, timeout,
3. More articles
- Python Tutorial for Beginners
- Python Random Module Tutorial
- Python input() method Tutorial
- Queue in Python
- Python RegEx Tutorial
- Python JSON Example
- Selenium with Python Example
4. Download the Source Code
You can download the full source code of this example here: Introduction to the Flask Python Web App Framework
Last updated on March 2nd, 2022
