Welcome readers, in this tutorial, we will implement internationalization in a React js application.
1. Introduction
Internationalization in a website helps to remove the language barrier. It helps users from different parts of the world to visit your website and thus increasing the website traffic.
1.1 Setting up dependencies
To play with react let us set up some of the required dependencies.
1.1.1 Setting up Node.js
To set up Node.js on windows you will need to download the installer from this link. Click on the installer (also include the NPM package manager) for your platform and run the installer to start with the Node.js setup wizard. Follow the wizard steps and click on Finish when it is done. If everything goes well you can navigate to the command prompt to verify if the installation was successful as shown in Fig. 1.

1.1.2 Setting up React js Internationalization project
Once the Nodejs setup is successful we will use the below command to install the react library and set up the project. Do note that the npx package is available with the npm 5.2 version and above.
Create project structure
$ npx create-react-app internationalisation-eg
The above command will take some time to install the react library and create a new project named – internationalisation-eg as shown below.
Once the project is created install the required React js internationalization packages with the help of the npm package command. You can refer to the below command for quick help.
Installing internationalization packages
$ npm install i18next react-i18next
2. Internationalization in React js
To set up the application, we will need to navigate to a path where our project will reside and I will be using Visual Studio Code as my preferred IDE.
2.1 Setting up the react code for Internationalization
To understand a practical implementation let us go through some hands-on exercises.
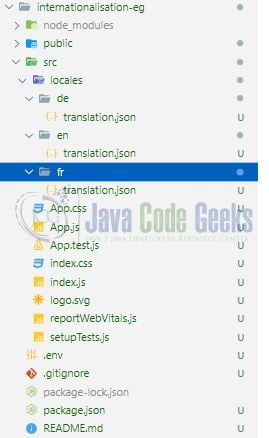
2.2.1 Creating the translation files
Create multiple translation files supporting English, French, and German in the src/locales folder. Let us start by creating the translation.json file for the English language. As the introductory example, we’ll use three keys.
en/translation.json
{"learn_react":"Learn React","english":"English","german":"German","french":"French"}
Similarly, we can create translation files for French and German languages in the fr and de folders respectively inside the src/locales parent folder or you can download the translation files from the Downloads section
2.2.2 Creating the React js implementation file
In the App.js component we will include the i8next dependencies to initialize and enable the internationalization support for a website. The Html page will have three buttons responsible to translate the different texts shown on the page. We will also use the local storage to save and get the current language stored in the browser’s local storage.
App.js
import "./App.css";
import logo from "./logo.svg";
import { useEffect } from "react";

// importing translation modules
import i18n from "i18next";
import { initReactI18next, useTranslation } from "react-i18next";

// importing translation files
import german from "./locales/de/translation.json";
import english from "./locales/en/translation.json";
import french from "./locales/fr/translation.json";

i18n
  .use(initReactI18next) // passes i18n down to react-i18next
  .init({
    resources: {
      en: {
        translation: english
      },
      de: {
        translation: german
      },
      fr: {
        translation: french
      }
    },
    lng: "en", // if you're using a language detector, do not define the lng option
    fallbackLng: "en",
    interpolation: {
      escapeValue: false // react already safes from xss => https://www.i18next.com/translation-function/interpolation#unescap
    }
  });

const changeLanguageHandler = (selectedLanguage) => {
  return () => {
    // now change the language
    i18n.changeLanguage(selectedLanguage);
    // now set the current language in local storage
    localStorage.setItem("lang", selectedLanguage);
  };
};

function App() {
  const { t } = useTranslation();

  useEffect(() => {
    // get the current language stored in local storage
    let currentLanguage = localStorage.getItem("lang");
    // set the stored language code as current language
    i18n.changeLanguage(currentLanguage);
  });

  return (
    <div className="App">
      <header className="App-header">
        <img src={logo} className="App-logo" alt="logo" />
        <h3>{t("learn_react")}</h3>
        {/* language change buttons */}
        <button onClick={changeLanguageHandler("en")}>{t("english")}</button>
        <button onClick={changeLanguageHandler("de")}>{t("german")}</button>
        <button onClick={changeLanguageHandler("fr")}>{t("french")}</button>
      </header>
    </div>
  );
}

export default App;
3. Run the setup
To run the application navigate to the project directory and enter the following command as shown below in the terminal.
Run command
$ npm run start
The application will be started on the default port. In case the application does not get started on the default port you can change the port number as per your requirement with the help of the .env file. I have changed the default port to 2001 to avoid the default port clash.
4. React js Internationalization Demo
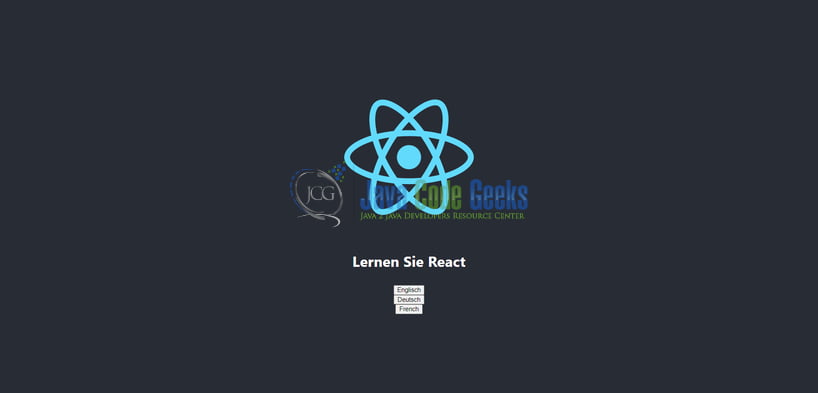
The application will be started in the default browser and a welcome message along with three buttons in the English language will be shown.

You can click on the German language button to translate the welcome message and button texts on the fly as shown in the below figure.
You’re free to play with another button to understand the internationalization in a React js application. That is all for this tutorial and I hope the article served you with whatever you were looking for. Happy Learning and do not forget to share!
5. Summary
In this tutorial, we created a React js application and understood internationalization with the help of an example. You can download the source code from the Downloads section.
6. Download the Project
This was a tutorial to understand the internationalization in React js.
You can download the full source code of this example here: Internationalization in reactjs
