Before we delve into the details of creating a survey website using ReactJS, let’s understand the basic premise. ReactJS is a popular JavaScript library for building user interfaces, known for its component-based architecture and efficient rendering. In this tutorial, we will guide you through the process of building a survey website step by step. We assume you have a basic understanding of HTML, CSS, and JavaScript.
1. Introduction
In today’s digital age, surveys are crucial for gathering valuable insights from users. Building a survey website using ReactJS can provide a dynamic and interactive way of collecting responses. Users can navigate through the survey questions seamlessly, and you can present the data in a visually appealing manner.
2. Setting Up the Project
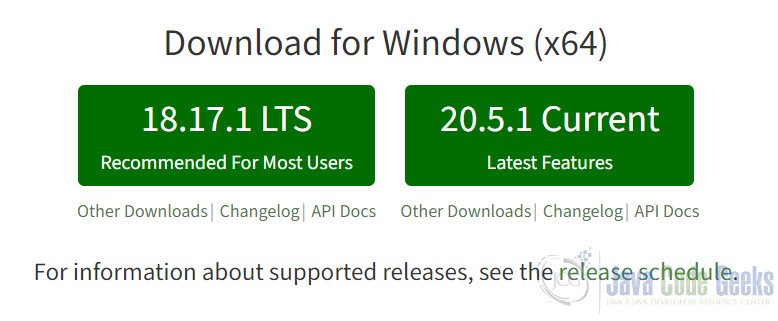
To start, you need Node.js installed on your system. If you haven’t already, download and install it from the official Node.js website.
To install Node.js on your system, you can follow these steps:
2.1 For Windows
- Download Installer: Go to the official Node.js website: https://nodejs.org/
- Choose Version: Choose the “LTS” (Long Term Support) version, as it’s recommended for most users.
- Download: Click on the “Windows Installer” button to download the installer.
- Run Installer: Once the installer is downloaded, run the executable (.msi) file.
- Setup Wizard: Follow the instructions in the setup wizard. You can generally accept the default settings.
After the installation is complete, you can open the Command Prompt or PowerShell and type node -v and npm -v to verify that Node.js and npm (Node Package Manager) have been installed successfully. You should see the versions of Node.js and npm displayed in the terminal.
2.2 For macOS
- Download Installer: Go to the official Node.js website: https://nodejs.org/
- Choose Version: Choose the “LTS” version for stability.
- Download: Click on the “macOS Installer” button to download the installer.
- Run Installer: Once the installer is downloaded, open the downloaded .pkg file.
- Setup Wizard: Follow the instructions in the setup wizard. You can generally accept the default settings.
After the installation is complete, you can open the Terminal and type node -v and npm -v to verify that Node.js and npm have been installed successfully.
2.3 For Linux (Ubuntu/Debian)
- Using Package Manager: Open your terminal and run the following commands:
sudo apt update
sudo apt install nodejs npm
- Verify Installation: After the installation is complete, you can type
node -vandnpm -vto verify that Node.js and npm have been installed successfully.
Please note that the installation steps might slightly vary depending on the specific version of Node.js you’re installing and your operating system. Always refer to the official Node.js website for the most up-to-date installation instructions.
Once Node.js is installed, you can proceed with creating and managing your ReactJS project.
- Create a new project directory and navigate to it in your terminal.
- Initialize a new React application by running the following command
npx create-react-app survey-website
- Navigate into the project directory
cd survey-website
3. Creating Components
In React, components are the building blocks of your user interface. For our survey website, we will create the following components:
App.js: This will serve as the main component where other components will be imported and used.Survey.js: This component will handle the rendering of survey questions.Question.js: This component will represent individual survey questions.
Here’s an example of the Question.js component
import React from 'react';
import styles from './Question.module.css';

const Question = ({ questionText, options, onSelect }) => {
    return (
        <div className={styles.question}>
            <p>{questionText}</p>
            <ul>
                {options.map((option, index) => (
                    <li key={index}>
                        <button onClick={() => onSelect(option)}>{option}</button>
                    </li>
                ))}
            </ul>
        </div>
    );
};

export default Question;
4. Designing the Survey Interface
Now, let’s create the actual survey interface using the components we’ve defined. In the Survey.js component, you can render a list of Question components based on your survey data. Here’s an example
// src/components/Survey.js
import React, { useState } from 'react';
import Question from './Question';

const Survey = ({ surveyData }) => {
    const [responses, setResponses] = useState([]);

    const handleResponse = (question, response) => {
        setResponses([...responses, { question, response }]);
    };

    return (
        <div>
            <h1>Survey</h1>
            {surveyData.map((question, index) => (
                <Question
                    key={index}
                    questionText={question.questionText}
                    options={question.options}
                    onSelect={(response) => handleResponse(question.questionText, response)}
                />
            ))}
            <button>Submit</button>
        </div>
    );
};

export default Survey;
5. Incorporating Routing
To manage different sections of your survey, you can use React Router. First, install React Router by running
npm install react-router-dom
Next, set up your routes in the App.js
// src/App.js
import React from 'react';
import { BrowserRouter as Router, Route, Routes } from 'react-router-dom';
import Survey from './components/Survey';
const surveyData = [
{
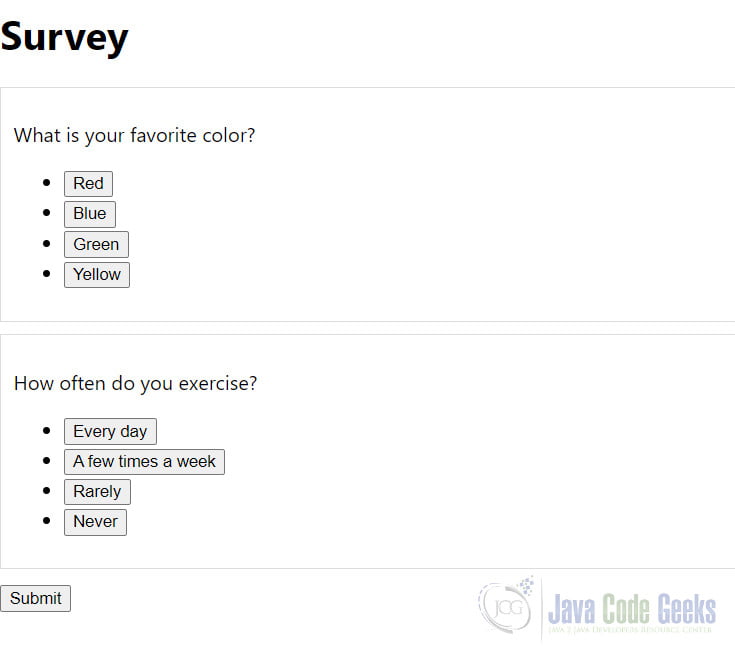
questionText: "What is your favorite color?",
options: ["Red", "Blue", "Green", "Yellow"],
},
{
questionText: "How often do you exercise?",
options: ["Every day", "A few times a week", "Rarely", "Never"],
},
// Add more question objects as needed
];
function App() {
return (
<Router>
<div className="App">
<Routes>
<Route path="/" element={<Survey surveyData={surveyData} />} />
</Routes>
</div>
</Router>
);
}
export default App;6. Styling with CSS
For styling, you can use CSS modules or a CSS-in-JS library like styled-components. Here’s an example of using CSS modules
// src/components/Question.module.css
.question {
  border: 1px solid #ddd;
  padding: 10px;
  margin-bottom: 10px;
}
Now we can run the command
npm start
Here is the output:
7. Conclusion
In this tutorial, we’ve covered the foundational steps of creating a survey website using ReactJS. You’ve learned how to set up the project, create components, design the survey interface, incorporate routing, style the components, and consider data handling. Building upon these concepts, you can further enhance the survey website by adding features like validation, progress tracking, and data visualization. With ReactJS, you have a powerful toolkit to create dynamic and engaging survey experiences for your users.
8. Download the Source Code
This was an example of Creating a Basic Survey Website using ReactJS.
You can download the full source code of this example here: Survey Website using ReactJS
