In this article, we will show how to build and run a Hello World Docker Image.
1. Introduction
A Docker container image is a lightweight, standalone, and executable software package that includes everything needed to run an application. It uses the underlying operating system resources. In this example, I will use “Docker Desktop for Windows” to demonstrate:
- Build a “Hello World” Docker image from a Spring boot web application.
- Run the Spring boot web application from a Docker image.
2. Docker Account Creation
Docker Inc. hosts a public image store at hub.docker.com. I will use my account – maryzhengdockeracct01 to pull and push images.
You can use “docker run hello-world” to run the hello-world image from the Docker hub if you like.
docker run command
PS C:\MaryZheng\DockerImages> docker run hello-world

Hello from Docker!
This message shows that your installation appears to be working correctly.

To generate this message, Docker took the following steps:
 1. The Docker client contacted the Docker daemon.
 2. The Docker daemon pulled the "hello-world" image from the Docker Hub.
    (amd64)
 3. The Docker daemon created a new container from that image which runs the
    executable that produces the output you are currently reading.
 4. The Docker daemon streamed that output to the Docker client, which sent it
    to your terminal.

To try something more ambitious, you can run an Ubuntu container with:
 $ docker run -it ubuntu bash

Share images, automate workflows, and more with a free Docker ID:
 https://hub.docker.com/

For more examples and ideas, visit:
 https://docs.docker.com/get-started/
3. Docker Installation for Windows
I will install the Docker Desktop to my PC because it has a Windows 10 Enterprise OS. Please ensure that Hyper-V is enabled.
3.1 Install Docker Desktop
Download “Docker Desktop Installer.exe” and install it.
3.2 Verify Docker is Running
Execute docker --version command to verify that Docker is installed.
PS C:\MaryZheng\DockerImages\springbootwebdemo> docker --version
Docker version 19.03.8, build afacb8b
PS C:\MaryZheng\DockerImages\springbootwebdemo>
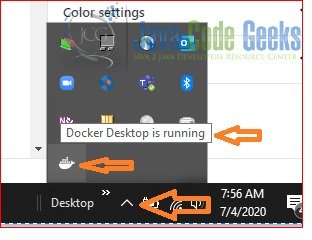
Verify the Docker is running by clicking on the Docker icon. See the screenshot as an example.
4. Technologies Used
The example code in this article was built and run using:
- Java 8
- Maven 3.3.9
- Eclipse Oxygen
- Spring boot 2.3
Note: JDK8 is the best for a Docker image at the time of writing. Click here for more detail.
5. Hello World Application
5.1 Generate a Maven project
I will generate a Maven Spring boot web application from Spring initializer. Download the generated zip file, extract and then import it into Eclipse as a Maven project.
5.2 POM.xml
No change to the generated pom.xml.
pom.xml
<?xml version="1.0" encoding="UTF-8"?>
<project xmlns="http://maven.apache.org/POM/4.0.0"
	xmlns:xsi="http://www.w3.org/2001/XMLSchema-instance"
	xsi:schemaLocation="http://maven.apache.org/POM/4.0.0 https://maven.apache.org/xsd/maven-4.0.0.xsd">
	<modelVersion>4.0.0</modelVersion>
	<groupId>zheng.demo</groupId>
	<artifactId>springbootwebdemo</artifactId>
	<version>0.0.1-SNAPSHOT</version>
	<name>springbootwebdemo</name>
	<description>Demo project for Spring Boot</description>

	<parent>
		<groupId>org.springframework.boot</groupId>
		<artifactId>spring-boot-starter-parent</artifactId>
		<version>2.3.1.RELEASE</version>
		<relativePath /> <!-- lookup parent from repository -->
	</parent>


	<properties>
		<java.version>1.8</java.version>
	</properties>

	<build>
		<plugins>
			<plugin>
				<groupId>org.springframework.boot</groupId>
				<artifactId>spring-boot-maven-plugin</artifactId>
			</plugin>
		</plugins>
	</build>

	<dependencies>
		<dependency>
			<groupId>org.springframework.boot</groupId>
			<artifactId>spring-boot-starter-web</artifactId>
		</dependency>

		<dependency>
			<groupId>org.springframework.boot</groupId>
			<artifactId>spring-boot-starter-test</artifactId>
			<scope>test</scope>
			<exclusions>
				<exclusion>
					<groupId>org.junit.vintage</groupId>
					<artifactId>junit-vintage-engine</artifactId>
				</exclusion>
			</exclusions>
		</dependency>
	</dependencies>


</project>
5.3 Spring Boot Web Application
I will add a @RestController and @RequestMapping to the generated SpringbootwebdemoApplication.java.
SpringbootwebdemoApplication.java
package zheng.demo.springbootwebdemo;

import org.springframework.boot.SpringApplication;
import org.springframework.boot.autoconfigure.SpringBootApplication;
import org.springframework.web.bind.annotation.RequestMapping;
import org.springframework.web.bind.annotation.RestController;

@SpringBootApplication
@RestController
public class SpringbootwebdemoApplication {

	public static void main(String[] args) {
		SpringApplication.run(SpringbootwebdemoApplication.class, args);
	}

	@RequestMapping("/")
	public String home() {
		return "Hello World from a Spring boot Java application";
	}

}
5.4 Demo
Start it and open a browser to verify that server is started with the log.
server log
2020-07-04 08:17:41.386  INFO 49624 --- [           main] o.s.b.w.embedded.tomcat.TomcatWebServer  : Tomcat initialized with port(s): 8080 (http)
2020-07-04 08:17:41.415  INFO 49624 --- [           main] o.apache.catalina.core.StandardService   : Starting service [Tomcat]
2020-07-04 08:17:41.416  INFO 49624 --- [           main] org.apache.catalina.core.StandardEngine  : Starting Servlet engine: [Apache Tomcat/9.0.36]
2020-07-04 08:17:41.656  INFO 49624 --- [           main] o.a.c.c.C.[Tomcat].[localhost].[/]       : Initializing Spring embedded WebApplicationContext
2020-07-04 08:17:41.658  INFO 49624 --- [           main] w.s.c.ServletWebServerApplicationContext : Root WebApplicationContext: initialization completed in 4828 ms
2020-07-04 08:17:42.115  INFO 49624 --- [           main] o.s.s.concurrent.ThreadPoolTaskExecutor  : Initializing ExecutorService 'applicationTaskExecutor'
2020-07-04 08:17:42.749  INFO 49624 --- [           main] o.s.b.w.embedded.tomcat.TomcatWebServer  : Tomcat started on port(s): 8080 (http) with context path ''
2020-07-04 08:17:42.775  INFO 49624 --- [           main] z.d.s.SpringbootwebdemoApplication       : Started SpringbootwebdemoApplication in 7.585 seconds (JVM running for 9.028)
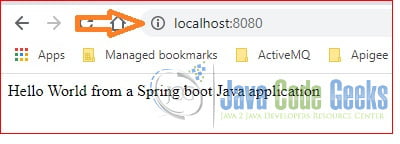
Open a browser and navigate to http://localhost:8080/. You should see a message as the screenshot here.
6. Hello World Docker Image
In this step, I will dockerize the application we built at step 5.
6.1 Create a Docker File
In this step, I will create Dockerfile which has no file extension. Docker build command will use this file to build a Docker image by default.
Dockerfile
FROM openjdk:8-jdk-alpine
VOLUME /tmp
ADD /target/springbootwebdemo-0.0.1-SNAPSHOT.jar app.jar
ENTRYPOINT ["java", "-Xmx750m", "-jar","/app.jar"]
Note: line 1 – “openjdk:8-jdk-alpine” is the base image for JDK8 application in a Linux container.
6.2 Build a Docker Image
In this step, I will execute Docker build command to build a sb-hello-world Docker image.
docker build command
PS C:\MaryZheng\DockerImages\springbootwebdemo> docker build . -t sb-hello-world
Sending build context to Docker daemon  16.65MB
Step 1/4 : FROM openjdk:8-jdk-alpine
 ---> a3562aa0b991
Step 2/4 : VOLUME /tmp
 ---> Using cache
 ---> c74aecb0f439
Step 3/4 : ADD /target/springbootwebdemo-0.0.1-SNAPSHOT.jar app.jar
 ---> Using cache
 ---> dad57ebae2ce
Step 4/4 : ENTRYPOINT ["java", "-Xmx750m", "-jar","/app.jar"]
 ---> Using cache
 ---> ab18ba368842
Successfully built ab18ba368842
Successfully tagged sb-hello-world:latest
SECURITY WARNING: You are building a Docker image from Windows against a non-Windows Docker host. All files and directories added to build context will have '-rwxr-xr-x' permissions. It is recommended to double check and reset permissions for sensitive files and directories.
PS C:\MaryZheng\DockerImages\springbootwebdemo> docker images
REPOSITORY               TAG                 IMAGE ID            CREATED             SIZE
sb-hello-world           latest              ab18ba368842        11 hours ago        121MB
docker/getting-started   latest              73f5385a001d        4 days ago          25.1MB
alpine                   latest              a24bb4013296        5 weeks ago         5.57MB
hello-world              latest              bf756fb1ae65        6 months ago        13.3kB
openjdk                  8-jdk-alpine        a3562aa0b991        14 months ago       105MB
docker/whalesay          latest              6b362a9f73eb        5 years ago         247MB
Note: line 14, the image Id = ab18ba368842 will be used to start a container.
6.3 Start a Docker Container
Start a container from the image just built and map to the host port 8090.
docker run command
PS C:\MaryZheng\DockerImages\springbootwebdemo> docker run -d --name maryTestImage -p 8090:8080 ab18ba368842
44b4feabcfe07e49cfbdb93df2c4f0fc065e64445b06fc2509e058103d849ce2
PS C:\MaryZheng\DockerImages\springbootwebdemo>
6.4 Demo
Verify the container configuration with docker ps command.
docker ps command
PS C:\MaryZheng\DockerImages\springbootwebdemo> docker ps -a
CONTAINER ID        IMAGE               COMMAND                  CREATED             STATUS              PORTS                    NAMES
44b4feabcfe0        ab18ba368842        "java -Xmx750m -jar …"   10 hours ago        Up 10 hours         0.0.0.0:8090->8080/tcp   maryTestImage
PS C:\MaryZheng\DockerImages\springbootwebdemo>
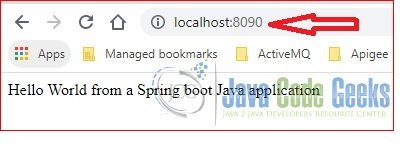
Verify the application is running by accessing it from the host’s browser by opening http://localhost:8090/. See the following screenshot.
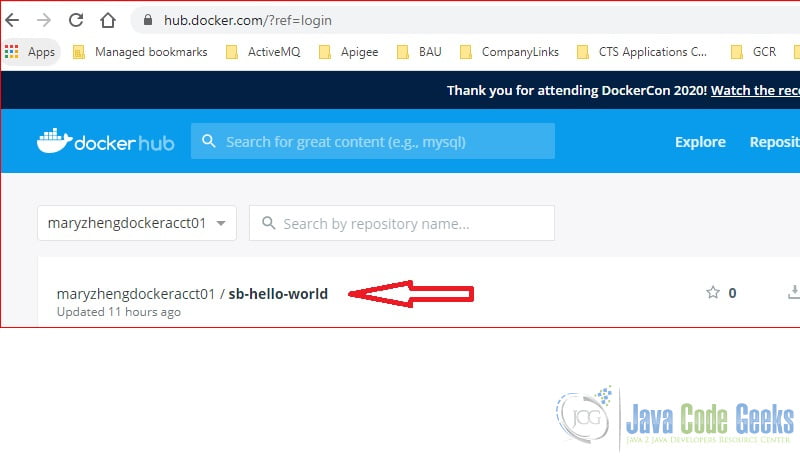
6.5 Push Image to Docker Hub
In this step, I will push the sb-hello-world image into the public Docker hub.
docker push command
PS C:\MaryZheng\DockerImages\springbootwebdemo> docker tag ab18ba368842  maryzhengdockeracct01/sb-hello-world:firsttry
PS C:\MaryZheng\DockerImages\springbootwebdemo> docker push maryzhengdockeracct01/sb-hello-world
The push refers to repository [docker.io/maryzhengdockeracct01/sb-hello-world]
51ff821df2ef: Pushed                                                                 ceaf9e1ebef5: Pushed                                                                 9b9b7f3d56a0: Pushed                                                                 f1b5933fe4b5: Pushed                                                                 firsttry: digest: sha256:b04237b6221408add03888c95b9d83e957b5d24e8fa469cba20b6019246fbf8d size: 1159
PS C:\MaryZheng\DockerImages\springbootwebdemo> docker images
REPOSITORY                             TAG                 IMAGE ID            CREATED             SIZE
maryzhengdockeracct01/sb-hello-world   firsttry            ab18ba368842        11 hours ago        121MB
sb-hello-world                         latest              ab18ba368842        11 hours ago        121MB
You can find this sb-hello-world image from Docker hub too.
7. Summary
In this example, I demonstrated how to:
- Build a simple hello world Docker image from a Spring boot web application.
- Start a Spring boot web application insides a Linux container.
- Push the Docker image to the public Docker hub.
Please remember that Linux container runs on Linux OS and Windows container runs on Windows OS. My windows 10 PC can run the Linux container is because Windows 10 Hyper-V creates a Linux VM internally.
9. Download the Source Code
You can download the full source code of this example here: Hello World Docker Image
