Docker Hello World Example
In this example we will explore different ways of running basic “Hello, World” containers in Docker.
1. Introduction
Creating a Docker Hello World container and getting it to work verifies that you have the Docker infrastructure set up properly in your development system. We will go about this in 4 different ways:
- Run Docker hello world image provided by Docker
- Get a “Hello, world” printed from another basic Docker image
- Write a Simple “Hello, World” Program in Java and Run it Within a Docker Container
- Execute a “Hello, World” Program in Java Using Gradle and Docker
Table Of Contents
- 1. Introduction
- 2. Run Docker Hello World image provided by Docker
- 3. Get a “Hello, world” Printed from Another Basic Docker Image
- 4. Write a Simple “Hello, World” Program in Java and Run it Within a Docker Container
- 5. Execute a “Hello, World” Program in Java Using Gradle and Docker
- 6. Summary
- 7. Download
You should have Docker installed already to follow the examples. Please go to the Docker home page to install the Docker engine before proceeding further, if needed. On Linux, please do ensure that your user name is added into the “docker” group while installing so that you need not invoke sudo to run the Docker client commands. You should also have Java and Gradle installed to try examples 3 and 4. Install your favorite J2SE distribution to get Java and install Gradle from gradle.org.
So let us get started!
2. Run Docker Hello World image provided by Docker
This is the simplest possible way to verify that you have Docker installed correctly. Just run the hello-world Docker image in a terminal.
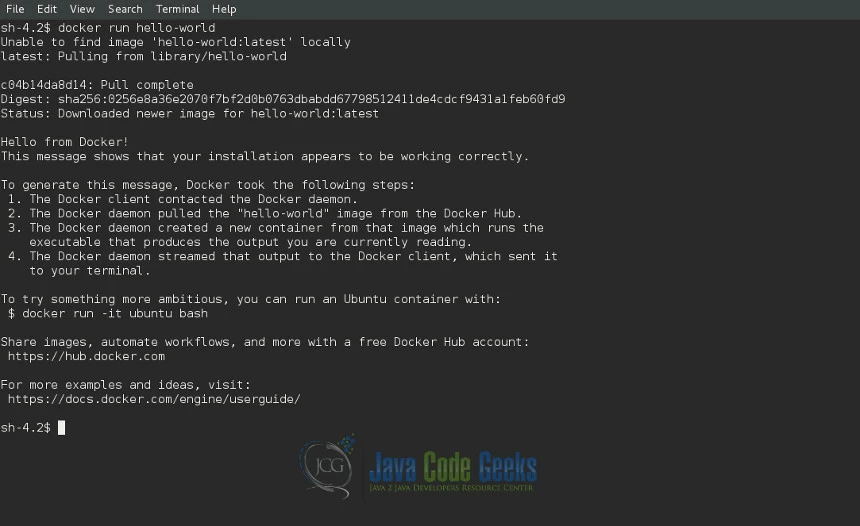
$ docker run hello-world
This command will download the hello-world Docker image from the Dockerhub, if not present already, and run it. As a result, you should see the below output if it went well.
3. Get a “Hello, world” Printed from Another Basic Docker Image
This too is simple. Docker provides a few baseimages that can be used directly to print a “Hello, World”. This can be done as shown below and it verifies that you have a successful installation of Docker.
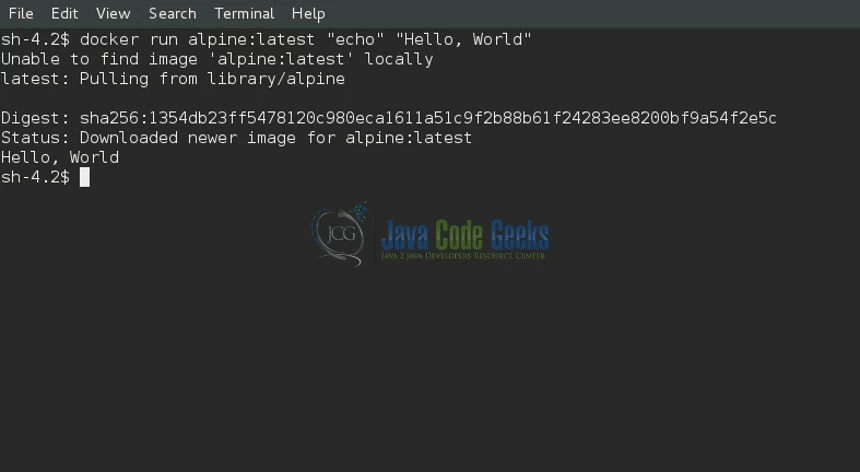
$ docker run alpine:latest "echo" "Hello, World"
This command downloads the Alpine baseimage the first time and creates a Docker container. It then runs the container and executes the echo command. The echo command echoes the “Hello, World” string. As a result, you should see the output as below.
4. Write a Simple “Hello, World” Program in Java and Run it Within a Docker Container
Let us take it up a notch now. Let us write a simple hello world program in Java and execute it within a Docker container.
4.1. Create HelloWorld.java
First of all, let us create a simple Java program that prints “Hello, World”. Open up your favorite text editor and enter the following code:
public class HelloWorld {
    public static void main(String[] args) {
        System.out.println("Hello, World");
    }
}
This is a standard HelloWorld program in Java very closely resembling the one provided in the Official Java tutorial. Save the file as HelloWorld.java. Now, compile this file using the Java compiler.
$ javac HelloWorld.java
This should create the class file Helloworld.class. Normally, we would use the java command to execute HelloWorld as below
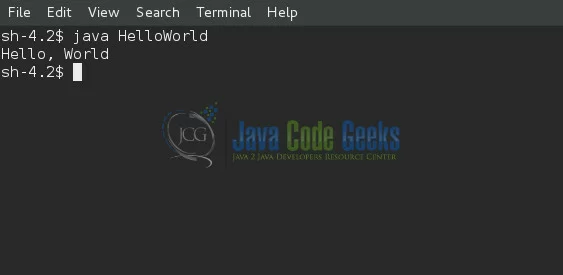
But we want to run this from within a Docker container. To accomplish that we need to create a Docker image. Let us do that now.
4.2. Create a Dockerfile
To create a new Docker image we need to create a Dockerfile. A Dockerfile defines a docker image. Let us create this now. Create a new file named Dockerfile and enter the following in it and save it.
FROM alpine:latest
ADD HelloWorld.class HelloWorld.class
RUN apk --update add openjdk8-jre
ENTRYPOINT ["java", "-Djava.security.egd=file:/dev/./urandom", "HelloWorld"]
The complete Dockerfile syntax can be found from Docker docs but here is briefly what we have done. We extend our image from the Alpine baseimage. We next added HelloWorld.class into the image with the same name. Later we installed a JRE environment using OpenJDK. Finally, we gave the command to execute when this image is run – that is to run our HelloWorld in the JVM.
4.3. Create Docker Hello World Image and Run it
Now, build an image from this Dockerfile by executing the below command.
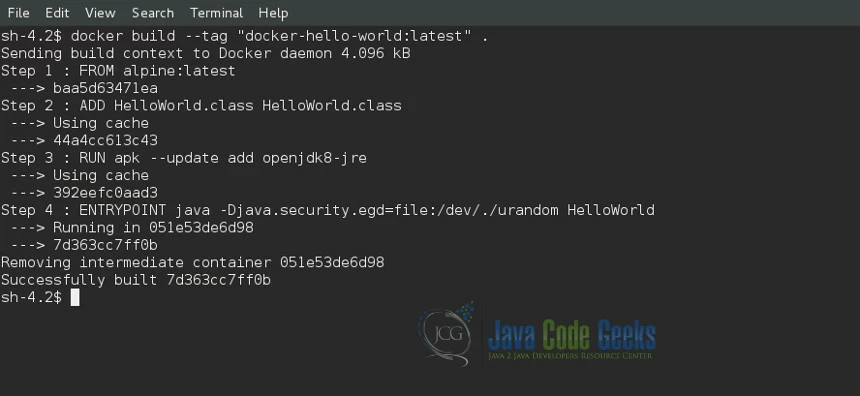
$ docker build --tag "docker-hello-world:latest" .
As a result of this you should see the following output
Finally, run the Docker image to see the "Hello, World" printed.
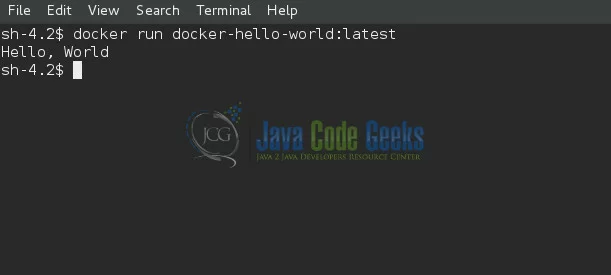
$ docker run docker-hello-world:latest
As a result of this you should see the below output
That’s it. This verifies that you can create your own custom Docker images too and run them.
5. Execute a “Hello, World” Program in Java Using Gradle and Docker
Let us take it up another notch now. Real world programs are more complex than the ones shown above. So let us create another hello world Java program and run it in a Docker container using a few best-practices of the Java ecosystem. Furthermore, let us set up a Java project using Gradle, add the Docker plugin for Gradle into it, create a Docker image and run it using Gradle.
5.1. Initialize a New Java Project and Create HelloWorld.java
First of all, Create a new folder called “docker-hello-world-example”, open a terminal and change into this folder. Next, use Gradle to initialize a new Java project.
$ gradle init --type java-library
Once done you should see the following folder structure created. You can freely delete the files Library.java and LibraryTest.java. We will not be needing them.
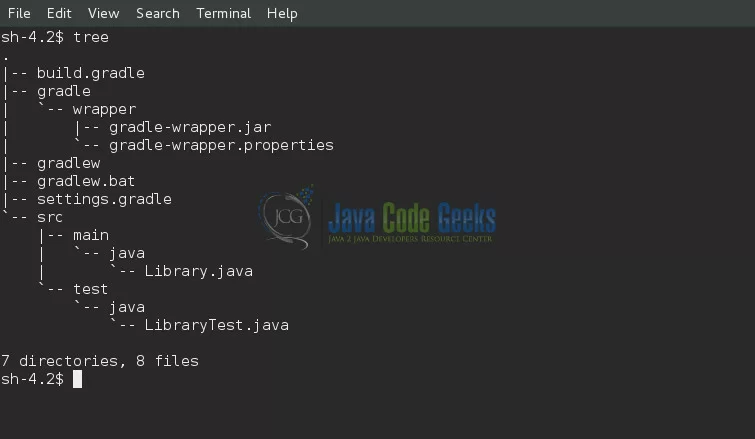
Now, create a new file src/main/java/com/javacodegeeks/examples/HelloWorld.java and enter the following in it. Save it once done.
package com.javacodegeeks.examples;

public class HelloWorld {
	public static void main(String[] args) {
		System.out.println("Hello, World");
	}
}
5.2. Create a Dockerfile
Next, create a Docker file in src/main/resources called “src/main/resources/Dockerfile” and enter the following. Save and close the file once done.
FROM alpine:latest
RUN apk --update add openjdk8-jre
COPY docker-hello-world-example.jar app.jar
ENTRYPOINT ["java", "-Djava.security.egd=file:/dev/./urandom", "-jar", "app.jar"]
Let us quickly go through what we did in the above Dockerfile. We derive our image from the Alpine Linux base image. Next, we installed J2SE from OpenJDK. Next, we copied the jar file generated by the build process as app.jar into the Docker image. Finally, we set the command to be run when the Docker container is run which is to execute the app.jar file.
5.3. Include Gradle-Docker Plugin
Next, make the following changes into the build.gradle file to update the Jar manifest.
mainClassName = 'com.javacodegeeks.examples.HelloWorld'

jar {
    manifest {
        attributes(
            'Main-Class': mainClassName
        )
    }
}
We set the mainClassName to com.javacodegeeks.examples.HelloWorld and set the same attribute to be inserted into the manifest file of the jar that will be created.
Next, insert the following changes at the very top of build.gradle file to configure and add the Gradle plugins for Docker.
buildscript {
    repositories {
        maven {
            url "https://plugins.gradle.org/m2/"
        }
    }
    dependencies {
        classpath "gradle.plugin.com.palantir.gradle.docker:gradle-docker:0.9.1"
    }
}

plugins {
    id 'com.palantir.docker' version '0.9.1'
    id 'com.palantir.docker-run' version '0.9.1'
}

apply plugin: 'com.palantir.docker'
Here we basically added the Gradle plugins called docker and docker-run provided by Palantir. These plugins enable us to create Docker containers and run them using Gradle. We added the URL to tell where to find the gradle-docker plugin (https://plugins.gradle.org/m2/). We also added the plugins into the classpath as build dependencies.
5.4. Configure the Docker Tasks in Gradle Build File
Next, insert the following changes at the bottom of build.gradle file to configure the details of the Docker image.
docker {
    name 'com.javacodegeeks.examples/docker-hello-world:1'
    tags 'latest'
    dockerfile 'src/main/docker/Dockerfile'
    dependsOn tasks.jar
}
Here we configured the details of the docker image. We assigned the image name com.javacodegeeks.examples/docker-hello-world with version 1. We assigned it the tag latest and gave the path where to find the Docker file. Finally, we made it depend on the Gradle task jar so that the output of the jar task will be fed to this task.
Finally, insert the following changes at the bottom of build.gradle file to configure the details of the Docker container.
dockerRun {
    name 'docker-hello-world-container'
    image 'com.javacodegeeks.examples/docker-hello-world:1'
    command 'java', '-Djava.security.egd=file:/dev/./urandom', '-jar', 'app.jar'
}
Here we configured the details of the docker container. We assigned the container name “docker-hello-world-container”. We assigned it the image from where to create the container and gave it a command to execute when running the container.
5.5. Create Docker Container and Run it
Now we are ready to build and run this. Use Gradle to build and run this program
$ ./gradlew clean build docker dockerRun
You will notice that the code was built, jar was created, Docker image and containers were created, and the container was run too. However, there is no “Hello, World” actually printed on the screen here.
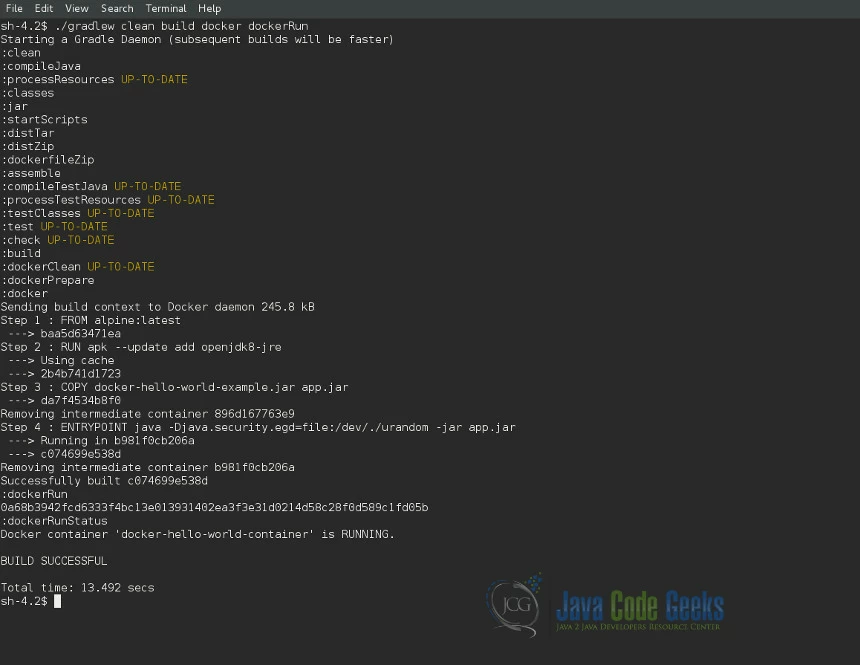
The last line simply says that the Docker container ‘docker-hello-world-container’ is running. To see if it printed “Hello, World” successfully, we need to check the logs created by the Docker container. This can be checked by executing the following command.
$ docker logs docker-hello-world-container
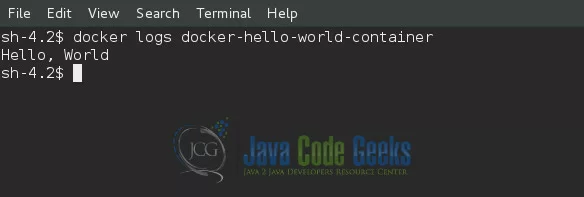
There it is!
6. Summary
In this example we learned how to create Docker Hello world type containers in 4 different ways:
- First, we learned how to run the hello-world image provided by Docker. This printed Hello World as soon as it was run
- Next, we learned how to run the Alpine image and print a Hello World using the echo shell command
- Next, we learned how to get the basic Hello World program into a Docker image and run it to print Hello World. The source code for this can be downloaded from the links given below.
- Finally, we learned how to set up a structured Java project using Gradle and generate Docker images and Containers using Gradle plugins. We used this structure to create a Hello World Java project and got it to run in a container. Later, we verified the Docker logs for the container to see that Hello World was printed when the container was run. The source code for this also can be downloaded from the links given below.
7. Download the Source Code
The source code for example 3 can be downloaded here: docker-hello-world.zip
The source code for example 4 can be downloaded here: docker-hello-world-example.zip



To resolve “java.lang.ClassNotFoundException: org.gradle.api.internal.component.Usage”, simply change the version of the gradle-docker plugin from 0.9.1 to 0.13.0.
To resolve “Cannot get the value of write-only property ‘dockerfile’ for object of type com.palantir.gradle.docker.DockerExtension.”, simply change:
dockerfile ‘src/main/docker/Dockerfile’
to
dockerfile project.file(‘src/main/docker/Dockerfile’)
There is a path mismatch in this example, step 5.2 uses: “src/main/resources/Dockerfile”, but the build.gradle file contains, “dockerfile ‘src/main/docker/Dockerfile'” (See 5.4)
Very good brief and this post helped me alot. Say thank you I searching for your facts. Thanks for sharing with us!
https://www.besanttechnologies.com/training-courses/other-training-courses/devops-training-institute-in-chennai
Excellent post, truly well post. It will be used for improve our self. Thank you for sharing this content…!
I am a beginner at java programming. Your blog is very useful for me.
Wow!! Really a nice Article. Thank you so much for your efforts. Definitely, it will be helpful for others. I would like to follow your blog. Share more like this. Thanks Again.
iot training in Chennai | Best iot Training Institute in Chennai
how to use volumes in docker in java program so that changes made in java program reflected during running of container without building the dockerfile again and again?
Really nice article…I think it is informative…Keep Sharing…
Testing & Training on Selenium
GREAT POST
Such a Great Article!!
Interesting Things.
Such A nice post… thanks For Sharing !!Great information for new guy like me
Thanks for sharing an informative blog keep rocking bring more details.I like the helpful info you provide in your articles.
To resolve “Cannot get the value of write-only property ‘dockerfile’ for object of type com.palantir.gradle.docker.DockerExtension.”, simply change:
dockerfile ‘src/main/docker/Dockerfile’
to
dockerfile project.file(‘src/main/docker/Dockerfile’)
Thank You for an amazing article, it was really helpful for me and loved to read this.
Thanks for sharing an informative blog keep rocking bring more details. I like the helpful info you provide in your articles.
STAD Solution is an IT Training and Development company. We provide Best Software testing Training in Ahmedabad.
Thank you for sharing this website.
Your new valuable key points imply much to a person like me and extremely more to my office workers. With thanks; from every one of us.
I am very new to this coding. Your blog is very helpful for me. Thanks for sharing.
Excellent information. Really love it.
“I’ve been using classroom management software for a few years now, and it has completely transformed the way I teach. It’s so much easier to organize my courses and assignments, and I can communicate with my students and parents more effectively. Highly recommend!”
Thanks for this useful article. Keep sharing & blogging. If you’re looking to study (or) Pursue a career abroad, Visit dynamic study abroad!
Excellent post.
This is an excellent post – thank you for sharing it! I always relish the opportunity to read such superb content filled with valuable information. The ideas presented here are truly best and exceptionally captivating, making the post thoroughly enjoyable. Please continue with your fantastic work.
You’re very welcome! I’m pleased to hear that the post was helpful and provided you with the information you were looking for. If you ever have more questions or need assistance in the future, don’t hesitate to ask. Thank you for your kind words, and I’m here to help with any information or guidance you may need!
https://www.slainstitute.com/devops-training-in-chennai
https://www.slainstitute.com/rpa-training-in-chennai
Excellent blog.
Excellent blog.