Hello. In this tutorial, we will understand and implement the google sign-in integration with the nodejs application using passport and passport-google-oauth2 modules.
1. Introduction
Passport.js is an authentication middleware designed for Nodejs. passport-local uses the passport strategy for authenticating with a username and password. The module helps to authenticate using a username and password in the nodejs applications. If you are interested in reading further about this module, look at this link.
1.1 Setting up Node.js
To set up Node.js on windows you will need to download the installer from this link. Click on the installer (also include the NPM package manager) for your platform and run the installer to start with the Node.js setup wizard. Follow the wizard steps and click on Finish when it is done. If everything goes well you can navigate to the command prompt to verify if the installation was successful as shown in Fig. 1.

2. Google authentication using Nodejs and Passport
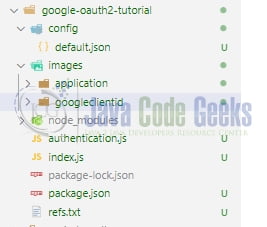
To set up the application, we will need to navigate to a path where our project will reside and I will be using Visual Studio Code as my preferred IDE. Let a take a quick peek at the project structure.
2.1 Creating oauth client id
To implement the google sign-in integration one needs to log in to the google developers console and create a google cloud project after valid authentication. Once logged in you need to head to the Credentials section. Configure the OAuth consent screen and choose External as the user type. Google cloud platform will ask to fill in some details e.g. application name and developer contact details.

Once the consent is done create a new oauth client id for a web application. Fill in the required details such as application name and authorized redirect uri’s. Once done click on create button and something like the below will be shown.
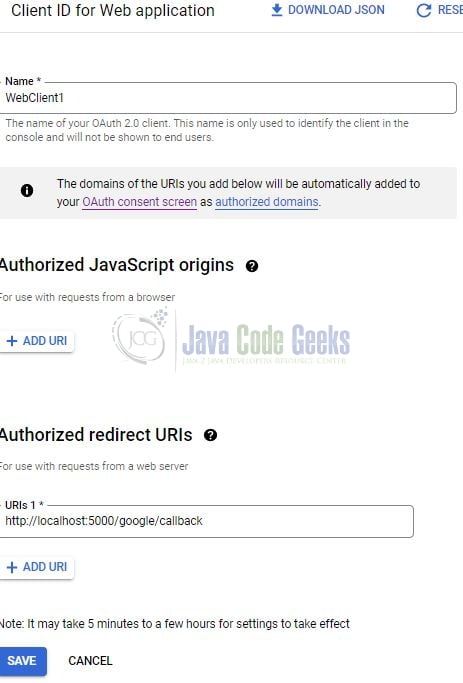
The callback specified in Fig. 4 is for local testing. Once the client is created remember to note down the google client id and client secret as this will later be used in the nodejs application.
2.2 Setting up project dependencies
Navigate to the project directory and run npm init -y to create a package.json file. This file holds the metadata relevant to the project and is used for managing the project dependencies, script, version, etc. Replace the generated file with the code given below –
package.json
{
  "name": "google-oauth2-tutorial",
  "version": "1.0.0",
  "description": "",
  "main": "index.js",
  "scripts": {
    "dev": "nodemon index.js",
    "start": "node index.js",
    "test": "echo \"Error: no test specified\" && exit 1"
  },
  "keywords": [],
  "author": "geeks",
  "license": "MIT",
  "dependencies": {
    "config": "^3.3.7",
    "express": "^4.18.1",
    "express-session": "^1.17.3",
    "passport": "^0.6.0",
    "passport-google-oauth2": "^0.2.0"
  }
}
Once the file is replaced trigger the below npm command in the terminal window to download the different packages required for this tutorial.
Downloading dependencies
npm install
2.3 Setting up the config json
Create a json file inside the config folder responsible to hold the configuration-related details for the application. The callback url specified in the below configuration file should match the Authorized redirect uris specified while creating the client as shown in section 2.1. You are free to change the values as per your requirement.
config/default.json
{
  "google": {
    "clientId": "google_client_id",
    "clientSecret": "google_client_secret",
    "callbackUrl": "http://localhost:5000/google/callback"
  },
  "port": 5000
}
2.4 Creating the authentication file
To integrate google authentication into the nodejs application create the file named authentication.js in the root directory. GoogleStrategy is what we will use for authentication with google and is specified in the passport-google-oauth2 module. Once the authentication will be successful the user details will be saved in the browser cookie.
authentication.js
const config = require("config");

const passport = require("passport");
const GoogleStrategy = require("passport-google-oauth2").Strategy;

passport.use(
  new GoogleStrategy(
    {
      clientID: config.get("google.clientId"),
      clientSecret: config.get("google.clientSecret"),
      callbackURL: config.get("google.callbackUrl"), // should be in sync specified while creating client id on google dev portal
      passReqToCallback: true
    },
    function (request, accessToken, refreshToken, profile, done) {
      return done(null, profile);
    }
  )
);

passport.serializeUser(function (user, done) {
  done(null, user);
});

passport.deserializeUser(function (user, done) {
  done(null, user);
});
2.5 Setting up implementation file
Create an implementation file in the root directory responsible to handle the application startup and expose the different routes.
/: represents the index page and with a hyperlink to authenticate via google/google/callback: represents the callback url that will be called if the google’s authentication is successful/protected: represents the page that will be called when the google’s authentication is successful and the user will be shown the welcome message with the logout button/auth/failure: represents the page that will be called when the google’s authentication is unsuccessful with an error message/logout: represents the page to logout the user
index.js
const config = require("config");

const express = require("express");
const session = require("express-session");
const passport = require("passport");
require("./authentication");

const app = express();
app.use(session({ secret: "pets", resave: false, saveUninitialized: true }));
// setup passport
app.use(passport.initialize());
app.use(passport.session());

// login url - http://localhost:5000/
app.get("/", (req, res) => {
  //console.log("showing index page");
  res.send('<a href="/auth/google">Authenticate with Google</a>');
});

app.get(
  "/auth/google",
  passport.authenticate("google", { scope: ["email", "profile"] })
);

app.get(
  "/google/callback",
  passport.authenticate("google", {
    successRedirect: "/protected",
    failureRedirect: "/auth/failure"
  })
);

app.get("/protected", isLoggedIn, (req, res) => {
  //console.log("showing protected route");
  res.send(`Hello ${req.user.displayName}.<br/><a href="/logout">Logout</a>`);
});

app.get("/auth/failure", (req, res) => {
  //console.log("unauthorized user. invalid access");
  res.send("Authentication failed");
});

app.get("/logout", (req, res) => {
  //console.log("logging out");
  req.logout((err) => {
    if (err) return next(err);
    req.session.destroy();
    res.send('Thanks for visiting.<br/><a href="/">Login</a>');
  });
});

const port = config.get("port");
app.listen(port, () => console.log(`App listening on port ${port}`));

function isLoggedIn(req, res, next) {
  req.user ? next() : res.sendStatus(401);
}
3. Run the Application
To run the application navigate to the project directory and enter the following command as shown below in the terminal.
Run command
$ npm run start
If everything goes well open the browser and navigate to the endpoint – http://localhost:5000.
4. Demo
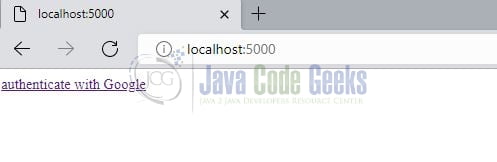
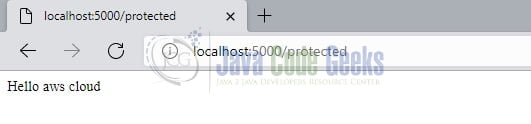
Click on the hyperlink and it will take you to the Google sign-in page. Once the authentication is successful the welcome page will be shown to the user along with the user’s display name.
Click on the logout hyperlink to log out of the application.

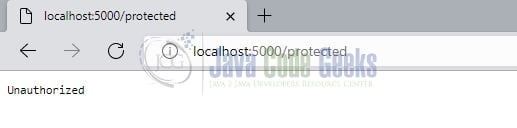
If any user tries to hit the protected endpoint without the valid authentication an unauthorized page will be shown to the user.
That is all for this tutorial and I hope the article served you with whatever you were looking for. Happy Learning and do not forget to share!
5. Summary
In this tutorial, we learned how to set up google oauth2 with the passport npm module in the nodejs application. You can download the source code from the Downloads section.
6. Download the Project
This was a tutorial to understand google oauth2 implementation in a nodejs application using passport.
You can download the full source code of this example here: Google authentication Nodejs and Passport
