In this example we will present the usage of Spring NamedParameterJdbcTemplate.
1. Introduction
JDBC in general, acts as a communication layer between client applications and various databases hence relevant how we can utilise it. An introduction about plain JDBC is already available under the following link https://examples.javacodegeeks.com/enterprise-java/servlet/jdbc-servlet-example/#introduction. It is best reading that post as well to have a broader understanding of the topic.
Table Of Contents
NamedParameterJdbcTemplate is built upon JDBCTemplate which is provided by spring and used for lower level communication with databases. It makes possible to pass SQL query arguments as key value pairs. As a result the program code is much more readable and therefore serves as better documentation compared to the indexed or the “?” placeholder approach. The latter is harder to follow specially if the number of parameters is huge.
2. NamedParameterJdbcTemplate example
2.1 Tools used
We will use MySQL as the database and MySQL Workbench as the client. Eclipse as IDE, maven for dependency management and finally spring-jdbc for DB access.
2.2 Database setup
First we will execute a query. It will return database records corresponding to the supplied parameters. We will use MySQL Workbench to start up the database, create the table and insert rows. If you haven’t done this already, download MySQL from here https://dev.mysql.com/downloads/mysql/ and install it. Having successfully installed MySQL you can start up the database and connect to it via Workbench.
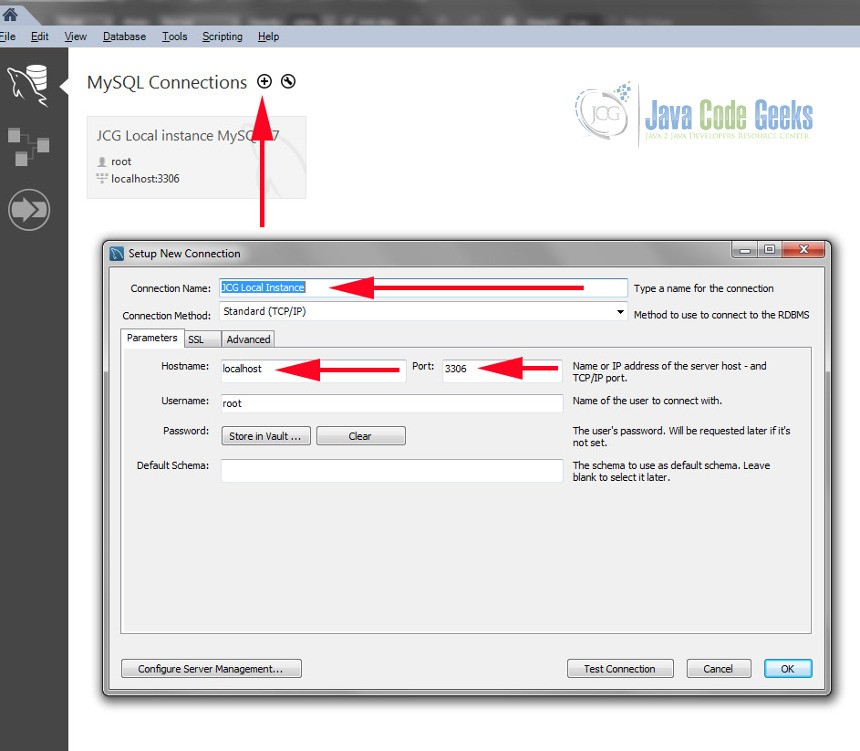
Start up Workbench and once it is done click on MySQL connections to create a new connection. Make sure you are connecting to the locally installed instance hostname: localhost port: 3306 and then click OK.
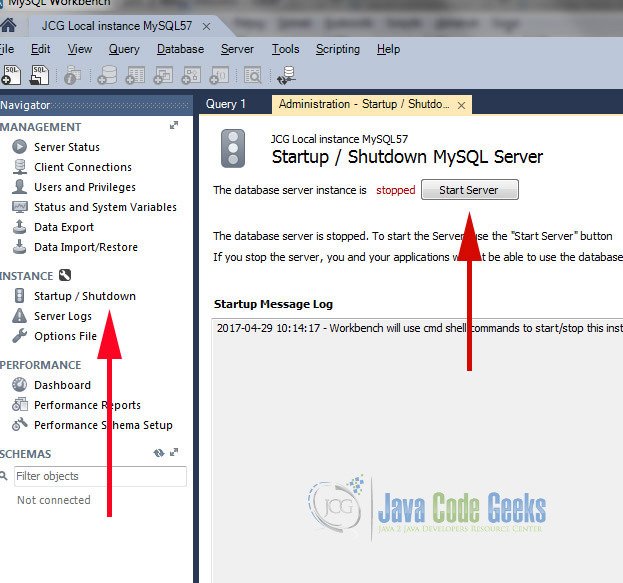
Having successfully connected the instance can be managed. Probably this is the first time you’re trying to connect hence the database needs to be started up. Go to the left menu and under INSTACE you will find Startup / Shutdown.
As a next step create a schema. The schema is a logical unit which groups database entities. To create one go to the empty area under SCHEMAS and right click on it. Name it arbitrarily e.g. jcg.

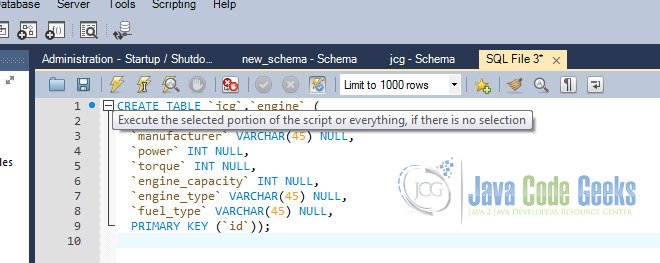
Now you need to create a table within that schema. We will create a table called engine. An engine in real life would have a lot more parameters. I wanted to keep the example simple therefore I listed only a few. Create a new SQL tab and execute the below DDL:
1 2 3 4 5 6 7 8 9 | CREATE TABLE `jcg`.`engine` (`id` INT NOT NULL,`manufacturer` VARCHAR(45) NULL,`power` INT NULL,`torque` INT NULL,`engine_capacity` INT NULL,`engine_type` VARCHAR(45) NULL,`fuel_type` VARCHAR(45) NULL,PRIMARY KEY (`id`)); |
Another necessary step is to populate data to the engine table. Execute the below insert commands:
1 2 3 4 5 | insert into jcg.engine (id, manufacturer, power, torque, engine_capacity, engine_type, fuel_type) VALUES (1, 'ford', 100, 80, 1600, 'straight', 'petrol');insert into jcg.engine (id, manufacturer, power, torque, engine_capacity, engine_type, fuel_type) VALUES (2, 'vw', 200, 120, 200, 'boxer', 'petrol');insert into jcg.engine (id, manufacturer, power, torque, engine_capacity, engine_type, fuel_type) VALUES (3, 'dodge', 300, 250, 6000, 'v_type', 'petrol');Finally create a database user. Go to Users and Privileges. Click on Add Account. Create user: test, password: test. |
2.3 Project setup
Download maven from here: https://maven.apache.org/download.cgi . Create a java project called NamedParameters and add a pom.xml to the project. The pom.xml describes the project dependencies therefore maven is able to manage them for you. The content of the pom.xml should be like this:
01 02 03 04 05 06 07 08 09 10 11 12 13 14 15 16 17 18 19 20 21 22 23 24 25 26 27 28 29 30 31 32 33 34 35 | <project xmlns="http://maven.apache.org/POM/4.0.0" xmlns:xsi="http://www.w3.org/2001/XMLSchema-instance" <modelVersion>4.0.0</modelVersion> <groupId>com.jcg</groupId> <artifactId>JDBCNamedParameters</artifactId> <version>0.0.1</version> <packaging>jar</packaging> <name>JDBC named parameters</name> <dependencies> <dependency> <groupId>org.springframework</groupId> <artifactId>spring-core</artifactId> <version>4.3.8.RELEASE</version> </dependency> <dependency> <groupId>org.springframework</groupId> <artifactId>spring-context-support</artifactId> <version>4.3.8.RELEASE</version> </dependency> <dependency> <groupId>org.springframework</groupId> <artifactId>spring-jdbc</artifactId> <version>4.3.8.RELEASE</version> </dependency> <dependency> <groupId>mysql</groupId> <artifactId>mysql-connector-java</artifactId> <version>5.1.6</version> </dependency></dependencies></project> |
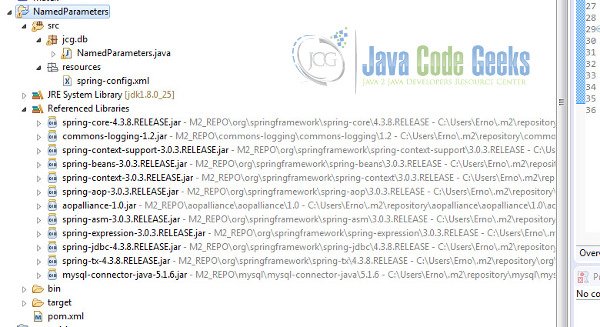
Execute the mvn eclipse:eclipse command. As a result the dependencies are downloaded and added to your eclipse project.
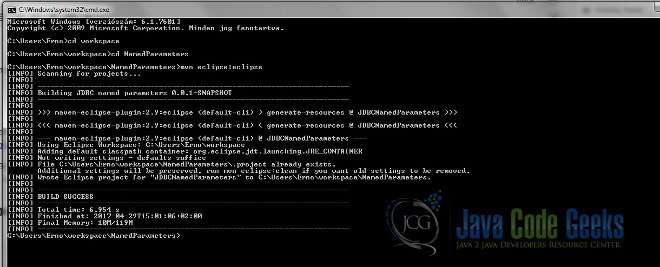
After execution refresh the eclipse project
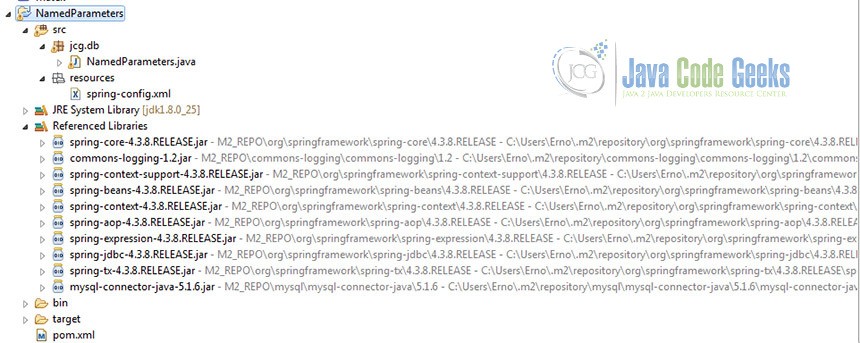
Create a file called spring-config.xml. Put to the file, the resources package. Below is the content of the file:
01 02 03 04 05 06 07 08 09 10 11 12 13 14 15 16 | xsi:schemaLocation="http://www.springframework.org/schema/beans <bean id="dataSource" class="com.mysql.jdbc.jdbc2.optional.MysqlDataSource"> <property name="url" value="jdbc:mysql://localhost:3306/jcg" /> <property name="user" value="test" /> <property name="password" value="test" /> </bean> <bean id="NamedParameters" class="jcg.db.NamedParameters"> <property name="dataSource" ref="dataSource" /> </bean></beans> |
With this spring configuration we are injecting a data source object to our class hence our class will be able to communicate with the database. The data source is passed to NamedParameterJdbcTemplate class. Corresponding to the database we use MysqlDataSource. First of all this defines the address of the database instance and it also defines the user and the password.
2.4 Source code and explanation
You can download java source code from here.
01 02 03 04 05 06 07 08 09 10 11 12 13 14 15 16 17 18 19 20 21 22 23 24 25 26 27 28 29 30 31 32 33 34 35 36 37 38 39 40 41 42 | package jcg.db;import java.util.HashMap;import java.util.Map;import org.springframework.context.ApplicationContext;import org.springframework.context.support.ClassPathXmlApplicationContext;import org.springframework.jdbc.core.namedparam.NamedParameterJdbcTemplate;import org.springframework.jdbc.support.rowset.SqlRowSet;import com.mysql.jdbc.jdbc2.optional.MysqlDataSource;public class NamedParameters { private MysqlDataSource dataSource; public static void main(String[] args) { ApplicationContext context = new ClassPathXmlApplicationContext("resources/spring-config.xml"); NamedParameters np = (NamedParameters) context.getBean("NamedParameters"); NamedParameterJdbcTemplate jdbcTemplate = new NamedParameterJdbcTemplate(np.getDataSource()); String sql = "select * from jcg.engine where manufacturer = :manufacturer"; Map parameters = new HashMap(); parameters.put("manufacturer", "ford"); SqlRowSet rowSet = jdbcTemplate.queryForRowSet(sql, parameters); while (rowSet.next()) { System.out.println("RowNumber: " + rowSet.getRow()); for (int i = 1; i < rowSet.getMetaData().getColumnCount(); i++) { System.out.println("ColumName: " + rowSet.getMetaData().getColumnName(i) + ", value: " + rowSet.getObject(i)); } } } public MysqlDataSource getDataSource() { return dataSource; } public void setDataSource(MysqlDataSource dataSource) { this.dataSource = dataSource; }} |
First of all we let spring open the configuration file. As a result spring instantiates the configured beans for us. We look up the NamedParameters bean and pass it over to NamedParameterJdbcTemplate.
The SQL query is specified with a single parameter “manufacturer” and passed to the NamedParameterJdbcTemplate.queryForRowSet as the first argument. Another parameter is a Map which contains the name value pairs. The names stored in the Map are matching with the SQL query parameter names. Having these two parameters properly specified the call to queryForRowSet executes our query. As a result we can display the matching rows. In this example we iterate over all the rows. And in each column within the row. The getMetaData function delivers us relevant information about the underlying schema.
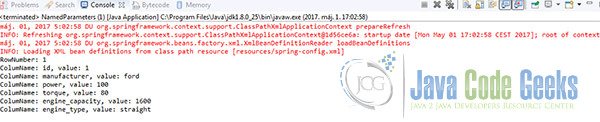
As expected the result is a single matching entry.
3. Summary
Frameworks like spring provide solution to recurring problems. We saw in this example how to utilise one of them. Consider the named parameter approach whenever you have lot of parameters and consequently hard readable code. Named parameters will make your code easier to read hence better maintainable.
