In this example, we will show how to resolve an error which is frequently encountered if you are using Java Server Pages (JSP). Java Server Pages is a server side technology and it is used to create dynamic java web application. JSP can be considered an extension to servlet technology. We will use embedded jetty to show the error and how to resolve error JSP Support not configured . If you want to learn more about how to use standalone jetty to deploy servlets, you can read here
1. Environment
In this example, we will use following environment:
- Eclipse Kepler 4.3
- Jetty Version 9.2.15
- Java version 7
- Java Servlet library – servlet-api-3.1
- Maven 3.0.4
2. Jetty – JSP Support Not Configured Example
2.1 Outline of example
In this example we will create a maven project with an embedded jetty. We will write a JSP page which will run on embedded jetty. We will show the error JSP Not Configured and then we will show how to resolve this error by configuring JSP in embedded jetty. At the end, we will also discuss why standalone jetty was not used for this example and show what ways we can configure JSP in standalone jetty.
2.2 Create a Maven Project
Here are the steps to create a Maven Project in eclipse:
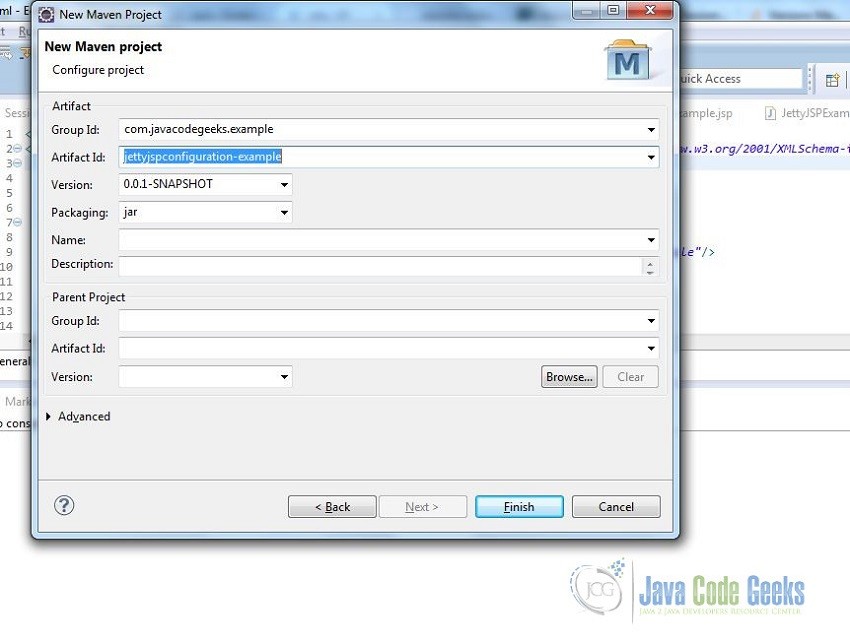
2.2.1. Create a new Maven project
As shown in below screenshot, create a new maven project. Fill in the detail with GroupId as com.javacodegeeks.example and ArtifactId as jettyjspconfiguration-example
2.2.2 Modify pom.xml file
POM is a Project Object Model and it is an xml file in Maven project. The file contains the information related to project and configuration details used by Maven to build the project. We will add some dependencies like jetty server, jetty-webapp and jetty-annotations. These dependencies are needed to run our web application on embedded jetty server. Once we have added these dependencies, our pom.xml file will look like as shown below:
<project xmlns="http://maven.apache.org/POM/4.0.0" xmlns:xsi="http://www.w3.org/2001/XMLSchema-instance" xsi:schemaLocation="http://maven.apache.org/POM/4.0.0 http://maven.apache.org/xsd/maven-4.0.0.xsd">
  <modelVersion>4.0.0</modelVersion>
  <groupId>com.javacodegeeks.example</groupId>
  <artifactId>jettyjspconfiguration-example</artifactId>
  <version>0.0.1-SNAPSHOT</version>
  <packaging>war</packaging>
    <dependencies>
	        <dependency>
	            <groupId>org.eclipse.jetty</groupId>
	            <artifactId>jetty-server</artifactId>
	            <version>9.2.15.v20160210</version>
	        </dependency>
	        <dependency>
	            <groupId>org.eclipse.jetty</groupId>
	            <artifactId>jetty-annotations</artifactId>
	            <version>9.2.15.v20160210</version>
	        </dependency>
	        <dependency>
	            <groupId>org.eclipse.jetty</groupId>
	            <artifactId>jetty-webapp</artifactId>
	            <version>9.2.15.v20160210</version>
	        </dependency>
</dependencies>
</project>
2.2.3 Configure Web Application
Create a WEB-INF folder under src/main/webapp and add web.xml file. The content of the file will be like below:
<web-app xmlns="http://java.sun.com/xml/ns/javaee" xmlns:xsi="http://www.w3.org/2001/XMLSchema-instance"
	xsi:schemaLocation="http://java.sun.com/xml/ns/javaee http://java.sun.com/xml/ns/javaee/web-app_2_5.xsd"
	version="2.5">
	<display-name>Jetty JSP Configuration Example</display-name>
</web-app>
2.2.4 Simple JSP Application
Now we will write a simple JSP web page and Java code to run our embedded jetty server. Create a file index.jsp in eclipse project under project-name-> src -> main -> webapp. This is a simple JSP web page to print Hello Java Code Geeks . Our index.jsp will look like below:
<html>
<head>
<title>Sample JSP Page</title>
<meta>
<%@ taglib uri="http://java.sun.com/jsp/jstl/core" prefix="c"%>
</meta>
</head>

<body>
	<c:out value="Jetty JSP Configuration Example"></c:out>
	<br />
	<% System.out.println("Hello Java Code Geeks"); %>
	<div align="center" style="margin-top: 50px;">

        <form id="loginForm">
            Please enter your Username:  <input type="text" name="username" size="20px"> <br>
            Please enter your Password:  <input type="text" name="password" size="20px"> <br><br>
			<input type="submit" value="submit">
        </form>

        </div>
</body>
</html>
We will write our java code to run jetty server. Let’s create java source file JettyJSPConfiguration.java under src->main->java as shown below:
package com.javacodegeeks.example;

import org.eclipse.jetty.server.Server;
import org.eclipse.jetty.webapp.WebAppContext;

public class JettyJSPConfiguration {

	public static void main(String[] args) {

		Server server = new Server(8580);
		WebAppContext ctx = new WebAppContext();
		ctx.setResourceBase("src/main/webapp");
		ctx.setContextPath("/jettyjspconfiguration-example");
		server.setHandler(ctx);
		try {
			server.start();
			server.join();
		} catch (Exception e) {
			e.printStackTrace();
		}
	}

}
2.2.5 Run our example
Now once we run JettyJSPConfiguration.java from eclipse, we can access the web application in browser at port 8580. Once the server is started, let’s go to browser and access http://localhost:8580/jettyjspconfiguration-example/index.jsp and we will get below error


3. How to configure JSP Support
To fix our error Jetty JSP Support Not Configured , we will configure JSP support in our embedded jetty server. In our pom.xml, we will add apache-jsp dependency to handle JSP along with jstl dependency to handle JSP tag library. This will look like below:
<dependency> <groupId>org.eclipse.jetty</groupId> <artifactId>apache-jsp/<artifactId> <version>9.2.15.v20160210</version> </dependency> <dependency> <groupId>jstl</groupId> <artifactId>jstl</artifactId> <version>1.2</version> </dependency>
We will do following changes in our Java source code to support JSP configuration for an embedded jetty. We will need to include jstl jar in building our application, so compiler can recognize jsp tags.
ctx.setAttribute("org.eclipse.jetty.server.webapp.ContainerIncludeJarPattern",".*/[^/]*jstl.*\\.jar$");
org.eclipse.jetty.webapp.FragmentConfigurationprocesses all WEB-INF/web-fragment.xml files.- We can extend the support of container by adding some extra configurations which will be needed to deploy a webapp.
org.eclipse.jetty.plus.webapp.EnvConfigurationis used to create environment for webapp which is applied through WEB-INF/jetty-env.xml in a standalone jetty. org.eclipse.jetty.plus.webapp.PlusConfigurationwill support JNDI aspects of WEB-INF/web.xml.- We will use
org.eclipse.jetty.annotations.AnnotationConfigurationto scan container and webapp jars looking for annotations related to WebServlet, WebFilter or WebListener. -
org.eclipse.jetty.webapp.JettyWebXmlConfigurationis used to look for xml configuration in WEB-INF.
It is important to note how these configurations are added in server classlist. This is how we will add those configurations through code:
		org.eclipse.jetty.webapp.Configuration.ClassList classlist = org.eclipse.jetty.webapp.Configuration.ClassList.setServerDefault(server);
        classlist.addAfter("org.eclipse.jetty.webapp.FragmentConfiguration", "org.eclipse.jetty.plus.webapp.EnvConfiguration", "org.eclipse.jetty.plus.webapp.PlusConfiguration");
        classlist.addBefore("org.eclipse.jetty.webapp.JettyWebXmlConfiguration", "org.eclipse.jetty.annotations.AnnotationConfiguration");
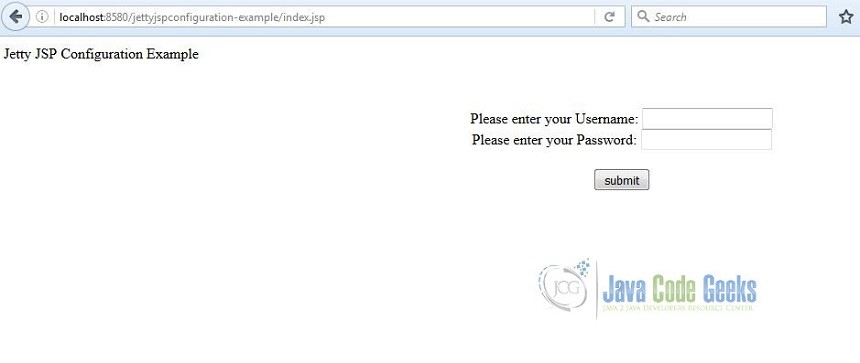
4. Run the web application
Once we are done with changes to java source code, we can run our project from eclipse and it will start our embedded jetty server. We will see the output of our JSP file in browser and also Hello Java Code Geeks in console of eclipse.
5. Standalone Jetty Server
If you are using jetty version 9.2.15 v20160210, jsp is by default enabled. In $jetty.base/start.d/jsp.ini file has following settings to enable jsp --module=jsp and jsp-impl=apache
6. Conclusion
In this example, we showed how to resolve the error jetty JSP support not configured by configuring jsp for embedded-jetty server.
7. Download the eclipse project
This was an example to configure JSP on an embedded-jetty.
You can download the full source code of this example here: jettyjspconfiguration-example.zip
8. Related Articles
Following articles were referred in developing this example:

Yogesh, thank you very mach! Useful for me!
You published here a good and complete example of a JSP project. It’s really helpful to me!
Thank you very much!