JMX technology provides a simple, standard way of managing resources such as applications, devices, and services. Jetty itself does not provide a GUI based console for management/monitoring, however ii presents a solid integration with JMX, which enables us to monitor/manage Servers through JMX.
In this post we are going to discuss JMX integration of Jetty. We will start with an Embedded Jetty example. We will first configure our embedded server to be accessible through JMX; thereafter we are going to incorporate Managed Objects in Jetty style. After the embedded example, we are going to show how we can enable JMX in a standalone Jetty Server. During the example, we are going to monitor and administer our Jetty through JConsole.
In Jetty, the main constructs such as handlers and holders are also JMX beans. This makes almost every single piece of Jetty observable or controllable through JMX. In addition this, Jetty enables creation of JMX objects(MBeans) through annotations(which is an extension to standard MBean capabilities).
1. Environment
In the example, following environment will be used:
- Java 8 (Java 7 is also OK.)
- Maven 3.x.y
- Eclipse Luna(as the IDE)
- Jetty v9.2.11 (In Embedded Jetty example, we will add Jetty libraries through Maven.)
- JConsole(which is already bundled with your Java)
2. JMX with Embedded Jetty
2.1 Structure of the Example
In this example, we are going to enable Jetty for an Embedded Jetty Server programmatically. Our embedded server will have a deployed simple application with a simple servlet. Thereafter we are going to implement Managed Object with Jetty annotations. The Maven project will be packaged as a WAR; so that it can be deployed also on a standalone server.
2.2 Creating the Maven Project
We will create the Maven project in Eclipse, applying the steps below:
- Go to File -> New ->Other -> Maven Project
- Tick Create a simple project and press “Next”.
- Enter groupId as : com.javacodegeeks.snippets.enterprise
- Enter artifactId as : jetty-jmx-example
- Select packaging as “war”.
- Press “Finish”.
After creating our project, we are going to add following dependencies to our pom.xml.
- org.eclipse.jetty:jetty-server
- org.eclipse.jetty:jetty-webapp
- org.eclipse.jetty:jetty-jmx
The first two dependencies are common for almost all embedded Jetty applications. The third one(jetty-jmx) enables us to integrate Jetty with JMX. After adding the dependencies, the dependency section of our pom.xml seems as follows:
<dependencies>
		<!--Jetty dependencies start here -->
		<dependency>
			<groupId>org.eclipse.jetty</groupId>
			<artifactId>jetty-server</artifactId>
			<version>9.2.11.v20150529</version>
		</dependency>


		<dependency>
			<groupId>org.eclipse.jetty</groupId>
			<artifactId>jetty-webapp</artifactId>
			<version>9.2.11.v20150529</version>
		</dependency>

		<dependency>
			<groupId>org.eclipse.jetty</groupId>
			<artifactId>jetty-jmx</artifactId>
			<version>9.2.11.v20150529</version>
		</dependency>

		<!--Jetty dependencies end here -->

</dependencies>
2.3 Enabling JMX Programmatically
In order to keep things simple, we are going to implement our Jetty Server through our Main class of the project. You can see the JettyJmxExampleMain class below, decorated with source code comments.
JettyJmxExampleMain.java
package com.javacodegeeks.snippets.enterprise.jettyjmx;

import java.lang.management.ManagementFactory;

import org.eclipse.jetty.jmx.MBeanContainer;
import org.eclipse.jetty.server.Server;
import org.eclipse.jetty.util.log.Log;
import org.eclipse.jetty.webapp.WebAppContext;

public class JettyJmxExampleMain {

	public static void main(String[] args) throws Exception {

		// 1. Creating the server on port 8080
		Server server = new Server(8080);

		// 2. Creating the WebAppContext for the created content
		WebAppContext ctx = new WebAppContext();
		ctx.setResourceBase("src/main/webapp");
		server.setHandler(ctx);

		// 3. CreatingManaged Managed Bean container
		MBeanContainer mbContainer = new MBeanContainer(ManagementFactory.getPlatformMBeanServer());

		// 4. Adding Managed Bean container to the server as an Event Listener  and Bean
		server.addEventListener(mbContainer);
		server.addBean(mbContainer);

		// 5. Adding Log
		server.addBean(Log.getLog());
		// 6. Starting the Server
		server.start();
		server.join();

	}
}
In the first steps (1 and 2), we initialize a Jetty Server with a Web Application context under src/main/resources/webapp. In this part, nothing is special in terms of JMX integration. The web application in this example consists of a trivial Servlet, details of which will be provided later.
In Step 3, we create our Managed Bean container. This container holds reference to the JMX Managed objects. In step 4, we attach this container to our Server. In the later steps (5 and 6), we add logging capability and start our server.
As mentioned above, the web application we deployed on our embedded Server is simple. It consists of a single servlet (JCGServlet) that increments a counter on each request. The counter is encapsulated in a singleton object. The content of the web.xml, JCGServlet and CounterSingleton are presented below:
web.xml
<web-app xmlns="http://java.sun.com/xml/ns/javaee" xmlns:xsi="http://www.w3.org/2001/XMLSchema-instance"
	xsi:schemaLocation="http://java.sun.com/xml/ns/javaee
	      http://java.sun.com/xml/ns/javaee/web-app_3_0.xsd"
	version="3.0">

	<display-name>Jetty JMX Configuration Example</display-name>


	<servlet>
		<servlet-name>JCGServlet</servlet-name>
		<servlet-class>com.javacodegeeks.snippets.enterprise.jettyjmx.JCGServlet</servlet-class>
	</servlet>

	<servlet-mapping>
		<servlet-name>JCGServlet</servlet-name>
		<url-pattern>/jcg/*</url-pattern>
	</servlet-mapping>


</web-app>
JCGServlet.java
package com.javacodegeeks.snippets.enterprise.jettyjmx;

import java.io.IOException;

import javax.servlet.ServletException;
import javax.servlet.ServletRequest;
import javax.servlet.ServletResponse;
import javax.servlet.http.HttpServlet;


public class JCGServlet extends HttpServlet {


	@Override
	public void service(ServletRequest req, ServletResponse res) throws ServletException, IOException {

		CounterSingleton.getInstance().increment();

		res.getOutputStream().print("Application Specific Servlet Response");

	}

}
CounterSingleton.java
package com.javacodegeeks.snippets.enterprise.jettyjmx;

public class CounterSingleton {

	private static CounterSingleton instance = new CounterSingleton();

	private Integer counter = 0;

	private CounterSingleton() {
		counter = 0;
	}

	public static CounterSingleton getInstance() {
		return instance;
	}

	public synchronized void increment() {
		counter++;
	}

	public Integer getCounter() {
		return counter;
	}

	public synchronized void reset(){
		counter=0;
	}

}
When we start our application, our application is ready to be monitored and managed through JMX. We can verify that our web application and server are running by navigating to http://localhost:8080/jcg with our browser and seeing the response below:
2.4 Monitoring with JConsole
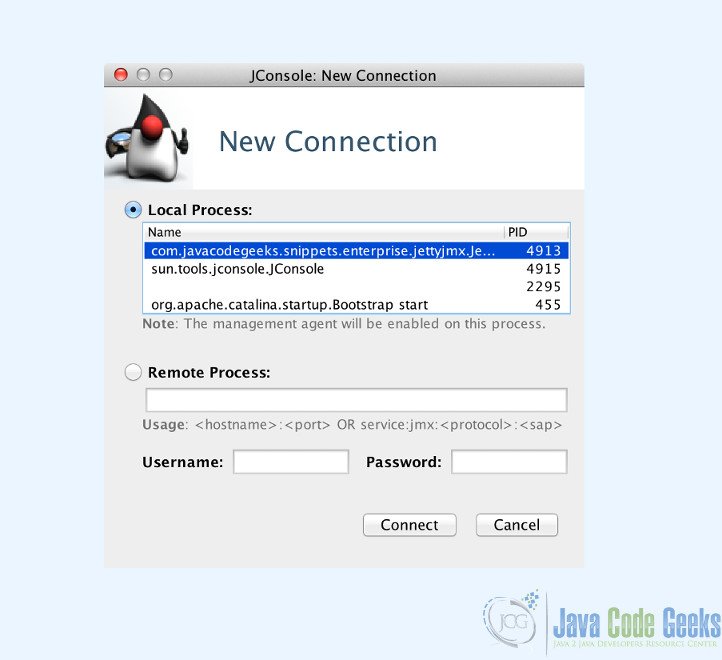
We can monitor our JMX enabled embedded server using JConsole, which is available under JAVA_HOME of our system. When we launch JConsole, it shows as a list of available local processes as in the figure below:

Here our embedded server is listed with name of the main class. When we select this process and proceed, we can see various parameters(memory,CPU, thread utilization etc) related to our Jetty. The screen presents 6 tabs for JMX administration. When we select MBean tab, the available Managed Beans are listed in a tree, which can be viewed below:
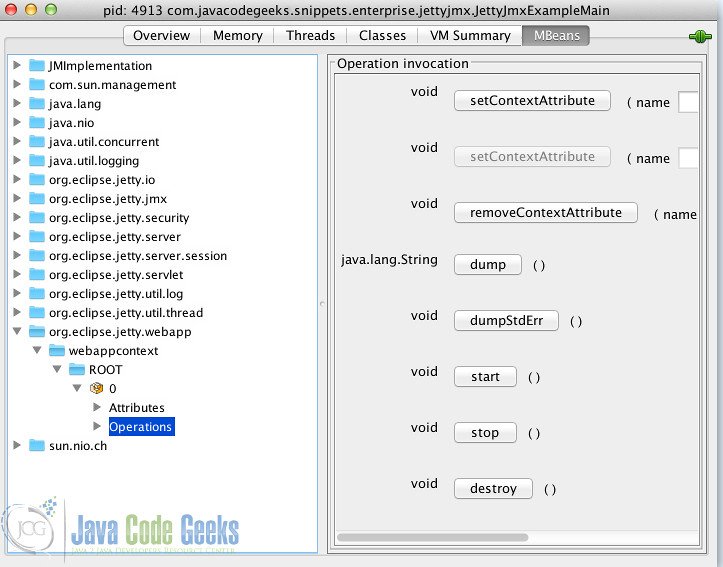
We can expand the tree org.eclipse.jetty.webapp->webappcontext->ROOT->0. This node shows a list parameters to be monitored under Attributes and a set of operations that can be invoked under Operations sections. Among these operations, we can stop the application invoking stop() method. When we call this operation, the webapp will immediately stop and will return 404 error when we try to access. We can restart our web application invoking the start() method.
In addition to these, JConsole enables us various monitoring and administration options. Forcing a Garbage Collection or setting web application initialization parameters are among those options.
2.5 Jetty Managed Objects
As mentioned in the previous sections, Jetty enables us to create our Managed Beans using Jetty annotations. It is worth to mention three annotations here:
- @ManagedObject: This annotation is used for annotating managed object classes.
- @ManagedAttribute: This annotation denotes the getter fields that are listed under Attributes section,
- @ManagedOperation: This annotation denotes the methods to be listed under Operations section.
Here you can see an example Managed object named JCGManagedObject. This class simply returns our previously mentioned counter and provides an operation to reset the counter.
JCGManagedObject.java
package com.javacodegeeks.snippets.enterprise.jettyjmx;

import org.eclipse.jetty.util.annotation.ManagedAttribute;
import org.eclipse.jetty.util.annotation.ManagedObject;
import org.eclipse.jetty.util.annotation.ManagedOperation;

@ManagedObject("jcgManagedObject")
public class JCGManagedObject {


	@ManagedAttribute
	public Integer getCount() {
		 return CounterSingleton.getInstance().getCounter();
	 }


	 @ManagedOperation
	 public void reset() {
		 CounterSingleton.getInstance().reset();
	 }
}
Our managed bean can be wired to Jetty through adding the highlighted code below(Line 4) in the main:
// 4. Adding Managed Bean container to the server as an Event Listener and Bean
server.addEventListener(mbContainer);
server.addBean(mbContainer);
server.addBean(new JCGManagedObject());
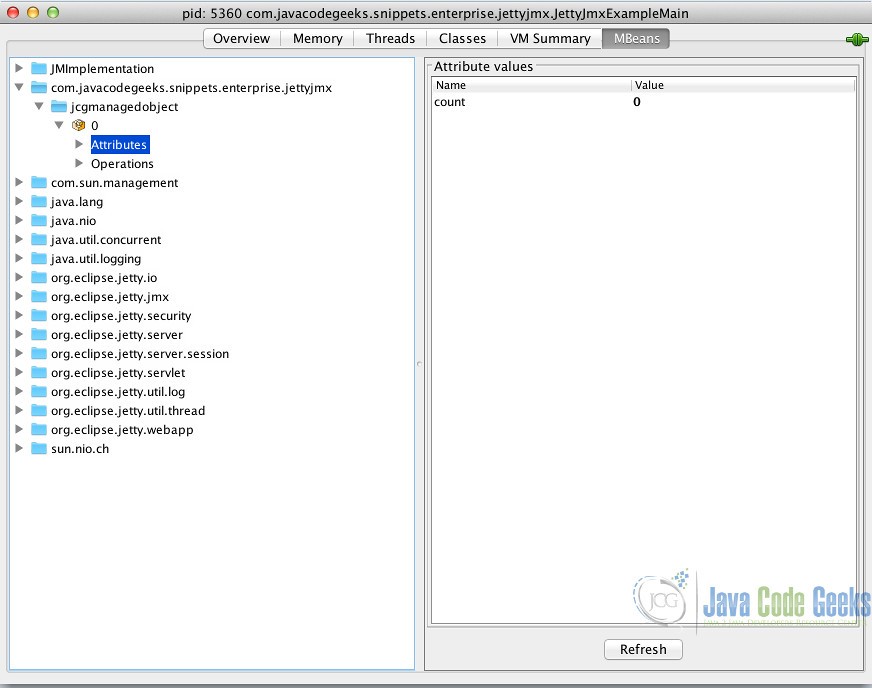
Here we have created an instance of our managed object and added as a bean. When we restart our application and open JConsole, we can see our managed bean in the MBeans tab under com.javacodegeeks.snippets.enterprise.jettyjmx->jcgmanagedobject->0. Here we can see our counter, which is incremented at each request, as an attribute, and we can reset this counter invoking the reset() under the Operations section:
3. JMX with Standalone Jetty
To this point, we have discussed how we can integrate JMX to embedded Jetty, now we are going to enable JMX for standalone mode. Jetty presents a modular architecture which also includes JMX integration a a module. Related configuration is stored under JETTY_HOME/etc/jetty-jmx.xml. This configuration is almost equal to our programmatic configuration in the embedded mode. All we have to do is enabling jmx module. The related steps are as simple as below:
- Open start.ini under JETTY_HOME
- Add this line: –module=jmx-remote
- Save and close the file.
When we run our standalone Jetty, Jetty will start with JMX enabled. We can access our server through JConsole and manage it as in the embedded mode.
4. Conclusion
Jetty provides powerful administration and monitoring capabilities through JMX. In this example, we have skimmed through Jetty JMX integration for embedded and standalone modes. In addition to this, we have created a Managed Object which is implemented in Jetty style.
You can download the full source code of this example here: Jetty JMX Example
