1. Introduction
Google Web Toolkit (GWT) allows a developer to enjoy writing code in Java for the frontend but transpiles the code to JavaScript on the frontend so that what the browser sees is optimized JavaScript code. One of the advantages of using GWT like any other web framework is that it creates the basic UI widgets that can be used. Widgets like buttons, checkboxes and so many more are usually available by default.
However, sometimes, you might need to have a group of these widgets that can help achieve a certain task. Imagine you want to have a contact form on different pages of your application. One way to go is to create the widgets on every page of the application so that you might repeat widgets like the Textboxes, Labels, and Buttons. But wait, can we achieve this in another way.
In this example, we would look at how GWT allows for Code Reusability through Components. By the end of this example, you would understand what it takes to create components in GWT.
2. Create a new GWT Project
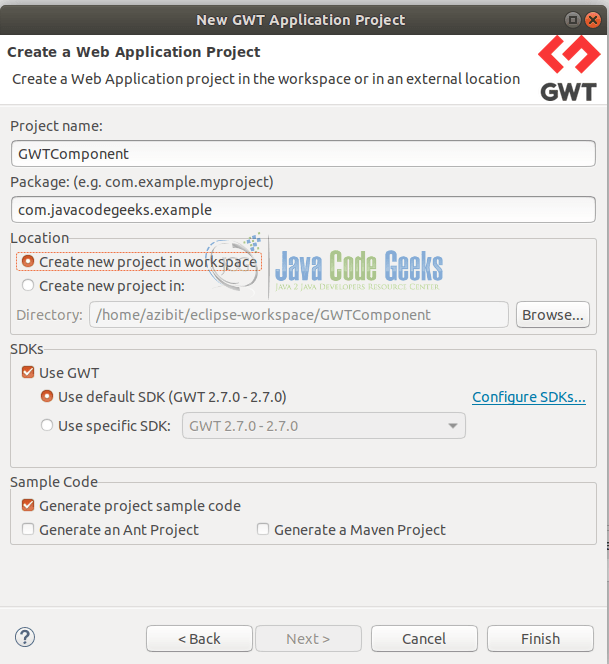
In the image below, we create a New GWT Project. The IDE used for this project is Eclipse. We name the Project GWTComponent, give our package name and basically use other default features provided by the Eclipse IDE.
In the image below, we show a dialog box on the Eclipse IDE for creating a new GWT Project. We name our project GWTComponent, add the package name com.javacodegeeks.example and we leave other details as default.
2.1 Basic Code Setup
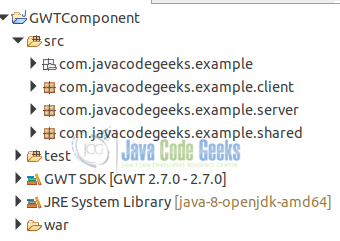
We review the basic code that was generated after creating the New GWT Project. It contains the client, server and shared code. Our example would focus on the client code so we would delete the server and shared code base, so we have only the client code.
In the image below, we show the basic code structure of a new GWT project. We have the client, server and shared code. For our project, we need only the client code.
2.2 Refactor Code Base
As explained earlier, we remove all the other code sections, so we have only the GWTComponent class. In the GWTComponent class, we have the onModuleLoad method, which is the most important method we would need to get started with. The onModuleLoad method initiates all the other processes in a GWT project.
GWTComponent.java
package com.javacodegeeks.example.client;

public class GWTComponent implements EntryPoint {
    /**
     * This is the entry point method.
    */
    public void onModuleLoad() {
    }
}
2.3 Create A Contact Form
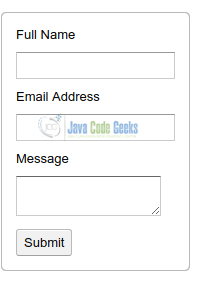
So remember we want to develop a Contact Form. The contact Form would have the name, email and the message to be sent. Then the submit button to finally submit the message. So consider that you want to have the contact form on all the pages of your application in case a user wants to send you a message at any point in time.
Now we create the Contact Form using the basic widgets available in GWT. We would use Textbox, Label, Button and a TextArea widget. We align them vertically so that they are stacked one on top of another.
Added UI Widgets In method onModuleLoad
import com.google.gwt.core.client.EntryPoint;
import com.google.gwt.user.client.ui.Button;
import com.google.gwt.user.client.ui.DecoratorPanel;
import com.google.gwt.user.client.ui.Label;
import com.google.gwt.user.client.ui.RootPanel;
import com.google.gwt.user.client.ui.TextArea;
import com.google.gwt.user.client.ui.TextBox;
import com.google.gwt.user.client.ui.VerticalPanel;

public class GWTComponent implements EntryPoint {

	/**
	 * This is the entry point method.
	 */
	public void onModuleLoad() {
	    DecoratorPanel decPanel = new DecoratorPanel();

		// Create a Vertical Panel
	    VerticalPanel vPanel = new VerticalPanel();
	    vPanel.setSpacing(10);
	    vPanel.setWidth("50px");

	    Label nameLabel = new Label("Full Name");
	    TextBox nameTextBox = new TextBox();
	    nameTextBox.setWidth("50");

	    Label emailLabel = new Label("Email Address");
	    TextBox emailTextBox = new TextBox();

	    Label messageLabel = new Label("Message");
	    TextArea messageTextArea = new TextArea();

	    Button submitButton = new Button("Submit");

	    vPanel.add(nameLabel);
	    vPanel.add(nameTextBox);

	    vPanel.add(emailLabel);
	    vPanel.add(emailTextBox);

	    vPanel.add(messageLabel);
	    vPanel.add(messageTextArea);

	    vPanel.add(submitButton);

	    decPanel.setWidget(vPanel);
	    RootPanel.get().add(decPanel);
	}
}
The image below is the Contact Form we have created. It contains the name, email address and message of the sender.
2.4 Create The Contact Form Class
But if we need to create this same exact component on another page, we might have to rewrite all the code or maybe there is another way to achieve that.
To create a Reusable Component, create a class ContactForm. The classContactForm extends the CompositeClass. You must call the methodinitWidget at the end of the class.

ContactForm.java
import com.google.gwt.user.client.ui.Button;
import com.google.gwt.user.client.ui.Composite;
import com.google.gwt.user.client.ui.DecoratorPanel;
import com.google.gwt.user.client.ui.Label;
import com.google.gwt.user.client.ui.TextArea;
import com.google.gwt.user.client.ui.TextBox;
import com.google.gwt.user.client.ui.VerticalPanel;

public class ContactForm extends Composite{

    private TextBox nameTextBox, emailTextBox;
    private Label nameLabel, emailLabel, messageLabel;

    public ContactForm() {
        DecoratorPanel decPanel = new DecoratorPanel();

        // Create a Vertical Panel
        VerticalPanel vPanel = new VerticalPanel();
        vPanel.setSpacing(10);
        vPanel.setWidth("50px");

        nameLabel = new Label("Full Name");
        nameTextBox = new TextBox();

        emailLabel = new Label("Email Address");
        emailTextBox = new TextBox();

        messageLabel = new Label("Message");
        TextArea messageTextArea = new TextArea();

        Button submitButton = new Button("Submit");

        vPanel.add(nameLabel);
        vPanel.add(nameTextBox);

        vPanel.add(emailLabel);
        vPanel.add(emailTextBox);

        vPanel.add(messageLabel);
        vPanel.add(messageTextArea);

        vPanel.add(submitButton);

        // Return the content
        vPanel.ensureDebugId("cwHorizontalPanel");

        decPanel.setWidget(vPanel);

        initWidget(decPanel);
    }
}
2.5 Reuse The ContactForm Class
So anywhere you need the Contact Form, all you need is to call ContactForm. So we return to the initial Class and simply call ContactForm Class. And we get the same result.
Refactored GWTComponent class
import com.google.gwt.core.client.EntryPoint;
import com.javacodegeeks.example.client.components.ContactForm;
import com.google.gwt.user.client.ui.RootPanel;

/**
 * Entry point classes define onModuleLoad().
 */
public class GWTComponent implements EntryPoint {

    /**
     * This is the entry point method.
     */
    public void onModuleLoad() {

        ContactForm contactForm = new ContactForm();
        RootPanel.get().add(contactForm);


    }
}
And we still have the same output. So anywhere on our application where we need to create a Contact Form, we simply call the ContactForm class.
The image below is the same contact form we created earlier using the basic widgets directly from GWT. Now, we achieve the same result by calling the ContactForm class.
3. GWT Components – Conclusion
This post shows the reusability capacity for GWT. Rather than repeating UI widgets on different pages, you can have the same code as a Component and simply just call the component rather than having to create the entire UI from scratch.
4. Download The Source Code
This was an example of how to Create a Component using GWT
You can download the full source code of this example here: GWT Components Example

Thanks for the article, but I think GWT is pretty dead:
https://insights.stackoverflow.com/trends?tags=gwt
http://www.gwtproject.org/release-notes.html (last release Oct 2017)