In this example, we will discuss Apache Hadoop Distributed File System(HDFS), its components and the architecture in detail. HDFS is one of the core components of Apache Hadoop ecosystem also.
Table Of Contents
1. Introduction
Apache Hadoop provides a distributed filesystem and a framework for the transformation of large data sets using the MapReduce paradigm. HDFS is designed to store very large data sets reliably while running on commodity hardware. It is fault-tolerant and provides high thoughput access to the data stored. While the interface of HDFS is patterned after the Unix filesystem, but it relaxes a few POSIX requirements to improve the performance of the application it targets to address and to provide streaming access to the data stored in the file system.
2. HDFS Design
Following are the properties of HDFS which makes it different from other file systems and which make HDFS capable of handling very large amount of data reliably.
2.1 System failures
HDFS is designed to work on a set of commodity hardware. System failures are considered a norm. As there are a large number of components on which HDFS rely on, considering these components have a non-trivial probability of failure will also result in one component or the other failing all the time. So HDFS is designed to detect the failures and perform automatic recovery in order to provide required performance is one of the core properties of HDFS.
2.2 Can handle large amount of data
HDFS is designed to be used with applications which depend on a large amount of data. This data can be in gigabytes, terabytes or petabytes also. So HDFS is tuned to support such large data sets and to scale to a large cluster of systems to store this data without compromising with the data thoughput.
2.3 Coherency Model
HDFS is tuned to address the applications which require to write data once or at maximum only a few times and read the data a lot more. As these applications are assumed to rely on “write once read many times” model, it simplifies the data coherency issues and allow HDFS to provide high thoughput data access.
2.4 Portability
HDFS is designed to be portable across heterogeneous hardware and software platforms. Which makes the adaptation of HDFS very easy and it became the platform of choice for the application dependent on distributed large set of data.
3. HDFS Nodes
There are two main components of HDFS NameNode and DataNode.
3.1 NameNode
HDFS follows a master-slave architecture in which NameNode is node which acts as the master node. One HDFS cluster consists of only one NameNode. The main functionality of NameNode is to manage the file system namespace and control the client authentication to the files stored in the HDFS cluster. It also handles the mapping of the data stored in different DataNodes.
3.2 DataNode
DataNode are the nodes which as the name indicates stores the actual data in the cluster. There are multiple DataNodes in the cluster, usually the number of DataNodes is same as the node of hardware nodes in the cluster. DataNode serve the read and write requests from the clients and also handles operation related to blocks of data like creation of blocks, deletion and replication of blocks.
4. HDFS Architecture
In this section we will understand the basic architecture of Hadoop Distributed File System(HDFS).
4.1 Working of NameNode and DataNode
HDFS is block-structured file system, that means all the individual files are divided into small blocks of data having a fixed block size. These blocks are then stored across the cluster of machines in the DataNodes. The NameNode handles the functions like opening, closing and renaming files or directories. NameNode as mentioned above also handles the mapping of the data in the cluster that means NameNode keeps track of which block of data is stored on which DataNode and how the replication of this data is handled.
4.2 HDFS Namespace
HDFS namespace defines how the data is stored and accessed in the cluster. HDFS supports the traditional hierarchical organization of the files and directories. It also supports almost all the required functions to handle the namespace operations like creation or removal of files or directories, moving files/Directories from one place to another etc.
As we discussed in section 3, NameNode is the component which maintains the HDFS file system namespace. Any operation on the data like creation or deletion of files, displacement of files or directories are maintained in the NameNode.
4.3 Data Replication
As HDFS is designed to store large amount of data reliably and securely on a set of commodity hardware. As this hardware is prone to easy failure, HDFS need to handle the data in a way that it can be retrieved easily in the event of hardware failure of one or more systems. HDFS uses data replication as the strategy to provide fault-tolerance feature. The application using the HDFS can configure the replication factor as well as the block size of data as per the requirement.
Now the question arises how the replication is decided, what if all the replicas are in a single rack in the cluster and the whole rack fails. HDFS tries to maintain the rack aware replication strategy which in fact needs a lot of tuning and experience. A simple but non-optimal policy is to place each replica of the block on a unique rack so that in case of a whole rack failure. Atleast the replica os the block is safe in another rack.
In most of the production systems the replication factor of three is used. In those cases. HDFS uses a slight different version of unique rack policy. It usually places one replica on a node in the local rack, another on a node on a completely different remote rack and the third one on a different node on the remote rack. This policy improves the write speed by cutting the inter-rack transfer time while writing on two different racks instead of three. This provides us backup in case of node failures and also in case of rack failures. This policy improves the write performance without and compromising data reliability.
4.4 Failures
The main objective and goal of Hadoop Distributed File System(HDFS) is to provide access to data reliably even in case of failures. As failures are more of norm in the commodity hardware cluster than an exception, HDFS needs a strategy to handle the failures. The three common types of failures are:
- NameNode failure
- DataNode failure
- Network partitions
Each and every DataNode in the cluster sends a periodic message to NameNode, this message is called heartbeat. This heartbeat conveys to NameNode that the particular DataNode is working fine and is live. Now in case of DataNode failures, there will be no heartbeats from the DataNode to the NameNode. Similarly in case of network partition also a subset of DataNodes may loose its connection to the NameNode and stops sending Heartbeats. Once the NameNode stop getting heartbeats from a particular DataNode or a set of DataNodes, it declares those nodes to be dead and then start the procedure to check the damage which include checking if all the blocks which are in dead DataNodes still have the sufficient number of replicas, if not then it starts the process to create re-replicas to attain the minimum number of replicas configured in the applicaion.
The NameNode failures are more serious as NameNode system is the only single point of failure for the complete HDFS cluster. If the NameNode system fails, the whole cluster is useless and it needs a manual intervention and another NameNode need to be setup.
4.5 Data Accessibility
Now in order to allow applications to access the data stored in an HDFS cluster, it provides a Java API for applications to use. A C language wrapper is also provided over the Java API if C language need to be used.
Besides Java and C API, HDFS also provides an option to access the HDFS data through web browser over the TCP port which can be configured in the settings of HDFS.
Third accessibility option is to use the file system shell. HDFS also provides a command line interface called FS Shell that let a user interact with the data in HDFS. The syntax for this command line interface is similar to the Linux shell commands. For example:
#To make a new directory
hadoop fs -mkdir /user1/project1

#List the content of the file
hadoop fs -ls /user1/project1

#Upload a file from local system to HDFS
hadoop fs -put Desktop/textfile.txt /user1/project1
For more examples and explanation of the FS Shell commands, you can check the article Apache Hadoop FS Commands Example
5. Configuring HDFS
Configuration of HDFS is very easy and it does not take much time to set up HDFS cluster. All the configuration files for HDFS are by default included in the Hadoop package and can be directly configured.
Note: We assume that the Hadoop package is already downloaded, unzipped and placed in the desired directory. In this article, we will discuss just the required configurations for HDFS. For detailed articles on how to setup Hadoop and Hadoop cluster. Follows the following tutorials:
5.1 Configuring HDFS
The HDFS is configured using the set of XML files which are by default present in the Hadoop configuration directory. This configuration directory is present in the root of the Hadoop folder and is named conf.
First of all, we will modify the file conf/hadoop-sites.xml and we need to setup three properties in this file i.e. fs.default.name, dfs.data.dir, dfs.name.dir
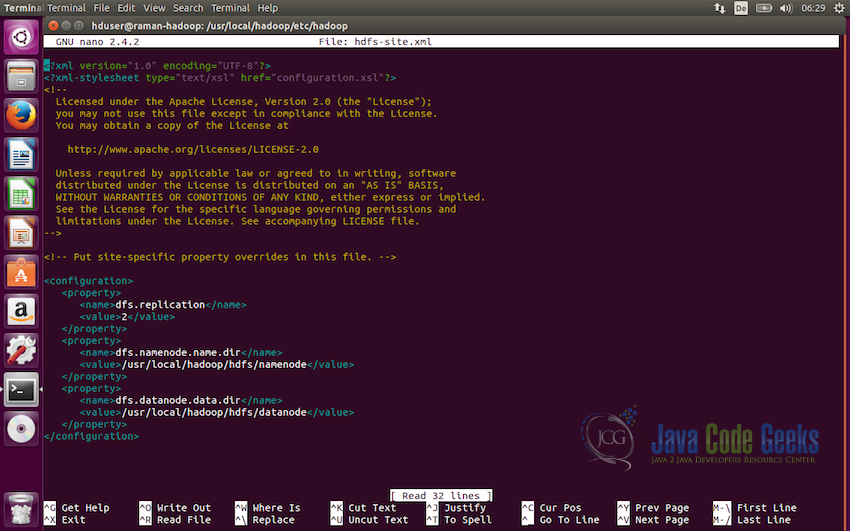
To modify the file open the file in the editor and add the following lines of code:
<configuration>
   <property>
      <name>dfs.replication</name>
      <value>2</value>
   </property>
   <property>
      <name>dfs.namenode.name.dir</name>
      <value>/usr/local/hadoop/hdfs/namenode</value>
   </property>
   <property>
      <name>dfs.datanode.data.dir</name>
      <value>/usr/local/hadoop/hdfs/datanode</value>
   </property>
</configuration>
First configuration we set here is dfs.replication which sets the replication factor to be used by the distributed file system. In this case we have set it up to be two.
The next configuration is to define the NameNode path i.e. dfs.namenode.name.dir and the value here need to be the directory to store the namenode information.
The third and the last configuration we need to set up is defining the path for the DataNode i.e. dfs.datanode.data.dir which will define the path to the directory to store the datanode information.
Note: Make sure the directory where the namenode and datanode directory will be created and data will be stored is owned by the user which will run Hadoop. So that the user have read and write permission in the directory.
5.2 Formating NameNode
Now the next step is to format the NameNode that we just configured. Following command is used to format the NameNode:
hdfs namenode -format
This command should be executed without any error on the console output. If it is executed without any errors, we are good to start the Apache Hadoop instance on our Ubuntu system.

5.3 Starting the HDFS
Now we are ready to start the Hadoop File System. To start HDFS, use the following command to run the start-dfs.sh file:
/usr/local/hadoop/sbin/start-dfs.sh
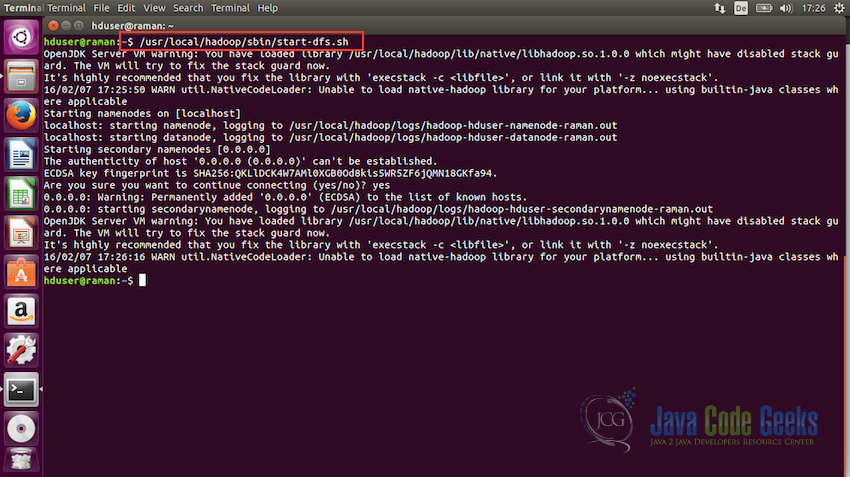
Once this script is executed without any errors, HDFS will be up and running.
6. Interacting with HDFS using Shell
Now we will see some commands which are necessary to interact with HDFS using shell. In this section we will see just the basic introductory commands and will use only the command line interface. The commands which communicate with the cluster are present in the script bin/hadoop. This script loads the Hadoop package with the Java Virtual Machine(JVM), followed by the execution of the user command.
6.1 Creating a directory
Usage:
hadoop fs -mkdir
Example:
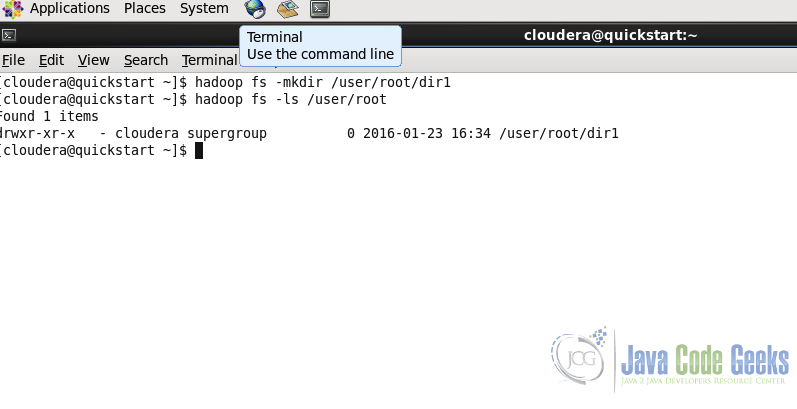
hadoop fs -mkdir /user/root/dir1
Command in the second line is for listing the content of a particular path. We will see this command in the next sub-section. We can see in the screenshot that dir1 is created
6.2 List the content of the directory
Usage:
hadoop fs -ls
Example:
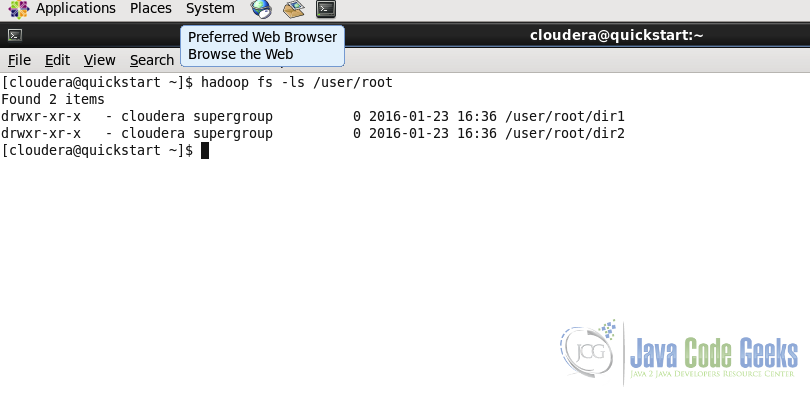
hadoop fs -ls /user/root/
The command is similar to the ls command of the unix shell.
6.3 Upload a file in HDFS
Command is used to copy one or multiple files from local system to the Hadoop File System.
Usage:
hadoop fs -put ...
Example:
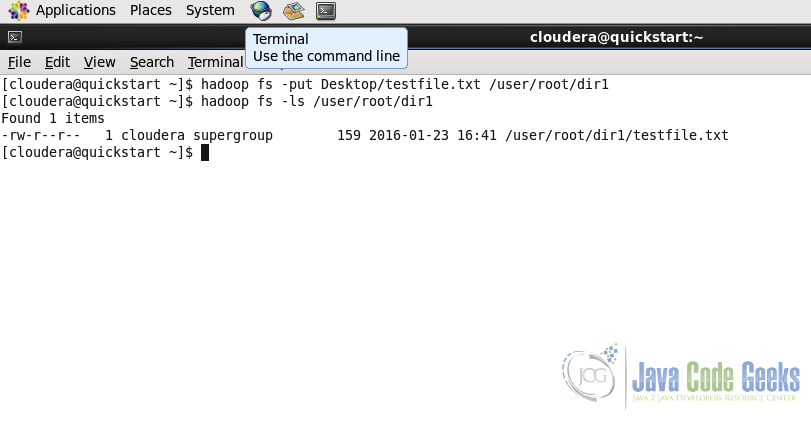
hadoop fs -put Desktop/testfile.txt /user/root/dir1/
In the screenshot below, we put the file testfile.txt from Desktop of the Local File System to the Hadoop File System at the destination /user/root/dir1
6.4 Download a file from HDFS
Download the file from HDFS to the local file system.
Usage:
hadoop fs -get
Example:
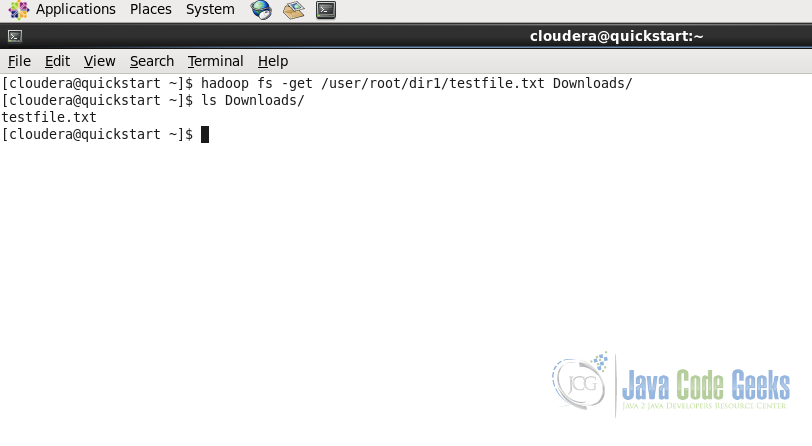
hadoop fs -get /user/root/dir1/testfile.txt Downloads/
As with the put command, get command gets or downloads the file from Hadoop File System to the Local File System in the Downloads folder.
Note: For details about the file system commands and for example of other important commands, refer to the article Apache Hadoop FS Commands Example or you can check the complete documentation of shell commands on the Apache Hadoop website in the documentation here: File System Shell Commands and HDFS Commands Guide
7. Interacting with HDFS using MapReduce
As we discussed that HDFS is a base component of Hadoop and MapReduce. Hadoop MapReduce jobs fetch data from the HDFS and stores the final result data in the HDFS.
Hadoop also provides a Java API using which we can execute HDFS functionality in out Java Application is required. In this section, we will see how to consume Java API in java code.
package com.javacodegeeks.examples.HDFSJavaApi;

import java.io.IOException;

import org.apache.hadoop.conf.Configuration;
import org.apache.hadoop.fs.FileSystem;
import org.apache.hadoop.fs.FSDataInputStream;
import org.apache.hadoop.fs.FSDataOutputStream;
import org.apache.hadoop.fs.Path;

/**
 * Example application to show how the HDFS file system Java API works
 *
 * @Author Raman Jhajj
 */
public class App
{
	public static final String filename ="dummy.txt";
	public static final String message = "This is the dummy text for test the write to file operation of HDFS";

    public static void main( String[] args ) throws IOException
    {
    	//Get the file system instance
    	Configuration configuration = new Configuration();
    	FileSystem fs = FileSystem.get(configuration);

    	Path filenamePath = new Path(filename);

    	try {
    		if(fs.exists(filenamePath)) {
    			//Delete Example
    			fs.delete(filenamePath, true);
    		}

    		//Write example
    		FSDataOutputStream out = fs.create(filenamePath);
    		out.writeUTF(message);
    		out.close();

    		//Read example
    		FSDataInputStream in = fs.open(filenamePath);
    		String messageIn = in.readUTF();
    		System.out.println(messageIn);
    		in.close();

    		//Rename the file
    		if(fs.exists(filenamePath)) {
    			Path renameFilenamePath = new Path("renamed_" + filename);
    			fs.rename(filenamePath, renameFilenamePath);
    		}

    	} catch(IOException ex) {
    		System.out.println("Error: " + ex.getMessage());
    	}
    }
}
This code above creates a file named dummy.txt, writes dummy message into this file.
-
Line no. 24-25 creates an abstract
FileSystemobject withConfigurationobject. Configuration object uses default parameters in this case as we have not defined any parameters. -
Line no. 30-33 checks if the file already exists in HDFS and if it does exist, it tries deleting the file. This example introduces us to two methods available in the file system
exists()anddelete() - Line no.35-38 writes the file into HDFS on the provided path, followed by writing the dummy messages in the file. This introduces to another method about how to write files in HDFS.
- Line no. 40-44 reads the file which we just wrote in the previous code lines and write the content of the file on the console. This code example does not provide much useful work, it is just designed to get the basic understanding of how reading and writing files works in HDFS using Java API.
-
Line no. 47-50 checks if the file exists in HDFS and if it does, renames the file from
dummy.txttorenamed_dummy.txt
For further reading, you can check the HDFS API JavaDoc on HDFS API JavaDoc
8. Conclusion
This brings us to the conclusion of the article. We discussed the basics of Hadoop Distributed File System(HDFS) starting with the design, followed by the understanding of the HDFS architecture. Then we saw how to configure and start the HDFS node and finally we discussed how to interact with the running HDFS cluster using the shell command line and HDFS Java API. I hope this gives the basic explanation about HDFS and its building blocks.
9. Download the code
Download the Eclipse project containing the code used to understand the HDFS Java API in this example.
You can download the full source code of this example here: HDFSJavaApi
