Table Of Contents
1. Introduction
Apache Hadoop is designed for a multi-machine cluster setup. Though it is possible to run on single machine also for testing purpose but real implementation is for multi-machine clusters. Even if we want to try out multi-machine setup we will need multiple systems which are connected to each other over the network which is not possible always; what if you do not have multiple systems to try out Hadoop Cluster?
Virtual Machines comes to rescue here. Using multiple Virtual Machines we can setup Hadoop Cluster using a single system. So, in this example, we will discuss how to setup Apache Hadoop Cluster using Virtual Machines.
2. Requirements
- VirtualBox (or any other VM environment)
- Lubuntu 15.04 (or any other linux flavor of your preference)
- VBox Guest Additions image file (VBoxGuestAdditions.iso)
I personally prefer Lubuntu as it has lightweight LXDE Desktop GUI and it strips all the additional components which are present in Ubuntu and is a good option for virtual machines.
3. Preparing Virtual Machine
In this section we will go through steps to prepare virtual machines which we will use for cluster later in the example.
3.1 Creating VM and Installing Guest OS
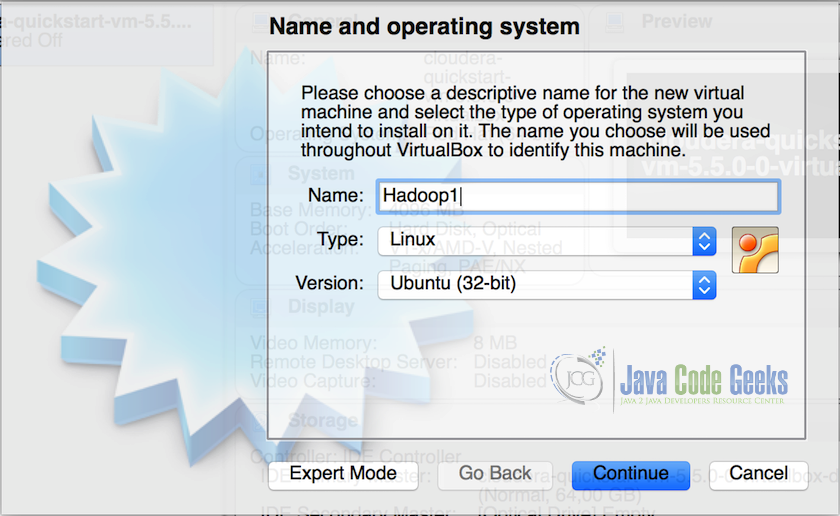
- Create a virtual machine(VM) in VirtualBox and assign minimum 2GB of memory and 15GB of storage to the virtual machine. Name the first VM as Hadoop1.

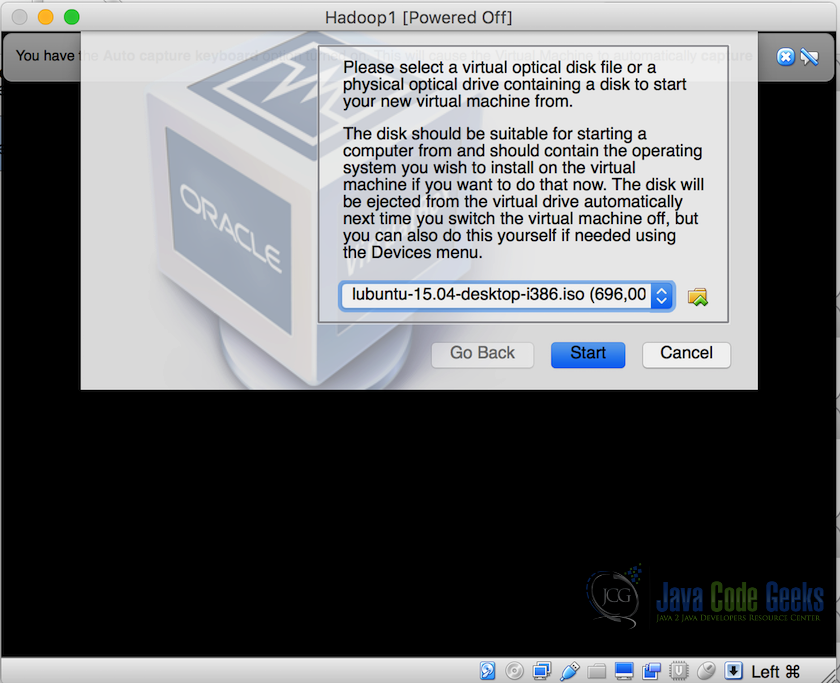
Creating Virtual Machine in VirtualBox - Once the VM is created, install Lubuntu in the VM and complete the setup, we will get a working virtual machine after this.

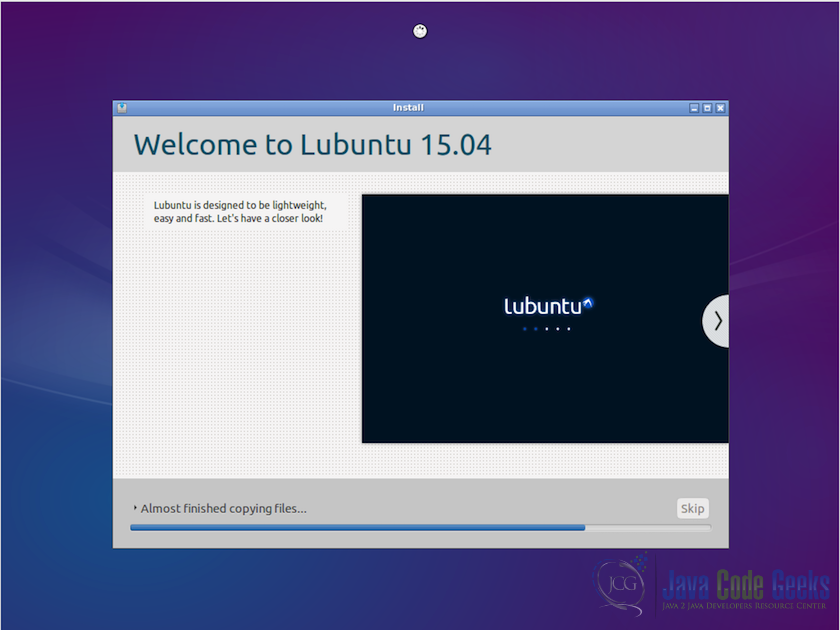
Installing Lubuntu in created VM - Installation of the OS might take some time.

Lubuntu installation in progress
3.2 Installing Guest Additions
Next step is to install Guest Additions in the VM. Guest Additions are additional setup needed for the VM to perform well. It consist of device drivers and system applications that optimize the guest operating system for better performance and usability. This is one of the important and needed step whenever creating a virtual machine, one thing it allows the Guest OS to detect the size of the screen(which helps in running the VM full screen) and also enabling guest operating system to have a shared folder with the host operating system if needed. Following are the steps which need to be performed for installing guest additions in the Guest OS:
- First of all, prepare the system for building external kernel modules which can be done by running the following command in the terminal and installing DKMS(DKMS provides support for installing supplementary versions of kernel modules):
sudo apt-get install dkms
- Insert
VBoxGuestAdditions.isoCD file into Linux guest virtual CD-ROM drive. - Now open the terminal and change the directory to the CD-ROM drive and then execute the following command:
sh ./VBoxLinuxAdditions.run
Note: At this point reboot the system and move on to the next step where we will configure the network settings for the virtual machine.
4. Creating Cluster of Virtual Machines
In this section we will see how to configure the network for the virtual machines to act as single cluster machines, how to clone the first machine to others which will save all the time as we do not need to perform previous steps on all the machine individually.
4.1 VM Network settings
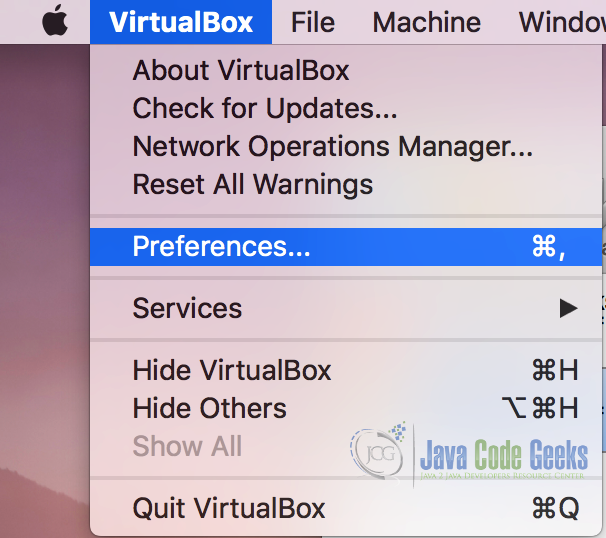
- Go to Virtualbox preferences menu and select ‘Preferences’ from the dropdown menu.

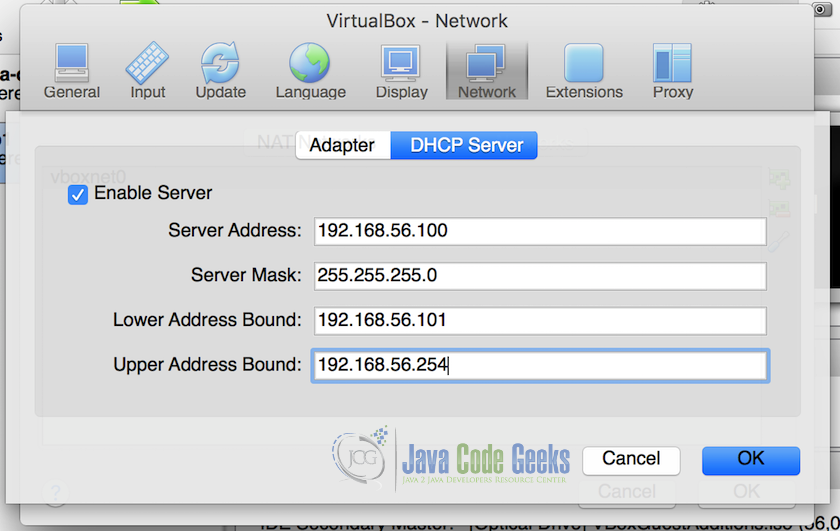
VirtualBox Preferences Menu - In ‘Preferences’ menu, select ‘Network’. In network preferences, select ‘Host-only Networks’ and click on ‘Add Driver’. Driver will be added to the list. Double click the driver and it will open a popup for DHCP server settings, insert DHCP server settings as shown in the screenshot below.

DHCP Server Settings We will set the lower bound and upper bound of the network to be ‘192.168.56.101’ and ‘192.168.56.254’, all the machines will have the IPs assigned from this range only. Do not forget the check ‘Enable Server’
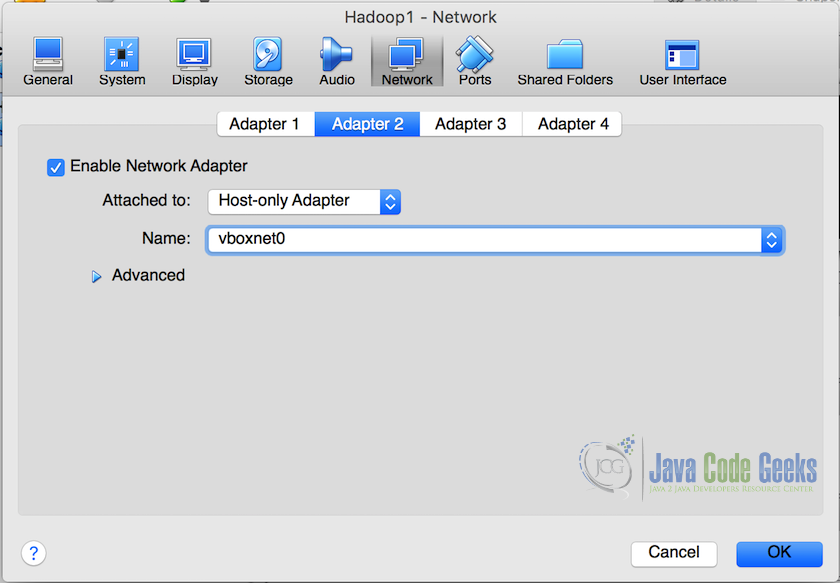
- Once the network settings are done and DHCP server ready, in the VirtualBox Manager, right-click on the virtual machine and from the list and select ‘Settings’ from the dropdown. From the settings popup, select ‘Network’ and then ‘Adapter2’Check ‘Enable Network Adapter’ and then in ‘Attached to’ dropdown choose ‘Host-only adapter’. In second dropdown, names of all the adapters will be available including the one we created in the previous step. Select that from the dropwdown, in our example it is names as ‘vboxnet0’. This will attach the virtual machine to this particualr network.

Virtual Machine Settings
4.2 Cloning the Virtual Machine
Now we have a virtual machine ready and we cna not clone this virtual machine to create identical machines, this saves us from the hassle of all the previous steps and we can easily have multiple virtual machines with the same configuration as the one they are cloned from.
- Right-click on the virtual machine and from the dropdown select ‘Clone’.
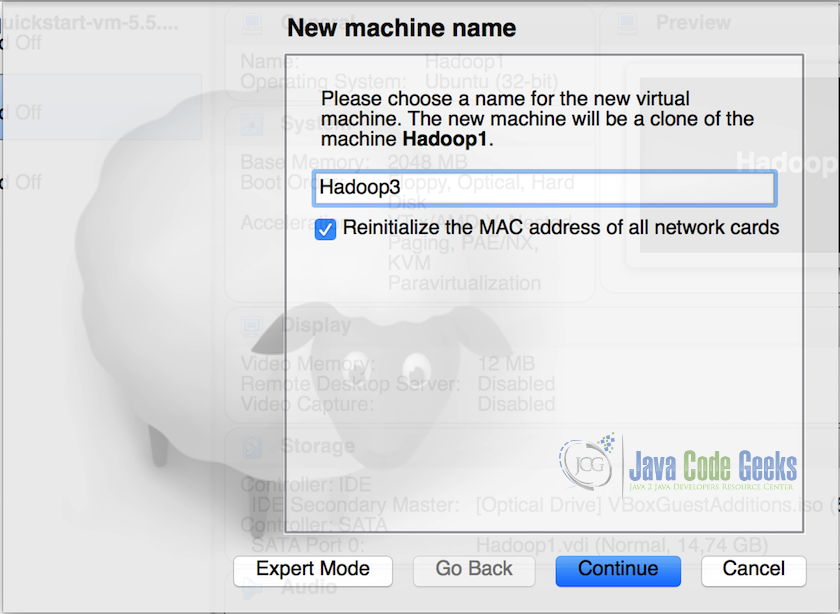
- In the clone popup, rename the VM to ‘Hadoop2’ and select ‘Reinitialize the MAC address of all the network cards’ and click Continue.

Cloning the Virtual Machine Note: Reinitializing the MAC address make sure that the new Virtual Machine will have a different MAC address for the network card.
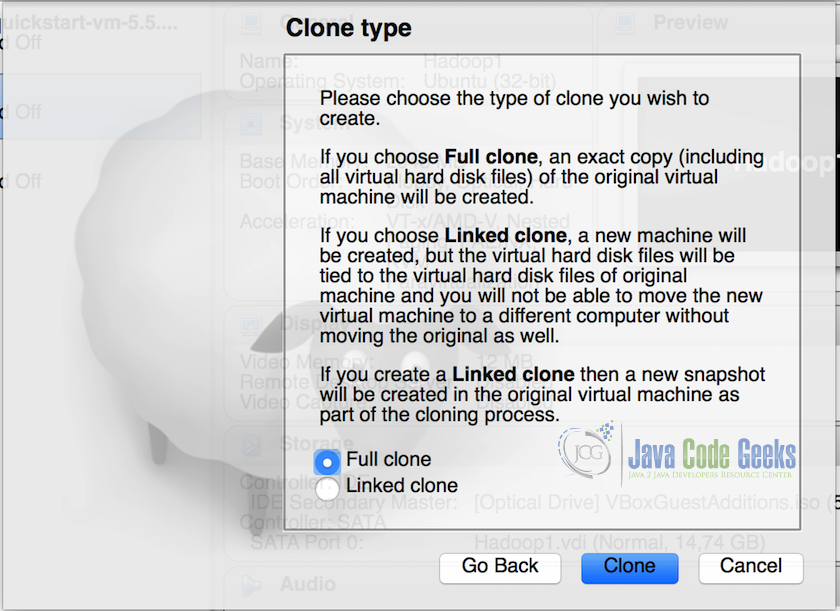
- In the next screen, select ‘Full Clone’ option and click on ‘Clone’.

Full clone of the Virtual Machine
4.3 Testing the network IPs assigned to VMs
So now we have 2 machines on the same network. We have to test if both the machines are connected to the network adapter we setup for the cluster. Following are the steps to do so:
- Start both the virtual machines and in terminals use the following command:
ifconfig
This will show the network configuration of the machine. We will notice that the IP assigned is in the range 192.168.56.101 and 192.168.56.254 (i.e. between lower address bound and upper address bound assigned to the DHCP network)

IP configuration of the virtual machine
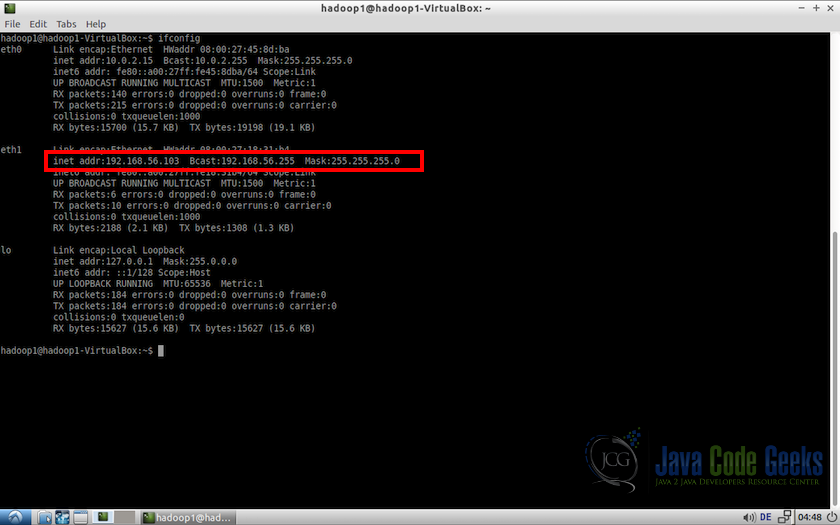
Note: Perform the same task for both the machines and confirm everything is fine.
4.4 Converting to Static IPs for VMs
There will be one problem with this configuration though. IPs are allocated randomly to the systems and may change in the future reboots. Hadoop need static IPs to access the machines in the cluster, so we need to fix the IPs of the machines to be static always and assign specific IPs for both the machines. The following steps need to be performed on both the machines.
- Go to
/etc/networksin the terminal and edit the fileinterfacesas a root.#Go to networks directory cd /etc/networks #Edit the file 'interfaces' sudo nano interfaces
- Add the following lines at the end of the interfaces file.
auto eth1
iface eth1 inet static

#Assign a static ip to the virtual machine
address 192.168.56.101
netmast 255.255.255.0
network 192.168.56.0

#Mention the broadcast address, get this address using ifconfig commmand
#in this case, is it 192.168.56.255
broadcast 192.168.56.255

Interfaces file - On each machine, edit the file
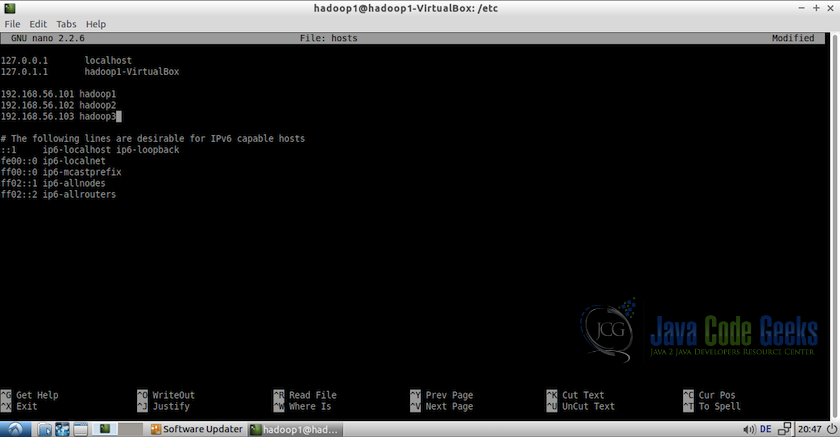
/etc/hostsas root and add the hosts. For example:#Edit file using nano editor sudo nano /etc/hosts
Add following hosts:
192.168.56.101 hadoop1
192.168.56.102 hadoop2
Note: IPs should be same as assigned in the previous step.
Hosts file in the virtual machine - Reboot all the machines

5. Hadoop prerequisite settings
Following are the prerequisite settings for hadoop setup. Remember all the settings need to be done in all the machines which will be added to cluster(2 machines in this example)
5.1 Creating User
Create hadoop users in all the machines. For that open the terminal and enter the following commands:
#create a user group for hadoop
sudo addgroup hadoop

#create user hduser and add it to the hadoop usergroup
sudo adduser --ingroup hadoop hduser
5.2 Disable ipv6
Next step is to disable ipv6 on all the machines. Hadoop is set to use ipv4 and that is why we need to disable ipv6 before creating a hadoop cluster. Open /etc/sysctl.conf as root using nano
sudo nano /etc/sysctl.conf
and add the following lines at the end of the file.
#commands to disable ipv6
net.ipv6.conf.all.disable-ipv6=1
net.ipv6.conf.default.disable-ipv6=1
net.ipv6.conf.lo.disable-ipv6=1
After this, to check if the ipv6 is properly disable, use the following command
cat /proc/sys/net/ipv6/conf/all/disable-ipv6
it will return 0 or 1 as an output and we want it to be 1 as it symbolizes that the ipv6 is disabled.
5.3 Connecting the machines (SSH Access)
Now, we have to make sure that the machines are able to reach each other over the network using static IP addresses and SSH. For this example, we will consider hadoop1 machine as the master node and hadoop1 and hadoop2 both as the slave nodes. So we have to make sure:
- hadoop1(master) should be able to connect to itself using
ssh hadoop1
- It should be able to connect to other VM using
ssh hduser@hadoop2
To achieve this, we have to generate SSH key in each machine. So login to hadoop1 and following the steps mentioned below in the terminal:
- Switch to the user
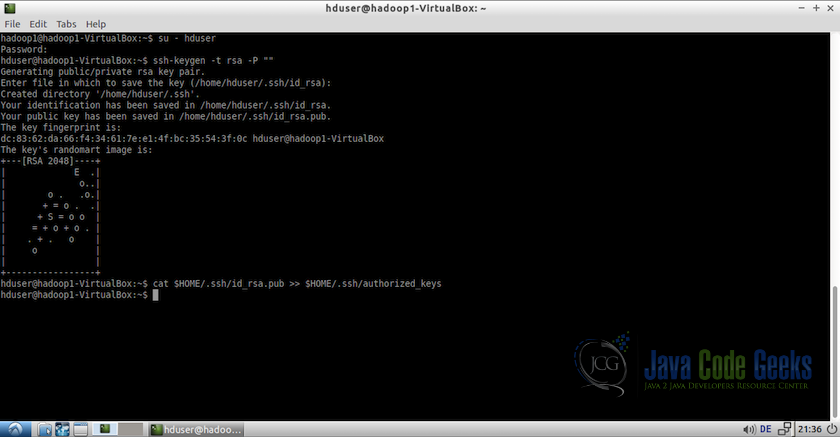
hduserand generate the SSH public keys:#change to user hduser su - hduser #generate ssh key ssh-keygen -t rsa -P ""
SSH Keygenration The second command will create an RSA key-pair for the machine. The password for this key will be empty as mentioned in the command. It will ask for the path to store the key with default path being
$HOME/.ssh/id-rsa.pub, just press enter when prompted to keep the same path. If you plan to change the path then remember it as it will be needed in the next step. - Enable SSH access to the machine with the key created in the previous step. For this, we have to add the key to the authorized keys list of the machine.
cat $HOME/.ssh/id-rsa.pub >> $HOME/.ssh/authorized_keys
- Now we have to add the
hduser@hadoop1‘s public SSH key (master node) to the authorized keys file of thehduser@hadoop2machine. This can be done using the following commands on the terminal ofhadoop1:ssh-copy-id -i $HOME/.ssh/id-ras.pub hduser@hadoop2
This will prompt for the password for the user
hduser@hadoop2 - Test the SSH connections from
hadoop1to itself and also tohadoop2to make sure everything is fine using:ssh hadoop1
This will connect
hadoop1to itself, if connected successfully, exit the connection and try to connect to thehadoop2machinessh hduser@hadoop2
This should also connect successfully.

6. Hadoop Setup
So, we are at the step where we have completed all the initial setup and now we are ready to setup hadoop on the cluster.
6.1 Download Hadoop
- Download Hadoop from Apache Mirrors at www.apache.prg/dyn/closer.cgi/hadoop/core
- After download finishes, extract hadoop folder and move it to
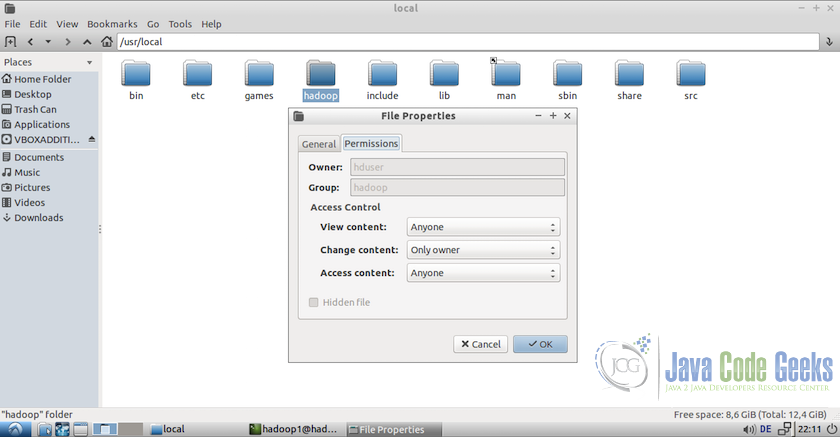
/usr/local/hadoopand finally change the owner of the folder tohduserandhadoopgroup.#Change to the directory cd /usr/local #move hadoop files to the directory sudo mv /home/hadoop1/Downloads/hadoop-2.7.1 hadoop #change the permissions to the hduser user. sudo chown -R hduser:hadoop hadoop
We can check the permissions in the folder setting to confirm if they are fine.
Folder settings to check permissions
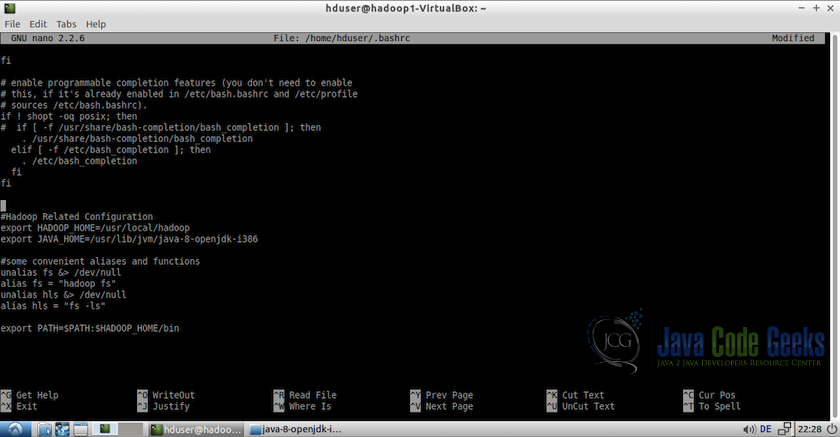
6.2 Update bashrc
- Update the bashrc file for the user hduser.
su - hduser
nano $HOME/.bashrc
- At the end of the file, add the folloeing lines.
export HADOOP_HOME=/usr/local/hadoop
export JAVA_HOME=/usr/lib/jvm/java-8-openjdk-i386

#Some convenient aliases
unalias fs &> /dev/null
alias fs="hadoop fs"
unalias hls &> /dev/null
alias hls="fs -ls"

export PATH=$PATH:$HADOOP_HOME/bin
Updating bashrc file of user hduser
6.3 Configuring Hadoop
Now, it is the time to configure the hadoop setup. Following are the steps which need to be followed:
- This need to be performed on all the machines. Open
hadoop-env.shin/usr/local/hadoop/etc/hadoop/and set theJAVA_HOMEvariable as shown below:export JAVA_HOME=/usr/lib/jvm/java-8-openjdk-i386
- Next, we will configure the
core-site.xmlin the folder/usr/local/hadoop/etc/hadoop/and add the following property<configuration> <property> <name>fs.default.FS</name> <value>hdfs://hadoop1:54310</value> </property> </configuration>This will also need to be edited in all the machine but all the
valuefields should point to the master node only which ishadoop1in this example. So for both the machines, same property with same name and value need to be added. - Next we need to update
hdfs-site.xmlon all master and slave nodes<configuration> <property> <name>dfs.replication</name> <value>2</value> </property> <property> <name>dfs.namenode.name.dir</name> <value>/usr/local/hadoop/hdfs/namenode</value> </property> <property> <name>dfs.datanode.data.dir</name> <value>/usr/local/hadoop/hdfs/datanode</value> </property> </configuration> - Now, we will update
mapred-site.xmlfile. It need to be edited only on master node<configuration> <property> <name>mapreduce.jobtracker.address</name> <value>hadoop1:54311</value> </property> </configuration> - The last configuration will be in the file
slavesin the folder/usr/local/hadoop/etc/hadoop. Add the host names or the ip addresses of the slave nodeshadoop1 hadoop2
As
hadoop1acts as both master and slave so we will add both the host names.
6.4 Formatting the Namenode
We are now done with all the configuration, so before starting the cluster we need to format the namenode. To do so, use the following command on the hadoop1(master) node terminal
hdfs namenode -format
6.5 Start the Distributed Format System
Now it is time to start the distributed format system and start running the cluster. Following is the command to do so:
/usr/local/hadoop/sbin/start-dfs.sh
Once the dfs starts without any error, we can browse the web interface for the Namenode on http://localhost:50070 on the master node
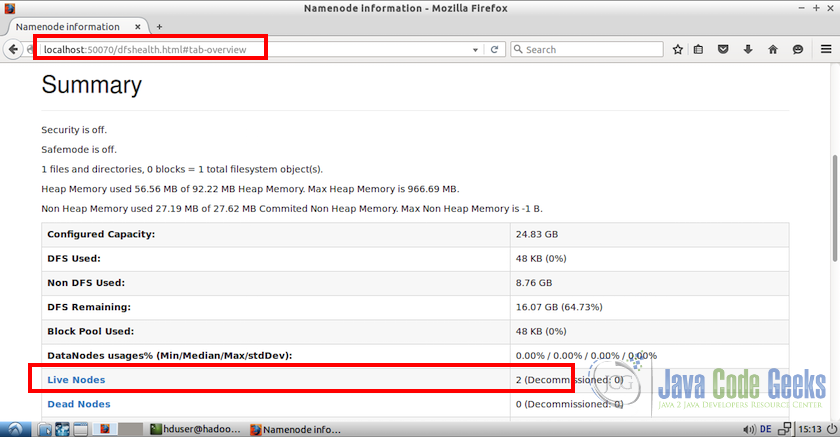
If you notice on the bottom of screenshot, there are two live node at the time what confirms that our cluster has two properly working nodes.
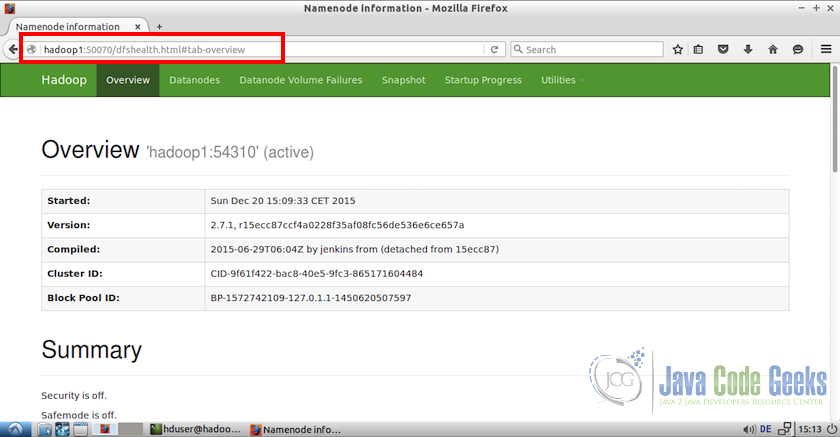
We can also access the web interface from any of the slave nodes but for those we have to use the master hostname or ip address. For example, from hadoop2(slave node) we can use the address http://hadoop1:50070 to access the web interface.
6.6 Testing MapReduce Job
- First of all, lets make the required HDFS directories and copy some input data for testing purpose
#Make the required directories
bin/hdfs dfs -mkdir /user
bin/hdfs dfs -mkdir /user/hduser
These directories can be accessed from the web interface also. To do so, go to the web interface, from the menu select ‘Utilities’ and from dropdown select ‘Browse the file system’
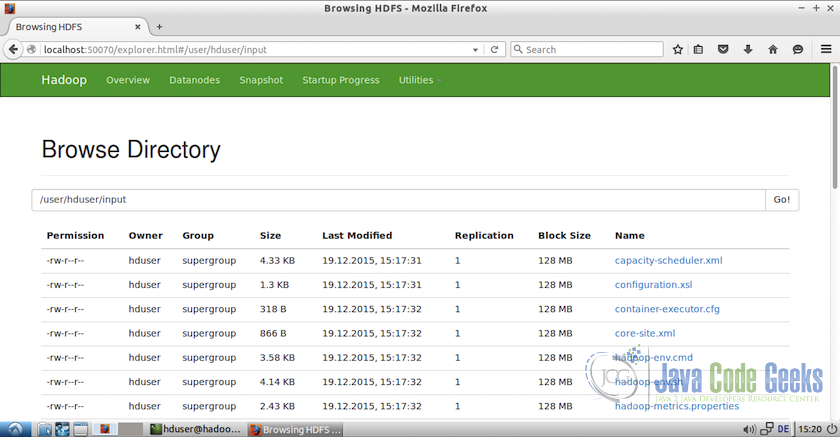
Accessing directories in HDFS using web interface - Now, we can add some dummy files to the directory which we will use for the testing purpose. Lets ass the all the files from
etc/hadoopfolder#Copy the input files into the distributed file system /usr/local/hadoop/bin/hdfs dfs -put /usr/local/hadoop/etc/hadoop input
Following screenshot shows the files added to the directories
/user/hduser/input
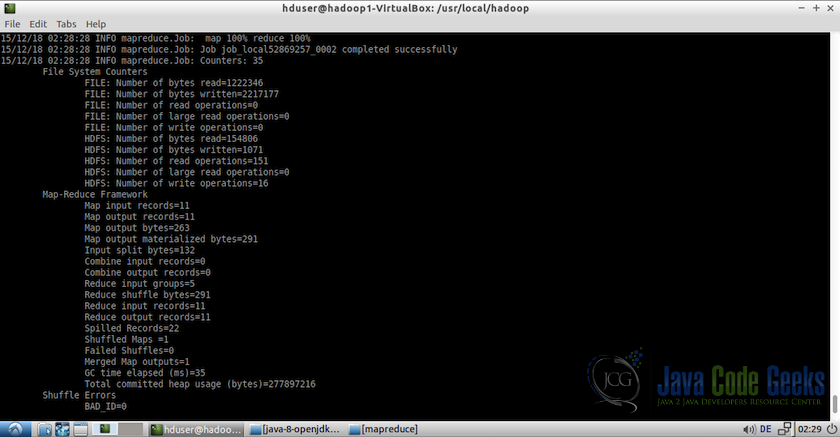
Browsing files in the HDFS - Run the MapReduce included in the hadoop package using the following command
/usr/local/hadoop/bin/hadoop jar share/hadoop/mapreduce/hadoop-mapreduce-example-2.7.1.jar grep input output 'dfs[a-z.]+'
Note: For details on how MapReduce example works, refer to the article “Hadoop Hello World Example”
Following screenshot shows the output log of the test example:
Output of the test MapReduce example - We can now view the output file using
/usr/local/hadoop/bin/hdfs dfs -cat output/*

6.7 Stopping the Distributed Format System
We can now stop the dfs(distributed format system) using the following command:
/usr/local/hadoop/sbin/stop-dfs.sh
This brings us to the end of the setup and initial testing.
7. Conclusion
This brings us to the conclusion of this example. Hope this makes it a little more clear about how to set up Hadoop cluster on multiple machines. In case, a cluster need to be setup on multiple physical machines instead of virtual machines, the instructions are similar except steps containing 4.1 VM Network settings and 4.2 Cloning the Virtual Machine. For physical machines cluster, we can perform all other steps on the machines and everything should work smoothly.
8. Download configuration files
The configuration files which are modified and used for this example can be downloaded from here. Keep in mind that the modification done in these configuration files can be different based on the user network and other setting and may need to be changes accordingly. The package contains:
- hosts file
- sysctl.conf file
- Hadoop 1 folder (contains master node files)
- core-site.xml
- hdfs-site.xml
- mapred-site.xml
- slaves
- Hadoop 2 folder (contains slave note files)
- core-site.xml
- hdfs-site.xml
You can download all the above mentioned files from this example here: HadoopClusterSetup

Hi, thanks for this, very helpful.
Just one change I had to make to stop errors when starting up hadoop
In core-site.xml:
fs.default.FS
to
fs.default.name
then perfect
Thanks again
Thank you so much, very useful
Is it necessary to install hadoop in both machines?