1. Introduction
In the Software world, Docker is considered a Platform as a Service (PaaS). This offers a platform for running different applications. You will be able to run different operating systems within a virtualization environment. There are two types of licenses: free and paid. A docker can run multiple containers. The software that runs those containers is Docker Engine.
The first release was on March 20, 2013, developed by Docker, Inc.
Therefore you can leverage the advantage of Docker methodologies for shipping, testing, and deploying your code quickly.
Docker Registries is high scalable server-side to allow you to store your images locally, isolated from the internet. You can use that images to start up a Docker container.
2. What is a Docker Container?
A docker container is a stand-alone process that runs independently of the operating system. This is isolated by other processes having all required files inside that container. The most important thing is that you can run whatever operating system, and it shares the same kernel.
Likewise other processes the containers can communicate with each other through dedicated channels.
3. What is Docker Registry?
A registry is a storage and content delivery system, holding images to be able to distribute over multiple hosts. The registry is an open-source platform under Apache license.
Most importantly, Docker Registry is compatible with the Docker platform version equals or higher than 1.6.0.
4. How to install Docker
You can install your Docker platform on different operating systems like Windows, Linux, and macOS. For instance, in this article, we will show you how to install the Docker platform on Windows and Linux.
4.1 Install on windows
Firstly, you have to go on the official website and download the executable file and install it.
Secondly, you have to follow the installer steps to finalize the installation.
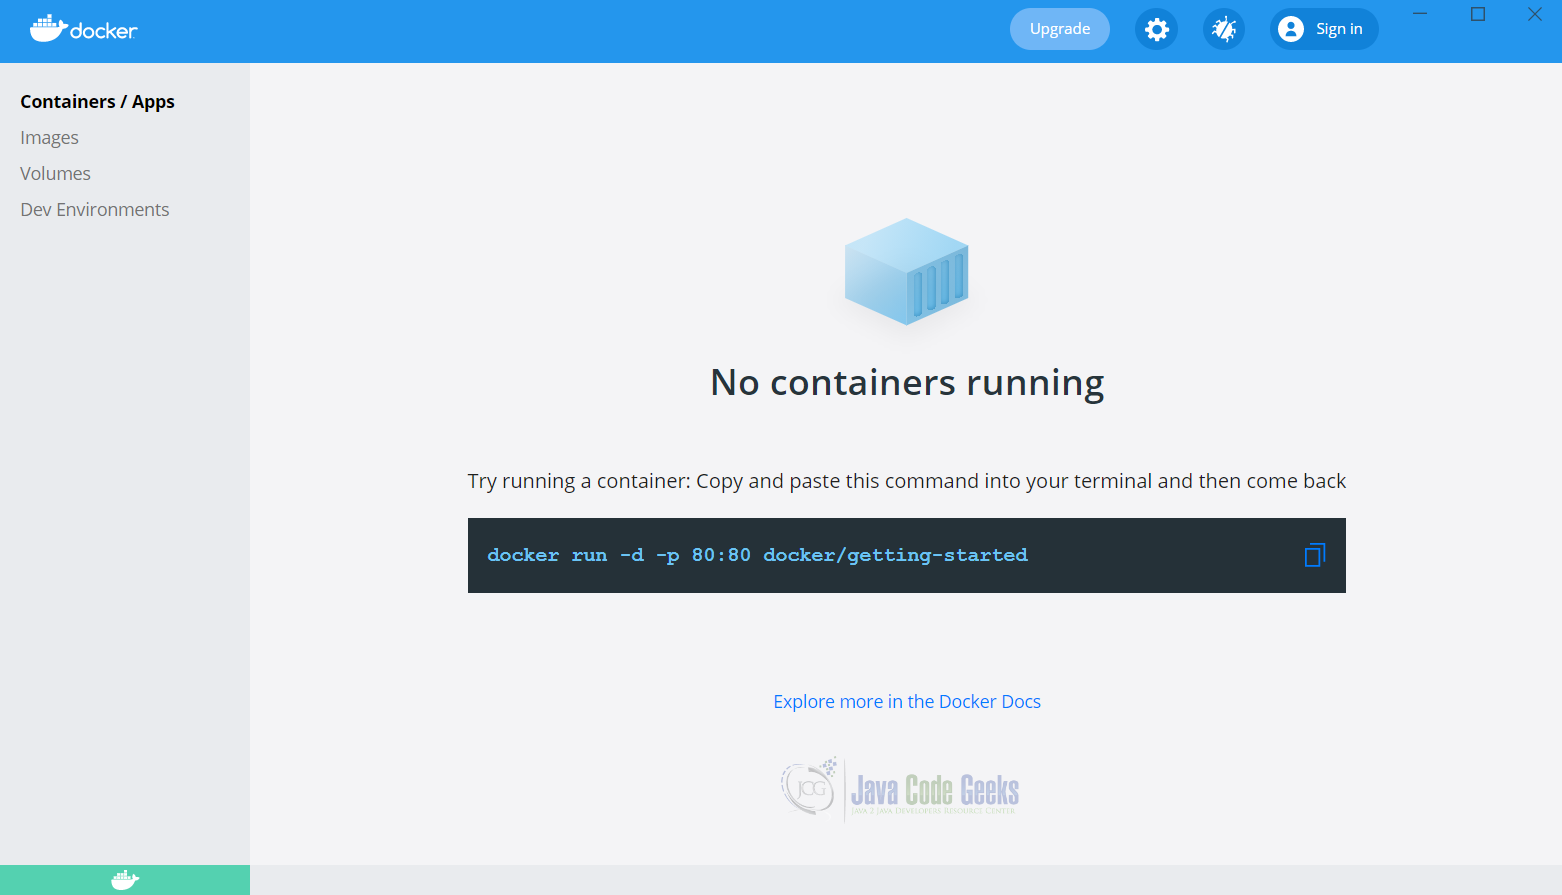
After the installation is completed, you will see this interface where you can manage your containers/ images/volumes and environments.
4.2 Install on Linux
From the official website you will have to follow the installation steps that are covered for multiple Linux distributions.
Example of installation on Ubuntu.
1. sudo apt-get remove docker docker-engine docker.io containerd runc
2. sudo apt-get update
3. sudo apt-get install \
    ca-certificates \
    curl \
    gnupg \
    lsb-release
4. curl -fsSL https://download.docker.com/linux/ubuntu/gpg | sudo gpg --dearmor -o /usr/share/keyrings/docker-archive-keyring.gpg
5. echo \
  "deb [arch=$(dpkg --print-architecture) signed-by=/usr/share/keyrings/docker-archive-keyring.gpg] https://download.docker.com/linux/ubuntu \
  $(lsb_release -cs) stable" | sudo tee /etc/apt/sources.list.d/docker.list > /dev/null
6. sudo apt-get update
7. sudo apt-get install docker-ce docker-ce-cli containerd.io
8. sudo docker run hello-world # checking that docker is installed correctly
5. Run a Docker Registry locally
To be able to use the functionality of the Docker Registry locally, you have to pull the Docker Registry from the Docker hub and run it.
In this example, we will run the Docker Registry on an Ubuntu system.
docker run \
  --entrypoint htpasswd \
  httpd:2 -Bbn user password > auth/htpasswd
Please make sure that firstly you created a folder called auth and after that, you run the above command. This command will encrypt the given password to use in the authentication process to the registry.
docker run -d \
  -p 5000:5000 \
  --restart=always \
  --name registry \
  -v "$(pwd)"/auth:/auth \
  -e "REGISTRY_AUTH=htpasswd" \
  -e "REGISTRY_AUTH_HTPASSWD_REALM=Registry Realm" \
  -e REGISTRY_AUTH_HTPASSWD_PATH=/auth/htpasswd \
  registry:2
The above command will run a Docker Registry locally with basic authorization with username: user and password: password.
NOTE: The given passwords are set just for testing purposes, if you want to use this command in production please make sure you use a stronger password and you use HTTPS instead of HTTP.
In case you will try to list all repositories from your local registry run this CURL:
curl -X GET http://localhost:5000/v2/_catalog
curl http://localhost:5000/v2/_catalog --user user:password #authentication provided in the request
In case you do not provide an authentication you will receive this error:

For more details about configuring a docker registry locally, you can check the official website.
6. Push an image to docker registry
To push an image to the docker registry you have to specify the host of the docker registry and the port. To push an image into a registry with authentication you have to firstly log in using this command:
docker login localhost:5000
docker push localhost:5000/test:v1
If you want to verify the image pushed in the docker registry you can use the above CURL command. This will return all existing repositories.
curl http://localhost:5000/v2/_catalog --user user:password

7. Pull an image from docker registry
To pull an image from the docker registry is the same as pulling an image from another public registry. By default docker use Docker Hub. Besides the classic command for pull you have to specify the host of the Docker Registry.
So the command is here:
docker pull localhost:5000/test:v1
NOTE: If you want to pull an image from your Docker Registry that has authorization you have to login firstly and after that to run a pull command.
8. Public and Private Registries
Firstly, we will start to discuss about public and private registries and how to use them.
Having a private registry means that your images will be stored on a certain machine managed by your organization. This is similar to the on-premise concept. The definition of on-premises (on-prem) is referring to a license and usage model for software or computer programs, which the client wants to install into their own IT infrastructure.
In contrast with storing images locally you have to possibility to store them in Docker Hub.
Firstly you have to create an account on docker hub.
Secondly confirm your email.
Thirdly create your own private repository where your images will be stored. For the free account you can create only one private repo. For a public repository you can have much more.
To push an image to your private repository from docker hub, you will have to login:
docker login -u <docker hub username>
Secondly you will have to build an image (ensure you have a Dockerfile from which to build the image).
Example of Dockerfile
FROM busybox
CMD echo "Hello world! My first docker file."
docker build -t <docker hub username>/<your private repository created before> .
Thirdly run it locally to ensure that the new image is working.
docker run <docker hub username>/<your private repository created before>
Lastly is to push your image to your private repository.
docker push <docker hub username>/<your private repository created before>
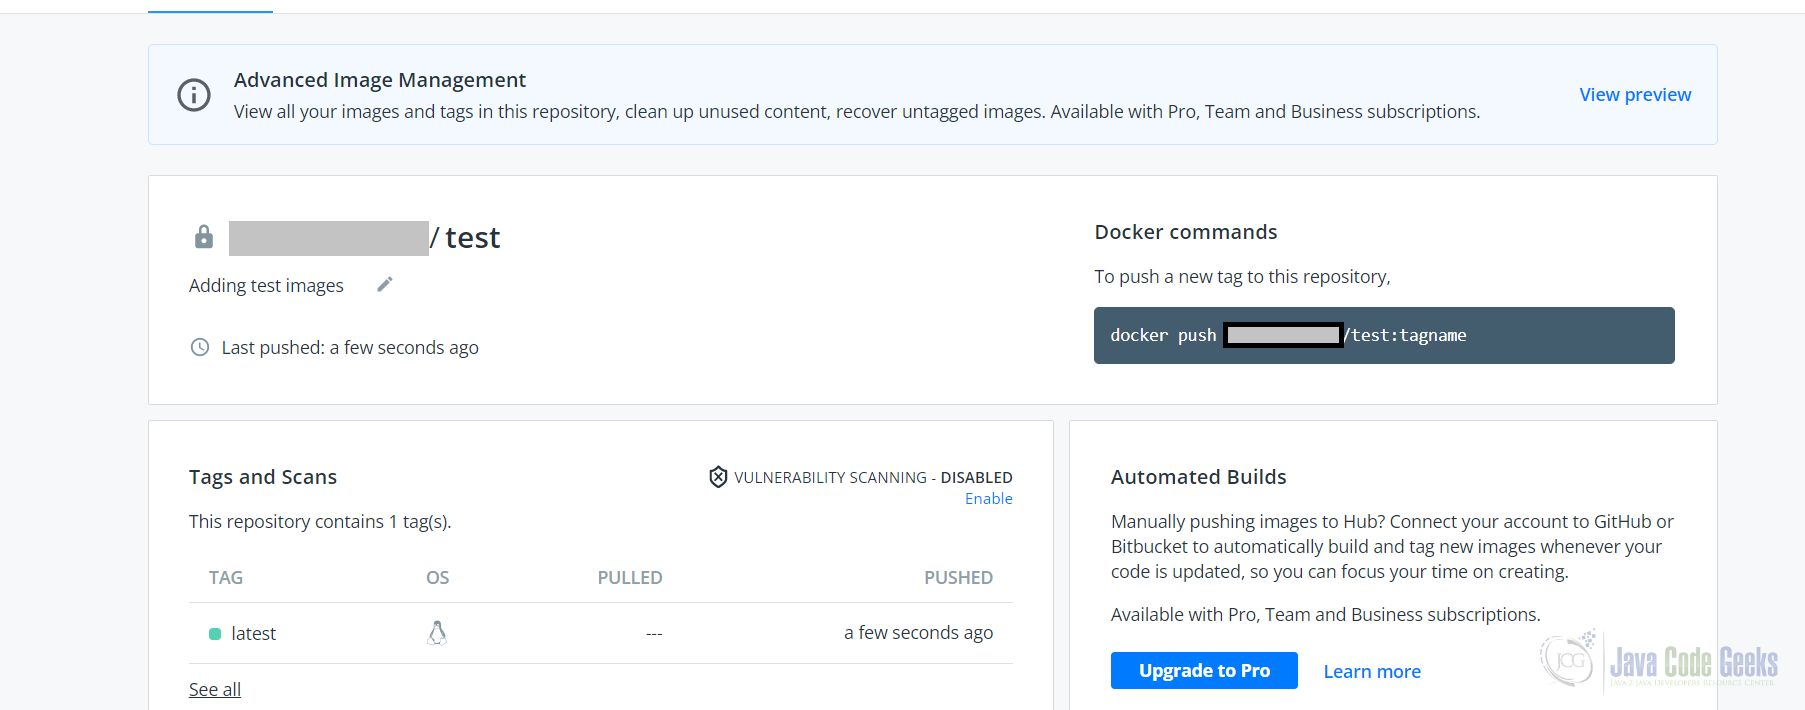
After you push the image successfully in the Docker Hub you will see something like this:
Besides all mentioned solutions, there are other public registries:
- Amazon Elastic Container Registry (Amazon ECR)
- Container Registry – from Google
- Azure Container Registry
- Container Registry – from Alibaba Cloud
Probably many other cloud providers offer container registries for their clients.
9. Basic commands
Below are some common commands for Docker platform
docker run #start a container.
docker ps #list containers
docker ps -a #list all containers even if failed to starts
docker stop <container name/container id> #stop a container
docker rm #remove a container
docker images #list all images
docker rmi <image>  #remove an image
docker pull <image> #pull an image
docker exec <container name> cat /etc/hosts #execute a command inside a container
docker run -d <image name> #run the image in detach mode
docker attach <container ID> #attach to a container
docker run -it centos bash #login into docker container
docker run --name webapp -d nginx:1.14-alpine
docker inspect <containerID or container name> #all details of a container
docker logs <containerID or container name> #show the live logs
docker logs -f <containerID or container name> #show the live logs
docker search <image_name> #search for an image in docker
docker image remove <docker registry instance>/<your image tag> #delete an image from your docker registry
10. Summary
In conclusion, in this article, you understand the basic concepts about Docker. The main focus was to get a better picture of the Docker registry.
Firstly we looked at an introduction to the Docker concept to understand the utility of this tool. In addition, we presented how to install the Docker platform locally and the Docker registry.
Secondly, we dived into the concept of Docker Registry, how to use it in your daily work. In addition, we presented the public and private Docker Registry.
Thirdly we presented some examples/commands of how to push/pull an image to/from the Docker registry.
To sum up, this article was mainly focused on the Docker Registry with a bit of introduction to the Docker concept.
