Welcome readers, in this tutorial, we will discuss how to deploy a simple Spring Boot application on AWS.
1. Introduction to AWS
To deploy a simple Hello World application on AWS we will make use of AWS Elastic Beanstalk. AWS Elastic Beanstalk is a compute service that makes easy for the developers to quickly deploy and manage application which is uploaded to the AWS cloud. A developer simply uploads the application and let AWS beanstalk do the rest (i.e. provision and configuration management). This service offers the following benefits –
- Easy to start and play with
- Offers autoscaling option and developer’s productivity
- Customization and cost-effective solution
- Management and updates
To start with this tutorial, we are hoping that users at present have an AWS account. If you don’t have an account go ahead and create one at this link.
2. Deploying a Spring Boot application on AWS
2.1 Application Pre-requisite
To deploy a Spring Boot application on Docker, developers need to simple hello-world spring boot application. They can refer to this tutorial at this link to download the application’s source code. Or can directly download the jar file from the Downloads section.
2.2 Application Deployment
To deploy an application, we have hoping developers now have created their account on AWS. After logging into the AWS console, head over to Services and type Elastic Beanstalk in the search bar. Click on it and you’ll be redirected to the Welcome page. Further, click on the Get Started button to start with the application deployment process. Developers will land on the following screen as shown in Fig. 1.
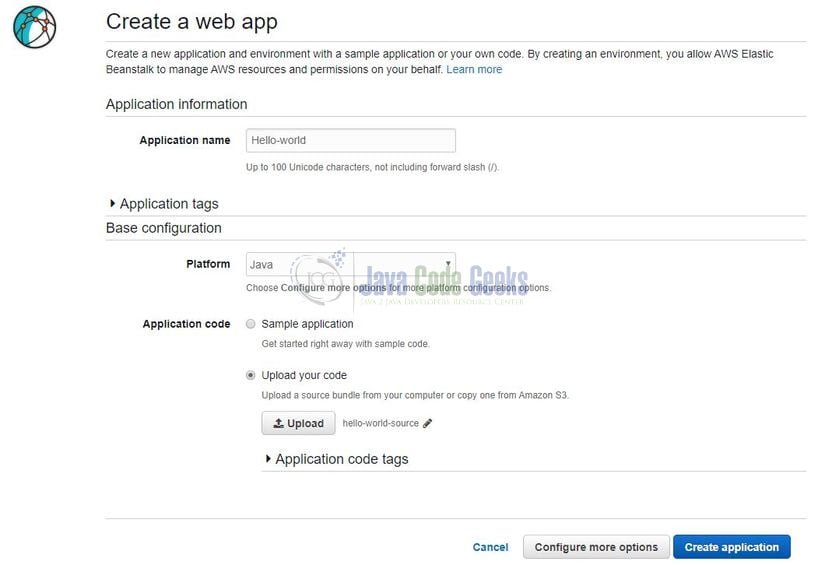
Here the developer will fill in the application information i.e. Application name, Platform and upload the application’s jar file of the code using the Upload your code option. Please note, a developer can use the following command: mvn clean install to export the application’s code into a jar file.
Once the upload completes, click on the Create application button. AWS will start creating the environment (such as a new EC2 instance, Health checks, etc.). Developers can keep an eye on the logs to understand the process for environment creation. Once everything goes well, they will land on the Dashboard page as shown in Fig. 2.
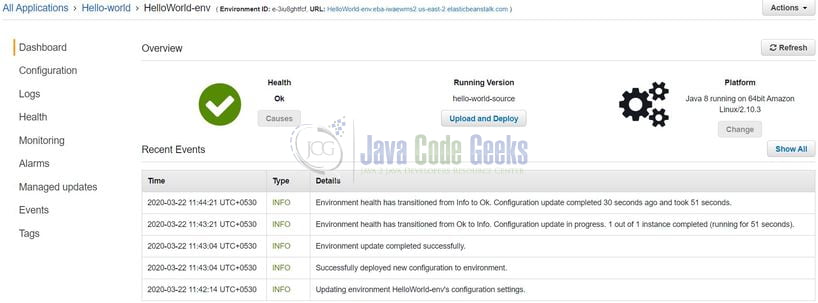
On the Dashboard page, developers can find the URL to access the application. Clicking on it will result in the HTTP 503 error. This is because by default Elastic Beanstalk runs the application on the port number 5000 while Spring Boot is running on port number 9099. To fix this issue, click on the Configuration link shown on the Dashboard page and developers will see the screen as shown in Fig. 3.

Click on Software category Modify button and add the following SERVER_PORT property under the Environment properties as shown in Fig. 4. Please note, developers can add or change any number of variables or features in the environment.

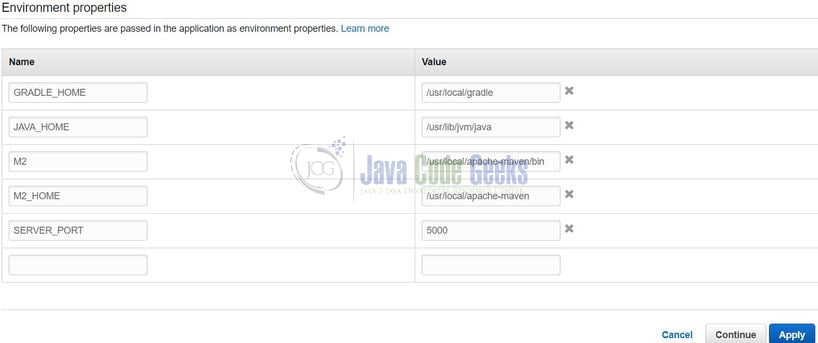
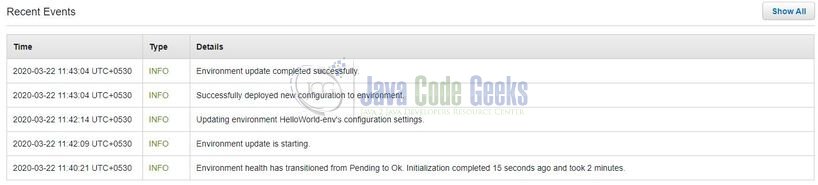
After updating, click on the Apply button and wait for AWS to apply the changes to the environment. Developers can keep an eye on the logs to understand the process. If everything goes well, the following message: Environment update completed successfully will be shown in the event logs.
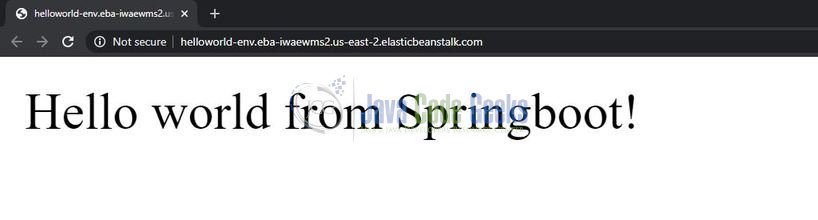
Now a developer can click on the URL to access the application and the welcome page will be shown as in Fig. 6.
2.3 Troubleshoot Steps
If due to any reason’s application is not starting, developers have an option to check the logs. In the Dashboard menu, click on Logs and the log menu will appear as shown in Fig. 7.

Go to Request Logs and select the option of your choice. This will generate a file with all your environment logs. Now go ahead and try out these steps in your development account to practice and learn.
3. Conclusion
That is all for this tutorial and I hope the tutorial will help you understand the basics. Happy learning and do not forget to share!
4. Download the source code
You can download the full source code of this example here: Deploying a Spring Boot application on AWS
