Welcome readers, in this tutorial, we will explore how to create a custom whitelabel error page in a spring boot application.
1. Introduction
- Spring boot is a module that provides rapid application development feature to the spring framework including auto-configuration, standalone-code, and production-ready code
- It creates applications that are packaged as jar and are directly started using embedded servlet container (such as Tomcat, Jetty or Undertow). Thus, no need to deploy the war files
- It simplifies the maven configuration by providing the starter template and helps to resolve the dependency conflicts. It automatically identifies the required dependencies and imports them in the application
- It helps in removing the boilerplate code, extra annotations, and xml configurations
- It provides a powerful batch processing and manages the rest endpoints
- It provides an efficient jpa-starter library to effectively connect the application with the relational databases
- It offers a Microservice architecture and cloud configuration that manages all the application related configuration properties in a centralized manner.
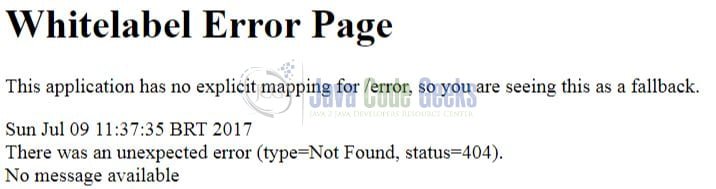
1.1 Spring boot Whitelabel Error Page
When we run a spring boot application it automatically registers the BasicErrorController as a spring bean and throws a default Whitelabel error page if any error occurs in an application i.e. a spring boot application uses a default Whitelabel error page in case of a server error.
To change this default behavior completely, developers implement the ErrorController interface and override the getErrorPath() method to return the path of a custom error page as shown in below coding snippet.
Coding Snippet
/*
 * To achieve the custom error logic for our spring boot application, developers must create
 * a custom error controller that will implement the "ErrorController" interface.
 * This interface provides a "getErrorPath()" method that developers will override to
 * return a custom path that will be called when an error occurs.
 *
 */
@Controller
public class Customerrorcontroller implements ErrorController {

	/*
	 * This method returns different error pages based on the error type.
	 */
	@Override
	public String getErrorPath() {
		return "/error";
	}

	. . . . . .
To follow the previous concept, let us open the eclipse ide and implement this tutorial. But before going any further I’m assuming that readers are aware of the concepts of creating and running a basic spring boot application.
2. Customize Whitelabel Error Page in Spring Boot
Here is a systematic guide for implementing this tutorial.
2.1 Tools Used
We are using Eclipse Kepler SR2, JDK 8, and Maven.
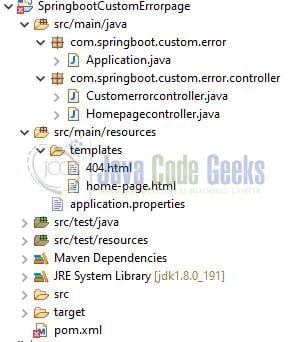
2.2 Project Structure
In case you are confused about where you should create the corresponding files or folder, let us review the project structure of the spring boot application.
Before starting we are hoping that developers have created a Java-based Maven project with Eclipse Ide. Let us start building the application!
3. Creating a Spring Boot application
Below are the steps involved in developing the application.
3.1 Maven Dependency
Here, we specify the dependency for the spring boot. Maven will automatically resolve the other dependencies. The updated file will have the following code.
pom.xml
<project xmlns="http://maven.apache.org/POM/4.0.0"
	xmlns:xsi="http://www.w3.org/2001/XMLSchema-instance"
	xsi:schemaLocation="http://maven.apache.org/POM/4.0.0 http://maven.apache.org/xsd/maven-4.0.0.xsd">
	<modelVersion>4.0.0</modelVersion>

	<parent>
		<groupId>org.springframework.boot</groupId>
		<artifactId>spring-boot-starter-parent</artifactId>
		<version>2.2.2.RELEASE</version>
	</parent>

	<groupId>com.jcg.springboot.assignment</groupId>
	<artifactId>SpringbootCustomErrorpage</artifactId>
	<version>0.0.1-SNAPSHOT</version>
	<name>Springboot Custom Error page</name>

	<dependencies>
		<dependency>
			<groupId>org.springframework.boot</groupId>
			<artifactId>spring-boot-starter-web</artifactId>
		</dependency>
		<dependency>
			<groupId>org.springframework.boot</groupId>
			<artifactId>spring-boot-starter-thymeleaf</artifactId>
		</dependency>
	</dependencies>

	<build>
		<finalName>SpringbootCustomErrorPage</finalName>
	</build>
</project>
3.2 Implementing the ErrorController Interface
Let us create an error controller that implements the ErrorController interface and will replace the default behavior.
Customerrorcontroller.java
package com.springboot.custom.error.controller;

import org.slf4j.Logger;
import org.slf4j.LoggerFactory;
import org.springframework.boot.web.servlet.error.ErrorController;
import org.springframework.stereotype.Controller;
import org.springframework.web.bind.annotation.GetMapping;

/*
 * To achieve the custom error logic for our spring boot application, developers must create
 * a custom error controller that will implement the "ErrorController" interface.
 * This interface provides a "getErrorPath()" method that developers will override to
 * return a custom path that will be called when an error occurs.
 *
 */
@Controller
public class Customerrorcontroller implements ErrorController {

	static final Logger LOGGER = LoggerFactory.getLogger(Customerrorcontroller.class);
	static final String PATH = "/error";

	@GetMapping(value= PATH)
	public String defaultErrorHandler() {
		LOGGER.info("Showing the custom error page.");
		return "404";		// In case of an error, this custom error page (404.html) will be rendered.
	}

	/*
	 * This method returns different error pages based on the error type.
	 */
	@Override
	public String getErrorPath() {
		return PATH;
	}
}
Make note, developers can choose to display specific error pages for different error types. This can be achieved by naming the file as per the corresponding HTTP status code. For e.g.: HTTP 400 Not Found status code to 404.html, HTTP 403 Forbidden status code to 403.html and so on.
3.3 Custom Error Page
Let us create a custom HTML error page (known as 404.html) and place it under the src/main/resources/templates/ directory.
404.html
<!DOCTYPE html>
<html lang="en">

<head>
    <meta charset="ISO-8859-1">
    <title>Page Not Found</title>
</head>

<body>
    <h2>404 - Page not found</h2>

	<p>Something went wrong. Our team is looking into it.</p>
</body>

</html>
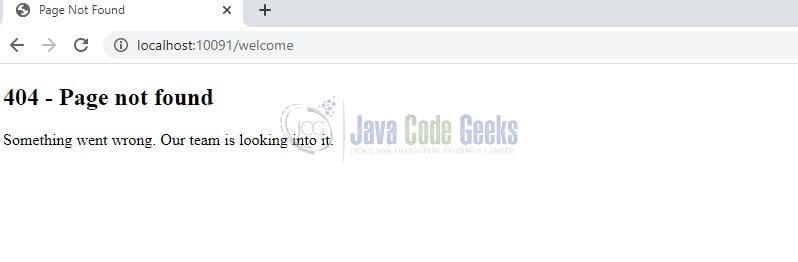
And remember, in case of an error spring boot application will automatically pick this custom error page. Looks like we are completed with the minimal configuration required to show the custom error page.
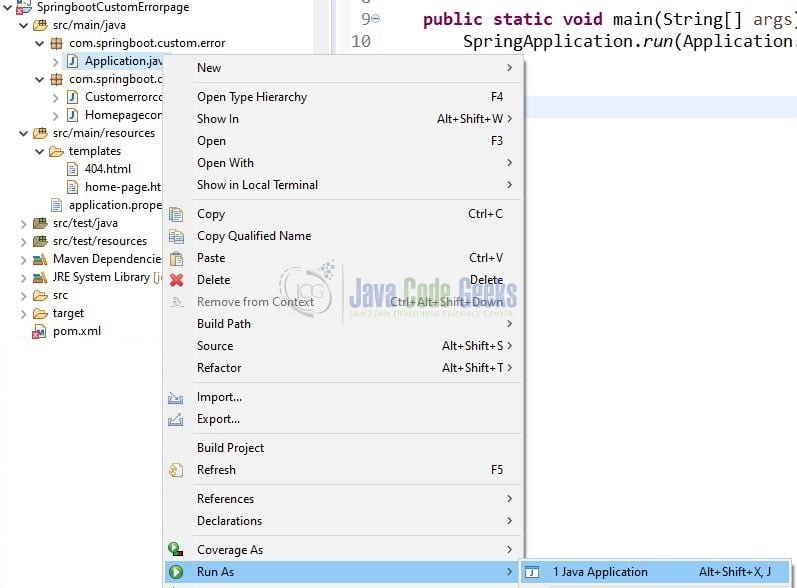
4. Run the Application
To execute the application, right-click on the Application.java class, Run As -> Java Application.
To view the custom error page, let us access the unmapped URL, say http://localhost:10091/about.
That is all for this tutorial and I hope the article served you whatever you were looking for. Happy Learning and do not forget to share!
5. Conclusion
In this section, developers learned how to disable Spring Boot Whitelabel Error Page and display the Custom Error Page in your spring boot application. That is all for this tutorial and I hope the article served you whatever you were looking for. Developers can download the sample application as an Eclipse project in the Downloads section.
6. Download the Eclipse Project
This was an example of displaying the Custom Error Page in a Spring Boot application.
You can download the full source code of this example here: Customize Whitelabel Error Page in Spring Boot

in case of embedded tomcat, this works, but this is not working when deployed in external server like standalone tomcat and wild-fly, how to handle this then.