In this example, we will learn to use the JSP Editor available through the Web Tools Platform (WTP) within Eclipse.
JavaServer Pages (JSP) technology, (part of Java Enterprise Edition – JEE), provides a simplified way for rapid development of web-based applications that are server- and platform-independent. It helps Java developers to create dynamically generated web pages based on HTML, XML, or other document types with embedded java code through scriplets.
JSP contains the JSP Standard Tag Library (JSTL), which is a collection of tag libraries that implement general-purpose functionality common to many Web applications.
The JSP editor provides a number of compelling features to ease JSP Development within eclipse.
Validate the editor availability
The first step is to validate whether the JSP editor is available for your Eclipse Installation. If you have already installed Eclipse IDE for Java EE Developers, you may skip the section below.
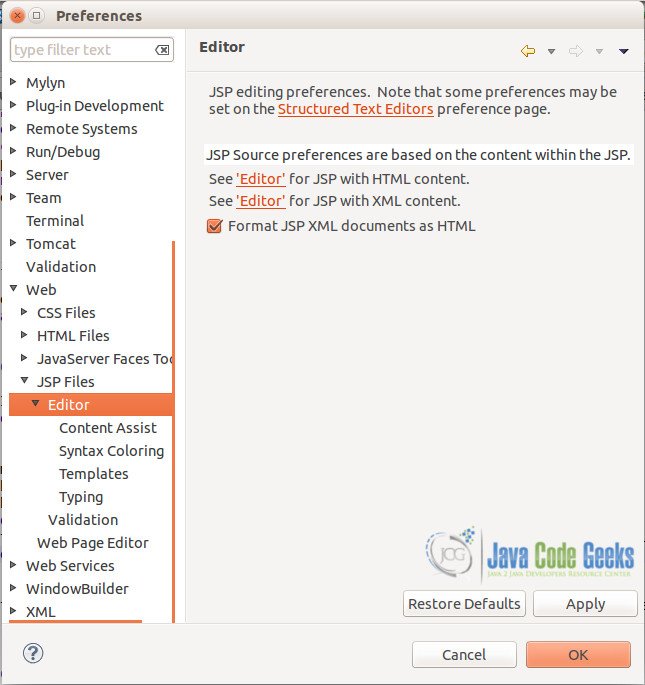
Go to Menu –> Window –> Preferences.
Browse to Web –> JSP Files –> Editor
In case, you do not find Web under Preferences, you may need to go back and install the Web Tools Platform (WTP) in your eclipse. The WTP is available by default for Eclipse 4.3 JEE and above. For versions prior to 4.3, please follow the New Software Installation instructions here
The update site repository links for webtools for specific eclipse releases can be found here
Features of the JSP Editor
The JSP Editor provides some great features to ease JSP development like searching, templating, encoding, code/content assists, syntax coloring, code typing and validations.
- General Options for JSP
- Content Assist
- Syntax coloring
- Create / Edit JSP Templates
- Typing and Validation
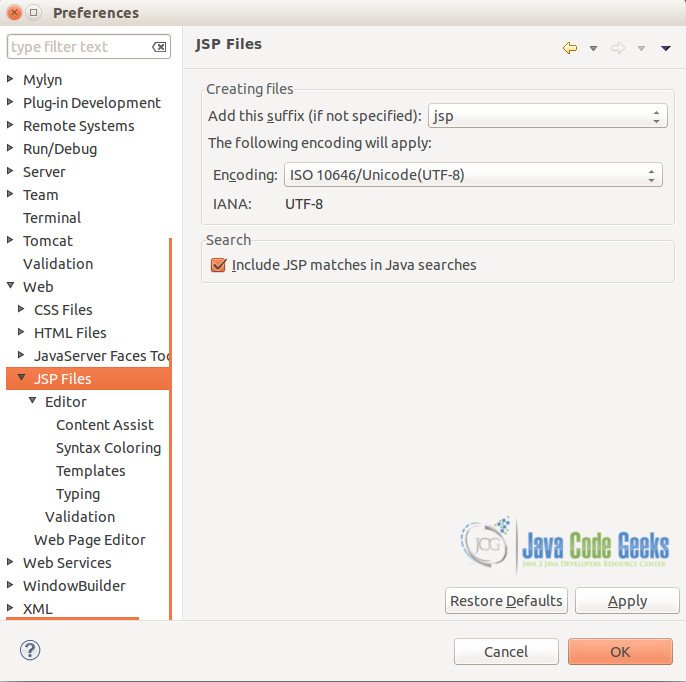
As seen below, the first option specifies default file extensions while you create a new JSP file. There is also an option to select the default encoding and whether (or not) to include JSP files for text searches.
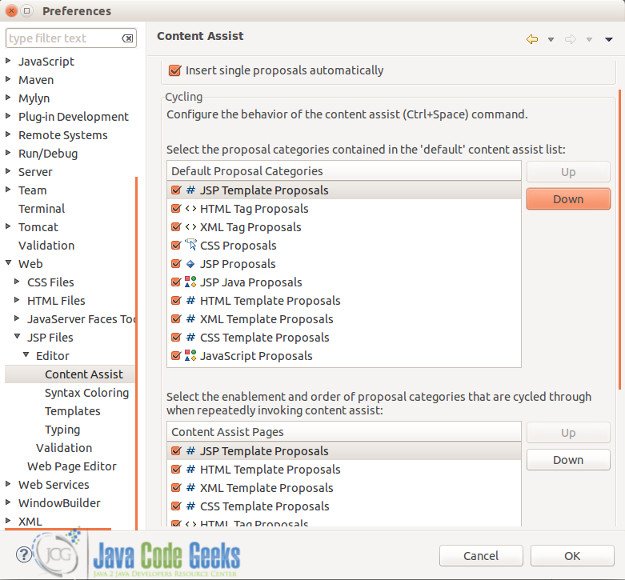
Here, one can customize the content assist in the JSP editor. The options include enabling and prioritizing proposal categories on shortcuts for code auto-complete using (Ctrl + space) command. As screen below, we have changed the priority of JSP Template proposals to the first one before HTML templates.
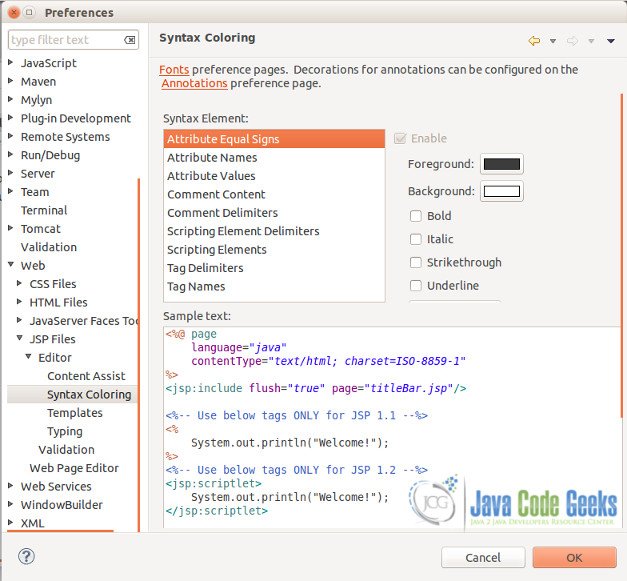
In this option, one can edit the color of the code in the editor.
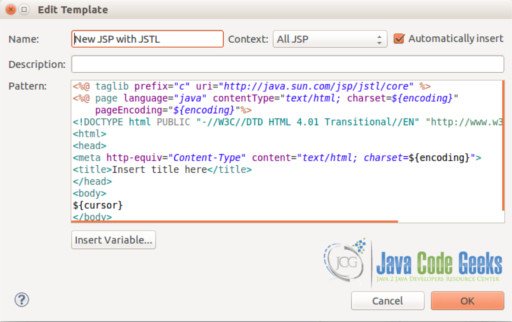
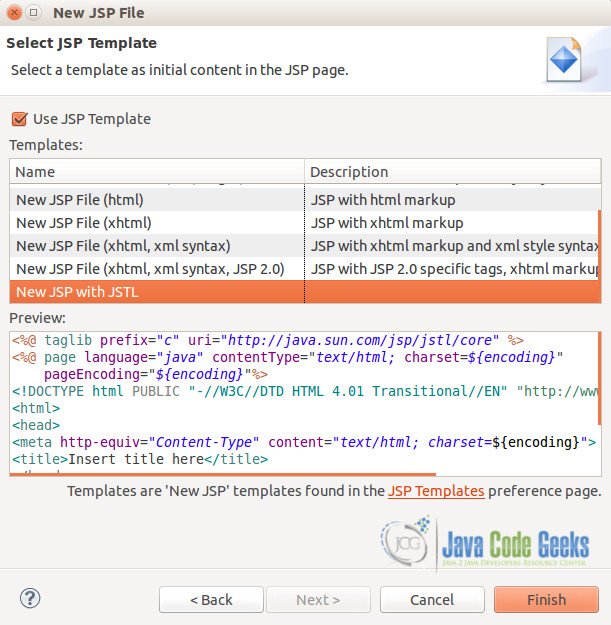
In this option, one can edit existing templates or create new ones.
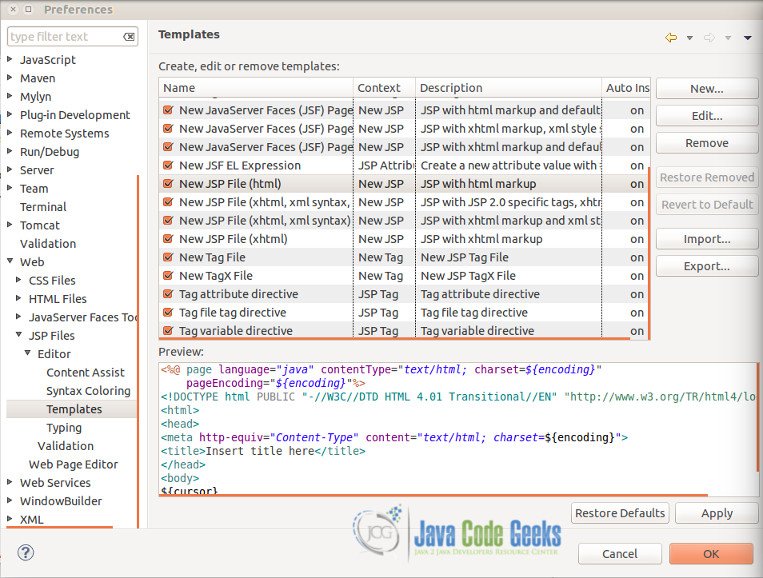
For this example, we will create a new template named “New JSP with JSTL” and have the template include the core JSTL library with the appropriate taglib prefix.
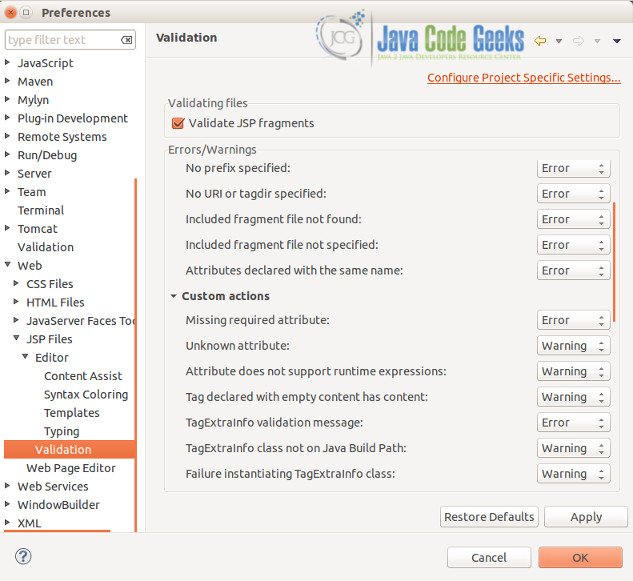
Finally, as part of the JSP Editor, one can set-up any of the code typing properties and classify incorrect code to be alerted as Error OR Warning in the editor.
JSP Editor in Action
After reviewing the editor features and configuration, let us know see the JSP editor in action.
Create a new “Dynamic Web Project”.
Go to Menu –> New –> Dynamic Web Project.
Please select the appropriate webapp archetype in case you are creating a new Maven project.
Once the web project is created, we can now create a new JSP file. Right click on the project context, and click New.
Select JSP file and provide a name to the JSP File. Click Next.
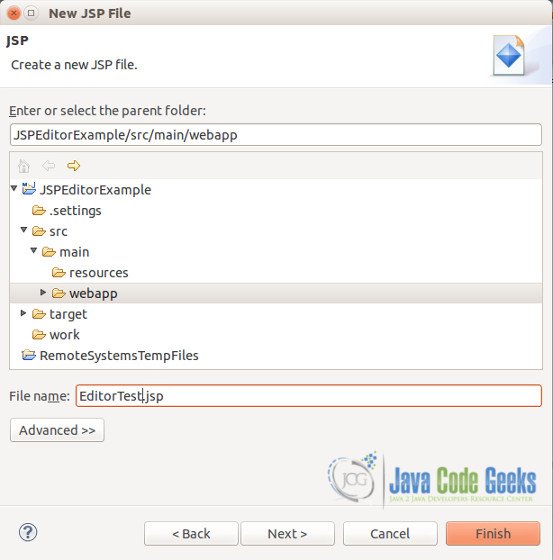
Select the new JSP Template – “New JSP with JSTL” as created in step 4 above.
Notice the include for the JSTL Core in the new created JSP as per our template created in Step 4 above.
You can now press Ctrl + Space (and type jsp) to view the available source options for the Editor.
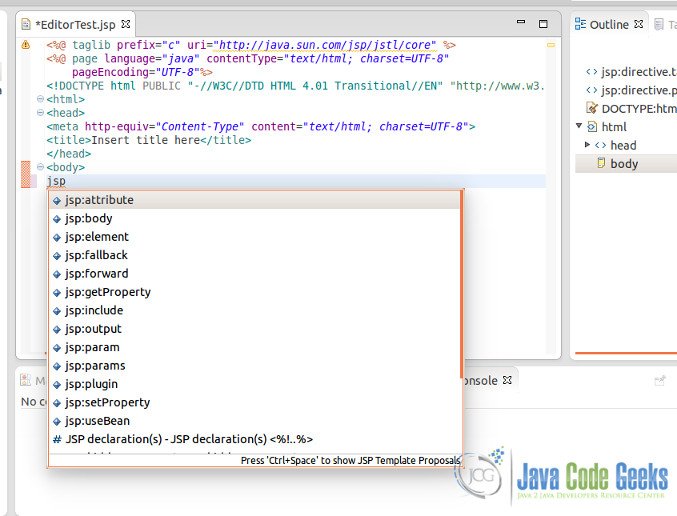
Let us know, use the content assist in the editor and create the following:
- JSP Declaration
- JSP Expressions
- JSP Scriplets
- JSP Use bean tag
Here, we will define a static method getWelcomeMessage which returns a String.
The expression would invoke the static method to display the message as an evaluated expression.
The JSP Scriplet is where we can write Java code within the JSP. For our example, we will print out some message to the jsp writer.
Here, we will create a sample bean named SamplePersonBean which has only one String variable personName. We will use this bean in JSP through useBean tag and set the personName property and retrieve it.
EditorTest.jsp
<%@ taglib prefix="c" uri="http://java.sun.com/jsp/jstl/core"%>
<%@ page language="java" contentType="text/html; charset=UTF-8"
	pageEncoding="UTF-8"%>
	<%@ page import="com.javacodegeeks.jspeditor.SamplePersonBean" %>
<!DOCTYPE html PUBLIC "-//W3C//DTD HTML 4.01 Transitional//EN" "http://www.w3.org/TR/html4/loose.dtd">
<html>
<head>
<meta http-equiv="Content-Type" content="text/html; charset=UTF-8">
<title>Java Code check - JSP Editor Plugin</title>
</head>

<body>
	<%-- JSP Declaration --%>
	<%! private static String getWelcomeMessage() {
		return "Hello JSP Editor Plugin";
	}%>

	<%-- JSP Expressions --%>
	<h2>
	<%=  getWelcomeMessage()%>
	</h2>

	<%-- JSP Scriplets --%>
	<% int i=-1; %>

	<%-- JSP Use Bean example --%>
	<jsp:useBean id="samplePerson" class="com.javacodegeeks.jspeditor.SamplePersonBean" scope="page"></jsp:useBean>
	<jsp:setProperty name="samplePerson" property="personName" value="Java Code Geeks" />

	<h3> - By <jsp:getProperty property="personName" name="samplePerson"/>
	</h3>

</body>
</html>
SamplePersonBean.java
package com.javacodegeeks.jspeditor;

public class SamplePersonBean {

	private String personName;

	public String getPersonName() {
		return personName;
	}

	public void setPersonName(String personName) {
		this.personName = personName;
	}
}
Add the jsp as the Welcome file in the Deployment assembly for the project.
web.xml
<!DOCTYPE web-app PUBLIC
 "-//Sun Microsystems, Inc.//DTD Web Application 2.3//EN"
 "http://java.sun.com/dtd/web-app_2_3.dtd" >

<web-app>
  <display-name>JSP Editor Plugin</display-name>
  <welcome-file-list>
  <welcome-file>EditorTest.jsp</welcome-file>
  </welcome-file-list>
</web-app>
Run the application on an integrated Web server – Tomcat, and view the output in the browser.

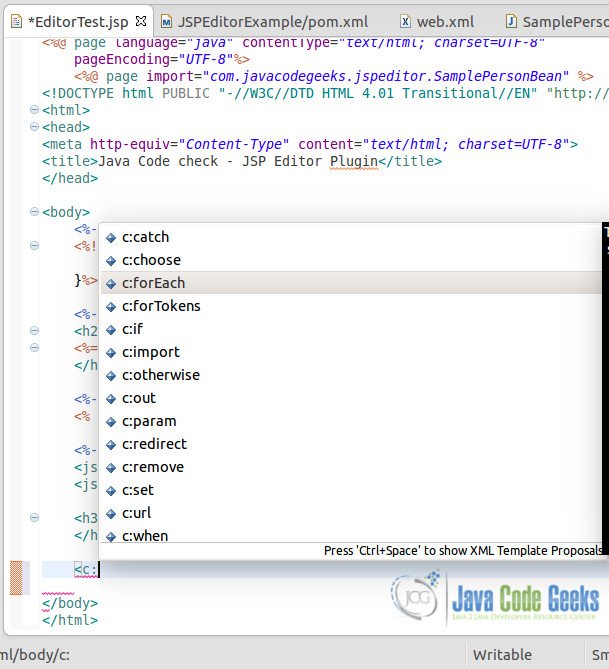
Support for JSTL
The JSP Editor also provides content assist support for JSTL. As seen above, we have included the core JSTL. By typing <c: and Ctrl + Space, the editor suggests the available tags under the JSTL core as shown below.
Download the Eclipse Project
This was the example demonstrating use of JSP Editor in eclipse.
You can download the full source code of this example here : JSPEditorExample.zip
