In this example of Solr Schema.xml Example, we will discuss about different configuration parameters in schema.xml file provided by Apache Solr. The schema.xml describes the documents we want the Solr to index. We get to define both the field types and the fields themselves. Field type definitions are powerful and include information about how Solr processes incoming field values and query values. We will discuss about how to create a field, create a custom field type, use a copy field and usage of dynamic field in this example.
To demonstrate the schema.xml file usage, we will create a core in Solr using basic configuration and index a sample file shipped along with Solr installation.
Our preferred environment for this example is solr-5.0.0. Before you begin the Solr installation make sure you have JDK installed and Java_Homeis set appropriately.
1. Install Apache Solr
To begin with, lets download the latest version of Apache Solr from the following location:
http://lucene.apache.org/solr/downloads.html
Apache Solr has gone through various changes from 4.x.x to 5.0.0, so if you have a different version of Solr you need to download the 5.x.x. version to follow this example.
Once the Solr zip file is downloaded, unzip it into a folder. The extracted folder will look like the below:
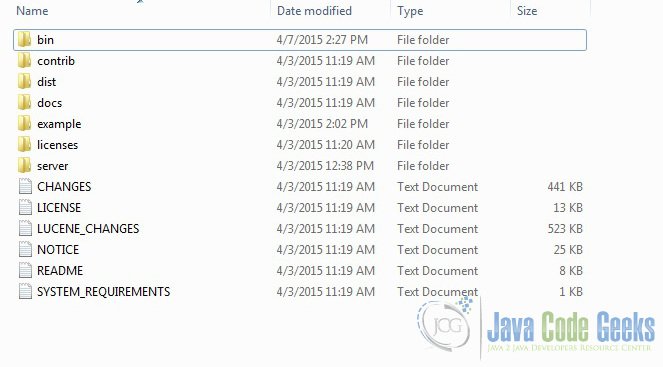
The bin folder contains the scripts to start and stop the server. The example folder contains few example files. We will be using one of them to demonstrate how Solr indexes the data. The server folder contains the logs folder where all the Solr logs are written. It will be helpful to check the logs for any error during indexing. The solr folder under server holds different collection or core. The configuration and data for each of the core/ collection are stored in the respective core/ collection folder.
Apache Solr comes with an inbuilt Jetty server. But before we start the solr instance we must validate the JAVA_HOME is set on the machine.
We can start the server using the command line script. Lets go to the bin directory from the command prompt and issue the following command:
solr start
This will start the Solr server under the default port 8983.
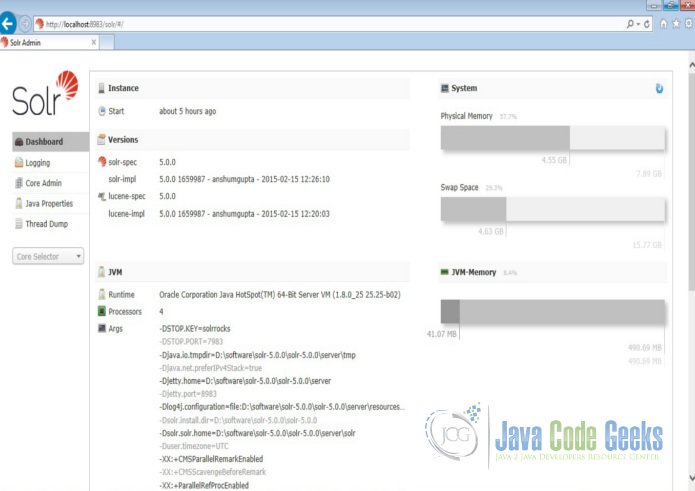
We can now open the following URL in the browser and validate that our Solr instance is running. The specifics of solr admin tool is beyond the scope of the example.
http://localhost:8983/solr/
2. Create a Solr core
When the Solr server is started in Standalone mode, the configuration is called core and when it is started in SolrCloud mode, the configuration is called Collection. In this example we will discuss about the standalone server and core. We will park the SolrCloud discussion for later time.
First, we need to create a Core for indexing the data. The Solr create command has the following options:
- -c <name> – Name of the core or collection to create (required).
- -d <confdir> – The configuration directory, useful in the SolrCloud mode.
- -n <configName> – The configuration name. This defaults to the same name as the core or collection.
- -p <port> – Port of a local Solr instance to send the create command to; by default the script tries to detect the port by looking for running Solr instances.
- -s <shards> – Number of shards to split a collection into, default is 1.
- -rf <replicas> – Number of copies of each document in the collection. The default is 1.
In this example we will use the -c parameter for core name and -d parameter for the configuration directory. For all other parameters we make use of default settings.
Now navigate the solr-5.0.0\bin folder in the command window and issue the following command:
solr create -c jcg -d basic_configs
We can see the following output in the command window.
Creating new core 'jcg' using command:
http://localhost:8983/solr/admin/cores?action=CREATE&name=jcg&instanceDir=jcg

{
 "responseHeader":{
 "status":0,
 "QTime":663},
 "core":"jcg"}
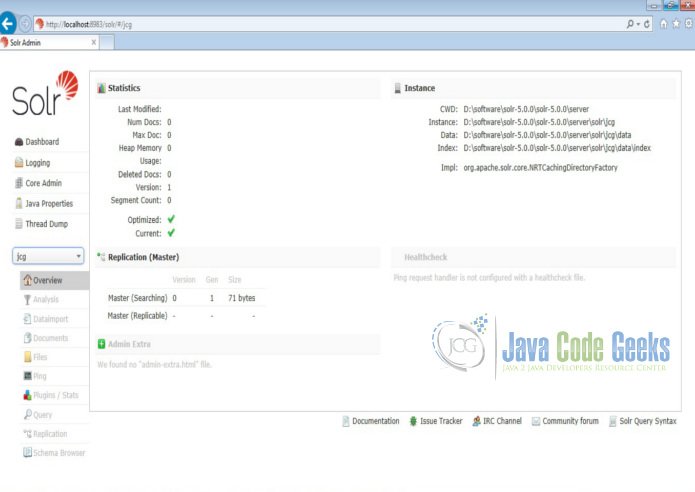
Now we navigate to the following URL and we can see jcg core being populated in the core selector. You can also see the statistics of the core.
http://localhost:8983/solr
3. Using field types
We need to modify the schema.xml file under the folder server\solr\jcg\conf to include the fields. We will use one of the example file “books.csv” shipped along with Solr installation for indexing. The file is located under the folder solr-5.0.0\example\exampledocs
Now we navigate to the folder server\solr directory. You will see a folder called jcg created. The sub-folders namelyconf and data have the core’s configuration and indexed data respectively.
Now edit the schema.xml file in the \server\solr\jcg\conf folder and add the following contents after the uniqueKey element.
schema.xml
<uniqueKey>id</uniqueKey>
<!-- Fields added for books.csv load-->
<field name="cat" type="text_general" indexed="true" stored="true"/>
<field name="name" type="text_general" indexed="true" stored="true"/>
<field name="price" type="tdouble" indexed="true" stored="true"/>
<field name="inStock" type="boolean" indexed="true" stored="true"/>
<field name="author" type="text_general" indexed="true" stored="true"/>
We have set the attribute indexed to true. This specifies the field is used for indexing and the record can be retrieved using the index. Setting the value to false will make the field only stored but can’t be queried with.
Also note we have another attribute called stored and set it to true. This specifies the field is stored and can be returned in the output. Setting this field to false will make the field only indexed and can’t be retrieved in output.
We have assigned the type for the fields present in the “books.csv” file here. The first field in the CSV file “id” is automatically taken care by the uniqueKey element of schema.xml file for indexing.
4. Defining field types
There are number of field types that gets created by default when we create the core. The field type defines how Solr should interpret data in a field and how the field can be queried. We will create a field type “text_uppercase” which will convert the data to the upper case value and index them. A field type definition can include four types of information:
- An implementation class name (mandatory)
- The name of the field type (mandatory)
- If the field type is TextField, a description of the field analysis for the field type
- Field type properties – depending on the implementation class, some properties may be mandatory.
The field type determines most of the behavior of a field type, but optional properties can also be defined.
Now edit the schema.xml file in the \server\solr\jcg\conf folder and add the following contents after the lowercase field type. The following configuration will create a field type “text_uppercase”.
schema.xml
   <!-- lowercases the entire field value, keeping it as a single token. -->
 <fieldType name="lowercase" class="solr.TextField" positionIncrementGap="100">
 <analyzer>
 <tokenizer class="solr.KeywordTokenizerFactory"/>
 <filter class="solr.LowerCaseFilterFactory" />
 </analyzer>
 </fieldType>
 <fieldType name="text_uppercase" class="solr.TextField" positionIncrementGap="100">
 <analyzer>
 <tokenizer class="solr.WhitespaceTokenizerFactory"/>
 <filter class="solr.UpperCaseFilterFactory"/>
 </analyzer>
 </fieldType>
5. Using the Copy field
Copy field commands copy one field to another at the time a document is added to the index. It’s used either to index the same field differently, or to add multiple fields to the same field for easier/faster searching.

In our example we will create a copy field for name. We will use the copy field to index the name in the upper case.
Now edit the schema.xml file in the \server\solr\jcg\conf folder and add the following contents after the lowercase field type. The following configuration will create a field type “text_uppercase”.
schema.xml
<!--
 <copyField source="title" dest="text"/>
 <copyField source="body" dest="text"/>
 -->
 <copyField source="name" dest="uname"/>
Now we have to assign the field type to the destination. We will add the field type as “text_uppercase” as shown below.
schema.xml
<uniqueKey>id</uniqueKey>
<!-- Fields added for books.csv load-->
<field name="cat" type="text_general" indexed="true" stored="true"/>
<field name="name" type="text_general" indexed="true" stored="true"/>
<field name="price" type="tdouble" indexed="true" stored="true"/>
<field name="inStock" type="boolean" indexed="true" stored="true"/>
<field name="author" type="text_general" indexed="true" stored="true"/>
<field name="uname" type="text_uppercase" indexed="true" stored="true"/>
6. Using the Dynamic field
Dynamic fields are created by applying convention over configuration principle. When we create the core using the basic configuration the following dynamic fields are created by default.
schema.xml
<dynamicField name="*_i" type="int" indexed="true" stored="true"/>
 <dynamicField name="*_is" type="int" indexed="true" stored="true" multiValued="true"/>
 <dynamicField name="*_s" type="string" indexed="true" stored="true" />
 <dynamicField name="*_ss" type="string" indexed="true" stored="true" multiValued="true"/>
 <dynamicField name="*_l" type="long" indexed="true" stored="true"/>
 <dynamicField name="*_ls" type="long" indexed="true" stored="true" multiValued="true"/>
 <dynamicField name="*_t" type="text_general" indexed="true" stored="true"/>
 <dynamicField name="*_txt" type="text_general" indexed="true" stored="true" multiValued="true"/>
 <dynamicField name="*_en" type="text_en" indexed="true" stored="true" multiValued="true"/>
 <dynamicField name="*_b" type="boolean" indexed="true" stored="true"/>
 <dynamicField name="*_bs" type="boolean" indexed="true" stored="true" multiValued="true"/>
 <dynamicField name="*_f" type="float" indexed="true" stored="true"/>
 <dynamicField name="*_fs" type="float" indexed="true" stored="true" multiValued="true"/>
 <dynamicField name="*_d" type="double" indexed="true" stored="true"/>
 <dynamicField name="*_ds" type="double" indexed="true" stored="true" multiValued="true"/>
In the books.csv file we have the following fields which are mapped to the field types dynamically.
- series_t – mapped to the dynamic field name “*_t” and assigned the type text_general
- sequence_i – mapped to the dynamic field name “*_i” and assigned the type int
- genre_s – mapped to the dynamic field name “*_s” and assigned the type string
7. Indexing the Data
Apache Solr comes with a Standalone Java program called the SimplePostTool. This program is packaged into JAR and available with the installation under the folder example\exampledocs.
Now we navigate to the example\exampledocs folder in the command prompt and type the following command. You will see a bunch of options to use the tool.
java -jar post.jar -h
The usage format in general is as follows:
Usage: java [SystemProperties] -jar post.jar [-h|-] [<file|folder|url|arg>

[<file|folder|url|arg>...]]
As we said earlier, we will index the data present in the “books.csv” file shipped with Solr installation. We will navigate to the solr-5.0.0\example\exampledocs in the command prompt and issue the following command.
java -Dtype=text/csv -Durl=http://localhost:8983/solr/jcg/update -jar post.jar books.csv
The SystemProperties used here are:
- -Dtype – the type of the data file.
- -Durl – URL for the jcg core.
The file “books.csv” will now be indexed and the command prompt will display the following output.
SimplePostTool version 5.0.0
Posting files to [base] url http://localhost:8983/solr/jcg/update using content-
type text/csv...
POSTing file books.csv to [base]
1 files indexed.
COMMITting Solr index changes to http://localhost:8983/solr/jcg/update...
Time spent: 0:00:00.647
8. Download the Configuration
This was an example of schema.xml configuration.
You can download the schema file of this example here: schema.xml
