In this post, we are going to discuss a very important concept and the basic building block of Kubernetes which is a Pod.
1. Introduction
A Pod is a basic build block and the smallest deployable unit of a Kubernetes (K8S) cluster. It can contain one or more containers.
In the Kubernetes world, everything is an object for instance Pod, Deployment, Service, etc, are different kinds of objects.
In simple words, we can say a Pod is a wrapper for a container(s). We cannot deploy containers directly into a Kubernetes cluster. Because Kubernetes supports the following Container Runtime (CRT) environments:
- Docker
- containerd
- CRI-O
- Mirantis Container Runtime
It’s very tough to understand which type of container we deployed into a K8S cluster by Kubernetes. So Kubernetes can understand only Pods and CRTs will take care of containers.
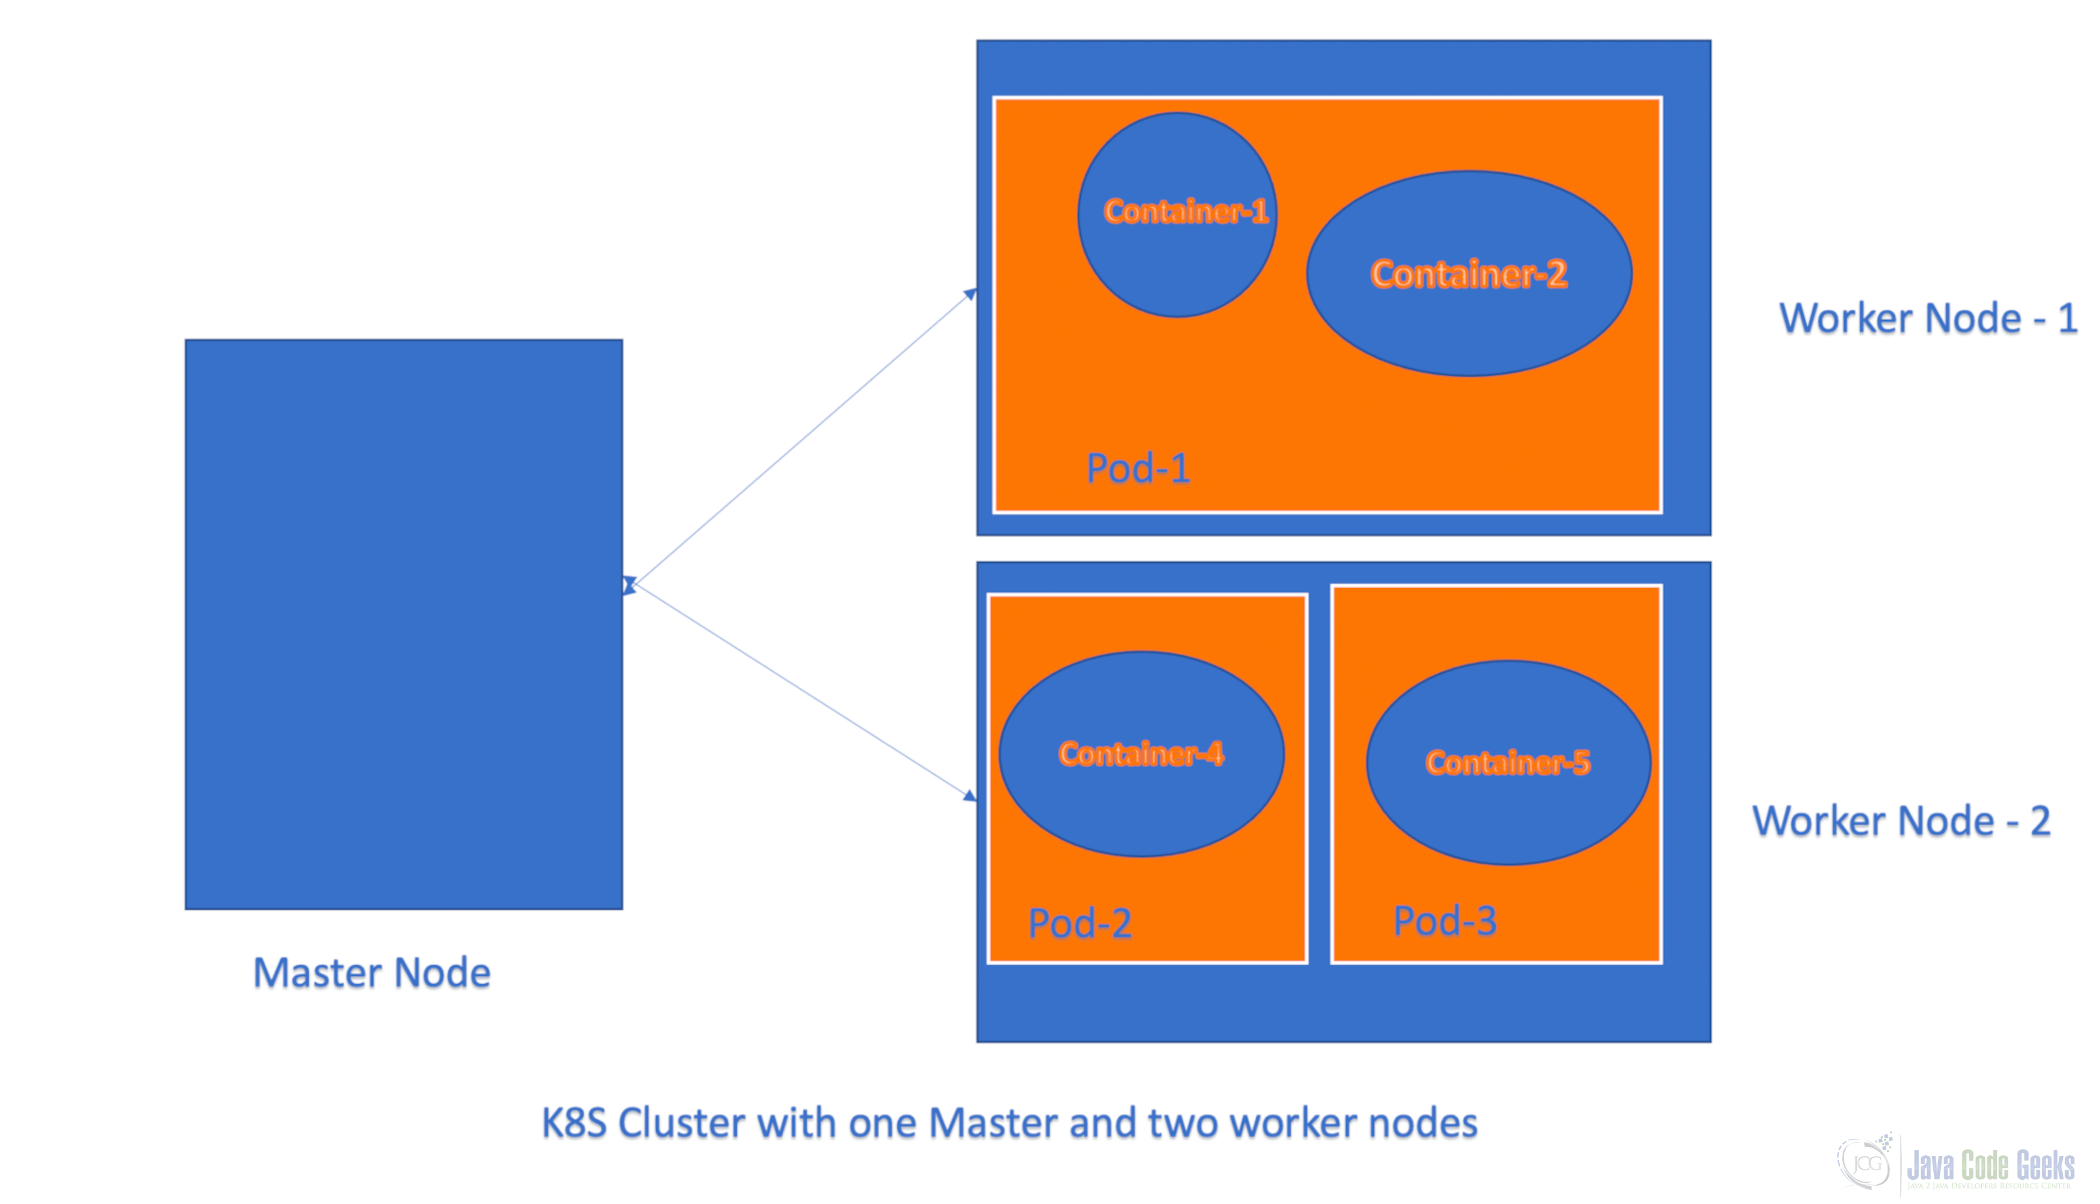
In a K8S cluster, we can deploy one or more Pods into a Node (a physical server or virtual machine) and each Pod can contain one or more containers as shown below
NOTE:- Please install docker software (for instance Docker Desktop) in your local environment.
I’m going to use MacOS to perform/execute all installation steps and examples provided in this post.
2. Environment setup
We can use any Kubernetes environment to execute commands or examples provided in this post like Google GKE, AWS EKS, AKS, Minikube, etc.
In this post, we are going to use the Minikube environment. It’s a single Node and Open source Kubernetes cluster. We need to do the following 3 steps to setup our local Minikube environment.
2. Environment Setup
In this section, we will try to set up our local Minikube environment to execute our commands and examples described in the coming sections.
2.1. Install Virtualbox
Please download the required VirtualBox software based on your OS from this page then double-click on that software to install it in a few easy steps.
In MacOS, we can simply install it using the following brew command
brew install --cask virtualbox
2.2. Install Minikube
Please select the required Minikube software based on your OS from this Minikube documentation page then double-click on that software to install it in a few easy steps.
In MacOS, we can simply install Minikube using the following brew command
brew install minikube
Once Minikube is installed properly, please start this environment with the following command
minikube start --driver=virtualbox
In this post, we are using going to use VirtualBox as our Minikube Driver (virtualization tool). If you want to use docker as your driver, please use the following command to up and run Minikube environment
minikube start --driver=docker
NOTE:- Please check this page to know more available Minikube drivers
Please run the below command to check your Minikube environment status
minikube status
2.3. Install Kubectl
When we install the Minikube environment, by default we will get a kubectl command line tool. If we want to use this command, we don’t need to do this step. The only issue I found with this command is a bit tedious approach as shown below
minikube kubectl <command>
We need to type “minikube kubectl” every time, instead of just
kubectl <command>
If we want to use this shortcut or simple command, we need to install kubectl command-line tool separately.
brew install kubectl
After successful installation of kubectl command, please execute the following command to know its version and also to double check kubectl command is installed properly or not.
kubectl version
3. Kubernetes Pod operations
We can perform Pod operations like create, update and delete Pods in two ways: 1. Imperative approach 2. Declarative approach
3.1. Pod – Imperative approach
In this section, we will try to explore how to perform some pod operations in an imperative approach.
To create a Pod with kubectl command
kubectl run <pod-name> –image=<image-name>
Here pod-name is the name of the pod we are going to create and image-name is the docker image or container name we are going to deploy into our new pod. When we execute this command in our Minikube environment, it will download that image from Dockerhub and deploy it into our new pod as a container.
Please execute commands as mentioned below
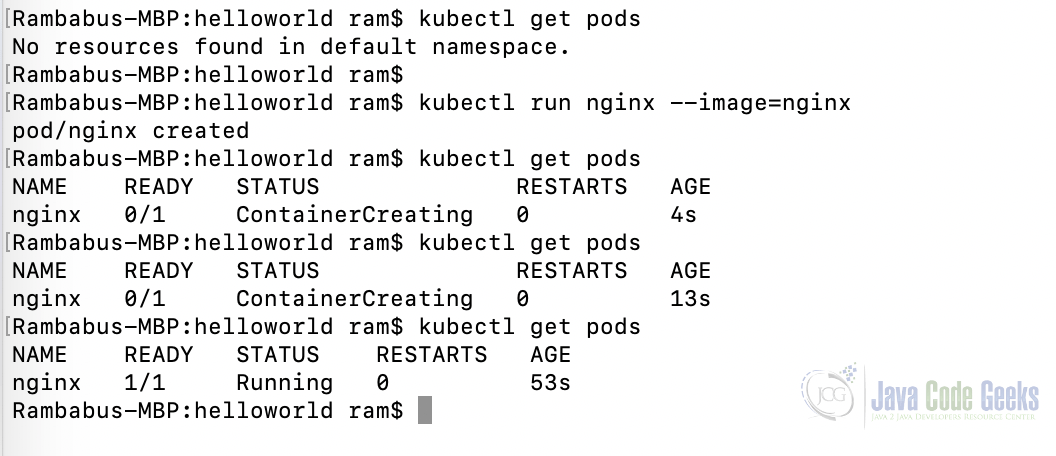
To get all pods details, please use this command
kubectl get pods
To get full details of a pod, like, name, namespace, IP details, status, events, etc, please use this command.
kubectl describe pod nginx
To delete a pod, please use this command
kubectl delete pod nginx
3.2. Pod – Declarative approach
In this section, we will try to explore how to perform some pod operations in a declarative approach.
In this approach, the first and foremost thing we need to do is define all pod details in a YAML file to perform pod operations. We will try to create the same nginx pod here using this approach.
Please delete the existing nginx pod (if you have one) before doing this step
3.2.1. Define a YAML File
The YAML file is a plan text file. We can use either “yaml” or “yml” as this text file extension. We need to follow proper Indentation with consistent spaces (not tabs) to create this YAML file.
apiVersion: v1
kind: Pod
metadata:
  name: nginx
spec:
  containers:
  - name: nginx
    image: nginx
Here we need to understand mainly 4 things
- apiVersion: Its Kubernetes API version
- kind: In Kubernetes, everything is an Object. Here we need to define what kind of object we are going to create using this yaml file. For instance, Pod, Deployment, Service etc.
- metadata: We need to define the newly create pod name
- spec: here we need to list our image details
If we observe this YAML file, we can say that it contains all K8S object’s details in the form of Map and List components. Map means key and value fairs and List means a list of values or keys/values. We can define those Map and Lists as simple or complex components. That means a complex Map or List can contain another Map and/or List.
For instance, apiVersion is a simple Map like apiVersion: v1 with one key and value entry.
metadata is a complex Map, it contains another simple Map inside.
spec is a complex Map, it contains containers as a complex Map which in turn contains a complex List.
3.2.2. Create a Kubernetes Pod using YAML file
Once we define a manifest file that YAML file with all pod details, we need to run the following command to create that Pod in a declarative approach.
kubectl apply -f nginx.yaml

Here apply is used to create a new pod if it does not exist or update the existing pod with provided details.
If we want to just create a new pod that does not exist, we can use create option as shown below
kubectl create -f nginx.yaml
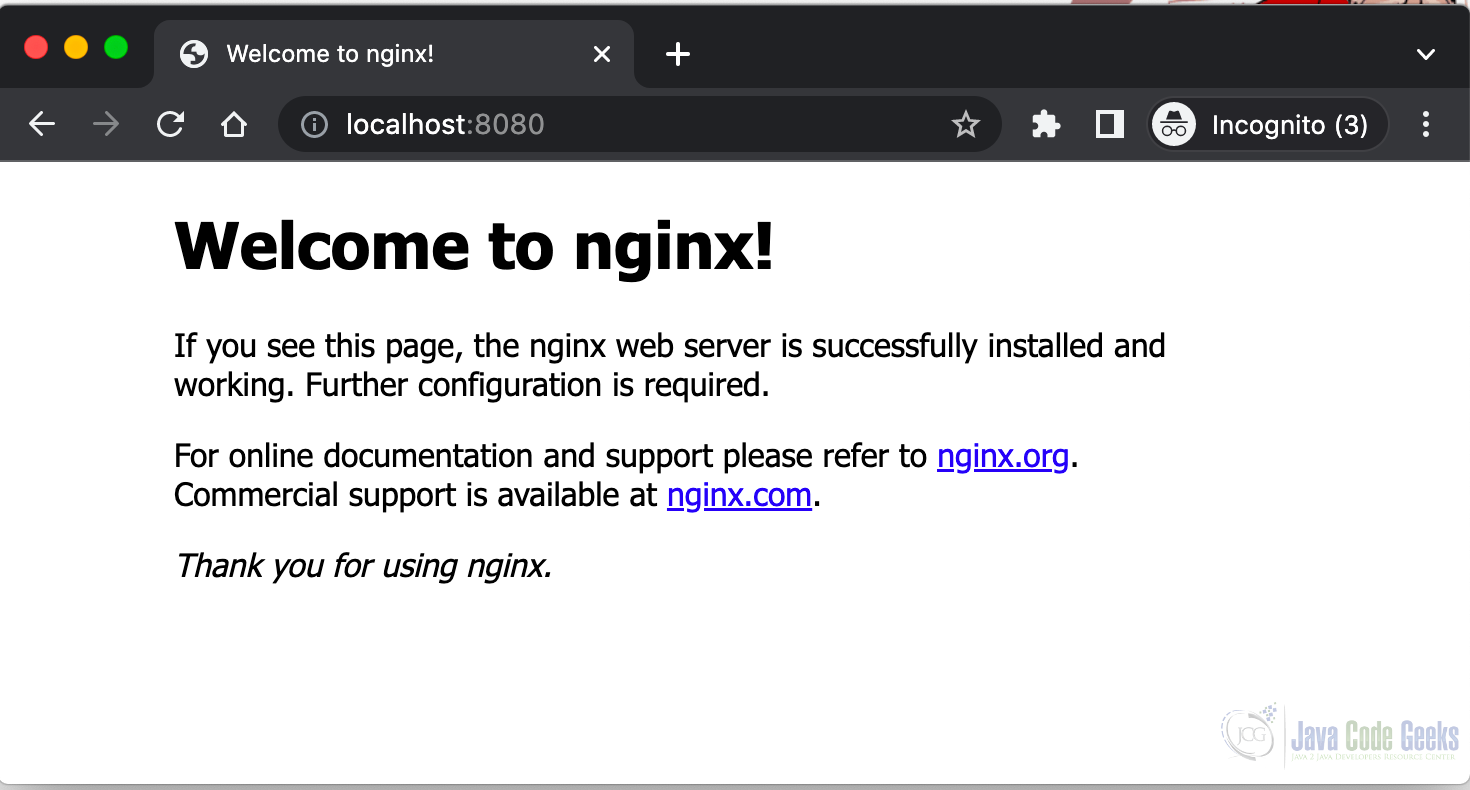
Once we create nginx pod with nginx container running in it, if we want to access its homepage from the outside world using your favorite browser, we need to use the port-forward concept as shown below:

By default, nginx runs on 80 port internally. We are port forwarding that 80 as 8080 (any available port number) for the outside world. Now we can access nginx homepage using http://localhost:8080 as shown below:
If we want to delete our nginx pod in a declarative way, please use this command
kubectl delete -f nginx.yaml
4. Create a Kubernetes Pod with our own Docker image
In the previous section, we created a nginx Pod using a docker image available in the Dockerhub environment. In this section, we are going to create our own docker image, push it to Dockerhub and create a Pod for this image in our Minikube cluster.
We will implement a standard “Hello World” example using Python programming language with Flask framework.
4.1. Create a python application
Create a Python application to expose an endpoint as REST API as shown below
from flask import Flask
app = Flash(__name__)

@app.route("/hello", methods=['GET'])
def helloworld():
    return "Hello World."

app.run(host="0.0.0.0", port=9090)
Here we have created a helloworld python function and exposed it as /hello endpoint.
Create a requirements.txt file to install flask library in our docker image
flask
4.1. Create Dockerfile
Create a Dockerfile as shown below
FROM python:3.9.14-slim
RUN mkdir /app
WORKDIR /app
ADD . /app
RUN pip install -r requirements.txt
CMD ["python","helloworld.py"]
Here we have configured python 3.9.14 slim version as our python environment.
4.3. Create image and push to Dockerhub
Here we are going to create our own helloworld docker image. My current folder name helloworld, which contains the following content:
- helloworld.py
- requirements.txt
- Dockerfile
To do this exercise, we need to signup with Dockerhub environment. My Dockerhub username is rambabuposa.
We need to run the following commands from helloworld folder
To create a helloworld docker image with version 1.0, please run this command
docker build -t helloworld:1.0 .
Execute the following command to check whether your image is created or not
docker images
To create a tag for helloworld image to push it into Dockerhub environment, please run this command
docker tag helloworld:1.0 rambabuposa/helloworld:1.0
Here rambabuposa is my Dockerhub username.
Now login to Dockerhub with your login credentials to push our docker image
docker login --username=rambabuposa
Then enter the password as shown below
Rambabus-MBP:helloworld ram$ docker login --username=rambabuposa
Password:
Login Succeeded

Logging in with your password grants your terminal complete access to your account.
For better security, log in with a limited-privilege personal access token. Learn more at https://docs.docker.com/go/access-tokens/
Now push our helloworld docker image to Dockerhub using the following command
docker push rambabuposa/helloworld:1.0
Rambabus-MBP:helloworld ram$ docker push rambabuposa/ram-helloworld:1.0
The push refers to repository [docker.io/rambabuposa/ram-helloworld]
e6c07fb068dd: Pushed
105176bfd2bd: Pushed
c4488c216d7d: Pushed
da32bfd482fc: Mounted from library/python
6d8788bedbf9: Mounted from library/python
c9e151a52aaa: Mounted from library/python
8fb064dfbf5f: Mounted from library/python
18f9b4e2e1bc: Mounted from library/python
1.0: digest: sha256:375b723bfb54f135d6744ca4af45bbc06fd7849c454b5a4ecb1d391fb9f8a18d size: 1995
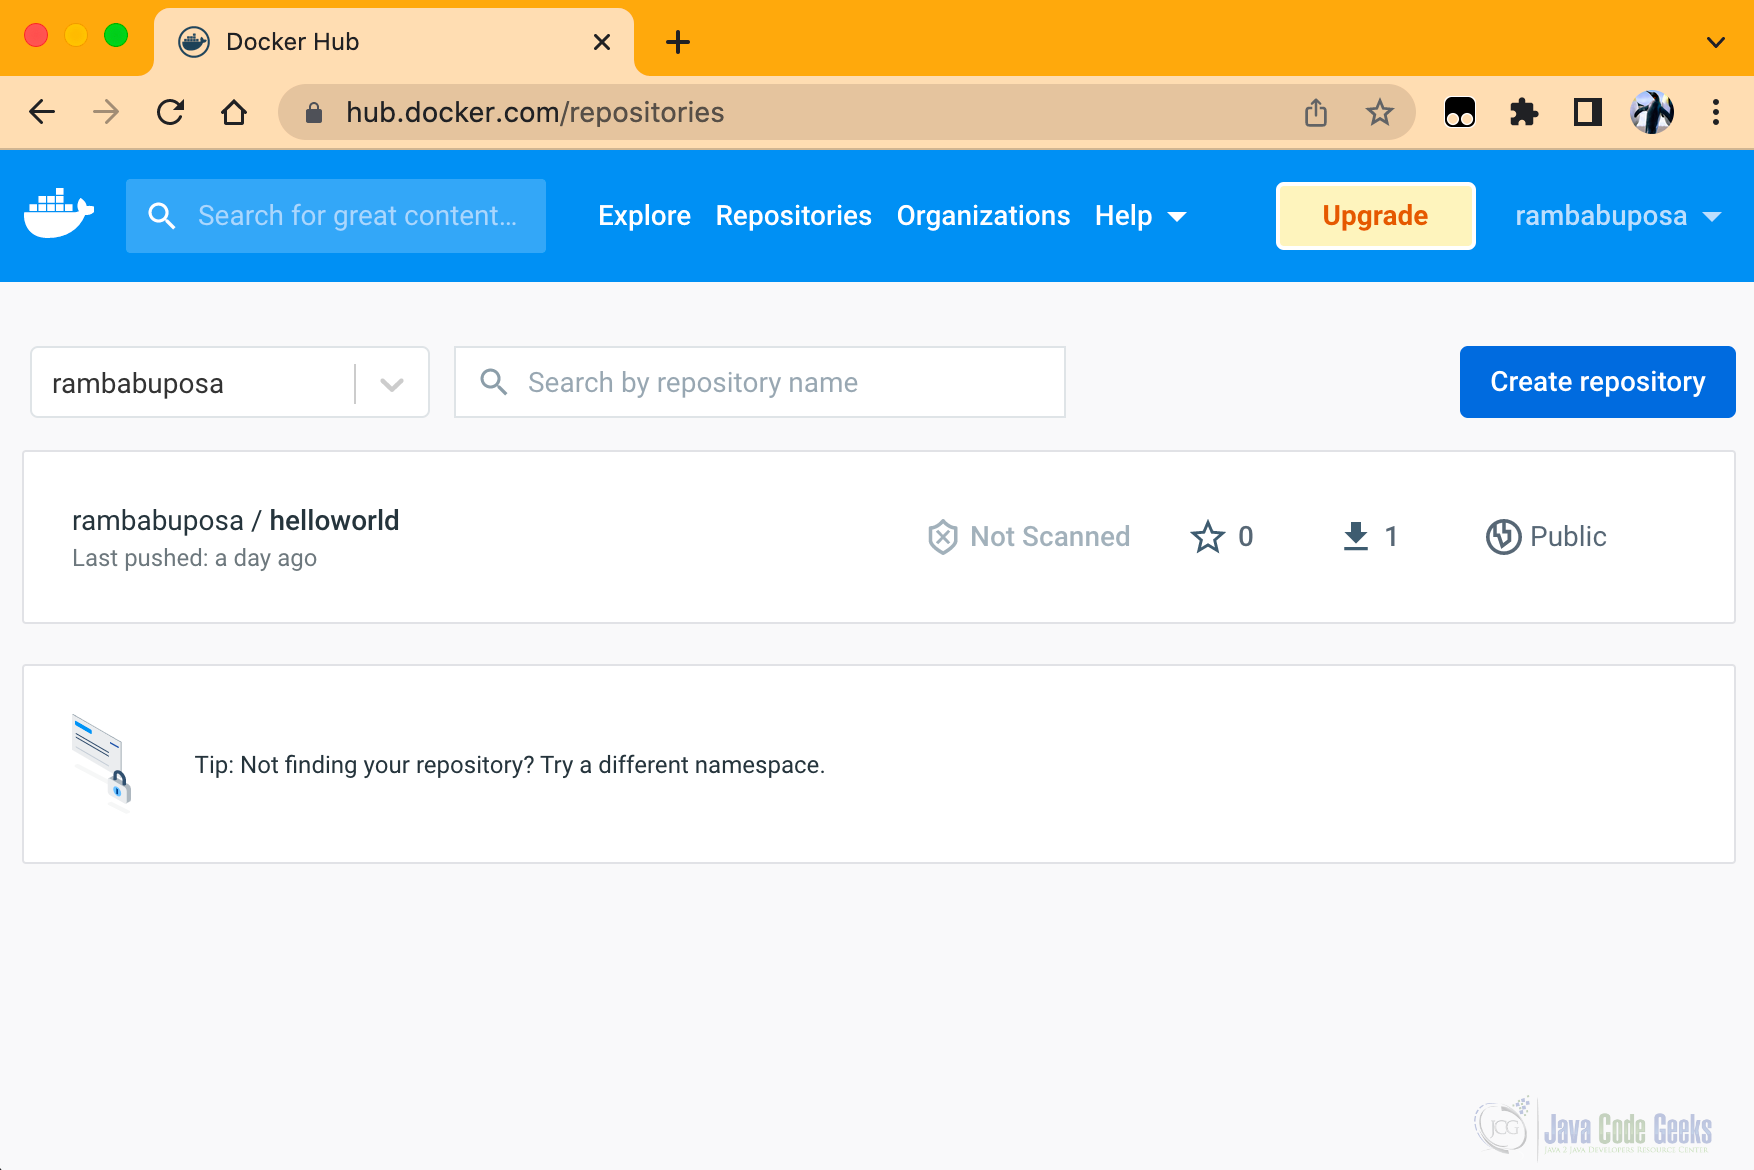
If we login to Dockerhub from the browser and click on the “Repositories” option from the top menu, we can see our newly created docker image as shown below:
4.4. Create a Kubernetes Pod using our Docker image
Now our helloworld docker image is ready in Dockerhub environment. It’s time to create a YAML file to create a Pod and access our Python REST API.
Please create a helloworld.yaml or helloworld.yml file under same helloworld directory where we have created our docker image.
apiVersion: v1
kind: Pod
metadata:
  name: helloworld
spec:
  containers:
  - name: helloworld
    image: rambabuposa/helloworld:1.0
Please execute the following command from helloworld command to create our new Kubernetes pod.
kubectl apply -f nginx.yaml
Please execute the following command to expose our helloworld REST API to outside world.
kubectl port-forward helloworld 9090:9090
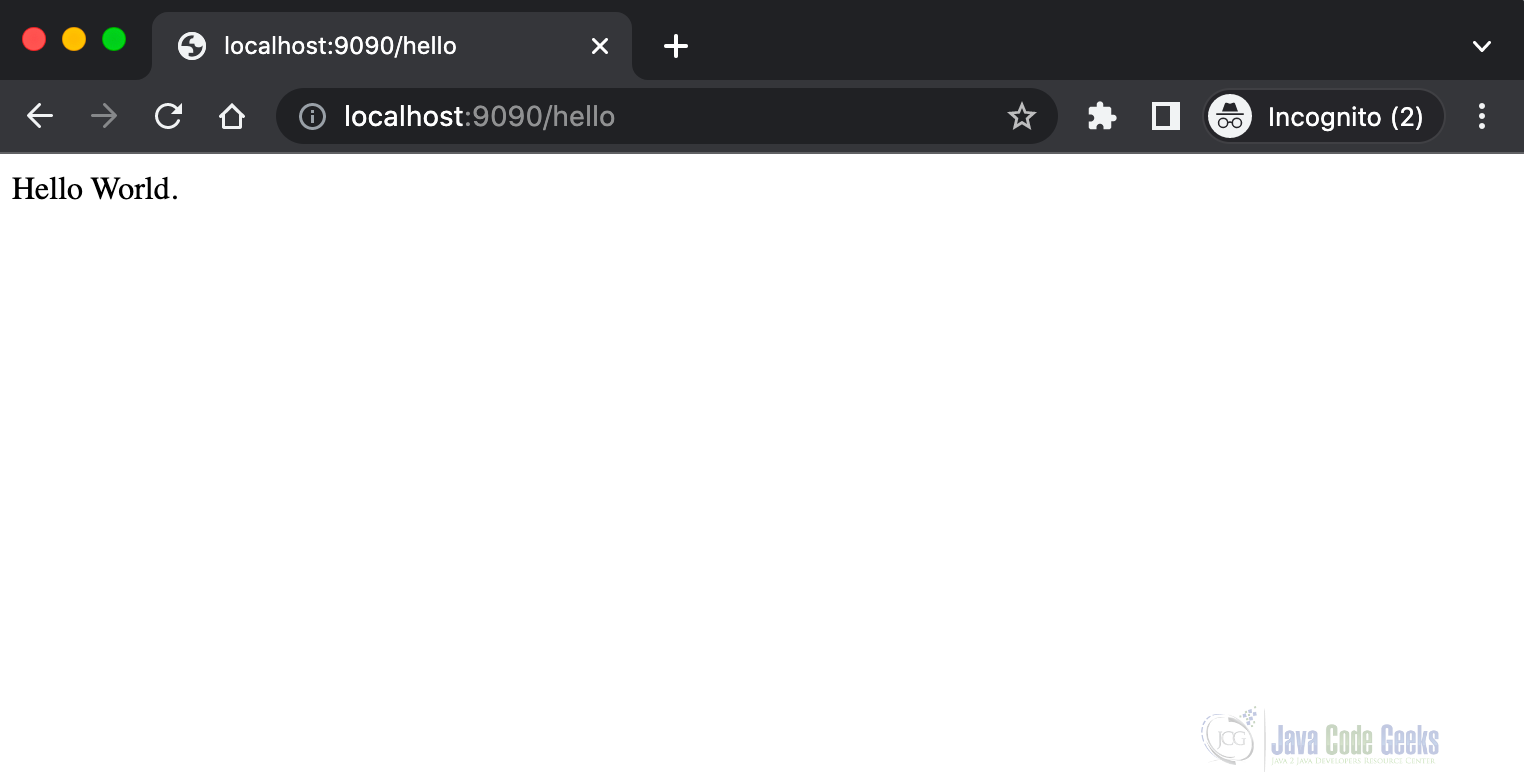
Access our helloworld REST API from your favourite browser
That’s it about Kubernetes Pod object. We will meet in my next post with another important concept of K8S. Happy Learning!
