1. Introduction
In this lesson, we will cover the basics of Web Development using Scala. We will make use of Play framework to construct RESTful APIs which can be used in any web application to perform various actions on resources of your application.
We will make sure that the project can be run as is and we will start from scratch so you can follow along each step we perform to make the complete lesson. As we are using Play 2 Framework with Scala, there exist frameworks for other languages as well like Spring for Java. If you are a Java Developer, we recommend you to read Scala Tutorial for Java Developers too.
2. Creating a Play framework app
To start making applications with Play Framework, you must install it correctly. Follow the installation guidelines for the same on Play Framework Installation guide page for this. If you have MacOS and have homebrew installed, then you can do:
Install activator
brew install typesafe-activator
This will install Typesafe Activator. This will allow you to use ‘activator’ commands instead of play commands. We will run the following command to create a new application:
Make new Scala application
activator new jcg-play-scala-app play-scala
With the above command, the activator will start creating a new Vanilla project which will be based on Play Framework in Scala. The play-scala tells the activator to make a plain new project based on Scala and not Java. Just for the knowledge, if we had to make the same project in Java, we would have used the following command:
Make new Java application
activator new jcg-play-scala-app play-java
Once the Scala application is created, we can either use activator-based commands to run the project or we can make use of sbt itself. It’s also worth noting that most commands you would use are available directly from sbt. Personally, I would only use activator to create a blank project. From then on, I do day-to-day tasks from sbt. (E.g. ‘sbt ~run’ to run the play app in dev mode, with the ~ so it is reloaded every time a file changes.). To run the application, we can run the following command to first enter into the sbt console:
Enter into the SBT console
sbt
When we run the above command, we will see a lot of libraries being downloaded:
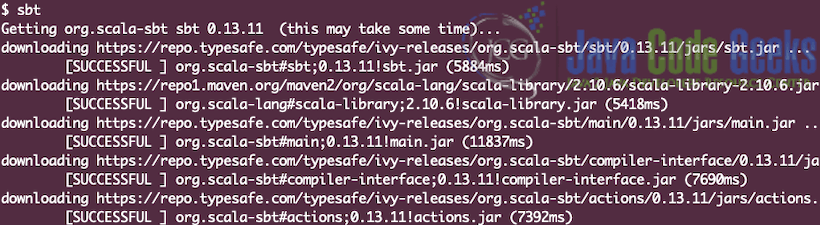
Once we are inside the sbt console, we can simply run the following command to run the project:
Run the app
run
We will see the following output when we run the above command:
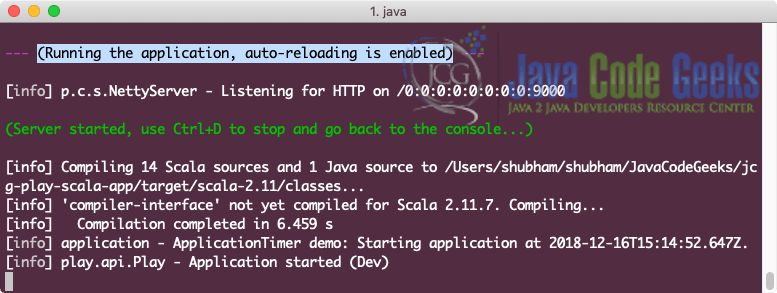
Now, we can open the application on our local machine on Port 9000 and we will see the following page:
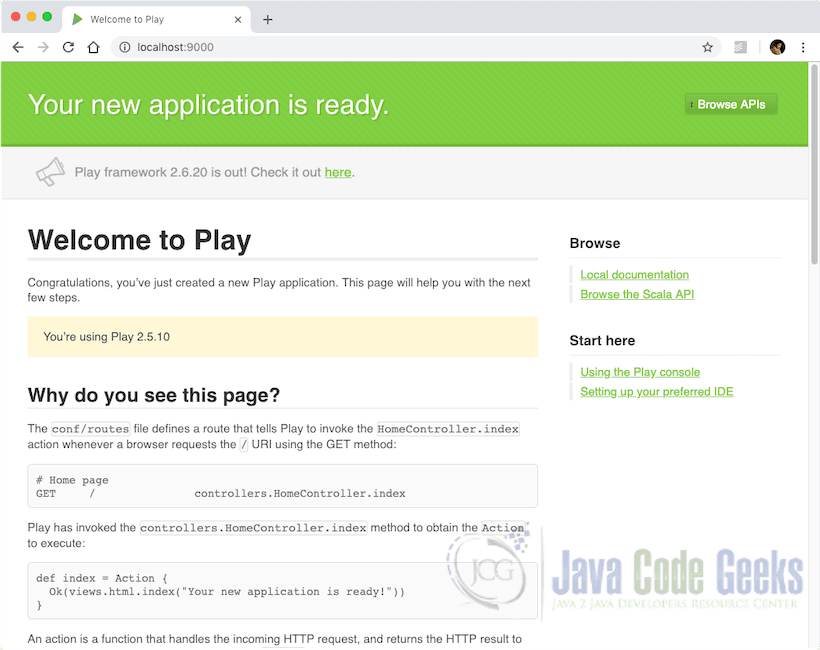
Excellent, we have created a brand new Scala application which we are able to run locally!
3. Understand Project structure
We were able to create a running Play Framework application and run it locally on (default) Port 9000. It is time we understand how this project is structured with Scala and Play. Here is the current project structure when we open the project using the IntelliJ IDEA IDE:
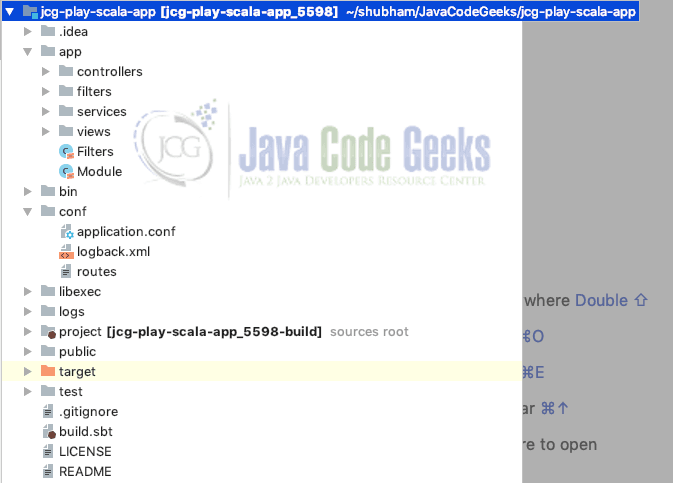
All of these folders and configuration was done by the activator tool when it built this Vanilla application in Scala. The anatomy of the application can be shown here:
app                      → Application sources
 └ assets                → Compiled asset sources
    └ stylesheets        → Typically LESS CSS sources
    └ javascripts        → Typically CoffeeScript sources
 └ controllers           → Application controllers
 └ models                → Application business layer
 └ views                 → Templates
build.sbt                → Application build script
conf                     → Configurations files and other non-compiled resources (on classpath)
 └ application.conf      → Main configuration file
 └ routes                → Routes definition
public                   → Public assets
 └ stylesheets           → CSS files
 └ javascripts           → Javascript files
 └ images                → Image files
project                  → sbt configuration files
 └ build.properties      → Marker for sbt project
 └ plugins.sbt           → sbt plugins including the declaration for Play itself
lib                      → Unmanaged libraries dependencies
logs                     → Standard logs folder
 └ application.log       → Default log file
target                   → Generated stuff
 └ scala-2.10.0
    └ cache
    └ classes            → Compiled class files
    └ classes_managed    → Managed class files (templates, ...)
    └ resource_managed   → Managed resources (less, ...)
    └ src_managed        → Generated sources (templates, ...)
test                     → source folder for unit or functional tests
Please feel free to read the complete anatomy of the Play Framework application in the documentation.
4. Adding RESTful endpoints
In this section, we will start looking at adding RESTful endpoints in our application. For demonstration purposes, we will make one of each endpoints with following HTTP verbs:
- GET
- POST
- PUT
- DELETE
We selected only two HTTP endpoints as working for the other verbs is extremely similar to the above verbs. We will show some tweaks which are generally used in our web application for these methods. Let’s get started.
4.1 Working with GET requests
We will see how we can add a simple GET endpoint to the HomeController in the controllers package. Let’s add a small code snippet:
Define GET handler method
def hello(name: String) = Action {
  Ok("Hello " + name)
}
Adding an endpoint is not complete as of now. Play framework relies on adding endpoints in a route file which is present at the following path:
Rout file path
<project-directory>/conf/routes
For the above endpoint, we added the following path in the routes file:
Add GET route
GET /hello controllers.HomeController.hello(name: String)
This file, as it seems maps a method we define in Controllers to a path defined by the routes file. When we run this route, we will be able to visit this endpoint in our browser by passing a query parameter. Here is the output when we opened the respective URL in our browser:

Clearly seen, the Play framework applications run on Port 9000.
4.2 Working with POST requests
We are going to do multiple good things in this section, like:
- Add a new model in our project
- Add a new view to be rendered
- Pass multiple parameters in the URL
- Render dynamic view based on passed parameters
Doesn’t above points sounds interesting? Let’s get started with each step by one at a time. We will add a new model in our project under a new package ‘model’ and name it User:
Adding new model
package model
case class User(age: Int, name: String)
After adding the above model, we can add a new view with the following views elements:
Adding new View
@(playUser: model.User)
@main("JavaCodeGeeks: Scala Web Development") {
 @play20.welcome("My name is " + playUser.name + ". My age is " + playUser.age)
}
Please note that we reference an external model in the above view. We have saved the above view with name ‘user.scala.html’. As a next step, we define a new route in the routes file with the following snippet:
Adding POST route
# POST request endpoint
POST /postdata controllers.HomeController.addData(age: Int, name: String)
Finally, let’s add the concerned method in the HomeController in the controllers package:
POST method Handler in Controller
def addData(age: Int, name: String) = Action {
  var user = User(age, name)
  Ok(views.html.user(user))
}
This means that the method is completely unknown to the fact that it is mapped to a GET or a POST endpoint. This is one of the good things in play which allows us to separate the functionality completely from the view logic. Please note that you won’t be able to run this method in a browser as this is a POST request. We run this as a POST request in Postman which is an excellent REST client and got the following output for the same:
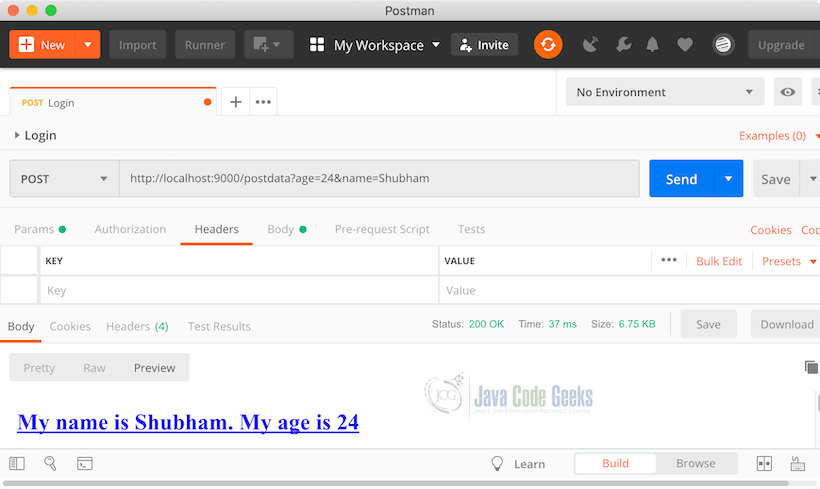
This means that the correct output was rendered. Feel free to add more endpoints as you develop your application and get yourself known to more elements which Play framework has to offer.
5. Play Framework vs. Spring
The Play Framework offers the following quick overview, but with the exception of the Groovy template engine (which you can get in Spring MVC if you want), Spring seems to offer all the same features and more…
- Fix the bug and hit reload! Edit your Java files, save, refresh your browser and see the results immediately! No need to compile, deploy or restart the server. Spring does this, which can get annoying.
- Stateless model Play is a real “Share nothing” system. Ready for REST, it is easily scaled by running multiple instances of the same application on several servers. Typical Spring applications have a stateless application tier; it’s not purely RESTful unless you want to be, but Spring is “ready for REST”.
- Efficient template system A clean template system based on Groovy as an expression language. It provides template inheritance, includes and tags. Spring uses Java, but Groovy is an option too.
- Resolve errors quickly When an error occurs, play shows you the source code and the exact line containing the problem. Even in templates. Spring does this as well.
- All you need to create a cool web application Provides integration with Hibernate, OpenID, Memcached… And a plugin system. Spring integrates with everything and more.
- Pure Java Code with Java, use any Java library and develop with your preferred IDE. Integrates nicely with Eclipse or NetBeans. Spring is pure Java as well.
- Really fast Starts fast and runs fast! Subjective, but Spring is pretty quick.
When we look at above points, it seems that Spring Framework is an equally good choice when it comes to making a web project with a JVM language.
6. Request flow in a Web app in Play
A play framework app is a simple Java application that starts listening at a given port. Listening is done using Netty library which understands different types of network protocols (most importantly HTTP). Once Netty knows what’s happening it will give control to the Play framework.
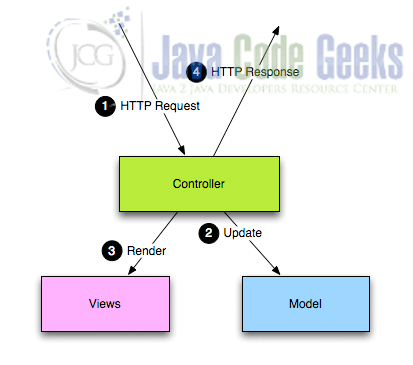
The Play Framework will then use the Global file in combination with the Routes to determine what Action to invoke. The play framework is more of a RESTful framework rather than a typical template based frameworks like JSP, JSF etc. with a request lifecycle concept, although it does have template support as well. The basic idea is to have the interaction with server based on pure data like JSON and most of the code to update the DOM structure is written in JS and is done on client-side only which is actually more flexible and a lot simpler and efficient. Taken from the play official documentation, here is the request flow described in an image:
7. Alternative Scala Web Development frameworks
In this lesson, we used the Play framework which allows Groovy templates to be used for views. Other than Play, there are many other Scala framework which can be used for web development. Some of them are:
- Finch: It is described as a Scala combinator library for building Finagle HTTP services. This is an interesting and an open-source framework to develop web services.
- Akka HTTP is a web framework which is available for both Java and Scala. Its other modules are equally popular.
- Chaos is known to be a lightweight framework for writing REST services in Scala
While there are many more frameworks to be used in Scala for web service development, it is to be noted that all of these strictly depends on the use-case and the type of product needed.
8. Conclusion
In this lesson, we covered the basics of Web Development using Scala. We made use of Play framework to construct RESTful APIs which can be used in any web application to perform various actions on resources of your application. We constructed some views using Groovy which is supported by the Play framework for rendering and we also demonstrated how we can render Scala models in Groovy-based templated by passing model data from our Controllers to the views mapped with a router file.
We also looked at the request lifecycle management in Play framework along with some of the alternative frameworks you should look at when it comes to development with Scala. It is important to note that if you do not want to stick to Scala and is been given a liberty to select another language (or at least another JVM language), many people will recommend using Java along with Spring Framework due to their never-ending support from community and introduction of Spring Boot which has been an amazing support to a developer due to its Template pattern implementations which has reduced a lot of boilerplate code when starting and setting up a new project.
Please share your feedback in the comments below for some of the frameworks you give a try.
10. Download the Source Code
This was an example of Scala Web Development.
You can download the full source code of this example here: Scala Web Application
