Vaadin OSGI Example
OSGI: Open Services Gateway initiative, is an open standards organization that make the OSGi specification that describe a modular system and a service platform for Java, OSGi components comes in the forms of bundles for deployment, can be remotely installed, started, stopped, updated, and uninstalled without requiring a reboot, in this example I am going to create a Vaadin OSGi bundle and deploy it on an OSGi container.
With OSGi you can have multiple Vaadin applications of different versions on the same container or you can have an application that is formed with multiple bundles like plug-ins and start or stop each module without affect the other parts of your program, whit this module architecture you can make applications less dependent of the Classpath. To run OSGi applications you need a container in our case we are going to use a ready to use container then create a simple Vaadin application and deploy it on that container.
1. The tools
- Java JDK 8
- Latest Eclipse Mars for JEE
- Apache Karaf 4.0.4
- Eclipse Libra
- Vaadin 7.6.1
2. Introduction
The OSGi container is an application capable of run OSGi bundles, it manages the lifecycle of the bundles and take care of the details of all applications running on the container, in this case Apache Karaf is my container and is where the Vaadin application is going to run, Eclipse Libra is a plug-in for Eclipse to help me create the Vaadin web application Bundle project. I am going to deploy the Vaadin web application on Karaf and see how it handles the lifecycle of the Vaadin Web Application.
3. Prerequisites
- JDK installed
- Eclipse Mars installed and working
- Vaadin Plugin installed
4. Download Apache Karaf
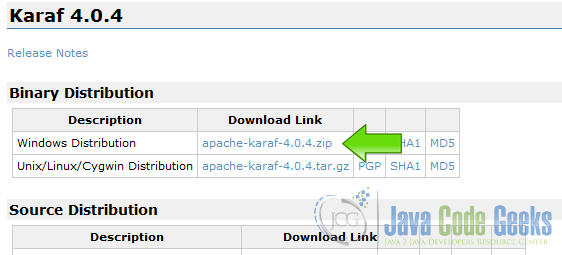
Go to Apache Karaf and get apache-karaf-4.0.4.zip.
5. Install Apache Karaf
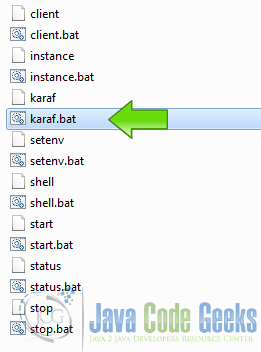
Uncompress the zip file into a well know location on your computer and you are ready to launch Karaf because is a batteries included OSGi container. Into the folder where you unzip Karaf there is a bin folder and inside it is the executable for Karaf, double click on it.
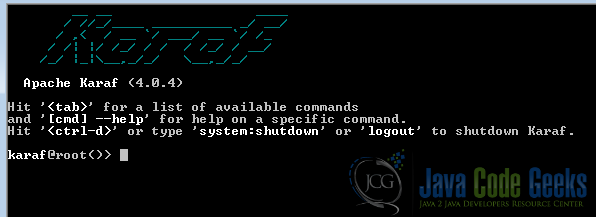
After you launch Karaf you get into the Karaf console.
In the Karaf console do the following command
Web console
root@karaf> features:install webconsole
with that command we install a web console that provides a graphical overview of the Karaf runtime.
you can access the web console from the uri http://localhost:8181/system/console
Now do the following command
War support
karaf@root()> feature:install war
this command install the WAR support to use war files as OSGi bundles.
Now we are done configuring Karaf to run our application.
6. Install Eclipse Libra
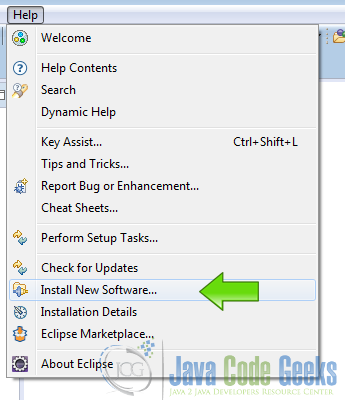
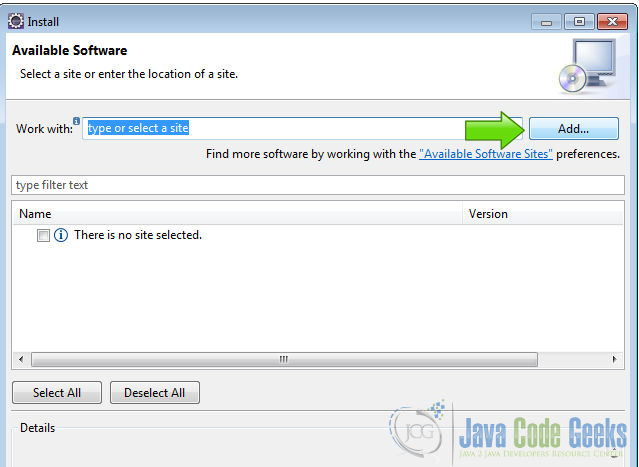
Launch Eclipse and go to Help -> Install New Software…
Now click on Add button
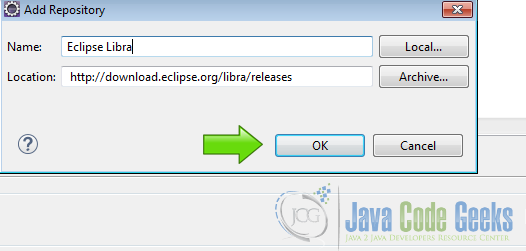
In Add repository window fill the name with a easy to remember name and in the Location put http://download.eclipse.org/libra/releases and click ok
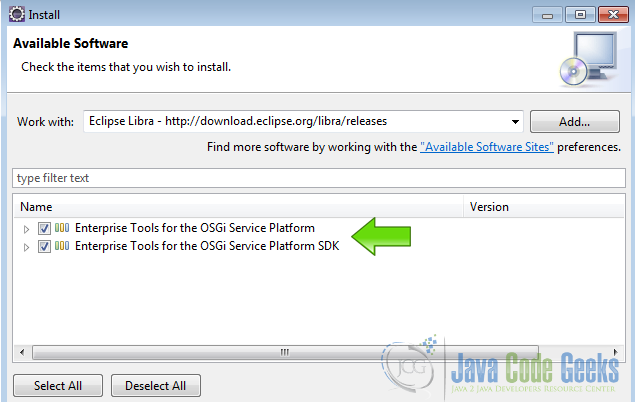
Select both packages and click finish
Accept the user agreement and follow the installation process, after that reboot Eclipse and we are done installing Eclipse Libra
7. Create a Vaadin Project
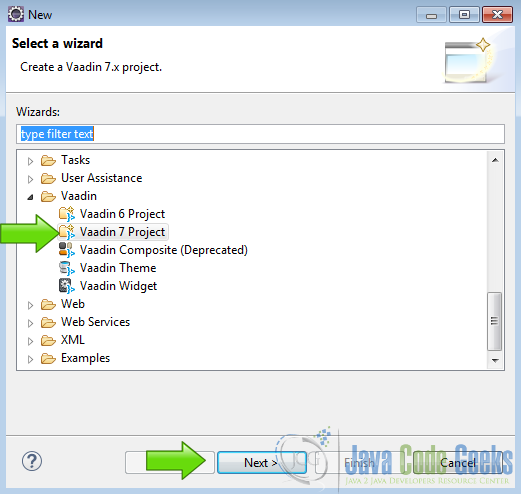
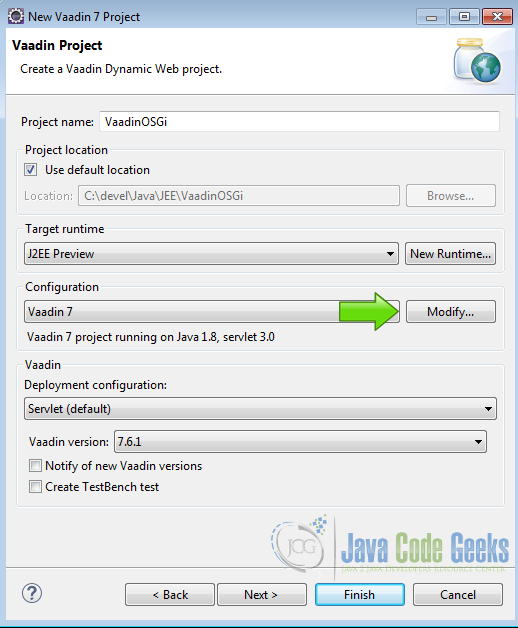
From File -> New -> Other…, select Vaadin 7 Project and click next
Now name the project and click modify
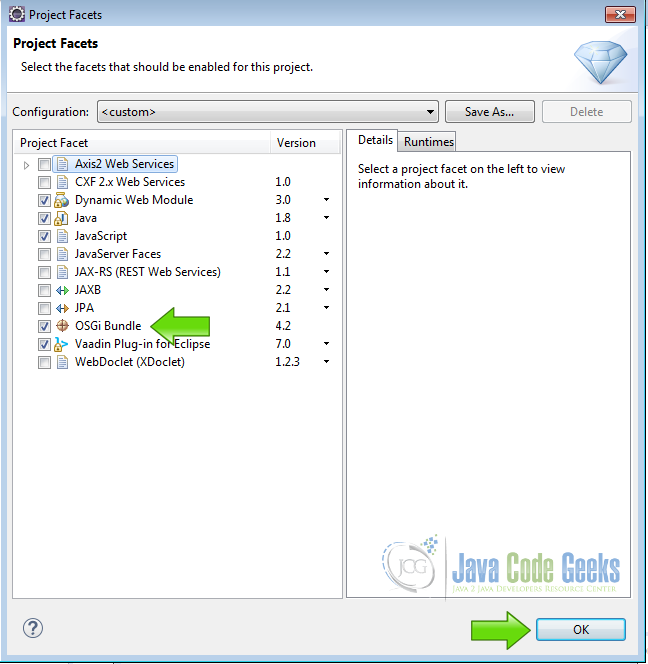
On the Project Facets add “OSGi Bundle” option and hit OK
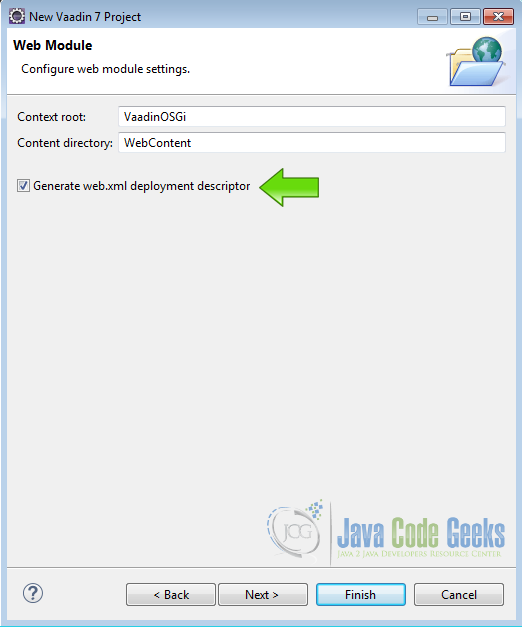
Hit next twice and check the option “Generate web.xml deployment descriptor”
Click finish and we have our brand new Vaadin project with OSGi support.
8. Edit MANIFEST.MF
Edit the file -> WebContent -> META-INF -> MANIFEST.MF and make it as follows
MANIFEST.MF
Manifest-Version: 1.0
Bundle-ManifestVersion: 2
Bundle-Name: VaadinOSGi
Bundle-SymbolicName: VaadinOSGi
Bundle-Version: 1.0.0.qualifier
Bundle-ClassPath: WEB-INF/classes/,
 WEB-INF/lib/vaadin-server-7.6.1.jar,
 WEB-INF/lib/vaadin-shared-7.6.1.jar,
 WEB-INF/lib/jsoup-1.8.3.jar,
 WEB-INF/lib/vaadin-client-compiled-7.6.1.jar,
 WEB-INF/vaadin-themes-7.6.1.jar,
 WEB-INF/vaadin-widgets-7.6.1.jar
Bundle-Vendor: JavaCodeGeeks
Bundle-RequiredExecutionEnvironment: JavaSE-1.8
Import-Package: javax.el,
 javax.servlet,
 javax.servlet.http,
 javax.servlet.jsp,
 javax.servlet.jsp.el,
 javax.servlet.jsp.tagext
Web-ContextPath: /VaadinOSGi
The MANIFEST.MF is used by the OSGi container and have all relevant information about our bundle, the important point for Vaadin here is the Bundle-ClassPath, where you put the libraries used by Vaadin, just because this is a minimal example only a few libraries are needed.
9. Edit web.xml
Edit the web.xml descriptor in WebContent -> WEB-INF folder of our project and modify as follows
web.xml
<?xml version="1.0" encoding="UTF-8"?>
<web-app xmlns:xsi="http://www.w3.org/2001/XMLSchema-instance" xmlns="http://java.sun.com/xml/ns/javaee" xsi:schemaLocation="http://java.sun.com/xml/ns/javaee http://java.sun.com/xml/ns/javaee/web-app_3_0.xsd" id="WebApp_ID" version="3.0">
  	<display-name>VaadinOsgi</display-name>
  	<servlet>
    	<servlet-name>VaadinOsgi</servlet-name>
    	<servlet-class>
			com.vaadin.server.VaadinServlet
		</servlet-class>
    	<init-param>
      		<param-name>UI</param-name>
      		<param-value>com.example.vaadinosgi.VaadinosgiUI</param-value>
    	</init-param>
  	</servlet>
  	<servlet-mapping>
    	<servlet-name>VaadinOsgi</servlet-name>
    	<url-pattern>/*</url-pattern>
  	</servlet-mapping>
	<context-param>
	  <description>Vaadin production mode</description>
	  <param-name>productionMode</param-name>
	  <param-value>true</param-value>
	</context-param>
</web-app>
Here we specify the entry point of our project also the servlet class inherited by our entry point class and set production mode for our application to avoid push errors, because is not supported by OSGi at the moment.
10. Compile the Vaadin Theme
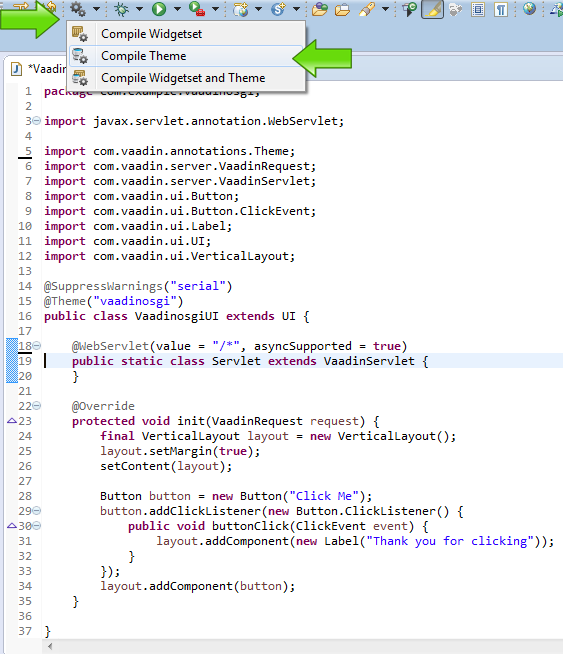
Is recommended in OSGi environments that you avoid the SCSS compiler that ships with Vaadin thats why we precompile the styles.css. In the Vaadin toolbar button choose the option “Compile Theme”.
in the Eclipse console you should get the output
Compile theme output
Compiling theme vaadinosgi
Compilation of theme vaadinosgi done in 3985 ms
11. Run Web Application on server
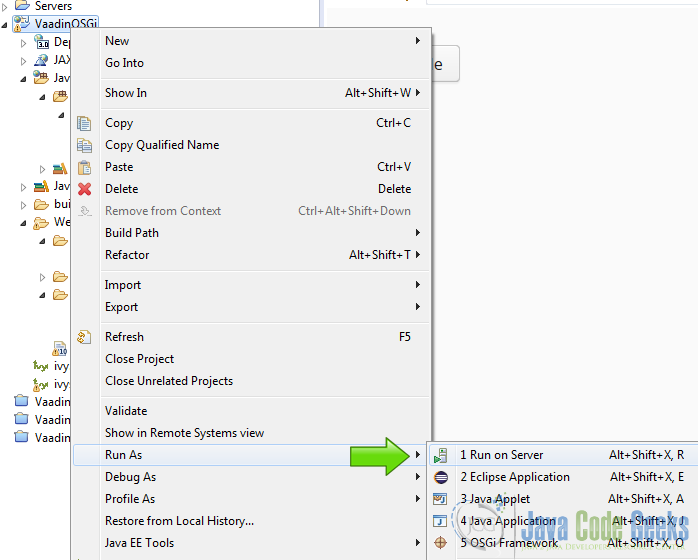
Right click on the project folder and choose the option Run As -> 1 Run On Server
with this step you ensure your application is working, everything must work before you drop your application on a OSGi container, I’m using J2EE Preview to test this simple application.
12. Export War file
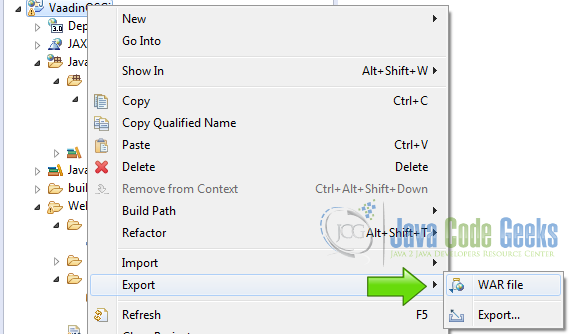
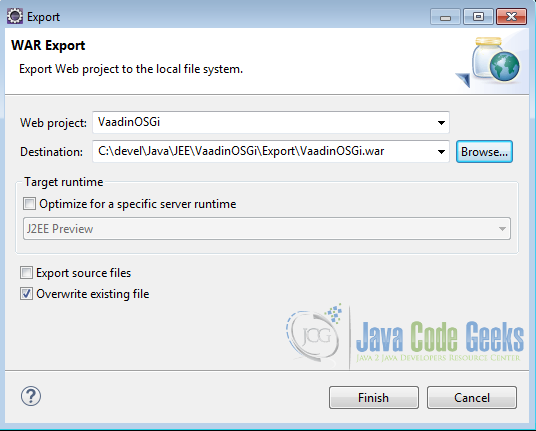
Now we need to export the war file to put it on the OSGi container, right click on the project folder and click on the option Export-> War File
now choose a well know location on your hard disk and click finish
13. The karaf web console
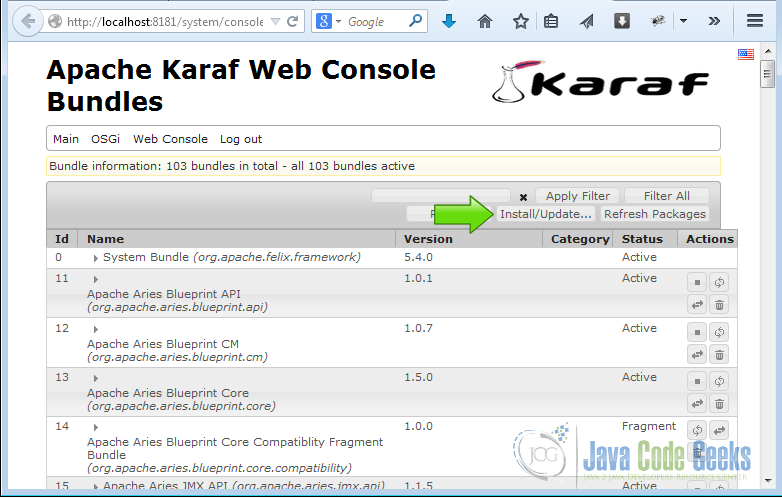
Run Karaf if not running as previously mentioned and open your browser at http://localhost:8181/system/console/bundles, click on the button Install/Update… to install our war bundle, remember war files can work as a bundle here just because we installed Karaf war support.
14. Install the Vaadin bundle
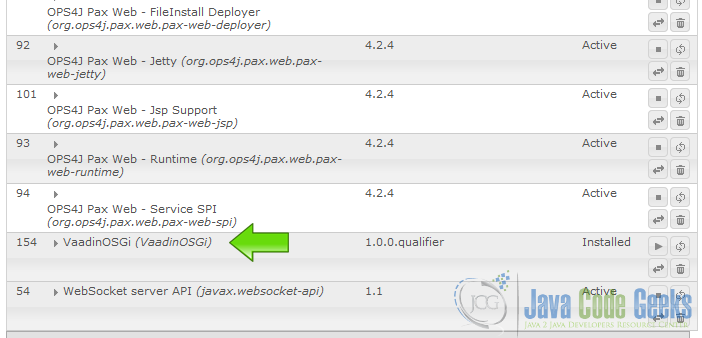
Choose the war file and then click Install or update, And now our war file should be on the bundles list, just locate it scrolling down
15. Run the bundle
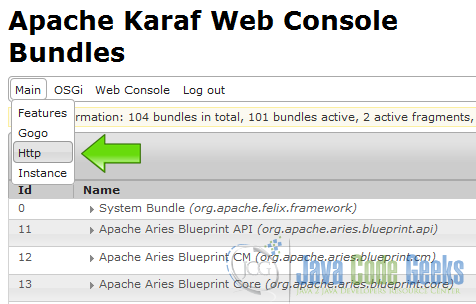
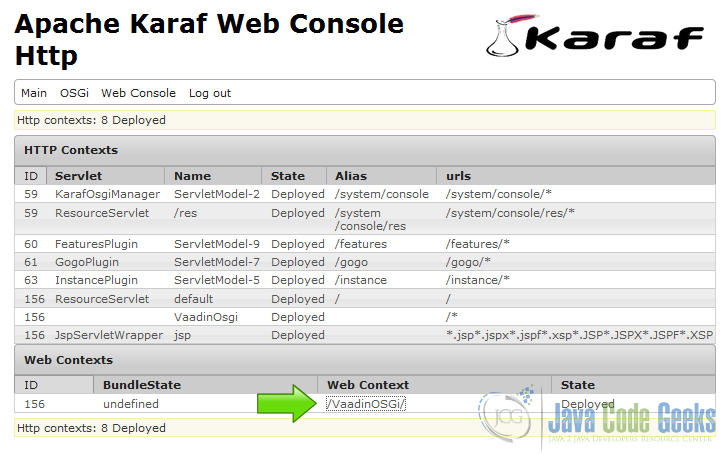
Click on the arrow button on our bundle application row of the bundles list and it should change the lifecycle state from Installed to Active, then go to menu Main option Http to see the Karaf web contexts
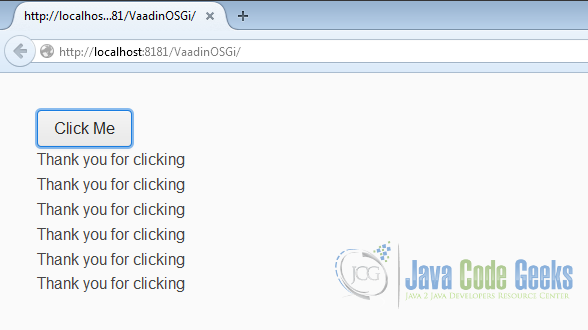
The example application must be in the list of http contexts and you can run it clicking on its web context link
the Vaadin bundle should be running on the OSGi Container
If the application is not running or something went wrong you can check the errors on the Karaf log, placed in the [Karaf Install Directory] -> data -> log -> karaf.log
16. Conclusion
OSGi could be an option to deploy Vaadin applications of different version, sometimes on the real world you get a programs versions labyrinth, each with different requirements and a clean solution for these cases could be OSGi.
17. Download the Source Code
You can download the Eclipse project here: VaadinOSGi

