How to Install Tomcat on Ubuntu Linux
Apache Tomcat is a web server and servlet container that is used to serve Java applications. A servlet is a Java technology-based Web component, managed by a container, that generates dynamic content.
1. The tools
- Ubuntu Linux 16.04
- Java JDK
- Apache Tomcat
2. Introduction
In this example we are going to install on Ubuntu Linux:
Java JDK 8.
Tomcat Server.
We are going to create a script to make Tomcat start with the system and easily start and stop the Tomcat service. Edit the tomcat users to access the Tomcat management console.
3. Prerequisites
- Ubuntu Linux installed
4. Download the JDK
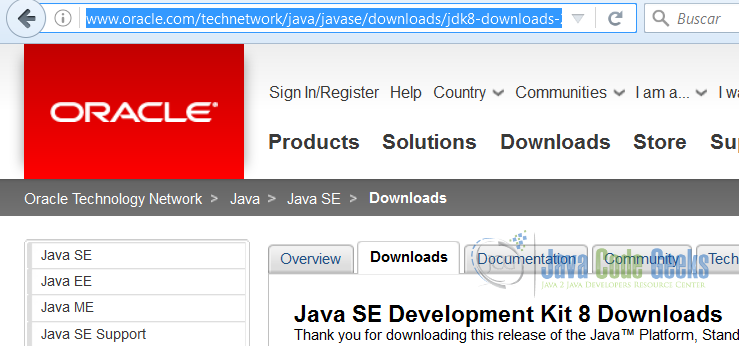
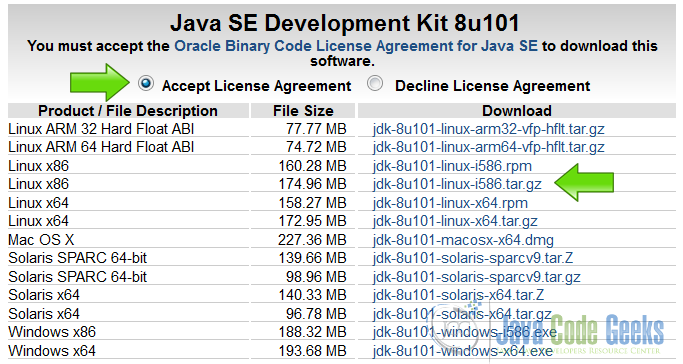
Go to the page JDK Download
Accept the end user Select the JDK to download:
5. Download Tomcat
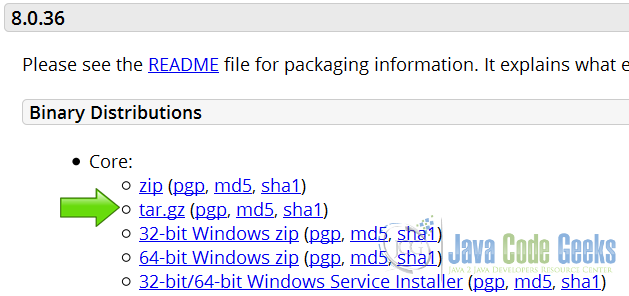
Go to the page Tomcat download and download the tomcat server.
6. Install the JDK
Copy the JDK to the /opt directory.
Copy the JDK
sudo cp /home/Downloads/jboadas/jdk-8u77-linux-i586.tar.gz /opt/
Extract the JDK compressed file.
Extract the file
sudo tar xvf jdk-8u77-linux-i586.tar.gz
Update the alternatives to make Ubuntu aware of the JDK installation.
Update alternatives
sudo update-alternatives --install "/usr/bin/java" java "/opt/jdk1.8.0_77/bin/java" 1
sudo update-alternatives --install "/usr/bin/javac" javac "/opt/jdk1.8.0_77/bin/javac" 1
sudo update-alternatives --set java /opt/jdk1.8.0_77/bin/java
sudo update-alternatives --set javac /opt/jdk1.8.0_77/bin/javac
After we update the alternatives, we are going to check the installation.
Execute the command:
Java Version
java -version
and you should get the output:
7. Install Tomcat server
We are going to extract the Tomcat server in the /opt directory.
Extract Tomcat
    sudo mkdir /opt/tomcat
    sudo tar xvf apache-tomcat-8.0.33.tar.gz -C /opt/tomcat --strip-components=1
Create a Tomcat group to use with the server
Tomcat group
sudo groupadd tomcat
Create a Tomcat user to avoid use the root user with the Tomcat server
Tomcat user
sudo useradd -s /bin/false -g tomcat -d /opt/tomcat tomcat
Update the permissions of the Tomcat server to use with the new user and group.
Update permissions
cd /opt/tomcat
sudo chgrp -R tomcat conf
sudo chmod g+rwx conf
sudo chmod g+r conf/*
sudo chown -R tomcat work/ temp/ logs/
Create a Tomcat start script.
Init Tomcat script
vi /etc/init/tomcat.conf
The tomcat.conf script is used by the operative system to start the Tomcat service at boot time. This script is used to start and stop the service when is needed.
tomcat
description "Tomcat Server"
  start on runlevel [2345]
  stop on runlevel [!2345]
  setuid tomcat
  setgid tomcat
  env JAVA_HOME=/opt/jdk1.8.0_77/jre/
  env CATALINA_HOME=/opt/tomcat
  exec $CATALINA_HOME/bin/catalina.sh run
start on runlevel [2345] Starts the service on these run levels
stop on runlevel [!2345] Stops the service on these run levels
setuid tomcat Sets the tomcat user.
setgid tomcat Sets the tomcat gtroup.
env JAVA_HOME=/opt/jdk1.8.0_77/jre/ Exports the Java home.
env CATALINA_HOME=/opt/tomcat Exports the tomcat home.
exec $CATALINA_HOME/bin/catalina.sh run Runs the server.
8. Starts the Tomcat server
Go to the opt/tomcat/bin directory and execute the following command.
console
./catalina.sh start
You should see the following output
console
Using CATALINA_BASE:   /opt/tomcat
Using CATALINA_HOME:   /opt/tomcat
Using CATALINA_TMPDIR: /opt/tomcat/temp
Using JRE_HOME:        /usr
Using CLASSPATH:       /opt/tomcat/bin/bootstrap.jar:/opt/tomcat/bin/tomcat-juli.jar
Tomcat started.
root@linux:/opt/tomcat/bin#
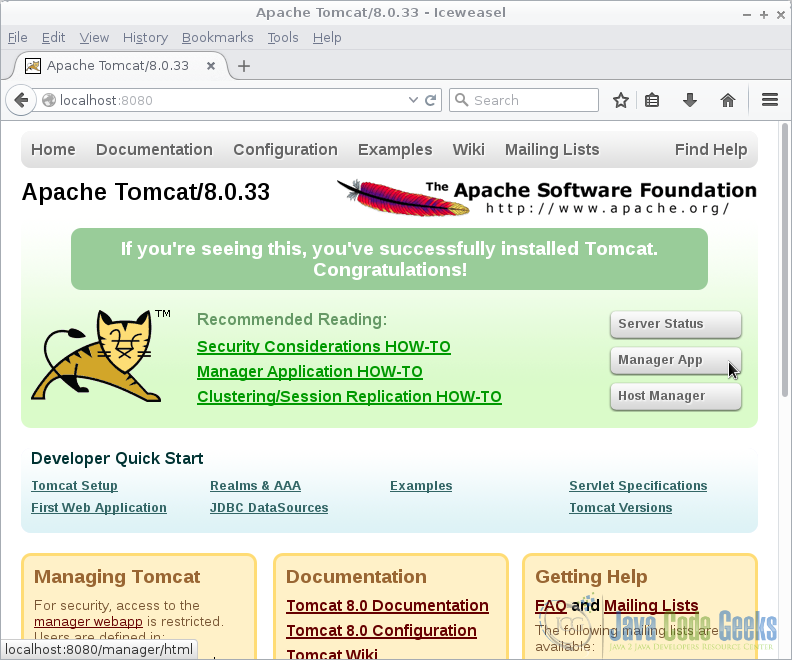
Now its time of test our server. Open your browser in the URL http://localhost:8080 and you should see the following page.
9. Activates the manager
To access the Tomcat manager we need to create a user with the privileges to do that. Edit the file /opt/tomcat/conf/tomcat-users.xml
In this file we are going to define the users to access the tomcat manager.
tomcat-users.xml
<?xml version='1.0' encoding='utf-8'?>
<tomcat-users xmlns="http://tomcat.apache.org/xml"
              xmlns:xsi="http://www.w3.org/2001/XMLSchema-instance"
              xsi:schemaLocation="http://tomcat.apache.org/xml tomcat-users.xsd"
              version="1.0">
	<user username="admin" password="admin" roles="manager-gui,admin-gui"/>
</tomcat-users>
user username="admin" password="admin" roles="manager-gui,admin-gui"
Here we are defining a user admin with the password admin with the roles manager-gui and admin-gui
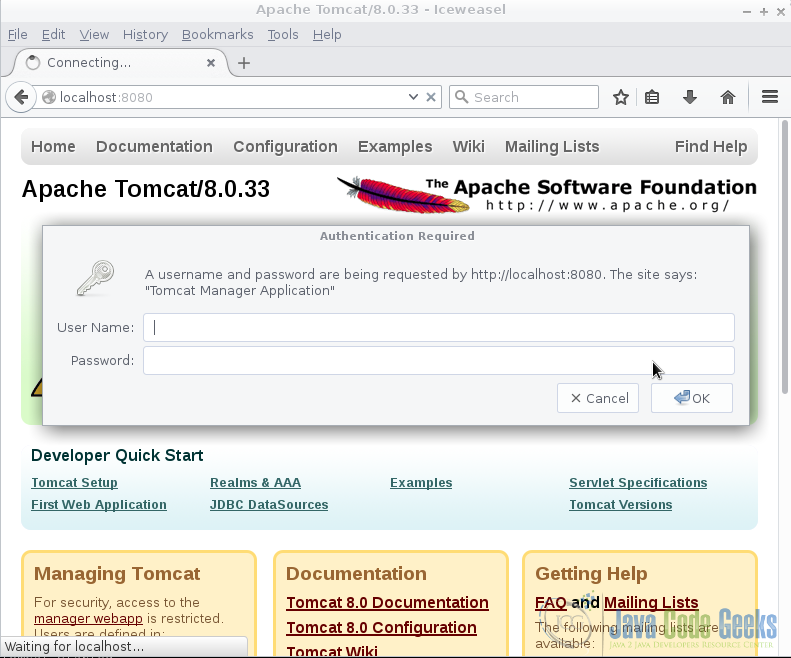
Now restart the server and open again the URL http://localhost:8080. This time click on the Manager App button. No Tomcat will ask for credentials. You should see the following screen.
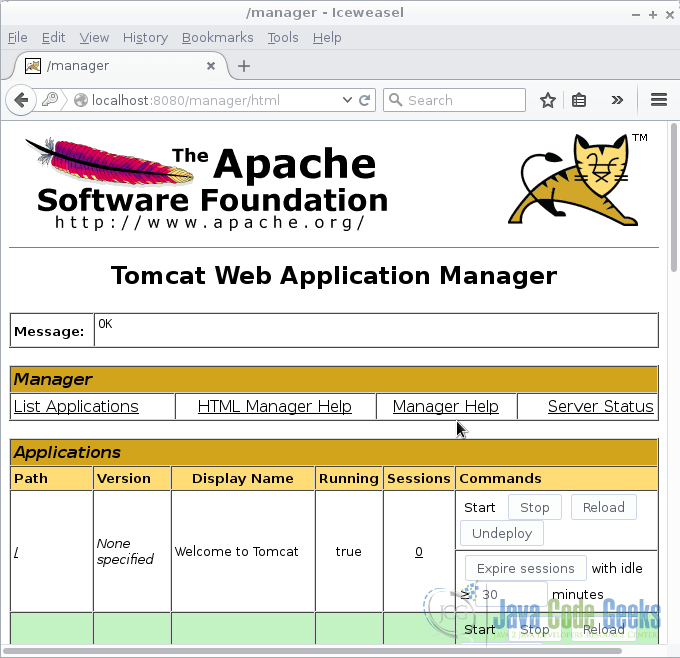
In the User Name write admin. In the Password write admin,then press enter. You should see the following screen.
10. Create a SSL Certificate
Run the following command to generate the certificate to make Tomcat support SSL. Generate Certificate
keytool -genkey -alias tomcat -keyalg RSA -keystore /opt/tomcat/keystore/tomcat
The tool is going to ask some questions to feed the certificate. The certificate is going to be in the folder /opt/tomcat/keystore/tomcat and the name of the certificate is tomcat. You can check the certificate with the command keytool -list -keystore /opt/tomcat/keystore/tomcat
11. Use the certificate in Tomcat
Edit the file /opt/tomcat/conf/server.xml and add an SSL connector.
Connector
    <Connector port="8443" protocol="org.apache.coyote.http11.Http11NioProtocol"
               maxThreads="150" SSLEnabled="true" scheme="https" secure="true"
               clientAuth="false" sslProtocol="TLS"
			   keystoreFile="C:\Java\apache-tomcat-8.0.23\keystore\tomcat"
	           keystorePass="changeit" />
Restart tomcat and you are done. Now you can run your Applications under HTTPS in Tomcat.
12. Complete source code
tomcat-users.xml
<?xml version='1.0' encoding='utf-8'?>
<tomcat-users xmlns="http://tomcat.apache.org/xml"
              xmlns:xsi="http://www.w3.org/2001/XMLSchema-instance"
              xsi:schemaLocation="http://tomcat.apache.org/xml tomcat-users.xsd"
              version="1.0">
	<user username="admin" password="admin" roles="manager-gui,admin-gui"/>
</tomcat-users>
server.xml
<?xml version='1.0' encoding='utf-8'?>
<Server port="8005" shutdown="SHUTDOWN">
  <Listener className="org.apache.catalina.startup.VersionLoggerListener"/>
  <Listener SSLEngine="on" className="org.apache.catalina.core.AprLifecycleListener"/>
  <Listener className="org.apache.catalina.core.JreMemoryLeakPreventionListener"/>
  <Listener className="org.apache.catalina.mbeans.GlobalResourcesLifecycleListener"/>
  <Listener className="org.apache.catalina.core.ThreadLocalLeakPreventionListener"/>
  <GlobalNamingResources>
    <Resource auth="Container" description="User database that can be updated and saved" factory="org.apache.catalina.users.MemoryUserDatabaseFactory" name="UserDatabase" pathname="conf/tomcat-users.xml" type="org.apache.catalina.UserDatabase"/>
  </GlobalNamingResources>
  <Service name="Catalina">
    <Connector connectionTimeout="20000" port="8080" protocol="HTTP/1.1" redirectPort="8443"/>
    <Connector port="8443" protocol="org.apache.coyote.http11.Http11NioProtocol"
               maxThreads="150" SSLEnabled="true" scheme="https" secure="true"
               clientAuth="false" sslProtocol="TLS"
			   keystoreFile="C:\Java\apache-tomcat-8.0.23\keystore\tomcat"
	           keystorePass="changeit" />
    <Connector port="8009" protocol="AJP/1.3" redirectPort="8443"/>
    <Engine defaultHost="localhost" name="Catalina">
      <Realm className="org.apache.catalina.realm.LockOutRealm">
        <Realm className="org.apache.catalina.realm.UserDatabaseRealm" resourceName="UserDatabase"/>
      </Realm>
      <Host appBase="webapps" autoDeploy="true" name="localhost" unpackWARs="true">
        <Valve className="org.apache.catalina.valves.AccessLogValve" directory="logs" pattern="%h %l %u %t "%r" %s %b" prefix="localhost_access_log" suffix=".txt"/>

      </Host>
    </Engine>
  </Service>
</Server>
tomcat
description "Tomcat Server"
  start on runlevel [2345]
  stop on runlevel [!2345]
  setuid tomcat
  setgid tomcat
  env JAVA_HOME=/opt/jdk1.8.0_77/jre/
  env CATALINA_HOME=/opt/tomcat
  exec $CATALINA_HOME/bin/catalina.sh run
12. Running the example
Run the command /opt/tomcat/bin/catalina.sh start to start the server. Open the browser in the URL http://localhost:8080 to verify the server is running.
Run the command /opt/tomcat/bin/catalina.sh stop to stop the server. Reboot the machine and verify that the script is starting the Tomcat server.
13. Results
You get a Tomcat server ready to deploy your Java war applications.
14. Download the Source Code
This was an example of: Tomcat on Ubuntu Linux.

