Apache Tomcat Http Connector Example
The Apache Tomcat® software is an open source implementation of the Java Servlet, JavaServer Pages, Java Expression Language and Java WebSocket technologies.
1. The tools
- Java JDK
- Apache Tomcat
2. Introduction
The HTTP Connector element , supports the HTTP/1.1 protocol. It enables Catalina to function as a stand-alone web server. A particular instance of this component listens for connections on a specific TCP port number on the server.
One or more such Connectors can be configured as part of a single Service, each forwarding to the associated Engine to perform request processing and create the response. Tomcat comes with a HTTP connector that can handle incoming HTTP requests from a browser. Because of this Tomcat can act as a standalone Web server, it can handle both HTTP and HTTPS requests.
3. Prerequisites
- JDK installed
4. Download Tomcat
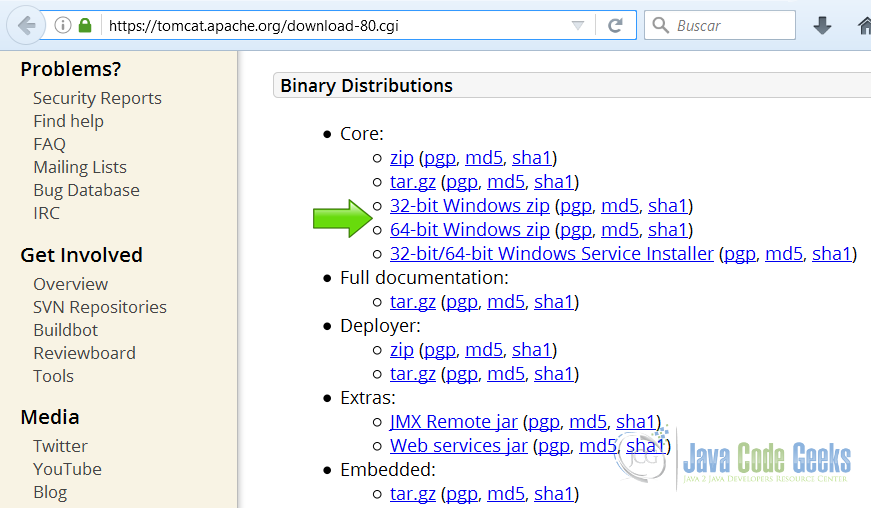
Go to the page https://tomcat.apache.org/download-80.cgi
Download the tomcat server as a zip compressed file for windows.
5. Tomcat Installation
5.1 Uncompress Apache Tomcat
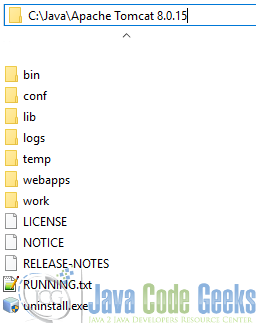
Choose an installation directory and uncompress the Tomcat server in its own directory.
5.2 Install the Tomcat service
Open the Windows terminal and go to the Tomcat Installation bin directory.
Tomcat installation directory
C:\Java\Apache Tomcat 8.0.15\bin>
Install the service with the following command:
Install Tomcat service
C:\Java\Apache Tomcat 8.0.15\bin>service install
You should get an output similar to this:
install Tomcat output
Installing the service 'Tomcat8' ...
Using CATALINA_HOME:    "C:\Java\Apache Tomcat 8.0.15"
Using CATALINA_BASE:    "C:\Java\Apache Tomcat 8.0.15"
Using JAVA_HOME:        "C:\Java\jdk1.8.0_40"
Using JRE_HOME:         "C:\Java\jre1.8.0_40"
Using JVM:              "C:\Java\jre1.8.0_40\bin\client\jvm.dll"
The service 'Tomcat8' has been installed.
5.3 Start the Tomcat service
Start the service with the following command:
Start tomcat output
C:\Java\Apache Tomcat 8.0.15\bin>sc start Tomcat8
You should get an output similar to the following:
console
SERVICE_NAME: Tomcat8
        TYPE               : 10  WIN32_OWN_PROCESS
        STATUS             : 2  START_PENDING
                                (NOT_STOPPABLE, NOT_PAUSABLE, IGNORES_SHUTDOWN)
        WIN32_OUTPUT_CODE  : 0  (0x0)
        SERVICE_OUTPUT_CODE: 0  (0x0)
        CHECK-POINT        : 0x0
        START-INDICATOR    : 0x7d0
        PID                : 5552
        MARKS              :
5.4 Check that tomcat is running
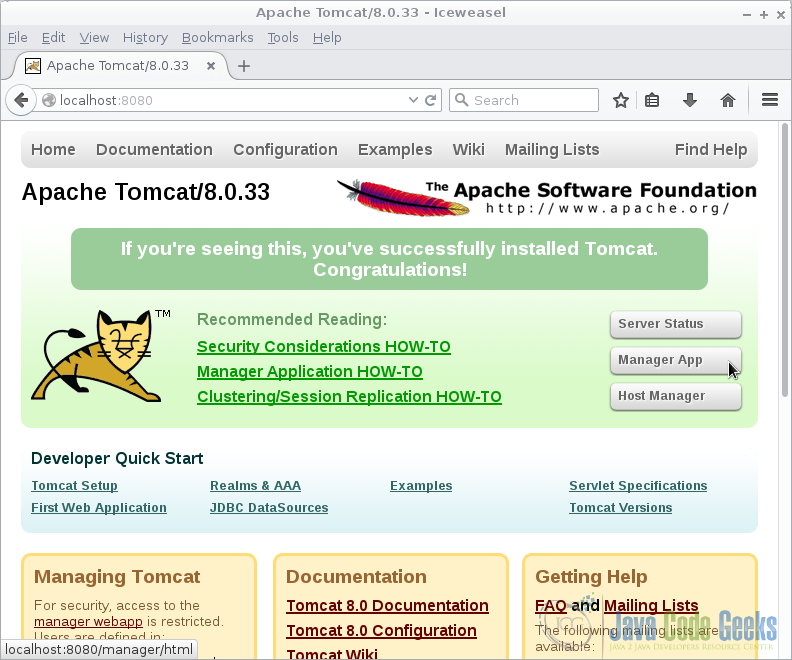
Open the browser in the URL: http://localhost:8080
And you should see the Tomcat Welcome screen.
6. Create Static content
Open the terminal and go to Tomcat webapps folder.
Tomcat webapps
C:\Java\Apache Tomcat 8.0.27\webapps>
Create a folder for your static application
Create static folder
C:\Java\Apache Tomcat 8.0.27\webapps>mkdir static
C:\Java\Apache Tomcat 8.0.27\webapps>cd static
Create a folder for your css files
Create css folder
C:\Java\Apache Tomcat 8.0.27\webapps\static> mkdir css
Create a file named styles.css and put it inside the css folder
styles.css
.exampleone {
  background-color: teal;
  color: white;
  height: 30%;
  font-size: 45;
}

.exampletwo {
  background-color: rgb(153,102,153);
  color: rgb(255,255,204);
  height: 30%;
  font-size: 55;
}

.examplethree {
  background-color: #777799;
  color: #FFFFFF;
  height: 30%;
  font-size: 65;
}
Create a folder for your javascript
Tomcat webapps
C:\Java\Apache Tomcat 8.0.27\webapps\static> mkdir js
Create a file named script.js and put it inside the js folder
script.js
function count_rabbits() {
    $("#div1").html("Rabbit 1");
    $("#div2").html("Rabbit 2");
    $("#div3").html("Rabbit 3");
}
Create a index file inside the static folder index.html. This index file is called by tomcat when you open the URL.
index.html
<DOCTYPE! HTML>
    <html>
        <head>
            <title>Static</title>
            <link rel="stylesheet" href="css/styles.css">
            <meta charset="UTF-8">
            <script src="js/jquery-3.1.1.min.js"></script>
            <script src="js/script.js"></script>
        </head>
        <body>
            <div id="div1" class="exampleone">A div</div>
            <div id="div2" class="exampletwo">A div</div>
            <div id="div3" class="examplethree">A div</div>
            <input type="button" onclick="count_rabbits()" value="Count rabbits!"/>
        </body>
    </html>
7. Complete source code
styles.css
.exampleone {
  background-color: teal;
  color: white;
  height: 30%;
  font-size: 45;
}

.exampletwo {
  background-color: rgb(153,102,153);
  color: rgb(255,255,204);
  height: 30%;
  font-size: 55;
}

.examplethree {
  background-color: #777799;
  color: #FFFFFF;
  height: 30%;
  font-size: 65;
}
script.js
function count_rabbits() {
    $("#div1").html("Rabbit 1");
    $("#div2").html("Rabbit 2");
    $("#div3").html("Rabbit 3");
}
index.html
<DOCTYPE! HTML>
    <html>
        <head>
            <title>Static</title>
            <link rel="stylesheet" href="css/styles.css">
            <meta charset="UTF-8">
            <script src="js/jquery-3.1.1.min.js"></script>
            <script src="js/script.js"></script>
        </head>
        <body>
            <div id="div1" class="exampleone">A div</div>
            <div id="div2" class="exampletwo">A div</div>
            <div id="div3" class="examplethree">A div</div>
            <input type="button" onclick="count_rabbits()" value="Count rabbits!"/>
        </body>
    </html>
8. Running the example
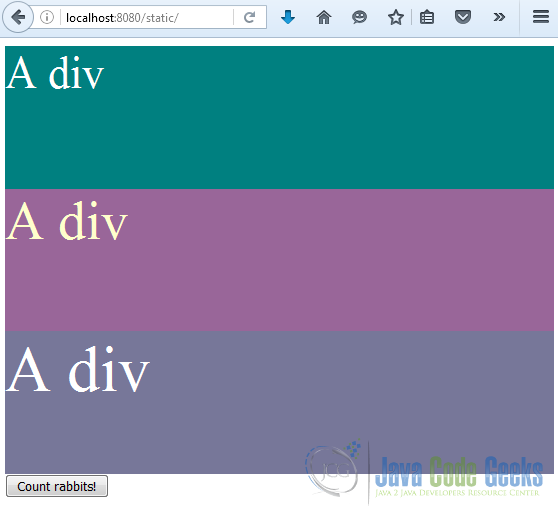
With all static files in place and Tomcat running, we are going to check our static application. Remember we can see this static content thanks to the HTTP Coyote connector enabled by default in Tomcat.
Open the browser in the URL: http://localhost:8080/static
9. Results
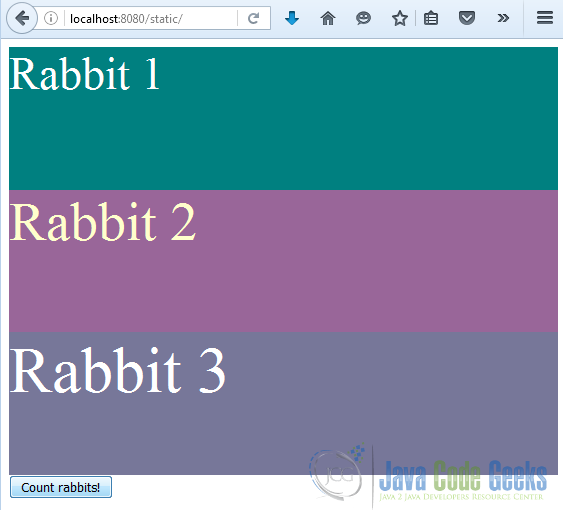
As we can see Tomcat opens the index file by default. The css is properly referenced and working.
By pressing the button we can test that the script is working correctly.
10. Download the Source Code
This was an example of: Apache Tomcat HTTP connector.

