This example demonstrates how you can get started with IntelliJ IDEA for the first time. Intellij IDEA is a JetBrains IDE product that supports multiple languages and frameworks (e.g. Java, Scala, Groovy) and works cross platforms i.e Windows, OS X, and Linux.
Intellij IDEA comes in two editions:
- Community Edition – Free and open source
- Ultimate Edition – Commercial
A comprehensive feature comparison between the two editions can be accessed from the JetBrains website.
1. Setup
In this example we shall use Intellij IDEA 15.0 Community Edition, which can be downloaded from the JetBrains website.
The following is the list of recommended system requirements for running Intellij IDEA 15.0:
- 2 GB RAM
- 300 MB hard disk space + at least 1 G for caches
- JDK 1.6 or higher
2. Creating a new project
When you working with intelliJ everything that you do you do it within the context of a project. A project is a representation of a complete solution that you have developed and comprises of source code, libraries and configuration files.
When you open intelliJ after the installation has been done you will be greeted by the welcome screen:
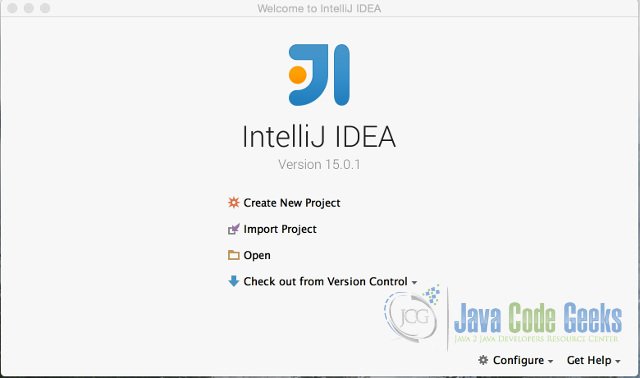
Click -> Create New Project

2.1 Project Type
When creating a new project in IntelliJ you have several project types to choose from as displayed in the left panel of the New Project dialog. When creating a standard Java project you will select Java as the project type. IntelliJ will then create for you the project structure for a typical Java application. The structure that is created by IntelliJ can still be updated to suit your own personal preferences.
In an instance where you want to use a build configuration tool like maven, you will then choose Maven as the project type. In this example we shall look at the Java project type.
2.2 Project SDK
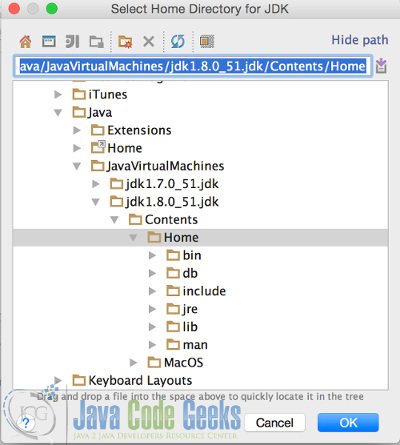
Every project that you create will require a Software Development Kit (SDK). An SDK is a software platform of toolsets required to develop an application for a particular language, framework or environment. In the case of a java application you will require the Java Development Kit(JDK). As part of creating a new project, In the project dialog window you have to specify the SDK that will be used for a project. To define the SDK for the first time, Click -> New, a dropdown menu appears where you can select the Home Directory of the installed JDK.
2.3 Project Template
The next form allows you to use a predefined template to create your project. Click -> Create project from template. Then select -> Command Line App. The command line app gives you a simple Java application that includes a class with a main() method.

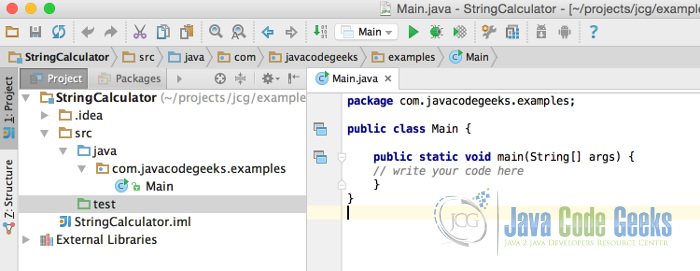
The next form prompts for a project name. In this tutorial we shall implement the String Calculator Kata as an example of how you create a java project in IntelliJ.
Insert StringCalculator as the Project Name and also insert the location where your project files will be saved (if you want to change the default location). Specify the base package for the project. In this example we are going to use: com.javacodegeeks.example
Click -> Finish
3. Project Directory Structure
It is always desirable to have a clear separation of application java source files and test files. The next set of instructions will achieve just that.
- Right-Click the src directory and select Mark Directory As -> Unmark as Sources Root.
- Right-Click the src directory and select New -> Directory.
- Enter java as the name of the new directory.
- Right-Click the src directory and select New -> Directory.
- Enter test as the name of the new directory.
- Right-Click the java directory and select Mark Directory As -> Sources Root.
- Right-Click the test directory and select Mark Directory As -> Test Sources Root.
4. Create New Class
- Right-Click java directory on the project view situated on the left panel
- Select New -> Java Class
- A popup appears that prompts you to enter the name of the new class -> Name: StringCalculator
- Click Ok
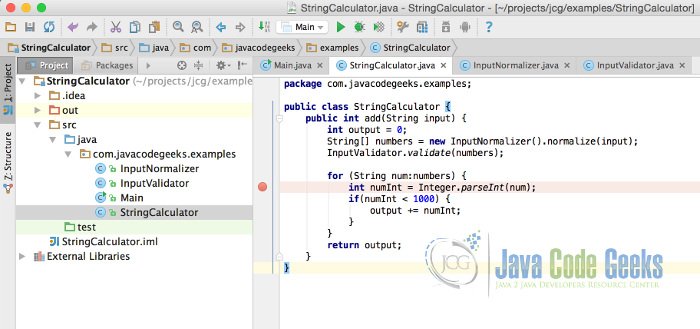
Implement the add method that takes an input of numbers in string format separated by delimiters that can take any form e.g.1,2#3,4. The method returns the sum of the input of numbers.
public class StringCalculator {
    public int add(String input) {
        int output = 0;
        String[] numbers = new InputNormalizer().normalize(input);
        InputValidator.validate(numbers);
        for (String num:numbers) {
            int numInt = Integer.parseInt(num);
            if(numInt < 1000) {
                output += numInt;
            }
        }
        return output;
    }
}
Add the InputNormalizer class. This class takes the input of numbers in string format and split them up based on the defined delimiters. The delimiters are defined at the beginning of the string, the start of the delimiters is marked by // and the end of the delimiters is marked by \n. Each delimiter is enclosed within the open and closed brackets. e.g.//[***][%]\n1***2%3
public class InputNormalizer {

    public String[] normalize(String input) {
        String delimiters = "\n|,";
        if(input.contains("//")) {
            delimiters = getDelimiters(input, delimiters);
            input = stripDelimiters(input);
        }
        return input.split(delimiters);
    }

    private String getDelimiters(String numbers, String defaultDelimiters) {
        StringBuilder delimiters = new StringBuilder(defaultDelimiters);
        while(numbers.indexOf("[") >= 0) {
            delimiters.append("|");
            String delimiter = numbers.substring(numbers.indexOf("[") + 1,numbers.indexOf("]"));
            for(char delimiterChar:  delimiter.toCharArray()) {
                delimiters.append("\\").append(delimiterChar);
            }
            numbers = numbers.substring(numbers.indexOf("]") + 1);
        }
        System.out.println(" delimiters.toString() = " + delimiters.toString());
        return delimiters.toString();
    }

    private String stripDelimiters(String numbers) {
        return numbers.substring(numbers.indexOf("\n") + 1);
    }
}
Add the InputValidator class. This class validates that the numbers in a string are all positive numbers. If a negative number is found an exception is raised that displays all the negative numbers.

public class InputValidator {
    public static void validate(String[] numbers) throws RuntimeException {
        StringBuilder negativeNumbers = new StringBuilder();
        for (String number:numbers) {
            int numInt = Integer.parseInt(number);
            if(numInt < 0) { if(negativeNumbers.length()> 0) {
                    negativeNumbers.append(",");
                }
                negativeNumbers.append(numInt);
            }
        }
        if(negativeNumbers.length()> 0) {
            throw new RuntimeException(String.format("[%s] negative numbers not allowed.", negativeNumbers.toString()));
        }
    }
}
5. Run Application
To be able to run the application we implement the main class to call the SimpleCalculator class.
public class Main {
    public static void main(String[] args) {

        String numbers = "//[***][%]\n1***2%3";

        StringCalculator calculator = new StringCalculator();
        int output = calculator.add(numbers);
        System.out.println(" output = " + output);

    }
}
Right-Click anywhere in the Main source file and select -> Run Main
6. Debugging an Application
Left-Click on the line where you want to add a breakpoint on the left pane of the source editor. A pale red circle will appear and the line will be highlighted in pale red.
Open the main class, right click on it and select debug main. When the program is running it will stop on the line that has a breakpoint and the debug window will be opened that will allow you to interrogate your program at runtime.
7. Adding a test
When unit testing your application you will typical use a testing framework like JUnit. In order to use JUnit in our application we will need to add the JUnit Library. Download the JUnit Library. In this example we are going to use version 4.12
Select-> File -> Project Structure -> Libraries – > New Project Library -> Java
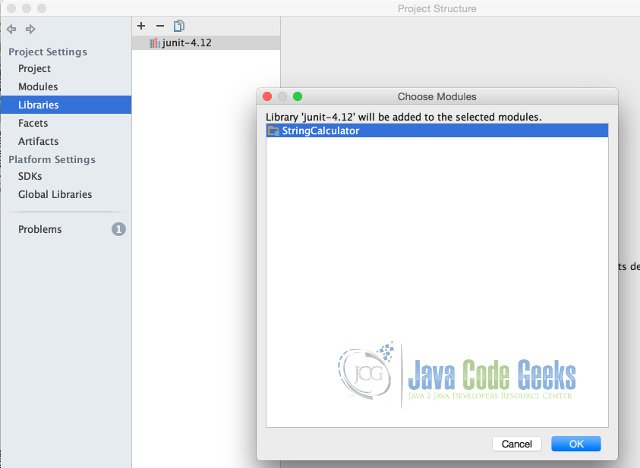
Locate JUnit library in the directory where it has been downloaded to and add it to the StringCalculator module. JUnit 4.12 has a dependency on hamcrest-core in this example we are using version 1.3. Add the hamcrest-core jar following the same steps used for adding the JUnit library.
In the test directory of the StringCalculator Project add new class:
package com.javacodegeeks.examples;

import org.junit.Before;
import org.junit.Test;

import static org.junit.Assert.assertEquals;

public class StringsCalculatorTest {

    StringCalculator calculator;

    @Before
    public void init() {
        calculator = new StringCalculator();
    }

    @Test
    public void testDefaultDelimiters() {
        String input = "1\n2,3";
        assertEquals(6,calculator.add(input));
    }

    @Test
    public void testMultiDelimiters() {
        String input = "//[***][%]\n1***2%3";
        assertEquals(6,calculator.add(input));
    }

    @Test
    public void testNumbersMoreThan1000() {
        String input = "//[***][%]\n1***2%3,2000";
        assertEquals(6,calculator.add(input));
    }
}
8. Download the IntelliJ Project
This was an example of using IntelliJ IDEA to create the String Calculator.
You can download the full source code of this example here: Intellij IDEA Example

I wanted to download the manuals they offer. They ask you to subscribe (to send you advertising and courses), well I subscribed. But, the page does not tell you how and where to download the manuals. Bad. I feel cheated.
You can find the pdf version of this here: https://www.javacodegeeks.com/minibook/intellij-idea-handbook but first you have to login.