This example demonstrates how you can utilize IntelliJ GUI Designer to create a graphical user interface that is based on the Swing library components. It must be noted that IntelliJ does not support modeling of non-swing components.
When working with the GUI Designer you operate in design view where you are able to drag and drop swing components within the context of a form. All GUI information related to the form are stored in a file with .form extension. When creating a GUI component in IntelliJ you begin by creating a form, this form serves as a container that groups all other components that are required for your application. When a form is created, IntelliJ provides you with an option of also creating a Bound Class. A Bound Class is a Java class that is bound to a form and contains auto-generated code that reflects the components that are added on the form. The bound class can be updated at any point to add specific behavior on the components that have been added in the form.
In this example we shall create a simple calculator application to demonstrate how you work with the GUI Designer.
1. Creating a new project
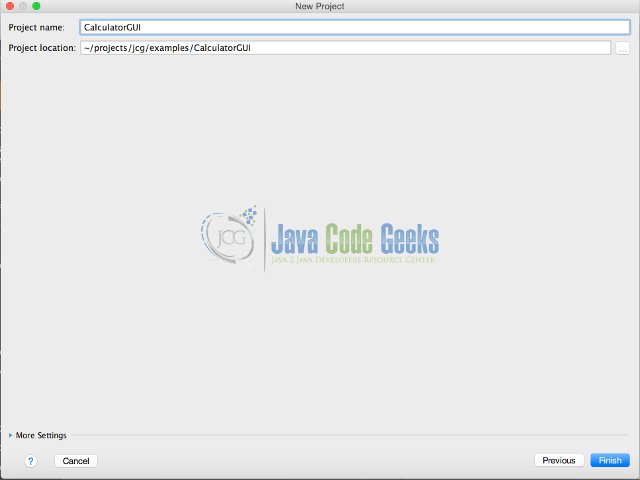
Launch IntelliJ and create a new project called: CalculatorGUI.
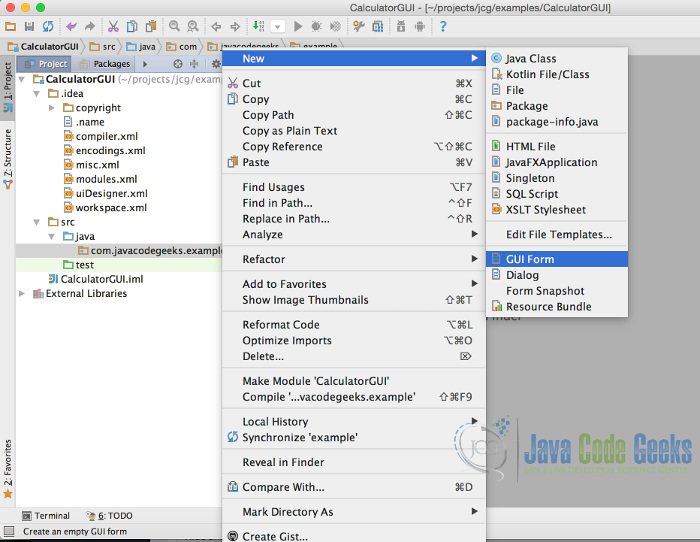
Create a new package in the src/java directory called com.javacodegeeks.example
Right-click the new package and select -> New -> GUI Form
In the New GUI Form Window populate the following:
- Form Name: Calculator
- Base layout manager: GridLayoutManager(IntelliJ)
- Create bound class:selected
- Class name: Calculator
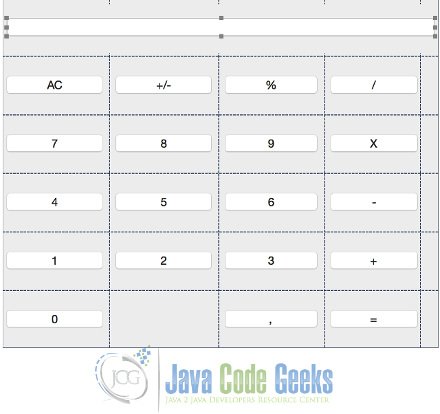
Clicking Ok on the GUI Form window once its populated, should display design-time graphical view as seen below:
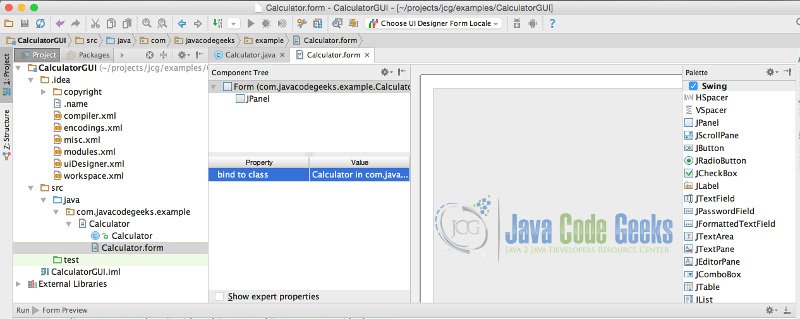
2. Graphical view
The graphical view allows you to drag and drop swing components to be added on the Form of the application. When any file that has a .form extension has been selected into the view, the following windows are displayed:
- Component tree – displays the hierarchical view of the components that have been added on the form.
- Property editor – displays the properties of the components added on the form which can be edited.
- Design area – the graphical view of the form. Components are dragged into this area to be added on the form.
- Palette – contains all available swing components that can be selected to be added on the form.
3. Creating the GUI
3.1 Add Results display
Drag the JTextField from the palette and drop it in the design area. Update the field name in the property editor to read: results

When you add the JTextField the Vertical Spacer also gets automatically added.
3.2 Add Buttons
Drag the JButton from the palette and drop it in the design area. Add the JButton on the left-hand side of the Vertical Spacer. As you release the mouse a tooltip will be displayed showing JPanel(Row 1, Before Col 0), which indicates the position where the component will be placed in the grid. Repeat the process to add 4 buttons in the same row. Update the properties of the 4 buttons to the following:
- button1: field name change to clearBtn, Text change to AC
- button2: field name change to signBtn. Text change to +/-
- button3: field name change to percentBtn.Text change to %
- button4: field name change to divideBtn. Text change to /
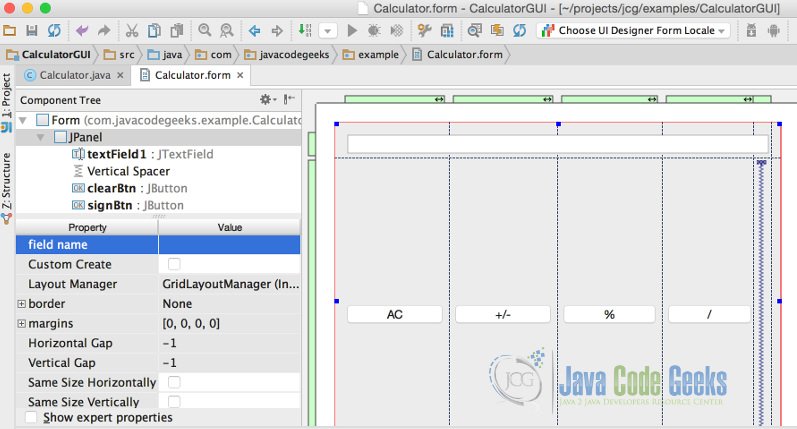
Add the rest of the buttons, in total should have 5 rows and 4 columns populated with buttons. You can now remove the Vertical Spacer.
Select the JPanel in the Component tree of the form view and update the field name property to calculatorView. Clicking on the Calculator.java should now have the following fields inserted:
Calculator.java
package com.javacodegeeks.example;

import javax.swing.*;

public class Calculator {
    private JTextField resultsTxt;
    private JButton clearBtn;
    private JButton signBtn;
    private JButton percentBtn;
    private JButton divideBtn;
    private JButton sevenBtn;
    private JButton eightBtn;
    private JButton nineBtn;
    private JButton multiplyBtn;
    private JButton fourBtn;
    private JButton fiveBtn;
    private JButton sixBtn;
    private JButton minusBtn;
    private JButton oneBtn;
    private JButton twoBtn;
    private JButton threeBtn;
    private JButton addBtn;
    private JButton zeroBtn;
    private JButton equalBtn;
    private JButton digitBtn;
    private JPanel calculatorView;
}
4. Making the form functional
In order for the form to be functional it requires a runtime frame to be created. We will create the main() method that will will be responsible for creating and disposing the runtime frame.
In the code editor of Calculator.java file select -> Generate… -> Form main()
The following code gets generated:
Calculator.java main method
public static void main(String[] args) {
        JFrame frame = new JFrame("Calculator");
        frame.setContentPane(new Calculator().calculatorView);
        frame.setDefaultCloseOperation(JFrame.EXIT_ON_CLOSE);
        frame.pack();
        frame.setVisible(true);
    }
Now we create an enum for handling the different calculator operations. The constructor of the enum takes in a function in this case DoubleBinaryOperator (provided in Java 8) which represents an operation on two double-valued operands that produces a double-valued result.
Operation.java
package com.javacodegeeks.example;

import java.util.function.DoubleBinaryOperator;

public enum Operation {
    ADDITION((x, y) -> x+y),
    SUBTRACTION((x, y) -> x-y),
    DIVISION((x, y) -> x/y),
    MULTIPLICATION((x, y) -> x*y),
    PERCENTAGE((x, y) -> x%y);


    private DoubleBinaryOperator operator;

    Operation(DoubleBinaryOperator operator) {
       this.operator = operator;
    }

    public DoubleBinaryOperator getOperator() {
        return operator;
    }
}
5. Putting everything together
Now we add action listeners that will be triggered when the buttons of the calculator get clicked. We then bind the buttons to those action listeners.
Calculator.java
package com.javacodegeeks.example;

import javax.swing.*;
import java.awt.event.ActionEvent;
import java.awt.event.ActionListener;

public class Calculator {
    private JTextField resultsTxt;
    private JButton clearBtn;
    private JButton signBtn;
    private JButton percentBtn;
    private JButton divideBtn;
    private JButton sevenBtn;
    private JButton eightBtn;
    private JButton nineBtn;
    private JButton multiplyBtn;
    private JButton fourBtn;
    private JButton fiveBtn;
    private JButton sixBtn;
    private JButton minusBtn;
    private JButton oneBtn;
    private JButton twoBtn;
    private JButton threeBtn;
    private JButton addBtn;
    private JButton zeroBtn;
    private JButton equalBtn;
    private JButton digitBtn;
    private JPanel calculatorView;
    private Double leftOperand;
    private Double rightOperand;
    private Operation calcOperation;

    public Calculator() {

        sevenBtn.addActionListener(new NumberBtnClicked(sevenBtn.getText()));
        eightBtn.addActionListener(new NumberBtnClicked(eightBtn.getText()));
        nineBtn.addActionListener(new NumberBtnClicked(nineBtn.getText()));
        fourBtn.addActionListener(new NumberBtnClicked(fourBtn.getText()));
        fiveBtn.addActionListener(new NumberBtnClicked(fiveBtn.getText()));
        sixBtn.addActionListener(new NumberBtnClicked(sixBtn.getText()));
        oneBtn.addActionListener(new NumberBtnClicked(oneBtn.getText()));
        twoBtn.addActionListener(new NumberBtnClicked(twoBtn.getText()));
        threeBtn.addActionListener(new NumberBtnClicked(threeBtn.getText()));
        zeroBtn.addActionListener(new NumberBtnClicked(zeroBtn.getText()));

        percentBtn.addActionListener(new OperationBtnClicked(Operation.PERCENTAGE));
        multiplyBtn.addActionListener(new OperationBtnClicked(Operation.MULTIPLICATION));
        divideBtn.addActionListener(new OperationBtnClicked(Operation.DIVISION));
        minusBtn.addActionListener(new OperationBtnClicked(Operation.SUBTRACTION));
        addBtn.addActionListener(new OperationBtnClicked(Operation.ADDITION));
        equalBtn.addActionListener(new EqualBtnClicked());
        clearBtn.addActionListener(new ClearBtnClicked());
        signBtn.addActionListener(new SignBtnClicked());
        digitBtn.addActionListener(new DigitBtnClicked());
    }

    private class NumberBtnClicked implements ActionListener {

        private String value;

        public NumberBtnClicked(String value) {
            this.value = value;
        }

        @Override
        public void actionPerformed(ActionEvent e) {
            if(leftOperand == null || leftOperand == 0.0) {
                value = resultsTxt.getText() + value;
            }else{
                rightOperand = Double.valueOf(value);
            }
            resultsTxt.setText(value);

        }
    }

    private class OperationBtnClicked implements ActionListener {

        private Operation operation;

        public OperationBtnClicked(Operation operation) {
            this.operation = operation;
        }

        @Override
        public void actionPerformed(ActionEvent e) {
            calcOperation = operation;
            leftOperand = Double.valueOf(resultsTxt.getText());
        }
    }

    private class ClearBtnClicked implements ActionListener {

        @Override
        public void actionPerformed(ActionEvent e) {
            resultsTxt.setText("");
            leftOperand = 0.0;
            rightOperand = 0.0;
        }
    }

    private class DigitBtnClicked implements ActionListener {

        @Override
        public void actionPerformed(ActionEvent e) {
            resultsTxt.setText(resultsTxt.getText() + ".");

        }
    }

    private class EqualBtnClicked implements ActionListener {

        @Override
        public void actionPerformed(ActionEvent e) {
            Double output = calcOperation.getOperator().applyAsDouble(leftOperand, rightOperand);
            resultsTxt.setText(output%1==0?String.valueOf(output.intValue()):String.valueOf(output));
            leftOperand = 0.0;
            rightOperand = 0.0;
        }
    }

    private class SignBtnClicked implements ActionListener {

        @Override
        public void actionPerformed(ActionEvent e) {
            resultsTxt.setText("-"+ resultsTxt.getText());
        }
    }

    public static void main(String[] args) {
        JFrame frame = new JFrame("Calculator");
        frame.setContentPane(new Calculator().calculatorView);
        frame.setDefaultCloseOperation(JFrame.EXIT_ON_CLOSE);
        frame.pack();
        frame.setVisible(true);
    }
}
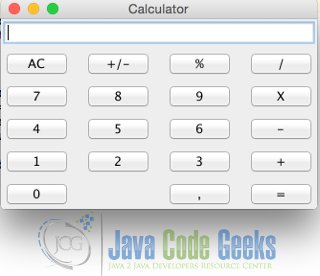
6. Running your application
Right-click Calculator.java and select Run Calculator.main()
7. Download the IntelliJ Project
This was an example of using IntelliJ GUI Designer to create a Swing Calculator.
You can download the full source code of this example here: CalculatorGUI

The application is good but does not quite work. It can be made to function like a real calculator with a couple of simple changes which I would be happy to share.
There is a error when I tried to run this project.
I have already searched in Google but didn’t find much helpful infomation.
Do you have any suggestion on fixing this problem ?
Error:forms: D:\javadev\CalculatorGUI\src\java\com\javacodegeeks\example\Calculator.form: Class not found: javax.swing.JPanel
My environment is
java version “1.8.0_191”
Java(TM) SE Runtime Environment (build 1.8.0_191-b12)
Java HotSpot(TM) 64-Bit Server VM (build 25.191-b12, mixed mode)
Thank you, just the sort of tutorial I was looking for! Just enough to get me started.
Thank you for the tutorial!
On step 4, please write “right click” instead of “file select”.