How to Install and Use the Eclipse Marketplace Plugin
In this example, we will see how to install and use Eclipse Marketplace Client Plugin from within Eclipse IDE.
1. Introduction
The Eclipse community has many third-party plugins and these plugins can be added to the individual Eclipse installation. But, in earlier version of Eclipse, this was not an easy way to discover and install these solutions from within Eclipse.
The Eclipse Foundation operates a website, called Eclipse Marketplace, the ‘App Store’ for Eclipse apps, that provides a listing of Eclipse-based solutions. The listings allow each solution provider to specify a P2 repository for their solution. Eclipse users now have a central catalog to find Eclipse solutions but the install process is still not tightly integrated with the Eclipse workspace.
To make this process simple, Eclipse MarketPlace Client (MPC) provides the tight install integration between the Eclipse workspace and Eclipse Marketplace, plus other third party solution listings. It is a new feature that allows Eclipse users to discover and install Eclipse solutions directly into their Eclipse installation.
2. Install Eclipse MarketPlace Client
From Eclipse Juno, the MPC is already included. But, it would be a great idea if we can have MPC on older versions also.
Please follow the steps below to configure market place in the older versions of Eclipse IDE.
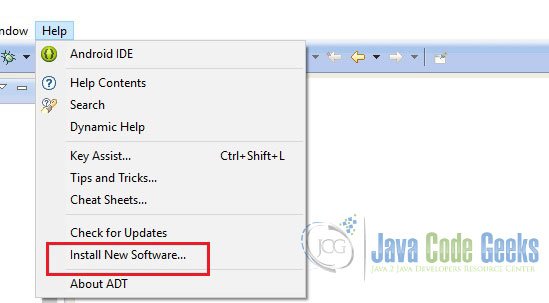
Open ‘Help -> Install New Software’
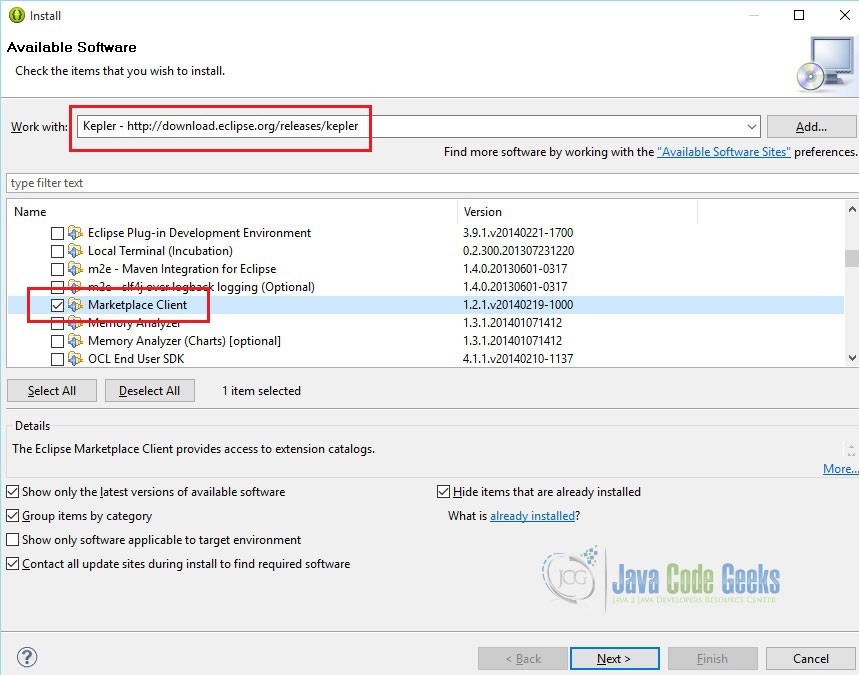
And select ‘Kepler – http://download.eclipse.org/releases/kepler’, or ‘Helios – http://download.eclipse.org/releases/helios ‘ from the ‘Work with’ field according to the version of your IDE.
Then select ‘General Purpose Tools – Marketplace Client’ as shown below.
Accept terms and install the plug-in. You will be asked to restart the IDE. Please do so.
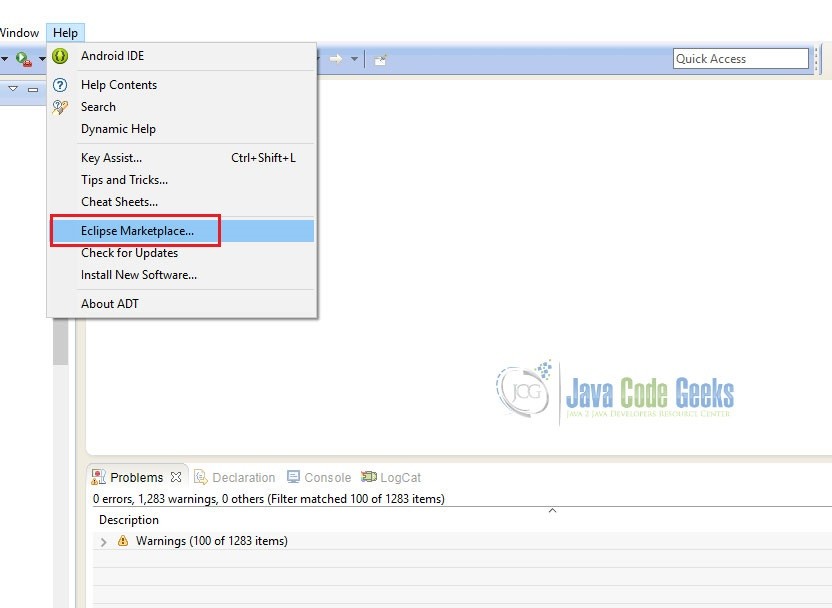
Now, you will see a new menu ‘Eclipse Marketplace…’ under help menu as shown below. Click on it.
3. Eclipse MarketPlace Wizard
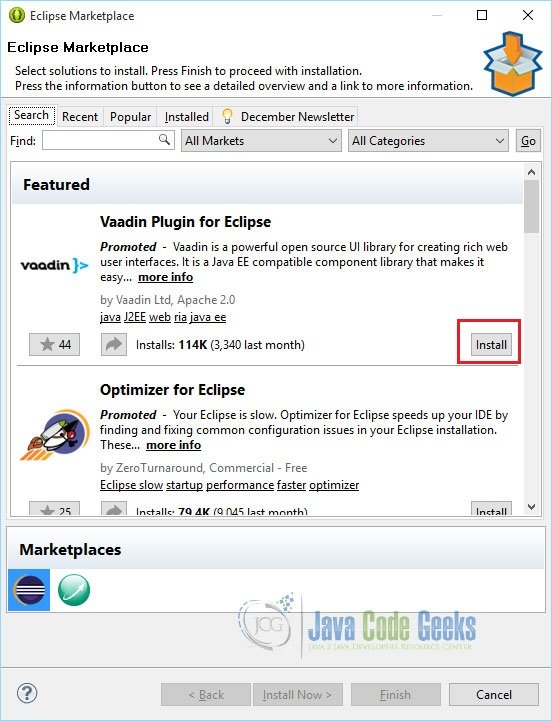
Yes, you have Eclipse Marketplace within your IDE now. You can install plugins as per your requirement from the Marketplace shown in the wizard.
4. Search Eclipse Solutions
There is a very effective feature of searching the solutions in the MarketPlace.
In the existing IDE, there is no support for Java 8. Now, from this MarketPlace, we will install Java 8 support plugin.
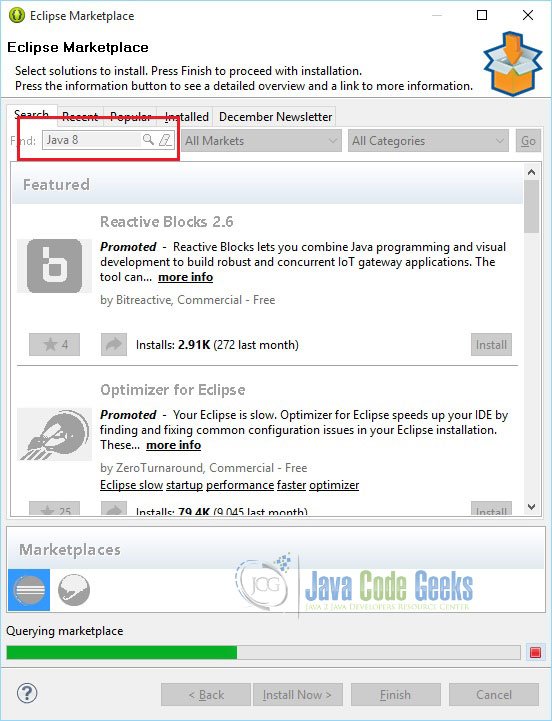
Please look at the picture given below. To enable Java 8 support in the existing IDE which was not there by default, enter Java 8 and click search icon.
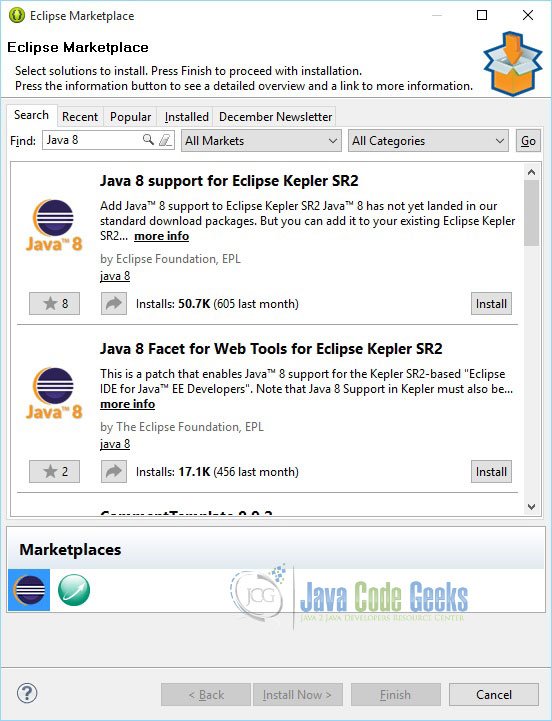
In the wizard, you will see available plugins to enable Java 8 support. Click ‘Install’ button of ‘Java 8 support for Eclipse Kepler SR2’ plugin.
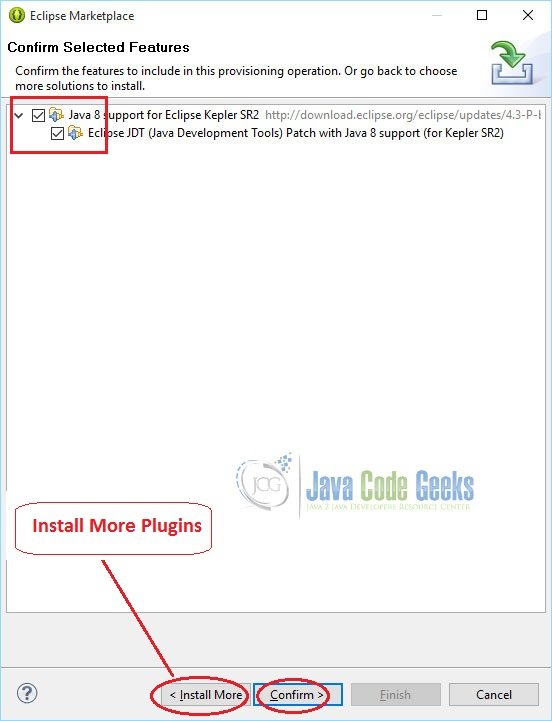
Select required features as shown below and click ‘Confirm’ button.
Also, it is good to notice that you can install multiple plugins on the same flow by pressing ‘Install More’ button.
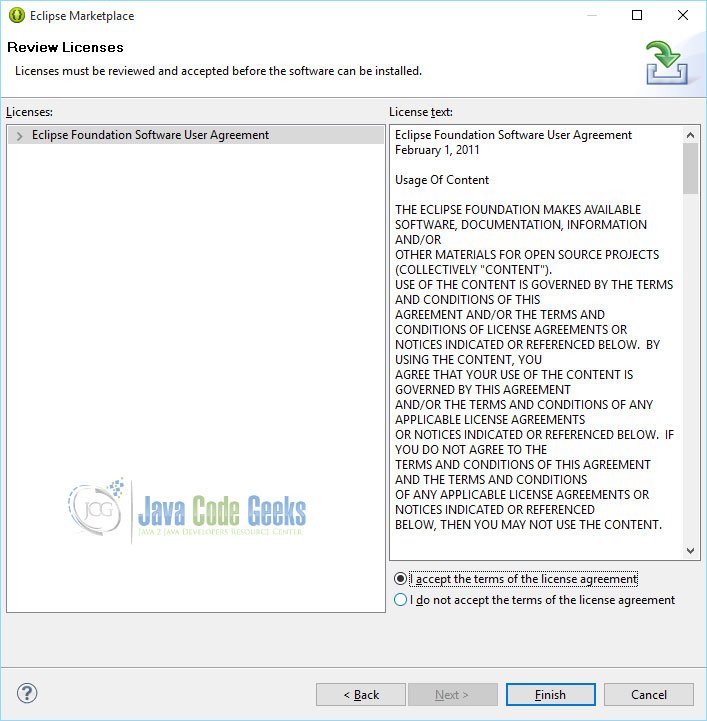
Accept terms and click ‘Finish’
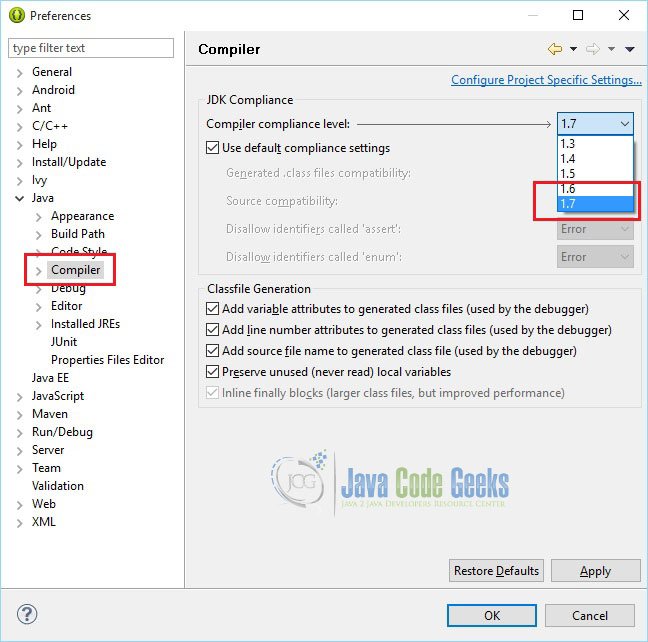
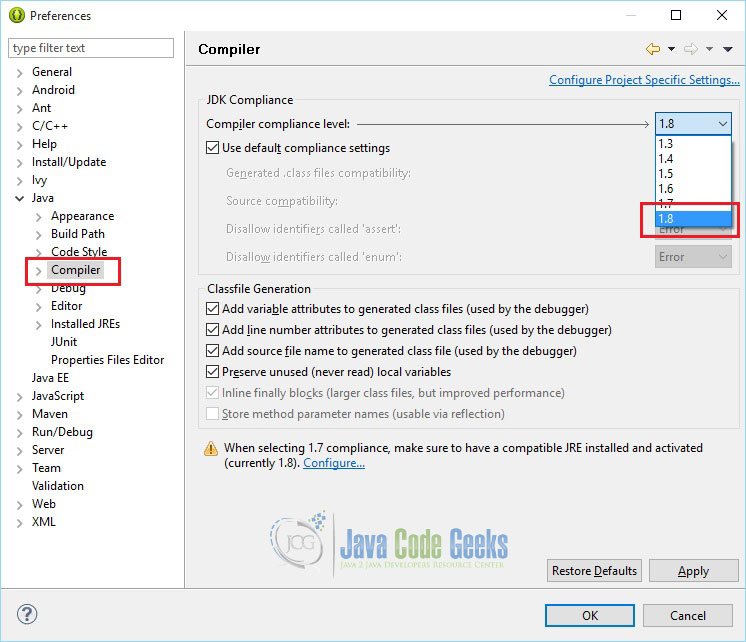
It may take some time to update your IDE with Java 8 support plug-in. You will be asked to restart the IDE. Now, after restarting the IDE if you look at the compiler version, you will be able to see Java 8 compliance level is enabled as depicted below.
5. Search by Market
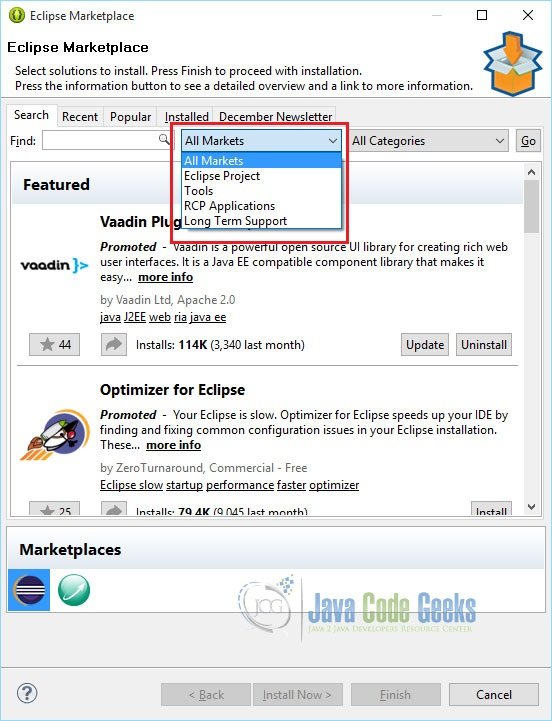
The search conditions can be still reduced by specifying Market or Category.
6. Conclusion
In this example, we have seen how to install Eclipse Marketplace Client plug-in used for browsing and installing the Eclipse based solutions listed on the Eclipse Marketplace portal from within the Eclipse IDE.

