1.Introduction
In this example, we will learn how to use Eclipse Rich Client Platform (RCP) to develop stand alone applications written in Java and built on top of Eclipse platform technologies. Using RCP, programmers can develop customized window applications, menus, tool bars, palettes, wizards and other specialized features.
1.1 What is Rich Client Platform?
The minimal set of plug-ins needed to build a rich client application is collectively known as the Rich Client Platform.This is a platform for building client applications with rich functionality.
1.2 Why Eclipse RCP?
RCP is a collection of lower-level frameworks. It is a well-suited platform for Java based desktop applications. The basic advantage of Eclipse RCP is module re-usability. Not just class re-usability but full component reuse. Eclipse architecture make this very much possible than ever before.
Applications written with RCP are completely portable and will run equally well on Windows, Mac or Linux. RCP development has been made simple with Eclipse 4.x API compared to Eclipse 3.
This example is tested with ‘Eclipse (Mars) for RCP and RAP Developers’ IDE. Before we start, please make sure you have the tools mentioned below are installed in your system. This example assumes basic programming knowledge in Java programming language using Eclipse IDE is a plus.
System requirements
Tools required to run this example are:
Eclipse
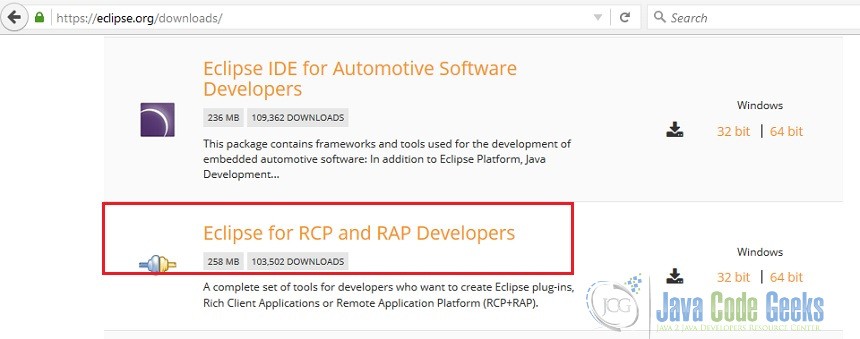
Download ‘Eclipse for RCP and RAP Developers’ from here. Please refer the picture given below to identify the correct IDE.
Java
Download Java SE 7 or above from here
Let’s start:
2. Open New Project
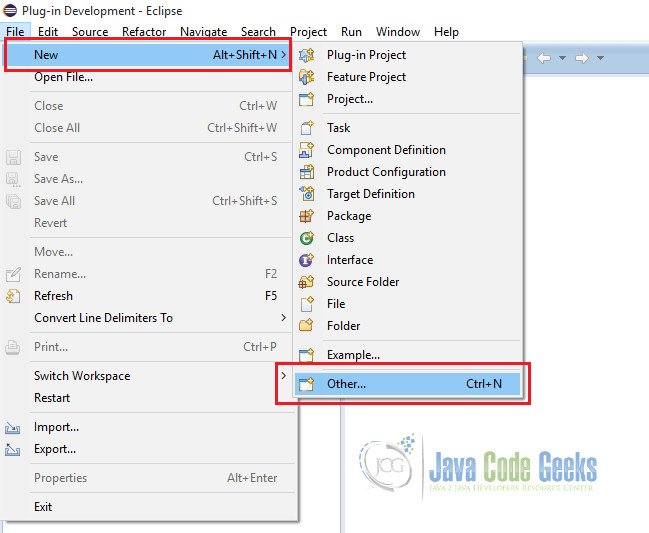
This needs to be created as new ‘Eclipse 4 Application Project’. For that open ‘File – New – Other’
3. Eclipse 4 Application Project
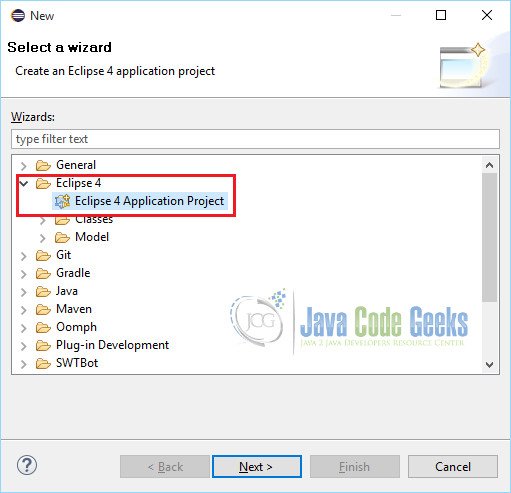
Select ‘Eclipse 4 Application Project’ and click Next
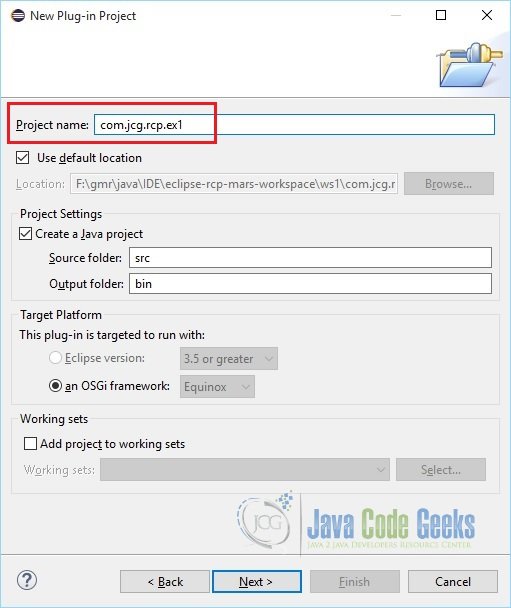
3.1. Enter Project Name
Leave other default values and click ‘Next’
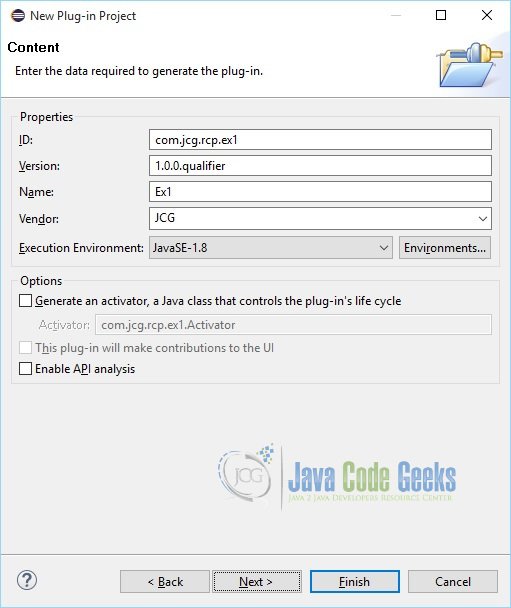
4. Project Properties
Leave other default values and click ‘Next’
5. Project Configuration
Make sure ‘Create sample content(parts, menu etc.)’ check box is checked and click ‘Finish’

6. RCP Application
Yes, a basic RCP application using built-in template has been created.
7. Structure of Eclipse 4 RCP application
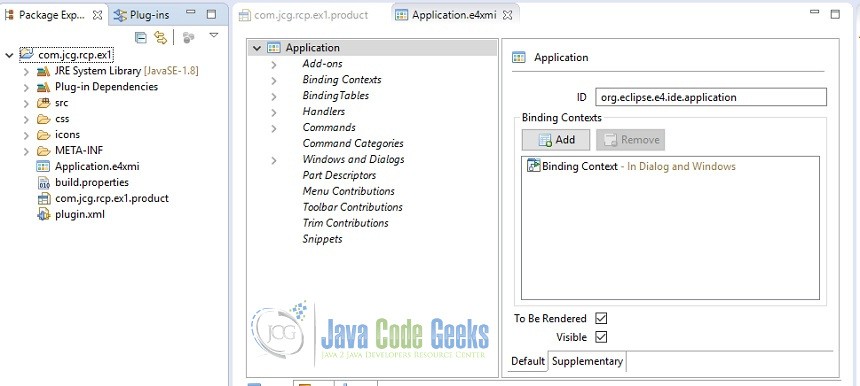
Eclipse Version 4 has introduced many new concepts and APIs, such as the application model, dependency injection (DI), and CSS styling. The structure of the application is described via the application model in the Application.e4xmi file. Views, menus, and toolbars of your application can be defined in this file.
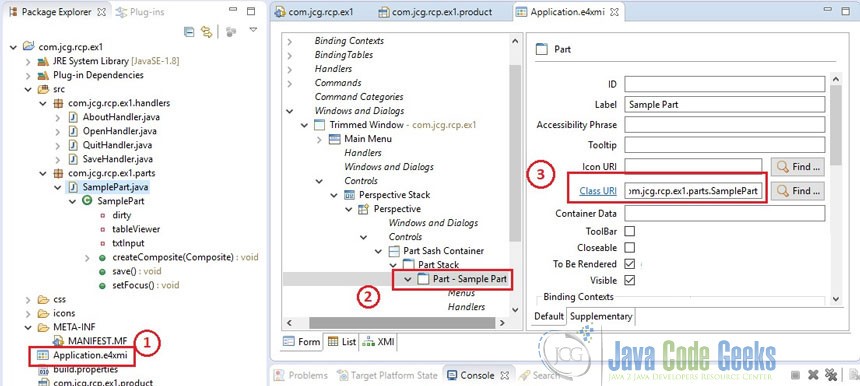
Open Application.e4xmi file and navigate to ‘Part – Sample Part’ as shown in the picture below. This is the default class gets executed and shown on the window as view part.
As per Eclipse 4 application model, Parts are the UI components which can be used to navigate and modify data. All Parts can be stacked next to each other or it can be positioned.
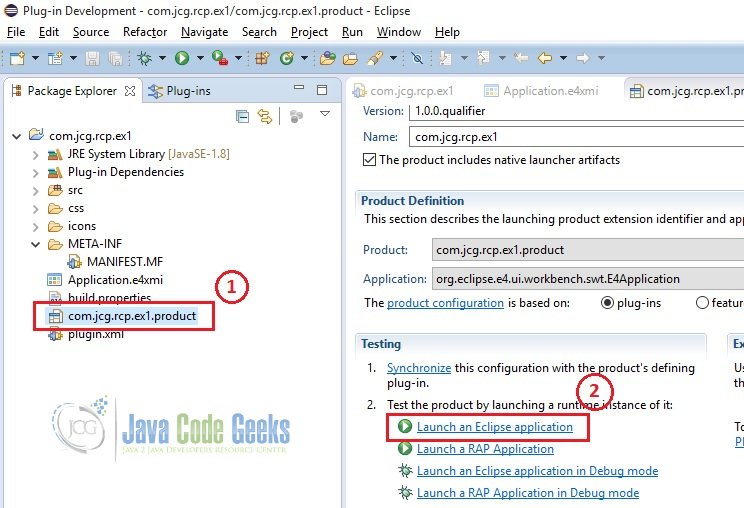
8. Run RCP Application
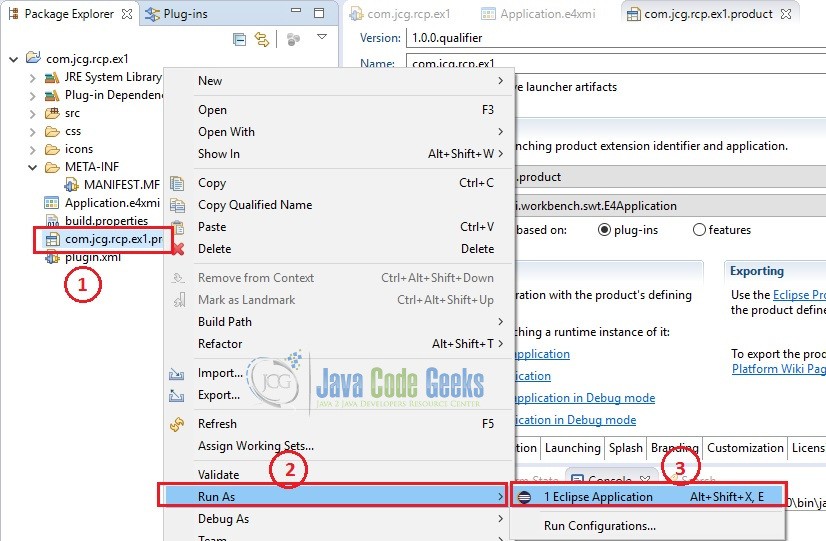
We will see how to run this application before we add our own components in this application. To run, double click on the product file as shown in the picture below (1). Launch your Eclipse application by pressing on ‘Launch an Eclipse application’ hyperlink (2) from the ‘Overview’ tab.
It can also be executed by selecting ‘Run As’ –> ‘Eclipse Application’ as depicted below.
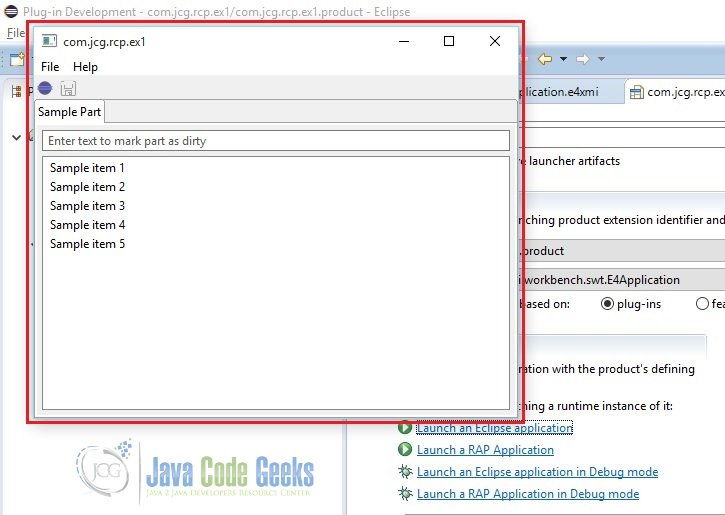
9. Stand-alone application
Separate desktop application is up and running.
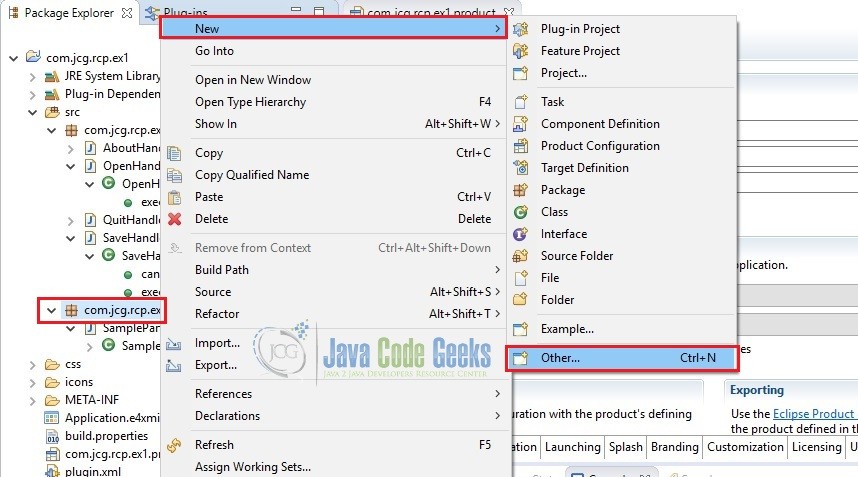
10. Create New Part
Now, we will see how to add our own Part in the application. As shown in the picture, click on the product name – New – Other:
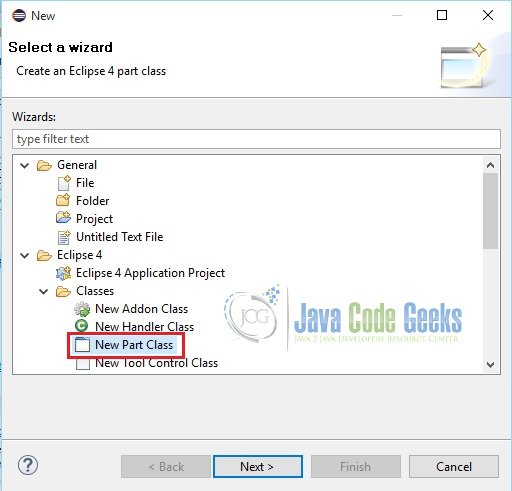
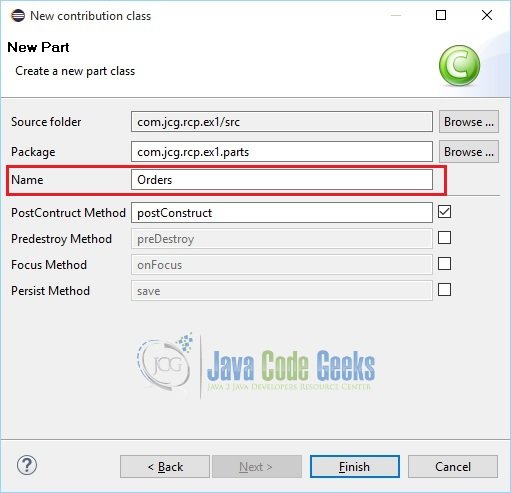
Select ‘New Part Class’ and click Next
Enter class name and click Finish
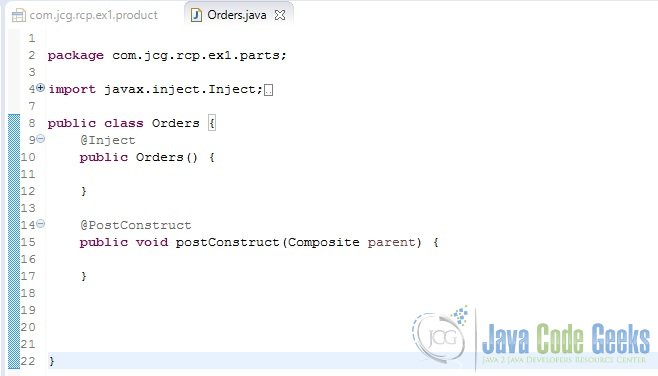
New Part is created with two annotations ‘@Inject‘ and ‘@PostConstruct‘. @Inject marks a constructor, method, or field as being available for injection and methods annotated with @PostConstruct are called after an object has been fully injected.
11. Add New Part
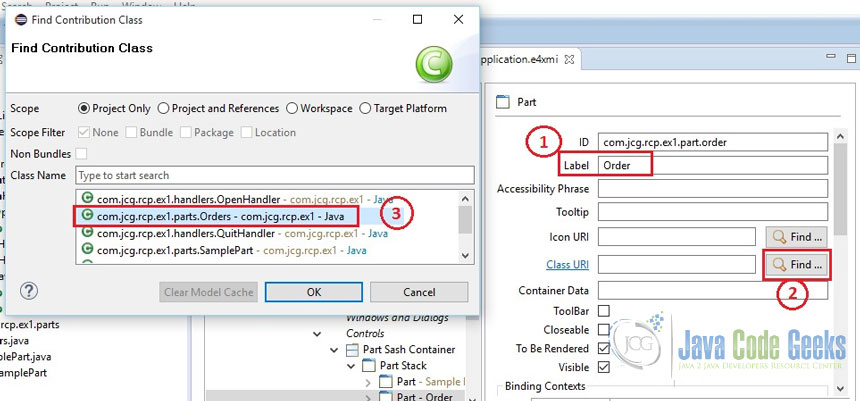
New Part created above should be attached to the stack to view. Open Application.e4xmi and navigate to ‘Part Stack’. Click ‘Add’ button.

New Part form is opened. Enter Part name and click ‘Find’ button of ‘Class URI’. Select the new part ‘Orders’ just created and click ‘OK’.
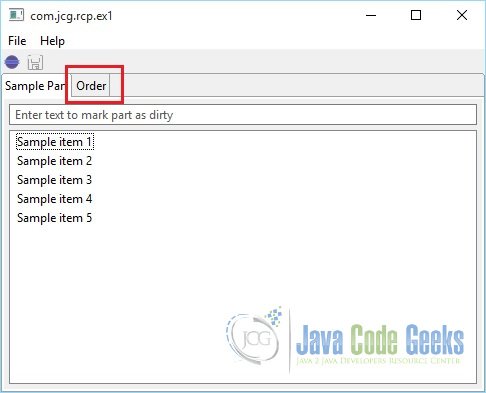
Now, newly created Part has been attached with the application. Click ‘Ctrl+S’ to save and run the application as explained in step 8. You can see the new Part has been attached next to ‘Sample Part’
12. Add Controls on Part
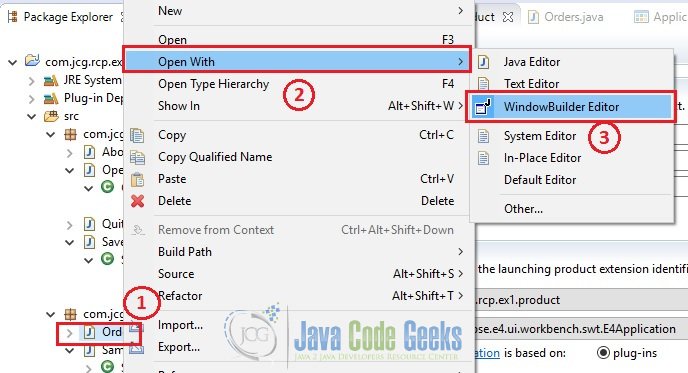
We will use WindowBuilder Editor to add controls on Part. To open WindowBuilder Editor, right click on the newly created class name ‘Orders’ and open with WindowBuilder Editor.
Click on ‘Design’ tab
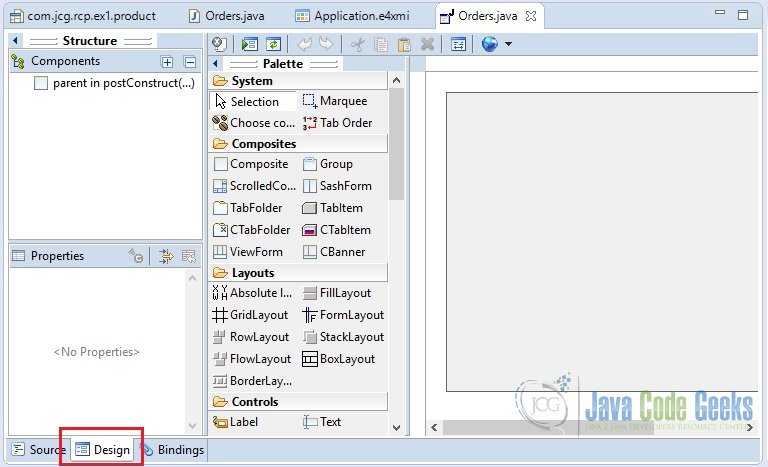
Now, your Part can be decorated with required controls and design elements.
13. Export application
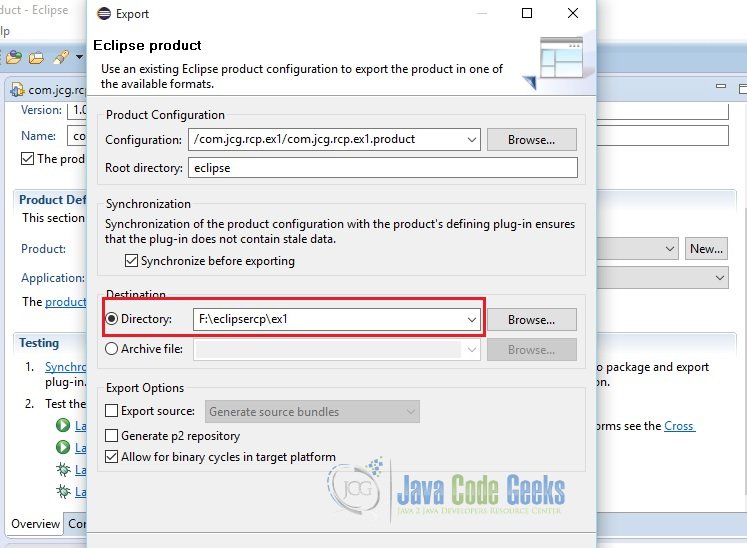
Yes, finally we want our application to be executed as a separate application away from Eclipse platform. RCP application can be exported as a separate product and executed out of eclipse platform. To export click on the ‘Eclipse Product export wizard’ hyperlink from the same ‘Overview’ tab.

Export pop-up window appears. Enter destination directory path where this stand-alone application needs to be exported. Click ‘Finish’
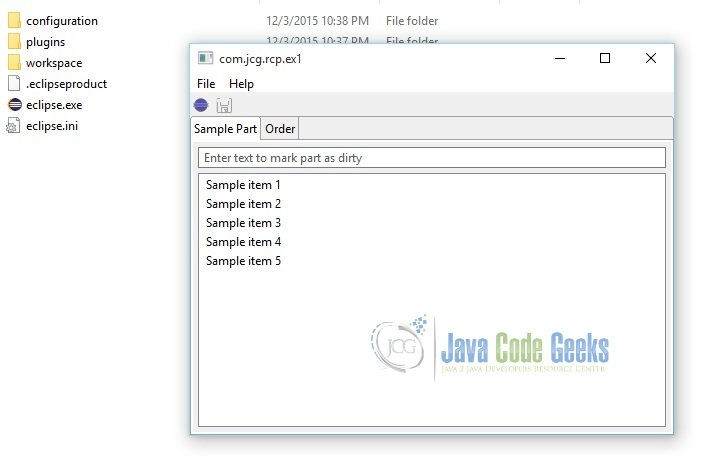
14. Completed Application
The application is built and by default the windows version of this application is copied in the destination directory. Click on the ‘eclipse’ icon to run the application away from eclipse platform.
15. Conclusion
We have shown you a way to define the general design of an application in a consistent way using Eclipse 4 RCP API. The Eclipse 4 Application Platform provides you the foundation to build whatever you want as a plug-in or as a stand alone application. In this example we have seen how to create our own view Part and attach with the application.
