The Yocto Project is an open source collaboration project that helps developers create custom Linux-based solutions for Embedded and IoT systems, regardless of the underlying hardware architecture. In order to develop solutions based on Yocto project, we need to use IDE like Eclipse and Yocto plugin is available for Eclipse which is required to be configured properly.
1. Introduction
The Open Source Yocto project is a combination of three key development elements. This umbrella open source project builds and maintains validated open source tools and components associated with embedded Linux. Yocto also maintains and validates these three development elements. These three elements are viz.
- A set of integrated tools to make working with embedded Linux successful, including tools for automated building and testing, processes for board support and license compliance, and component information for custom Linux-based embedded operating systems.
Poky, the reference embedded distribution.- The
OpenEmbeddedbuild system, co-maintained with theOpenEmbeddedProject.
Here are some highlights for the Yocto Project :
- Provides a recent Linux kernel along with a set of system commands and libraries suitable for the embedded environment.
- Makes available system components such as
X11,GTK+,Qt,Clutter, andSDL(among others) so that user can create a rich user experience on devices that have display hardware. For devices that do not have a display or where user wish to use alternative UI frameworks, these components need not be installed. - Creates a focused and stable core compatible with the
OpenEmbeddedproject with which you can easily and reliably build and develop. - Fully supports a wide range of hardware and device emulation through the Quick EMUlator (
QEMU). - Provides a layer mechanism that allows user to easily extend the system, make customization, and keep them organized.
1.1 Eclipse IDE Yocto Plugin
This plug-in enables user to use the popular Eclipse Integrated Development Environment (IDE), for development using the Yocto Project® all within the Eclipse IDE. User can work within Eclipse to cross-compile, deploy, and execute custom project output into a QEMU emulation session as well as onto actual target hardware.
The environment also supports performance enhancing tools that allow user to perform remote profiling, tracing, collection of power data, collection of latency data, and collection of performance data.
Once user enable the plug-in, standard Eclipse functions automatically use the cross-toolchain and target system libraries. User can build applications using any of these libraries.
2. Technologies Required
- Java (jdk 1.8.x or higher will be fine)
- Eclipse ( Luna or higher version is required)
- Linux environment of a flavor (viz. Ubantu, CentOs, Fedora, openSUSE, Debian) with appropriate version (viz. Ubantu 12.4 or higher etc.)
- Git 1.8.3.1 or greater
- tar 1.24 or greater
- Python 3.4.0 or greater.
- Yocto Freescale BSP Release or Freescale Community BSP. (For this example here Freescale BSP Release L3.14.28 is used but FSL Community BSP can also be used.)
- Poky Meta Toolchain (Poky 1.7 / L3.14.28 in this example but user should use the toolchain that corresponds to the BSP that will be used)
3. Eclipse Plug-in Configuration Steps
3.1 Eclipse Configuration Steps
- Go to http://www.eclipse.org/downloads/packages/release/luna/sr2
- Look for the “Eclipse IDE for C/C++ Developers”, which contains the Eclipse Platform, the Java Development Tools (JDT), and the Plug-in Development Environment.
- Execute Linux commands to extract downloaded .tar file
cd ~tar -xzvf ~/Downloads/eclipse-cpp-luna-SR2-linux-gtk-x86_64.tar.gz(Assuming .tar file is there in Downloads directory)
- Once Eclipse Luna is installed user may run the Eclipse IDE with the following command:
cd eclipse./eclipse
3.2 Initial Eclipse configuration for getting ready for Yocto plugin
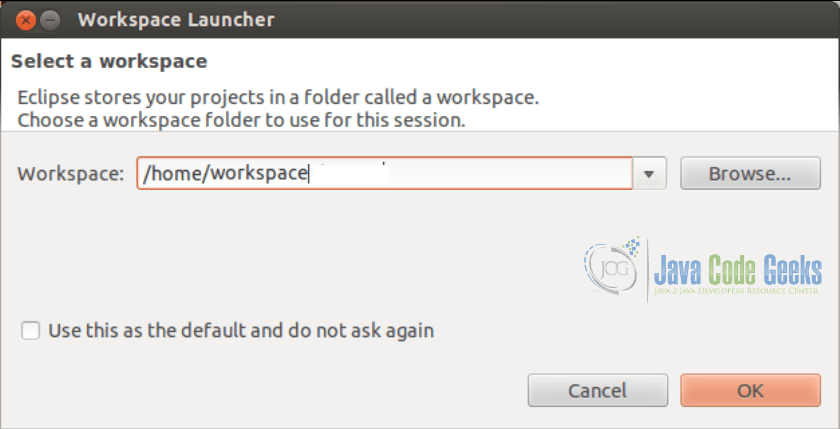
1. Select a new workspace.
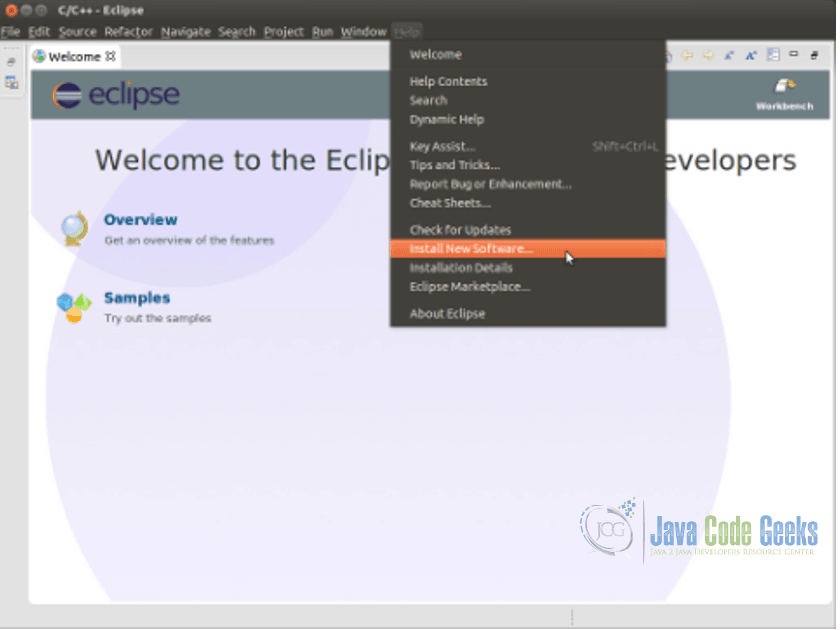
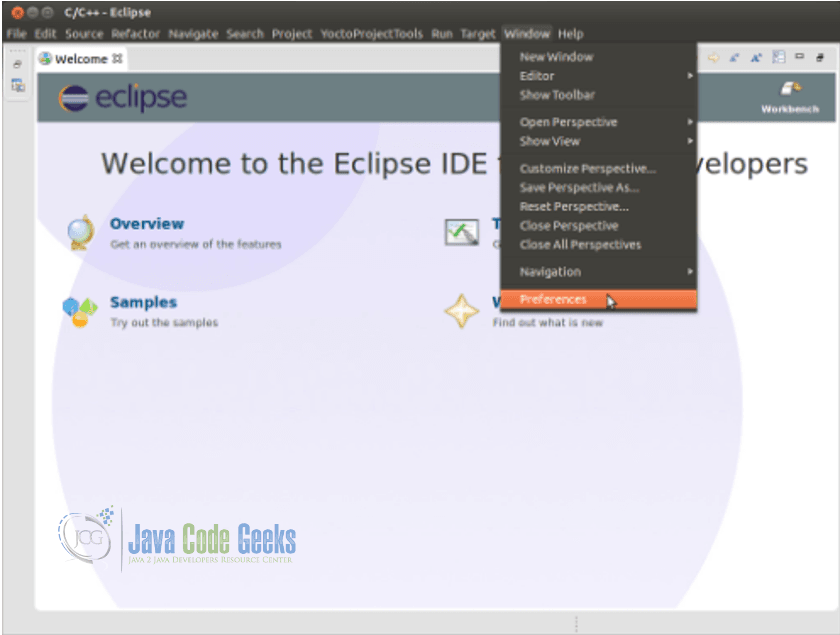
2. Choose “Install New Software” from the “Help” menu of Eclipse IDE.
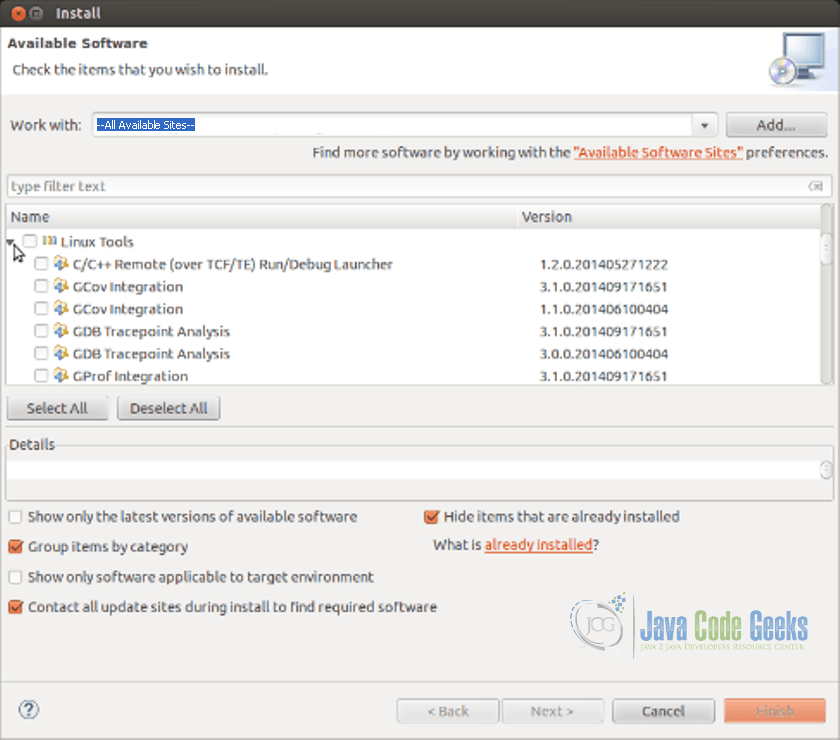
3. Choose “–All Available Sites–” from the “Work with” drop down menu.
From the populated drop down list, find and expand the Linux Tools option and select:
- Linux Tools LTTng Tracer Control
- Linux Tools LTTng Userspace Analysis
- LTTng Kernel Analysis
If some of these options are not listed that means that those are already installed.
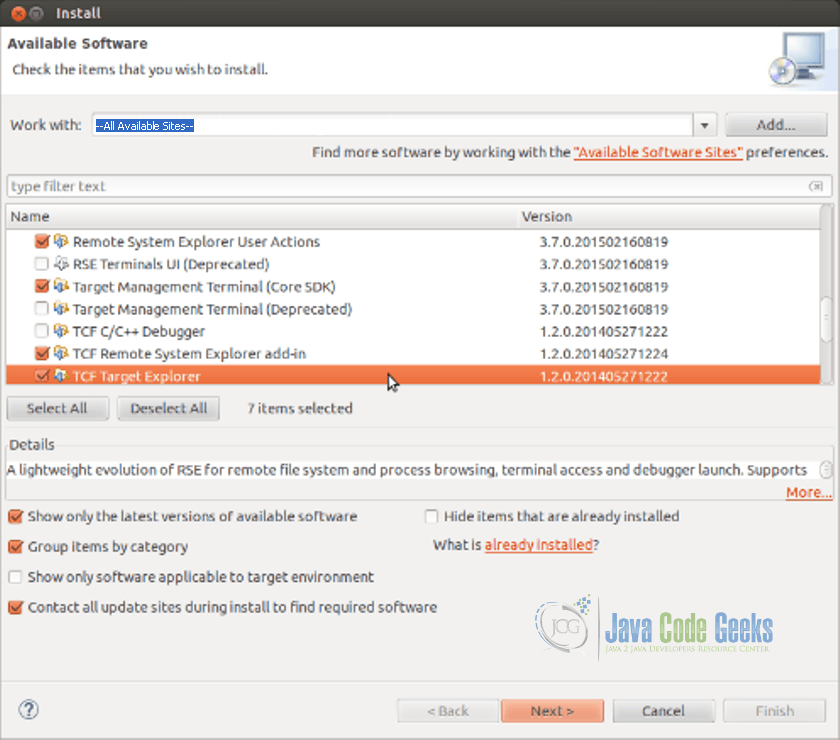
- Find and expand the Mobile and Device Development and select the following:
- C/C++ Remote Launch (Requires RSE Remote System Explorer)
- Remote System Explorer End-user Runtime
- Remote System Explorer User Actions
- Target Management Terminal (Core SDK)
- TCF Remote System Explorer add-in
- TCF Target Explorer
If some of these options are not listed that means that those are already installed.
- Expand Programming Languages and select:
- C/C++ Autotools Support
- C/C++ Development Tools
4. Choose Next and accept the necessary EULA

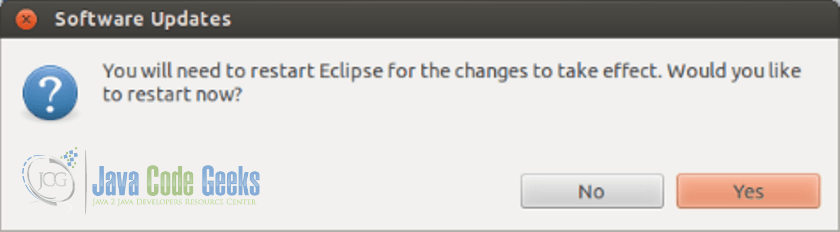
5. Finish button must be clicked. The selected packages will be downloaded and installed. User will be asked to restart Eclipse IDE to finish the installation.
3.3 Eclipse Yocto plugin addition
- Next step is to install the Eclipse Yocto Plug-in into the Eclipse IDE. Following shows how to install the pre-built plug in.
- In Eclipse, user need to select “Install new Software” from the “Help” menu
- Click the “Add…” button to add a repository Url as shown below:
- Name: Any name can be given, we will use Yocto
- Location: http://downloads.yoctoproject.org/releases/eclipse-plugin/1.8/luna
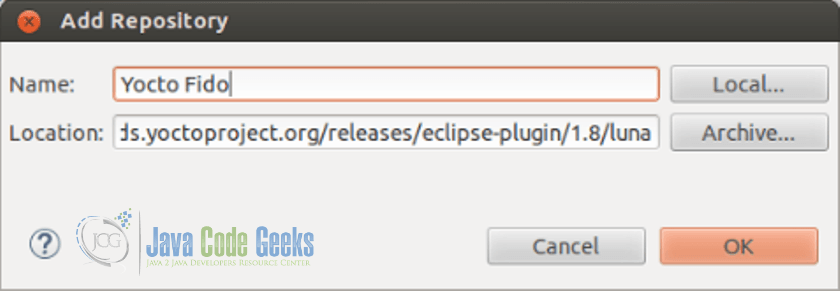
- Click “Ok” and then chose this new repository on the “Work with” drop-down menu and select the following plug-ins from the list
- Yocto Project ADT Plug-in
- Yocto Project Bitbake Commander Plug-in
- Yocto Project Documentation plug-in
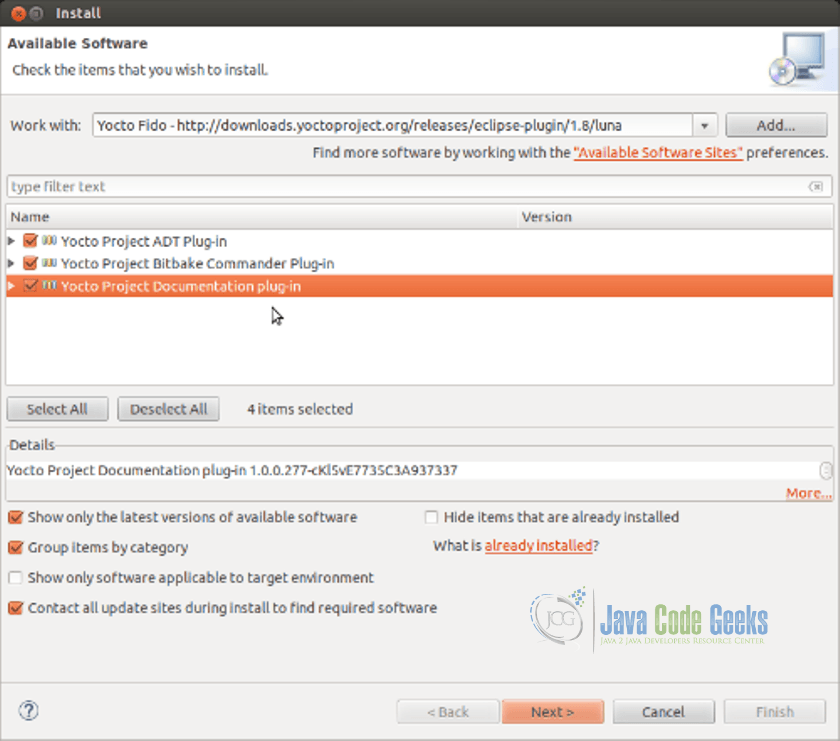
- Install these plug-ins and click “OK” when prompted about installing software that contains unsigned content. You may be asked to restart the Eclipse IDE.
3.4 Eclipse Yocto plugin configuration
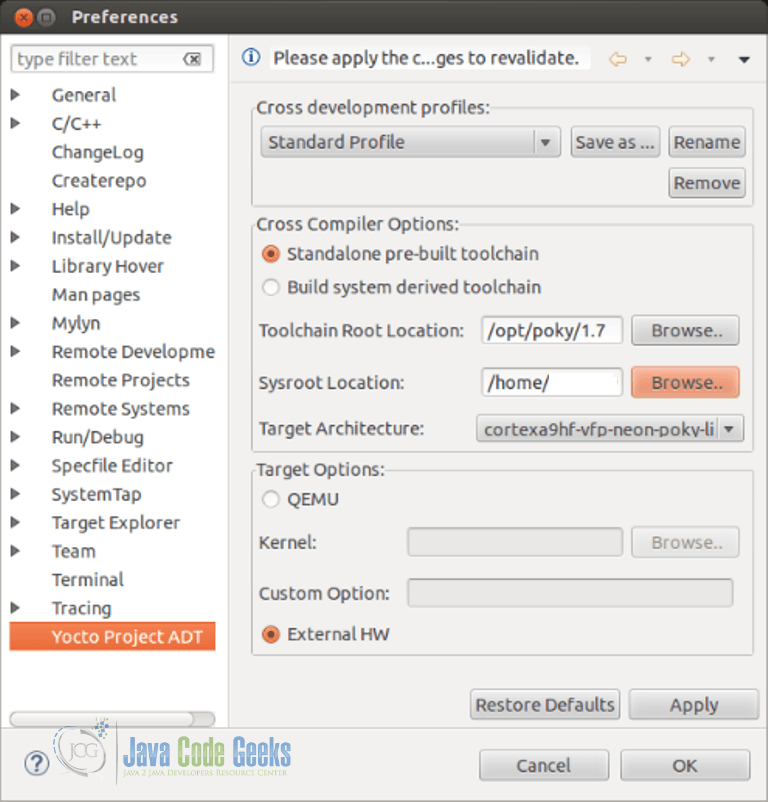
With all the necessary packages installed user now can configure the Eclipse Yocto Plug-in. In this steps user will configure the Cross Compiler options and the Target options. These will then be used as default for projects from within your working workspace.
Click on Yocto Project ADT from the left options and then under Cross Compiler Options select the Standalone pre-built toolchain radio button. User needs to point to the Toolchain Root location of installed toolchain. Build the tool chain image. It generates the toolchain that will be installed on user’s host machine and can be used to build any source code.
$ bitbake meta-toolchain
In this case user will be using poky 1.7 tollchain which has the following default location: /opt/poky/1.7
As for the sysroot Location this would correspond to your build directory sysroot folder, which is located on the following path: //tmp/sysroots/
In this case the Tartget architecture would be the Cortex-A9, which correspond to the i.MX6 and which is also the only option installed on the chosen directory.
For Target Options we would be using the actual HW in order to test our application so keep the External HW option selected.
4. Conclusion
That’s it on how to install Yocto Plugin on Eclipse IDE. Once the configuration is done, Eclipse IDE for which the plugin has been configured, will be ready for further application development for Yocto platform. You can also go through the links shared in this post for further reading.
