This article will look at what the Django framework is and how to get started with it using Python.
You can also check this tutorial in the following video:
1. What is Django?
Django is a Web framework. It is written in Python, and we use it for developing dynamic Web sites and applications. The Django framework is said to be a “batteries-included” framework. Batteries-included means that most functionality commonly needed for building web applications, such as URL routing, authentication, database migrations, etc., is included in the framework by default.
2. Why Django and Python?
Django’s primary goal is to make web application development easier. There are many reasons Django has become the de facto web application framework in Python. The most important factors are:
- It helps create secure and reliable web applications with minimum fuss.
- Since it is written in Python, it leverages many open-source libraries.
- It uses the “batteries-included” philosophy and offers a wide range of features out-of-the-box. Django’s features include a standalone Web server for development and testing, caching, middleware system, ORM, template engine, form processing. It also provides an interface with Python’s unit testing tools, an authentication system, an administrative interface with auto-generated CRUD operations, generation of syndication feeds (RSS/Atom), sitemaps, and even a Geographic Information System (GIS) framework.
- Django has been around for over 12 years and is a mature and reliable framework.
3. Prerequisites for Installing Django
Before we can install the Django framework, we need some softwares and settings pre-installed. They are as follows:
- Install Python on our system
- Create a Virtual environment to keep the Django and Python environments separate.
- Install Django framework inside the virtual environment.
3.1 Install Python and Pip
Your system should already have Python installed. To check the version, open a command prompt and type
python --version
Most Python version comes bundled with the pip installer. To check if the pip version, type
pip --version

In case your system does not have Python, please visit the Python download site and follow the instructions to install Python. Similarly to install pip, the steps are as follows:
- Visit the page and save the file as get-pip.py
- Open a command prompt and type
python get-pip.py
- Check the pip version with the command
pip --version
3.2 Creating a Virtual environment
This step is not mandatory, but it is highly recommended. The Virtual environment helps to isolate the Python, and the Django install. This step is to ensure that dependencies do not clash with each other. We can also have multiple Django versions running at the same time with the virtual environment setup. To create a virtual environment, we will use the pip command.
Open a command prompt window and type
pip install virtualenv
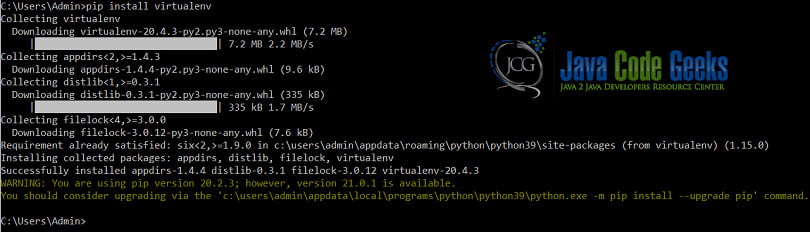
This step installs the virtual environment on our system.
3.3 Using the Virtual environment
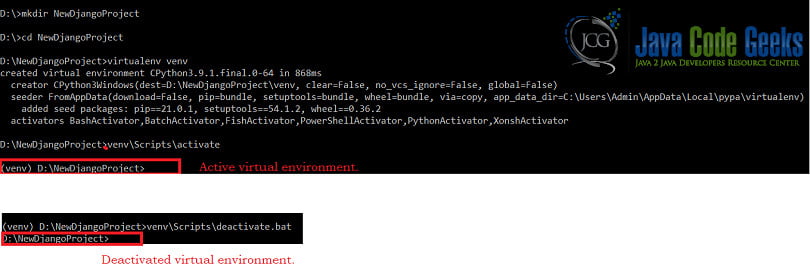
To use a Virtual Environment, first, we need to create the Project folder. This folder is where our web application and related resources will reside. For example, I am creating a new folder called NewDjangoProject in my D drive. Open a command prompt window and type
mkdir NewDjangoProject
- Change over to that directory by typing
cd NewDjangoProject
- To generate a new virtual environment in this folder, type
virtualenv venv
This command will create a new virtual environment inside the project folder. All the dependencies and third-party libraries we install will be restricted to this folder and will not affect the central base Python installation. We know that the folder is a virtual environment because we get a (venv) written before the folder.
- Before we can use this virtual environment, we need to activate it. To activate the virtual environment, type in
venv\Scripts\activate
Our virtual environment is now up and ready to use. Once we complete our work, we can deactivate the virtual environment by typing
venv\Scripts\deactivate.bat
4. Installing Django framework
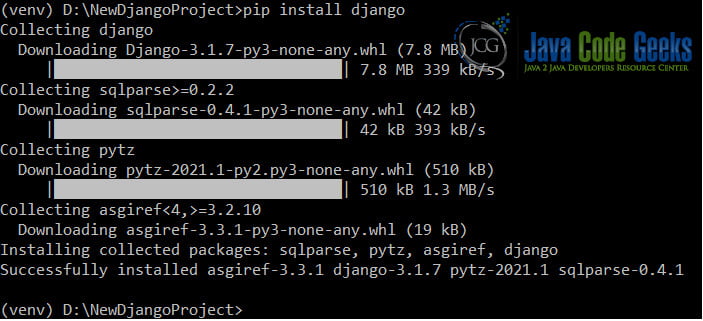
Now that we have Python and pip installed, we can install the Django framework by typing
pip install django
5. How Django works
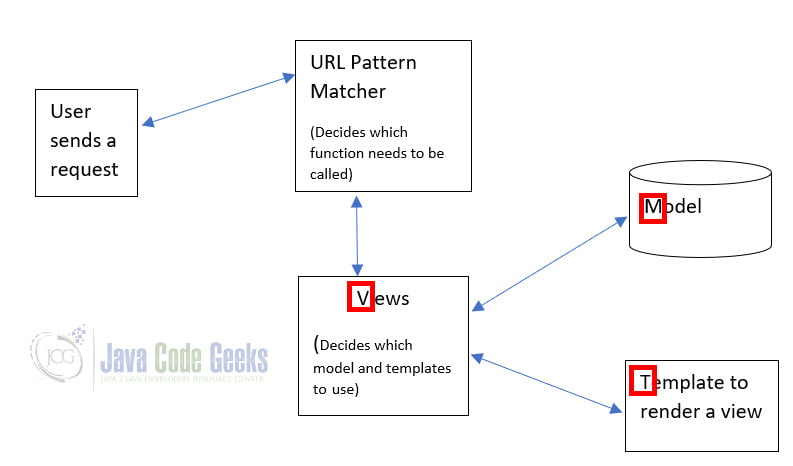
The Django framework supports the Model-View-Controller or MVC model, but it follows the Model-View-Template, i.e., MVT model.
- Model: This is the data layer, i.e., it stores the database.
- View: The View is the same as the “Controller” from the MVC model. It receives the input from the user and gives back the response to the user interface.
- Template: The template is the HTML file. The Template file is the presentation logic and controls the display to the user.
Django is a MVC architecture but the nomenclature used is different.
5.1 The Reasoning behind the MVT
The framework’s working is the same as a normal Model-View-Controller framework, but it is called a Model-View-Template View. The reasoning behind this is in the FAQ section in the Django documentation.
Django appears to be an MVC framework, but you call the Controller the “view”, and the View the “template”. How come you don’t use the standard names?
Well, the standard names are debatable. In our interpretation of MVC, the “view” describes the data that gets presented to the user. It’s not necessarily how the data looks, but which data is presented. The View describes which data you see, not how you see it. It’s a subtle distinction. So, in our case, a “view” is the Python callback function for a particular URL, because that callback function describes which data is presented.
Furthermore, it’s sensible to separate content from presentation – which is where templates come in. In Django, a “view” describes which data is presented, but a view normally delegates to a template, which describes how the data is presented. Where does the “controller” fit in, then? In Django’s case, it’s probably the framework itself: the machinery that sends a request to the appropriate View, according to the Django URL configuration. If you’re hungry for acronyms, you might say that Django is a “MTV” framework – that is, “model”, “template”, and “view.” That breakdown makes much more sense.
The typical Django framework looks like this
6. The development process
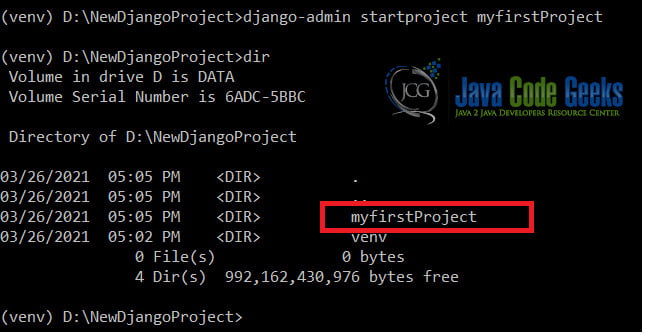
To understand the development process and what goes where let us create a new project. To create a new project:
- Open the command prompt
- Cd to the folder where we want to store our code (NewDjangoProject)
- Start and activate the virtual environment.
- Install all required softwares like Django etc.
- Type the command:
django-admin startproject myfirstProject
- If we do a dir command after this step, we see a folder called myfirstProject created.
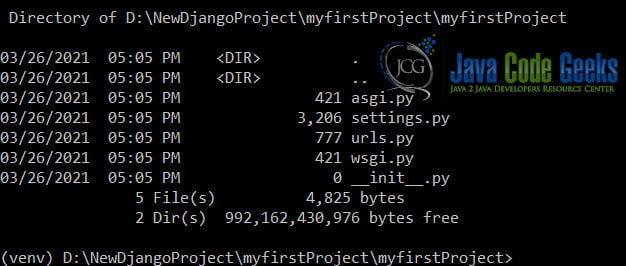
These steps create a project. To create an app inside this project:
- Be in the same folder as the manage.py file is
- Type in the command:
python manage.py startapp testapp
The above steps create a structure shown below and are where our entire Model-View and Template(s) sit.
In the structure above,
- Manage.py : command-line utility
- __init__.py: This is empty to tell Python to consider the app as a package.
- Settings.py: This is where we will keep all the configurations.
- Urls.py: This is a part of the View and will hold all the URL-patterns. These URLs help navigation through the app.
- Asgi.py and wsgi.py: These files are entry points for webservers.

Django comes packed with a web server, and we can run the server by the command
python manage.py runserver

7. The Model
The Model layer is the data layer and connects to the database. Each attribute of the model represents a database field. Every Model class in Django is a subclass of the django.db.models.Model.One Model class represents one database table. Django provides an automatically generated database-access API.
7.1 Fields
We specify the column names and their data types in the model. To identify the data type of the column, we use the Django Fields. Django provides the following Fields:
| Field | Description |
|---|---|
| AutoField | Auto-increment integer |
| BigAutoField | Auto-increment 64-bit integer |
| BigIntegerField | 64-bit Integer |
| BinaryField | Binary data |
| BooleanField | Boolean values, i.e., True or False. Usually used with checkboxes. |
| CharField | Alphanumeric characters |
| DateTimeField | Python Date and Time object |
| DecimalField | Fixed-precision decimal numbers |
| DurationField | The field stores periods |
| EmailField | It is a Charfield with inherent checks for a valid email address. |
| FileField | To upload files |
| FloatField | A field storing floating-point numbers |
| ImageField | A field for a file with inherent validation for image formats |
| IntegerField | A field for storing integers |
| NullBooleanField | A field for Boolean and NULL values. |
| SmallInteger | A field for storing integers. However, the range is less than the Integer field. |
| TextField | A text field for storing blob-like data |
| TimeField | storing time-related information. |
7.2 Field Options
Along with fields, we can also add constraints like primary key, etc. To do so, we use the Field Options. The Field options that are allowed are:
| Options | Description |
|---|---|
| Null | Can allow NULL Values |
| Blank | Allows Blank values also |
| Choices | To store choices like tuples, i.e., enums, in database |
| Default | Some default value |
| Help_text | Help to be displayed in the widget. Mainly for documentation |
| Primary_key | Primary Key constraint |
| Unique | Unique constraint |
For example, in the models.py file in our test app, we will create two models, one for Books and the other for Users
models.py
from django.db import models

# Create your models here.

class Books(models.Model):

   book_id = models.AutoField(auto_created = True, primary_key = True,)
   name = models.CharField(max_length = 20)
   author_name = models.CharField(max_length = 20)
   isbn = models.CharField(max_length = 20)

   class Meta:
      db_table = "book_inventory"

class Users(models.Model):

   user_id = models.AutoField(auto_created = True, primary_key = True,)
   first_name = models.CharField(max_length = 20)
   last_name = models.CharField(max_length = 20)
   address = models.CharField(max_length = 50)
   user_email = models.EmailField()

   class Meta:
      db_table = "book_inventory"
Django creates actual database tables with these models once we migrate.
8. The View
The framework that decides which request goes where and who gives the response is the View. In other MVC frameworks, this is the Controller. The View holds the business logic of our application. The View in the Django framework consists of
- URL Pattern Matcher, which is present in the file urls.py
- The View handles the HTTP requests and responses. The View we implement in the view.py file.
Every View (HTTP request) has its URL. We need to tell the Django framework which requests to look for, for every URL. These URL-patterns are written in the urls.py file and form a part of the “View” in a Django app. For example, let’s add an URL entry for the Welcome page in the urls.py file.
urls.py
from django.contrib import admin
from django.urls import path
from testapp import views

urlpatterns = [
    path('admin/', admin.site.urls),
    path('welcome/',views.helloReq,name='welcome')
]
Corresponding to the URL pattern, we need to add a Request handler function in the views.py file. For example, for the welcome page, we can add something like:
views.py
from django.shortcuts import render

# Create your views here.
def helloReq(request):
   return render(request,'welcome.html',{})
9. The Template
The template is nothing but the HTML files, i.e., what the users see. We store the template in the templates folder in our project, and they consist of the static HTML part and the dynamic content that Django inserts. To configure the template files, we use the settings.py file.
10. Common Web Applications
Django provides support to most of the commonly used applications required for building web applications. Some of the applications it offers in-built are as follows:
- Authentication
- Caching
- Logging
- Sending emails
- Syndication feeds (RSS/Atom)
- Pagination
- Messages framework
- Serialization
- Sessions
- Sitemaps
- Static files management
- Data validation
11. Summary
In this article, we saw a high-level overview of the Django framework and how we can get it set up and running on our systems. Django has extensive documentation available here.
12. Download the Source Code
This was a article on the Django framework and Python.
You can download the full source code of this example here: Getting started with Django and Python
