Best practices are procedures that are accepted or prescribed as being correct or most effective. The Apache Tomcat software is an open source implementation of the Java Servlet, JavaServer Pages, Java Expression Language and Java WebSocket technologies.
1. The tools
- Java JDK
- Apache Tomcat
2. Introduction
In this example we are going to illustrate best practices using the Apache Tomcat Servlet container. We are going to install the Tomcat server to illustrate these practices.
3. Prerequisites
- JDK installed
4. Download Tomcat
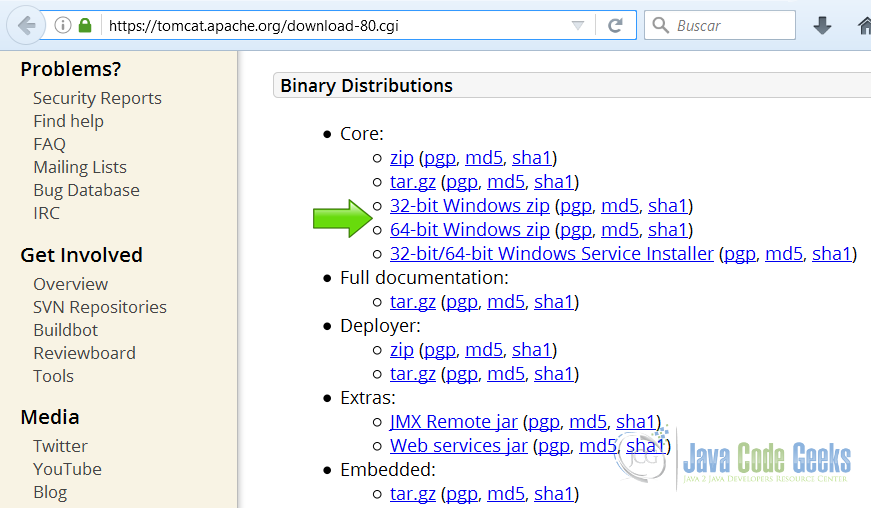
Go to the page https://tomcat.apache.org/download-80.cgi.
Download the tomcat server as a zip compressed file for windows.
5. Tomcat Installation
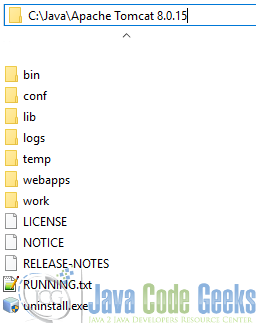
5.1 Uncompress Apache Tomcat
Choose an installation directory and uncompress the Tomcat server in its own directory.
5.2 Install the Tomcat service
Open the Windows terminal and go to the Tomcat Installation bin directory.
Tomcat installation directory
C:\Java\Apache Tomcat 8.0.15\bin>
Install the service with the following command:
Install Tomcat service
C:\Java\Apache Tomcat 8.0.15\bin>service install
You should get an output similar to this:
install Tomcat output
Installing the service 'Tomcat8' ...
Using CATALINA_HOME:    "C:\Java\Apache Tomcat 8.0.15"
Using CATALINA_BASE:    "C:\Java\Apache Tomcat 8.0.15"
Using JAVA_HOME:        "C:\Java\jdk1.8.0_40"
Using JRE_HOME:         "C:\Java\jre1.8.0_40"
Using JVM:              "C:\Java\jre1.8.0_40\bin\client\jvm.dll"
The service 'Tomcat8' has been installed.
5.3 Start the Tomcat service
Start the service with the following command:
Start tomcat output
C:\Java\Apache Tomcat 8.0.15\bin>sc start Tomcat8
You should get an output similar to the following:
console
SERVICE_NAME: Tomcat8
        TYPE               : 10  WIN32_OWN_PROCESS
        STATUS             : 2  START_PENDING
                                (NOT_STOPPABLE, NOT_PAUSABLE, IGNORES_SHUTDOWN)
        WIN32_OUTPUT_CODE  : 0  (0x0)
        SERVICE_OUTPUT_CODE: 0  (0x0)
        CHECK-POINT        : 0x0
        START-INDICATOR    : 0x7d0
        PID                : 5552
        MARKS              :
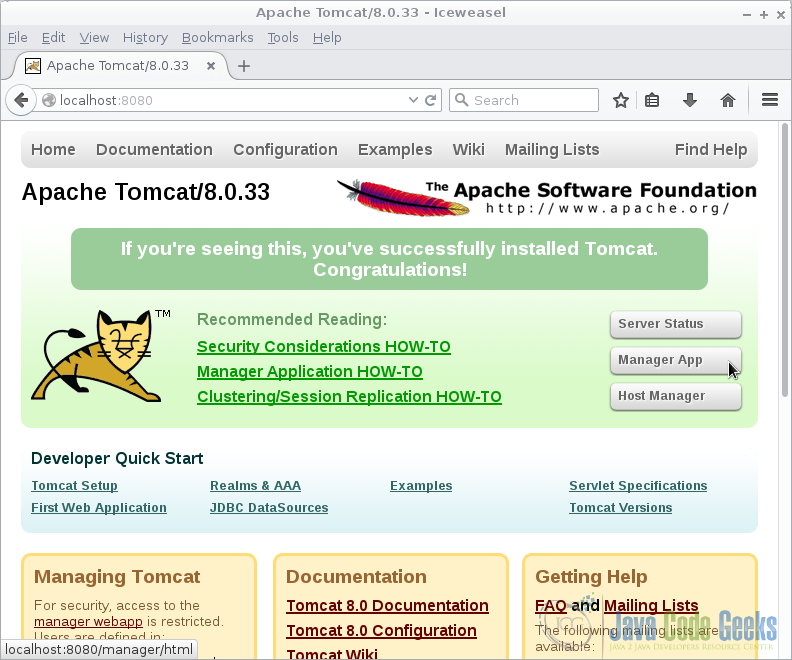
5.4 Check that tomcat is running
Open the browser in the URL: http://localhost:8080
And you should see the Tomcat Welcome screen.
6. Install Tomcat as a Service
If you are going to use Tomcat in a server is often useful to install it as a service. Services start with the operative system and also your Tomcat service starts and stops with the machine shutdown & restart procedure.
Go to the Tomcat bin folder. Type the command:
Install service
C:\Java\Apache Tomcat 8.0.27\bin>service install
This command installs the Tomcat service in Windows. You should get the following output
Install service output
Installing the service 'Tomcat8' ...
Using CATALINA_HOME:    "C:\Java\Apache Tomcat 8.0.27"
Using CATALINA_BASE:    "C:\Java\Apache Tomcat 8.0.27"
Using JAVA_HOME:        "C:\Java\jdk1.8.0_40"
Using JRE_HOME:         "C:\Java\jdk1.8.0_40\jre"
Using JVM:              "C:\Java\jdk1.8.0_40\jre\bin\server\jvm.dll"
The service 'Tomcat8' has been installed.
7. Remove everything from webapps
On a production server the webapps that come with Tomcat are not needed, so often it’s useful to remove all of them. Keep in mind that this also removes the manager and you are not longer allowed to access your tomcat server configuration from a remorte server. Instead you can use SSH and configure your Tomcat Server remotely from the command line.

8. Default Servlet
Make sure the default servlet is configured not to serve index pages when a welcome file is not present. In TOMCAT_HOME/conf/web.xml
web.xml
 <servlet>
   <servlet-name>default</servlet-name>
   <servlet-class>org.apache.catalina.servlets.DefaultServlet</servlet-class>
   <init-param>
     <param-name>debug</param-name>
     <param-value>0</param-value>
   </init-param>
   <init-param>
     <param-name>listings</param-name>
     <param-value>false</param-value>  <!-- make sure this is false -->
   </init-param>
   <load-on-startup>1</load-on-startup>
 </servlet>
9. Replace default error page
Replace default error page by adding the following into CATALINA_HOME/conf/web.xml. The default error page shows a full stack trace which is not recommended on a production web server.
A well configured web application should override the default error page.

xml
<error-page>
  <exception-type>java.lang.Throwable</exception-type>
  <location>/my-error.page.jsp</location>
</error-page>
10. Enable SSL
SSL, or Secure Socket Layer, is a technology which allows web browsers and web servers to communicate over a secured connection. This means that the data being sent is encrypted by one side, transmitted, and then decrypted by the other side before processing. This is a two-way process, meaning that both server AND the browser encrypt all traffic before sending out data.
11. Secure the manager application
If you are going to use the manager application, you should secure it with a user and a password for the appropriate role.
Edit the file
TOMCAT_HOME/conf/tomcat-users.xml
Tomcat Roles
<role rolename="manager"/>
<user username="darren" password="ReallyComplexPassword" roles="manager"/>
12. Use SSL in the manager application
When you access the password-protected manager webapp, the password you enter will be sent over the network in plain text. Using an SSL connection instead, you can transport the password securely.
After configuring an SSL Connector in server.xml, add the following to TOMCAT_HOME/webapps/manager/WEB-INF/web.xml inside of the security-constraint tag.
security-constraint
<user-data-constraint>
  <transport-guarantee>CONFIDENTIAL</transport-guarantee>
</user-data-constraint>
13. Use an individual log file for each web application
By default additional webapp log entries are added to TOMCAT_HOME/logs/catalina.YYYY-MM-DD.log and System.out/System.err are redirected to TOMCAT_HOME/logs/catalina.out. To place webapp log entries in individual log files create a logging.properties file similar to the following within TOMCAT_HOME/webapps/APP_NAME/WEB-INF/classes (change the APP_NAME value to create a unique file for each webapp).
Logs
 handlers = org.apache.juli.FileHandler, java.util.logging.ConsoleHandler
 org.apache.juli.FileHandler.level = ALL
 org.apache.juli.FileHandler.directory = ${catalina.base}/logs
 org.apache.juli.FileHandler.prefix = APP_NAME.
14. Cleartext Passwords in server.xml
When configuring a resource, such as a JDBC pool, it is necessary to include clear text username and password in TOMCAT_HOME/conf/server.xml. Best practices advice us to never store clear text passwords, but it is very difficult to avoid here.
In the case of a JDBC pool what you can do is:
- make sure the database user only has access to the databases and tables they need.
- make sure the raw database files are only accessible to the user running the database services (e.g. mysql/postgresql user)
- make sure the Tomcat configuration files are only accessible to the tomcat user.
15. Conclusion
As you have seen these best practices are useful for your server and help you avoid some common mistakes and future problems with your tomcat server.
