1. Introduction
MySQL is one of the most used SQL databases in many of the world-enterprise applications due to its ability to manage transactions and the ACID-behaviour which is built into its core. One of the reasons MySQL is so popular is due to the easiness it provides for its usage and its related commands. In the open source web application framework LAMP (which consist of Linux, Apache, MySQL and PHP), MySQL server is a central & important component. The MySQL Database server is written using C and C++ which internally uses a lexical analyser to parse and understand the SQL queries.
We will start this lesson by simple installation process of MySQL server followed by some basic SQL Queries which will be accompanied by an explanation of how to run them. These queries will also include some key examples from JOINS and sub-queries (or nested queries as the world calls them) using MySQL. MySQL Server was acquired by Sun Microsystems in 2008 and later bought by Oracle when it bought Sun Microsystems. MySQL project was forked to evolve into MariaDB but MySQL has still held its position in the market.
Table Of Contents
2. Installation: MySQL Server
MySQL Server doesn’t have a single straightforward installation process and architecture. Rather, many variants for MySQL Server exist with an option to create a clustered environment as well. These variants are listed here:
- Free
- Community Edition: The Community Edition is the freely downloadable version of this database. It is distributed under the GPL license and is supported by a huge and active community of open source engineers.
- Commercial
- Cluster CGE Server: MySQL Cluster is the distributed database combining linear scalability and high availability. It provides in-memory real-time access with transactional consistency across partitioned and distributed datasets. It is designed for mission-critical applications.
- Enterprise Edition: The Enterprise Edition includes the most comprehensive set of features, management tools with technical support to get the highest levels of MySQL scalability, security, reliability, and uptime.
- Cloud Service by Oracle: It is made on top of Enterprise Edition powered by Oracle Cloud.
In this post, we will study and use Community Edition for MySQL Server. You can move to its download page to find the right installation files. Ar the bottom of the page, we can find a list of downloads where we can select the OS for which we want to install the server:
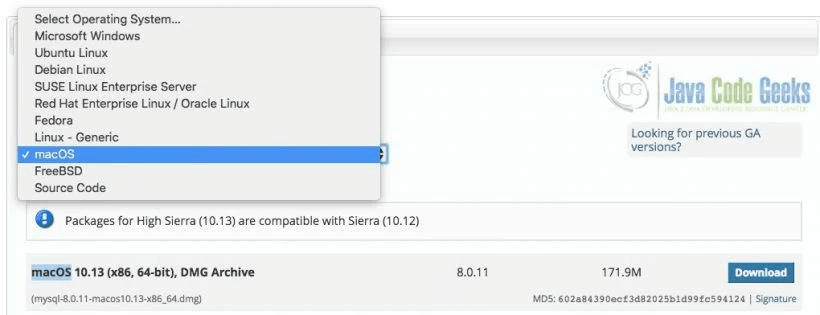
Based on the selected Operating system, an installer file will be downloaded which can be used for the further process. We can click on the installer file we downloaded and follow along with the process.
Something different (and better) does exist for the Linux machines for MySQL Server as well. As opposed to the UI tool setup mentioned above, Linux also allows using command line too. MySQL server is available over apt, yum as well as zypper repository. Moreover, we will be discussing the installation of MySQL server using the apt repository. Let’s start with the installation using command line:
- We need to get the apt package name for the server, we can get it from here (format will be similar to mysql-apt-config_x.x.xx-x_all.deb.).
- Download the mentioned package
- Execute the given command once the download is complete:
Depackage the file
sudo dpkg -i /PATH/version-specific-package-name.deb
- Once prompted for the version, enter the version you wish to install
- When the config steps are complete, we can update the apt repository:
Update repositories
sudo apt-get update
- We can now install MySQL Server with following command:
Update repositories
sudo apt-get install mysql-server
- When the installation is complete, it is started automatically by the server deamon. Check the status for the server process with the given command:
Update repositories
sudo service mysql status
3. Connecting to MySQL via command-line
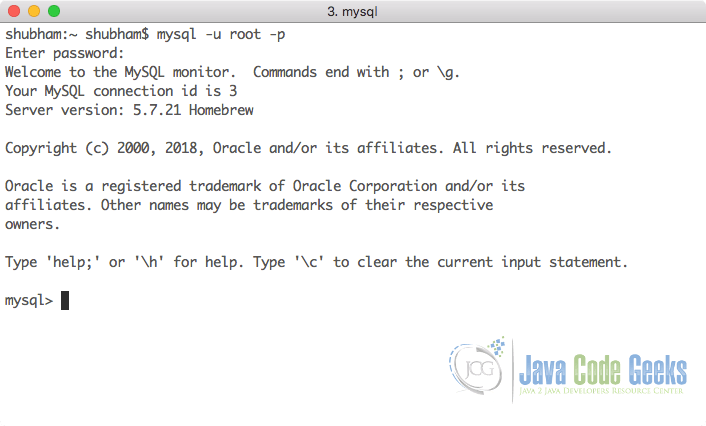
Now that we know that the MySQL server is up and running, we can connect to it using the username and password we supplied to it during the installation process. We can use the following command to do so:
Connect to MySQL
mysql -u root -p
When we press enter, MySQL Server will silently wait for us to provide the password. When you type it, the password will not be echoed back to the terminal due to security reasons. We will see the following prompt once we have logged into the MySQL command line:
When we are inside the MySQL command prompt, we can use the given command to show the databases which are present in the system and to ensure that MySQL is running fine:
Show Databases
show databases;
Here is what we get back with this command:
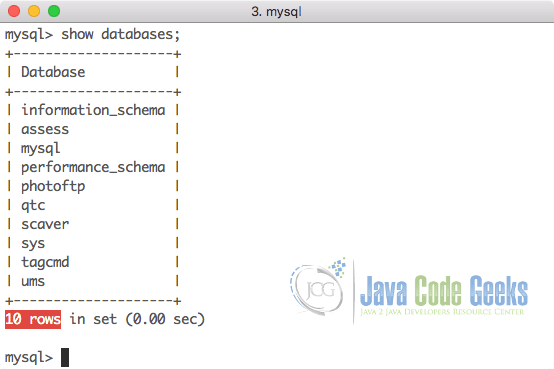
As we already had the server installed, the command displayed so many databases. If it was a fresh setup, MySQL will just show the list of MySQL default databases that are used for administration purpose.
4. Making a new Schema
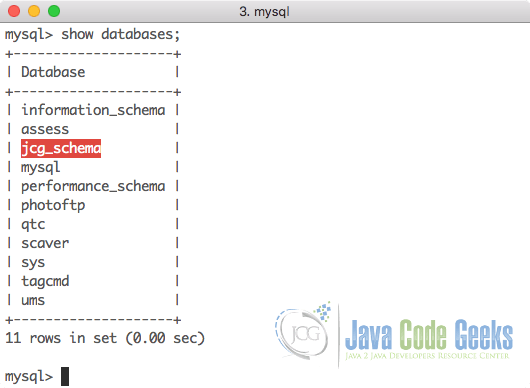
We will now move on and create our own database and tables inside that database where we can persist information. In MySQL Server, a database is known as a schema. We can make a new schema with the given command:
Create Schema
create database jcg_schema;
Here is what we get back when we try to check the schemas which exist in MySQL now to confirm that our new schema was created:
Now that we are confirmed with schema creation, we can start using it and create new tables inside it. To start working with a given database, we can run the given command:
Use Schema
use jcg_schema;
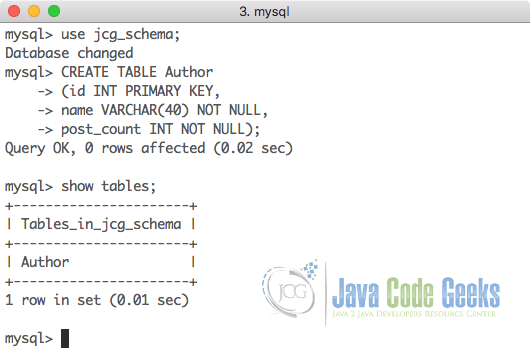
Now that the current schema is set, we can create new tables in this schema:
Create New Table
CREATE TABLE Author
(id INT PRIMARY KEY,
name VARCHAR(40) NOT NULL,
post_count INT NOT NULL);
We can now see what tables exist in our system with the given command:
Show Tables
show tables;
We will see the tables in current schema:
In the given create table command, we performed the below tasks:
- We made use of
CREATE TABLEcommand which is case insensitive in nature, to tell SQL that we want to create a table with the name i.e.Authoras mentioned - On each line of the command (it could have been on a single line but this is done for better visualisation), we provide the column names like
id,nameandpost_countin the mentioned command - We also mention the data type of each column we want to create as
INTandVARCHAR. The number forVARCHARrestricts the length which each value can have against this column - Finally, we also provide some additional constraints which extends the behaviour of each column defined, like
NOT NULLconstraint makes sure that a null value is never inserted into this column. If you try to so, it will raise an error and will leave the write operation as incomplete.
5. Inserting and Deleting Data
Now that we have the table ready for our usage, we can perform various operations on data like:
- Inserting new data
- Updating existing data
- Deleting the data
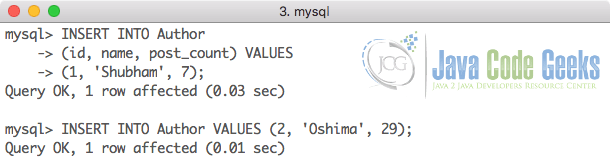
Inserting new data in the table is quite simple with the INSERT statement:
Use Schema
INSERT INTO Author
(id, name, post_count) VALUES
(1, 'Shubham', 7);
Note that providing an ID is essential that MySQL will not generate it itself unless we have marked the field AUTO INCREMENT when we were generating the schema for the table. When we execute the above command, we will get back a Query OK status:
Now, some data is present in our tables but how do we know it? We can display existing data in our MySQL tables with simple SELECT statement:
Select all columns
SELECT * FROM Author;
We will see all data present in our table:
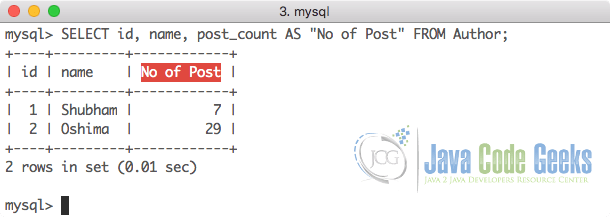
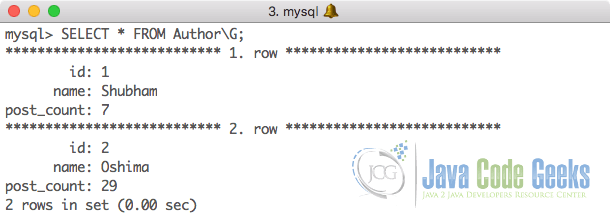
If you want a little more clear view of your data, we can format it as well with a small addition to the above command:
Descriptive display
SELECT * FROM Author\G;
We will see a much more descriptive format in the response:
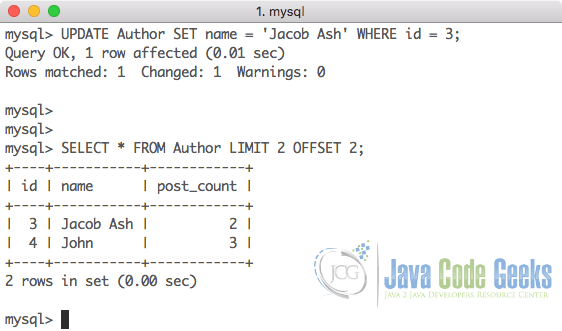
We can even update the existing data in MySQL with simple UPDATE command as:
Update selected row data
UPDATE Author SET name = 'Jacob Ash' WHERE id = 3;
Before this command, we inserted some sample data in our table for more demonstrations. Also, we used WHERE command as well to select a particular row of data. With updated data, we will see the following response:
We can finally delete the data with a specific ID from our table:
Update selected row data
DELETE FROM Author WHERE id = 5;
Let us look at the data we have after executing the above Delete command:
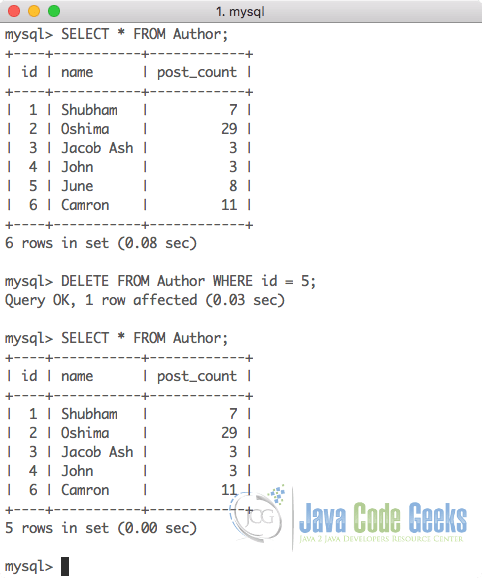
The count of deleted rows is displayed by the number of rows that were affected. Thus, it can be understood that one record has been deleted successfully.
6. Transactions in MySQL
When we hear the term Transactions, we usually mean a financial transaction which is meant to be safe and complete. But actually, a transaction can be any number of operations in a database which should happen in full, either they should happen completely or none should happen. This is the only way to ensure consistency in a database. For example, consider a situation when you place an order on Amazon. The order is placed but that order doesn’t reflect on your orders page. This happened due to the reason that the order placement happened successfully but order update in the database didn’t happen quite completely.
In SQL, any transaction must have four main attributes which are usually known as the ACID properties, which are described here:
- Atomicity: This property ensures that all steps in a transaction are completed successfully or none is completed and operations are rolled back if there is any failure in between
- Consistency: This property means that a transaction must update its state when it is successfully completed
- Isolation: A transaction should never depend on other transactions going on in the system
- Durability: This means that even if the complete system fails, the result of a committed transaction should always persist
Transactions in MySQL are achieved through autocommit keyword. When the autocommit is set to 1, each SQL statement we execute is considered as a transaction and it is committed automatically as soon as we hit enter. But when autocommit is set to 0, SQL will wait for an explicit COMMIT operation so that it can complete all previous commands in a single operation and those operations are part of a single transaction.
7. Indexes in MySQL
An index in a database allows queries to find and filter data much more efficiently and faster than that query could have performed without the presence of an index. The simplest example of an index is something we all have already used in our books. At the beginning of each book, there is a “Table of contents” which help readers find the page numbers of the topics present in that book. To read a topic, we just have to find it in the TOC which is an ordered list of topics and we can get the page number from that. Indexes work in the same manner. As there can be multiple columns in a table, an index can be created on any of the columns present in a table or on the collection of columns as well.
Multiple indexes in a table are needed when there is a need to perform search and filter data on multiple parameters. For example, for a table which contains data about Books, we can filter Book data based on author name or price or book name or any other field present in the table.
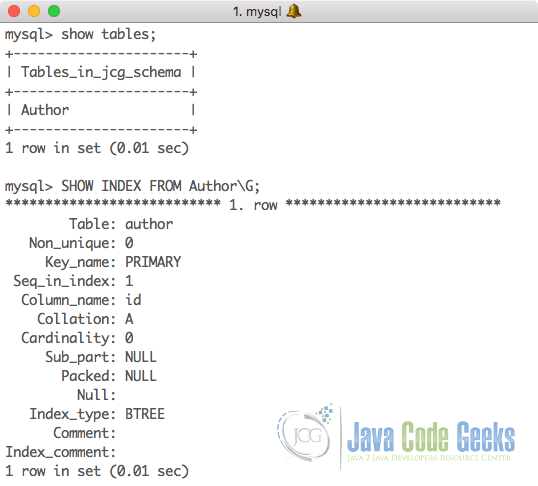
We also mentioned that the presence of indexes can slow down the performance of a database. This is possible when there too many indexes in a table. This happens because whenever there is an insertion in a table where too many indexes are built, all of these indexes have to be recalculated to adjust the new data which is not an asynchronous task. Only when all indexes have been updated, only then a write can be called as a success. This means that if there are too many indexes on any of the tables in a DB, all of these will have to be revisited and recalculated by MySQL when an insertion happens in the corresponding table. In MySQL, we always have an index on the Primary Key of the table. If we want to look at what all indexes are present in our table, we can run the following command:
Show Indexes
SHOW INDEX FROM Author\G;
We will see the following response:
8. Full-text Search in MySQL
When full-text search is available for databases like Elasticsearch and MongoDB, even MySQL is not behind for the same. We already know the LIKE operator and Regex operators we can use in an SQL query for performing Full-text Search in MySQL. But using this method has some limitations:
- Low performance: As MySQL needs to scan the complete table for the match, when data increases in the table, this will be very slow
- Flexibility: With the use of operators, we can search for Authors whose posts which contains the text “MongoDB”. But we cannot exclude the word “Bad”. With FTS, MySQL has added much more advantages (discussed next).
- Ranking of data is also an import factor which LIKE operator cannot provide as it returns results in the order it finds.
With the addition of the FTS feature in MySQL, it has extended its capabilities to a high extent. The advantages and features for this are:
- We can use Native SQL queries to perform FTS as well
- FIndexes are dynamic in nature and they update fast when an update in the column on which index was made has any data updated
- Index size is not much even when the original column has a lot of data associated with it
- Even complex FTS queries have very high performance for the same
To enable a column for FTS, we need to use some operators when we are creating a table. Here is the syntax for the same:
Create FTS Index
CREATE TABLE table_name(
 column1 data_type,
        column2 data_type,
        column3 data_type,
 …
PRIMARY_KEY(key_column),
FULLTEXT (column1,column2,..)
);
With the FULLTEXT command and a comma-separated value inside paranthesis. When we do this, a FTS index will be made for the provided columns and data inside it will be indexed as tokens.
9. Temporary Tables in MySQL
Temporary Tables were added in MySQL version 3.23. These tables have some nice features which are often used for temporarily holding data for a specific query. Some features for Temporary Tables in MySQL are:
- Temporary Tables are temporary in nature, i.e. they are deleted as soon as you log out for a given session in MySQL
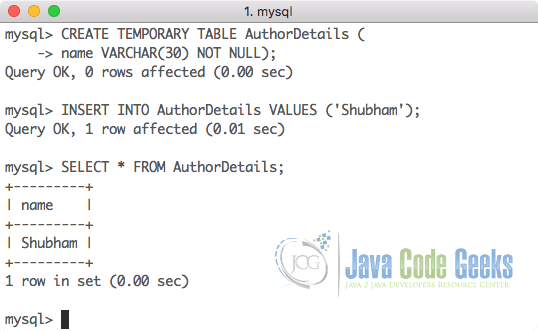
- Even a Temporary Table needs to be created with the similar
CREATE TABLEcommand with a small addition ofTEMPORARYkeyword, like:Create Temporary TablesCREATE TEMPORARY TABLE AuthorDetails ( name VARCHAR(30) NOT NULL);
Here is what we get back with the above command and when we try to insert and display data in the temporary table:

Data in Temporary Table - If you try to show the tables in your database, the temporary table will not be visible:

Temporary Table not visible
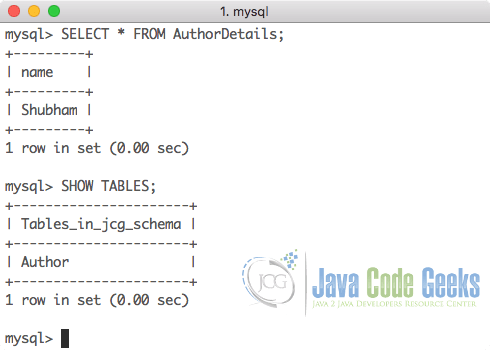
There is no need to explicitly delete this temporary table as it will be automatically deleted once we log out of the current session in MySQL.
10. Clone Tables in MySQL
Cloning existing tables is a very common scenario for a developer when they want to execute and test their queries on a similar table with some sample data. Of course, they can go ahead and create a new table with Create command with exactly the same schema but don’t you wish there was a shortcut! We can show the create command for a table with the following command:
Show Create Tables
SHOW CREATE TABLE Author \G;
Here is what we get back with the above command:
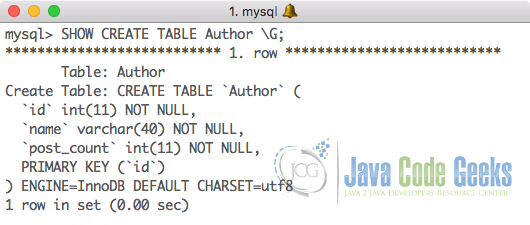
Now, we can easily copy paste the given command and just change the table name to the name we want for our cloned table.
11. MySQL Injection
SQL injection is a concept where a user can insert some content into a SQL query string, and the response modifies the syntax of our query in ways we didn’t intend to. It isn’t necessary the resultant query is malicious, it can also be accidental. But accidental SQL injection is more likely to result in an error than in a vulnerability.
The harmful content doesn’t have to come from a user, it could be content that even our application gets from any source, or even generates itself in code. For an example:
SQL Injection (PHP)
$password = $_POST['password'];
$id = $_POST['id'];
$sql = "UPDATE Accounts SET PASSWORD = '$password' WHERE account_id = $id";
Now suppose the user/attacker/code sets the POST request parameters to “password=xyzzy” and “id=account_id” resulting in the following SQL query being generated:
Injected Query
UPDATE Accounts SET PASSWORD = 'xyzzy' WHERE account_id = account_id
Even though the $id is meant to be an integer, the source chose the name of the column and now the condition is true for every row so that source has set the password for every account in your table. Now it is possible for him to log in to any account on the system. Taking care fo SQL Injection is quite important as it is one of the first steps taken by hackers when they are aiming to intrude into any system.
12. Conclusion
In this lesson, we looked at one of the most popular databases for transactional systems for today, MySQL. It has been around for many years and is still evolving to adapt to more functionalities to compete with other popular databases like MongoDB, Elasticsearch, CouchDB and many more. But this is to be understood that these functionalities might not compete with the mentioned DBs because it is not meant to do so because it provides its own set of features which it excels at and aims to provide these features at its core best. MySQL is eventually known for the transactional behaviour it provides to the system it is integrated into.
We mentioned some core concepts in this lesson like Temporary tables, SQL indexes and free-text search as well (which deserve a much deeper lesson for its own). SQL Injection is at least 20 years old but is still around because as mentioned in this Stack exchange post, there is no general fix for SQL injection because there is no fix for human stupidity.
Don’t forget to check the examples of using Java with SQL: JDBC Best Practices Tutorial and Java JDBC ResultSet Example. These lessons explain how to effectively use SQL commands with Java & JDBC drivers.
