1. Introduction
In this example we will review different JDBC Driver Types. We will write a simple Java application to demonstrate how to use JDBC connectivity steps to access an SQLite database.
JDBC stands for Java DataBase Connectivity. It was introduced in Java Development Kit (JDK) version 1.1. It’s an application programming interface (API) that allows Java programs to interact with a database. It is part of the Java Standard Edition platform (Java SE).
A JDBC driver is a software component that allows a Java program to interact with a Database. It implements the interfaces defined in the JDBC API. Database vendors implements the behaviors defined in the JDBC API in their database drivers.
We all know, Java can operate on a wide variety of hardware platforms and operating systems thus the driver implementation also varies. JDBC drivers are categorized into following four types:
Type 1 – JDBC – ODBC Bridge
Type 2 – Native API Driver
Type 3 – Network Protocol Driver (Middleware Driver)
Type 4 – Database Protocol Driver (Pure Java) or thin driver
1.1 Type 1 – JDBC – ODBC Bridge
As the name indicates type 1 driver uses the ODBC driver installed on the client machine to interact with the database. It converts the JDBC method calls into ODBC function calls.
Pros:
- Any
databasethat provides anODBCdriver can be accessed
Cons:
- Features are limited and restricted to what
ODBCdriver is capable of - Platform dependent as it uses
ODBCwhich in turn uses nativeO/Slibraries ODBCdriver must be installed on client machine- No support from
JDK8 (1.8) - Limited portability as
ODBCdriver may not be available for all platforms
1.2 Type 2 – Native API Driver
Type 2 drivers use the client side libraries of the database. The driver converts JDBC method calls into native database API calls.
Pros:
- Faster than
JDBC-ODBCbridge as there is no conversion likeODBCinvolved
Cons:
- Client side libraries needs to be installed on client machine
- Driver is platform dependent
- Not all
databasevendors provide client side libraries
1.3 Type 3 – Network Protocol Driver (Middleware Driver)
Type 3 driver makes use of middle tier between the Java programs and the database. Middle tier is an application server that converts JDBC calls into vendor-specific database calls.
Pros:
- No need to install any client side libraries on client machine
Middlewareapplication server can provide additional functionalitiesDatabaseindependence
Cons:
- Requires
middlewarespecific configurations and coding - May add extra latency as it goes through
middlewareserver
1.4 Type 4 – Database Protocol Driver (Pure Java) or thin driver
Type 4 drivers are also called Pure Java Driver. It converts JDBC calls directly into vendor-specific database protocol.
Pros:
- Written completely in
Javahence platform independent - Provides better performance than Type 1 and 2 drivers as there is no
protocolspecific conversion is required - Better than Type 3 drivers as it doesn’t need additional
middlewareapplicationservers - Connects directly to
databasedrivers without going through any other layer
Cons:
- Drivers are
databasespecific
Type 4 drivers are preferred if the Java application is accessing one database such as Oracle, Sybase, etc. In case multiple databases are accessed then a Type 3 driver would be preferable. Type 2 drivers are recommended, if Type 3 or 4 drivers are not available for the database. Type 1 drivers are not recommended for production deployment.
2. JDBC Connectivity Steps
Now that we have gone through different JDBC driver types, let’s review the steps that is required to interact with a database using JDBC.
- Import all necessary
JDBCpackages - Register
JDBCdriver (Optional since JDBC 4.0) - Establish a connection
- Create a statement
- Execute the query
- Process data
- Close connection
2.1 Import necessary JDBC packages
There are two primary packages for JDBC; java.sql and javax.sql. Initially javax.sql package was an extension to java.sql package. However, both are now part of Java SE (Standard Edition).
2.2 Register JDBC driver
Registering the driver allows the JVM to load the driver into memory. Class.forName() is used to load the driver dynamically.
Note: Since JDBC 4.0 it’s optional to register the driver explicitly. We just need to put the vendor jar file in the classpath. JDBC driver manager will detect and load the driver automatically. We will see it in action in our application later.
2.3 Establish a connection
We can use DriverManager's getConnection method to establish a database connection. There are three overloaded getConnection methods.
getConnection(String URL)–URLis the address or path that points to thedatabasegetConnection(String URL, Properties prop)– In addition toURL, this methods allows to pass driver properties in key-value pairsgetConnection(String URL, String user, String password)– This is the most common method used. It allows to pass thedatabaseusername and password
2.4 Create a statement
A statement is an interface that represents an SQL statement. Once we have a connection object, we can create a statement object using the createStatement method. There are three different types of statements:
Statement– Used for simple staticSQLstatements without any parametersPreparedStatement– Used for pre-compiledSQLstatements with parameters. It allows to supply the values of the parameters during runtimeCallableStatement– Used to executestored proceduresthat may contain both input and output parameters
2.5 Execute the query
To execute the query use one of the execute methods of the statement object. There are 3 methods available:
execute– Returns true if the first object returned is aResultSet. Use this ifquerycan return multipleResultSetsexecuteQuery– Returns oneResultSetobjectexecuteUpdate– Returns an integer that indicates the number of rows affected by thequery. This is used forINSERT,DELETEandUPDATESQLstatements
2.6 Process data
Executing a query returns a ResultSet, which is a table of data representing database result set. We can access the data in a ResultSet through a cursor. The cursor is a pointer to one row of data in a ResultSet, it’s not a database cursor. Initially, the cursor is positioned before the first row.
2.7 Close connection
The last step is to close the connection so that the resources are released immediately. Connection object provide a close() method for the same.
3. JDBC Example in Action
Let’s put together what we have learnt so far in a real example. We will develop a Java application to access SQLite database. The sample database we are going to use is called Chinook. It represents a digital media store, including tables for artists, albums, media tracks, invoices and customers. We will run a query to retrieve all artist names from the artists table.
3.1 Technologies used
For this example, we will use the following tools in a Windows 64-bit platform:
- NetBeans – 8.2
- Java – 1.8.0_161
- SQLite JDBC Driver – 3.23.1
- SQLite Sample Database (Chinook) – 1.4
3.2 Pre-requisites
- We need to prepare our environment before we can start writing code. First of all we need the
Javadriver forSQLitedatabase, which we can download from here - Instead of creating a
databasefrom scratch we will useSQLitesampledatabasecalledchinook. Go ahead and download the Chinook_Sqlite.sqlite file from here
I am going to use NetBeans IDE for this example, the steps will be similar for any other editor.
3.3 Create NetBeans Project
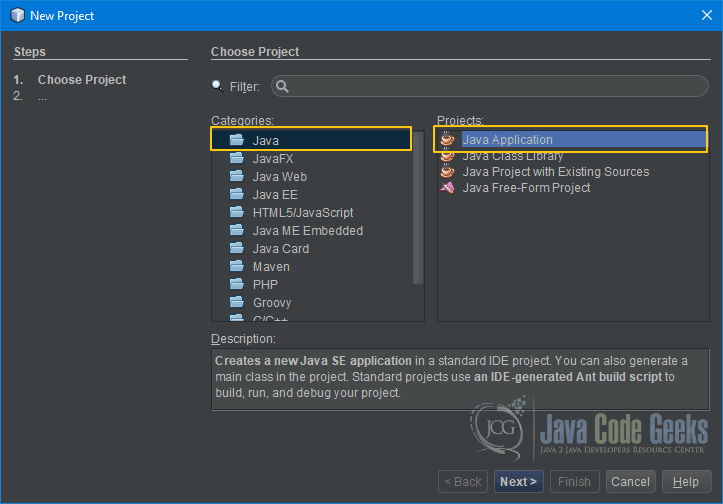
We will use the new project wizard to create a Java application. To do so, click on New Project button on the main toolbar or press Control + Shift + N on Windows (Cmd + Shift + N on Mac). Select Java from Categories list and Java Application from Projects list. Press Next.
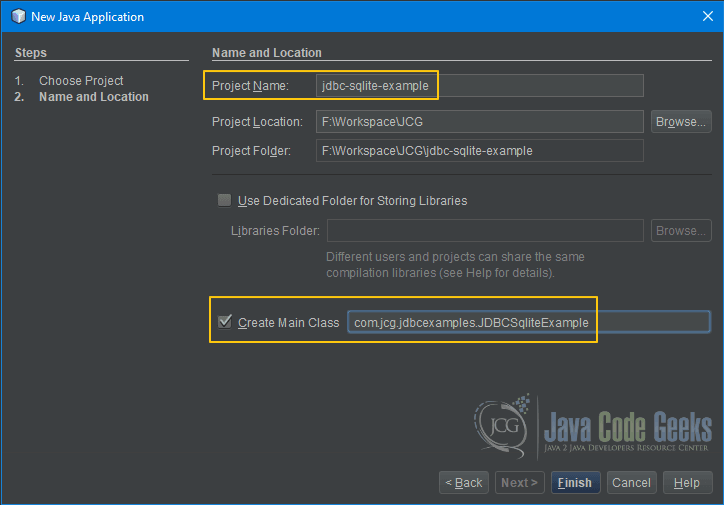
Enter a Project Name, select a location on your hard disk. Project Folder will be filled automatically based on name and location. Press Finish.
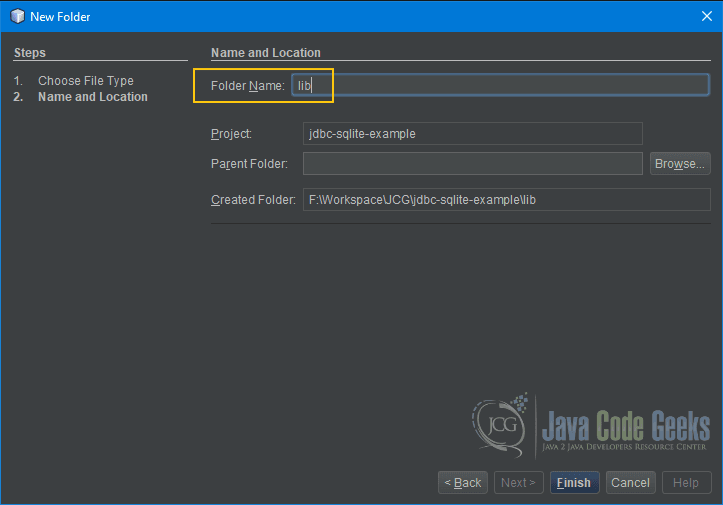
Let’s create two folders for our database and driver files.
Right click on project and select New > Folder. Enter a folder name (I used lib). We will use this for our SQLite JDBC driver. Press Finish.
Right click on the project again and select New > Folder. Enter a folder name (I used db). We will use this for our database. Press Finish.

Copy the Chinook_Sqlite.sqlite file and paste it into the db folder. Similarly, copy the sqlite-jdbc-3.23.1.jar file and paste it in lib folder.
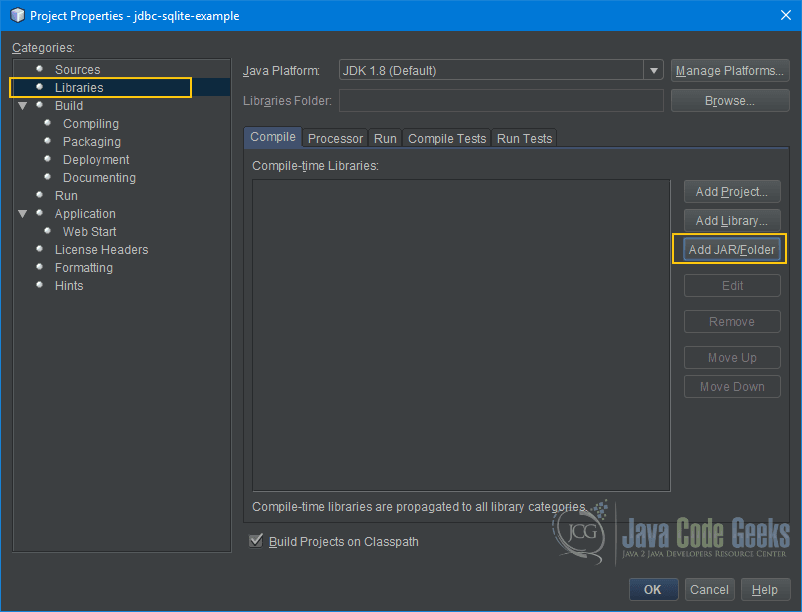
As I mentioned earlier we will have to provide the JDBC driver jar file so that JVM can load it automatically. In order to do that, right click on the project name and select properties.
Click on Libraries and press Add Jar/Folder button.
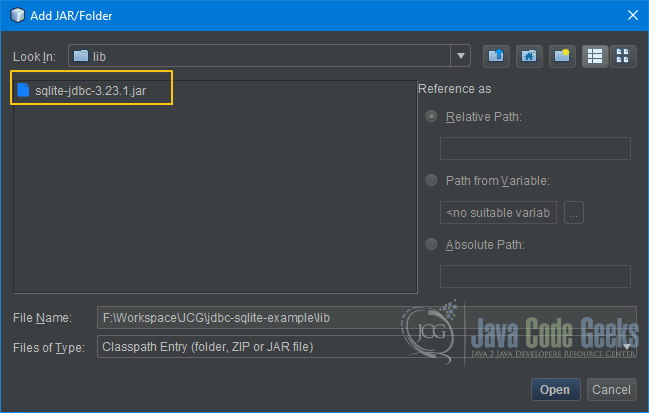
Select the Jar file that we copied to the lib folder, press Open.
Now we are all set to write our Java application to access the Chinook database. Here is the listing of JDBCSQLiteExample.java.
JDBCSQLiteExample.java
package com.jcg.jdbcexamples;

import java.sql.*;

/**
 *
 * @author Satya Choudhury
 */
public class JDBCSQLiteExample {

    public static void getArtists() {

        Connection conn = null;
        String db = "jdbc:sqlite:F:\\Workspace\\JCG\\jdbc-sqlite-example\\db\\Chinook_Sqlite.sqlite";

        try {
            // Establish database connection
            conn = DriverManager.getConnection(db);

            // Create statement
            Statement stmt = conn.createStatement();

            // Execute query
            ResultSet rs =  stmt.executeQuery("select Name from Artist");

            // Process data
            while(rs.next()) {
                System.out.println("Artist Name: " + rs.getString("Name"));
            }

            // Clean up
            rs.close();
            stmt.close();
        }
        catch(SQLException e) {
            System.err.println(e.getMessage());
        }
        finally {
            try {
                // Close connection
                if (conn != null)
                    conn.close();
            }
            catch (SQLException e) {
                // Unable to close connection
                System.err.println(e.getMessage());
            }
        }
    }

    // Main
    public static void main(String[] args) {
        // Retrieve all Artists
        getArtists();
    }

}
- Line 3 – We imported the
java.sql.*package. It’s recommended to import packages that you use for example,Connection,ResultSet, etc. For simplicity sake we will just import the entire package. We are not using any extended classes hence no need forjavax.sqlpackage - Line 11 – The
getArtistsmethod will access thedatabaseand retrieve all artist names - Line 13 – Defined a
connectionobject and initialized it toNull - Line 14 – Defined the
URLfor ourdatabaselocation. Here we provide path toChinookdatabasethat we copied to db folder - Line 18 – Used
getConnectionmethod ofDriverManagerto establish aconnectiontoChinookdatabase - Line 21 – Created a
Statementobject fromConnectionobject - Line 24 – Executed the
queryby providing the staticSQLstatement - Line 27 – 29 – Looped through the
ResultSetreturned by thequeryand print out the artist names on theconsole - Line 32-33 – Closed the
ResultSetandStatement - Line 41 – Verified the
connectionand closed. Finally block will be executed even if there is anexception - Line 54 – Called
getArtistsmethod frommainmethod
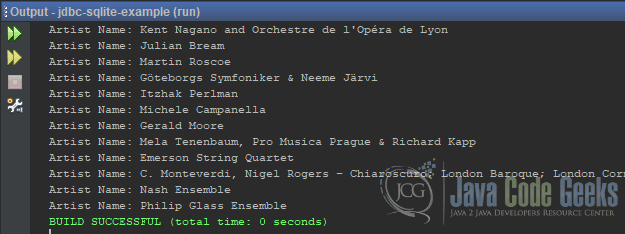
You should see the following output in the console.
4. Summary
In this example we discussed about different types of JDBC drivers and developed a simple application to put our learning into action by writing a Java application to access SQLite database.
5. Download the NetBeans Project
This was an example of how to connect to a database using JDBC.
You can download the full source code of the JDBC Driver Types Example here: jdbc-sqlite-example.zip
