It is always better to get notified about any major exceptions that occur in an application instead of manually going through huge logs to find the probable exception messages. In this tutorial, I will show you how to implement an out of box Log4j appender (called as SMTPAppender) to send email alerts.
1. Introduction
Printing messages to the console is an integral part of the development testing and the debugging of a Java program. If developers are working on a Server side application, where they cannot see what’s going on inside the server, then their only visibility tool is a log file.
Without logs, developers cannot do any debugging or see what’s going on inside the application. Java has pretty handy System.out.println() methods to print something on the console, which can also be routed to a log file but it is not sufficient for a real-world Java application.
If developers are running a Java program in Linux or in the Unix based systems, Log4j or SLF4j or any other logging framework offers a lot more features, flexibility, and improvement on message quality, which is not possible using the System.out.println() statements.
1.1 What is Log4j?
Log4j is a simple, flexible, and fast Java-based logging framework. It is thread-safe and supports internationalization. We mainly have 3 components to work with Log4j:
- Logger: It is used to log the messages
- Appender: It is used to publish the logging information to the destination like file, database, console etc
- Layout: It is used to format logging information in different styles
1.1.1 Log4j Logger Class
Logger class provides the methods for the logging process. We can use the getLogger() method to get the Logger object. The syntax is given below:
static Logger log = Logger.getLogger(YourClassName.class);
Logger class has 5 logging methods which are used to print the status of an application:
| Description | Method Syntax | |
|---|---|---|
| debug(Object message) | It is used to print the message with the level org.apache.log4j.Level.DEBUG. | public void debug(Object message) |
| error(Object message) | It is used to print the message with the level org.apache.log4j.Level.ERROR. | public void error(Object message) |
| info(Object message) | It is used to print the message with the level org.apache.log4j.Level.INFO. | public void info(Object message) |
| fatal(Object message) | It is used to print the message with the level org.apache.log4j.Level.FATAL. | public void fatal(Object message) |
| warn(Object message) | It is used to print the message with the level org.apache.log4j.Level.WARN. | public void warn(Object message) |
| trace(Object message) | It is used to print the message with the level org.apache.log4j.Level.TRACE. | public void trace(Object message) |
To summarize, the priority level is given below.
Trace < Debug < Info < Warn < Error < Fatal
Where org.apache.log4j.Level.FATAL has the highest priority and org.apache.log4j.Level.Trace the lowest.
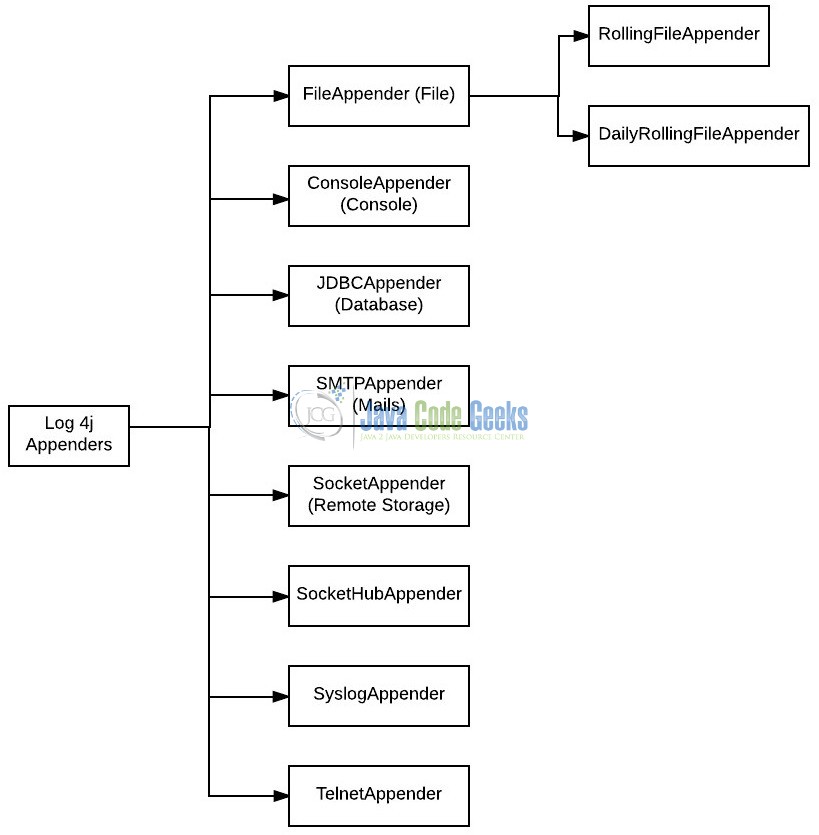
1.1.2 Log4j Appender Interface
Appender is an interface which is primarily responsible for printing the logging messages to the different destinations such as console, files, sockets, database etc. In Log4j we have different types of Appender implementation classes:
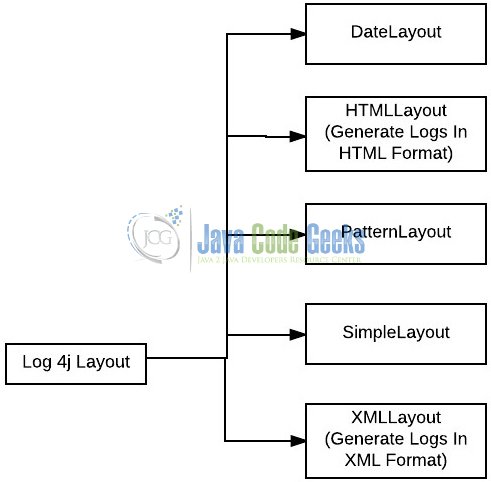
1.1.3 Log4j Layout Class
Layout component specifies the format in which the log statements are written into the destination repository by the Appender. In Log4j we have different types of Layout implementation classes:
1.2 Why prefer Log4j over System.out.println?
Below are some of the reasons, which are enough to understand the limitation of using System.out.println():
- Any logging framework including allows developers to log debugging information to a log level which can be used as filtering criteria, i.e. one can disable the message belongs to a particular log level. For e.g., Developers would be more concerned to see the
WARNmessages thanDEBUGmessages in the production environment - Logging framework can produce better outputs and metadata which helps to troubleshoot and debug. For e.g.,
Log4jallows to print formatted output by specifying a formatting pattern i.e. by usingPatternLayoutone can include a timestamp, class name etc
Now, open up the Eclipse Ide and let’s start building the application!
2. Log4j Email Configuration Example
Below are the steps involved in developing this application.
2.1 Tools Used
We are using Eclipse Kepler SR2, JDK 8, and Log4j Jar. Having said that, we have tested the code against JDK 1.7 and it works well.
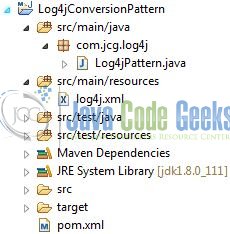
2.2 Project Structure
Firstly, let’s review the final project structure, in case you are confused about where you should create the corresponding files or folder later!
2.3 Project Creation
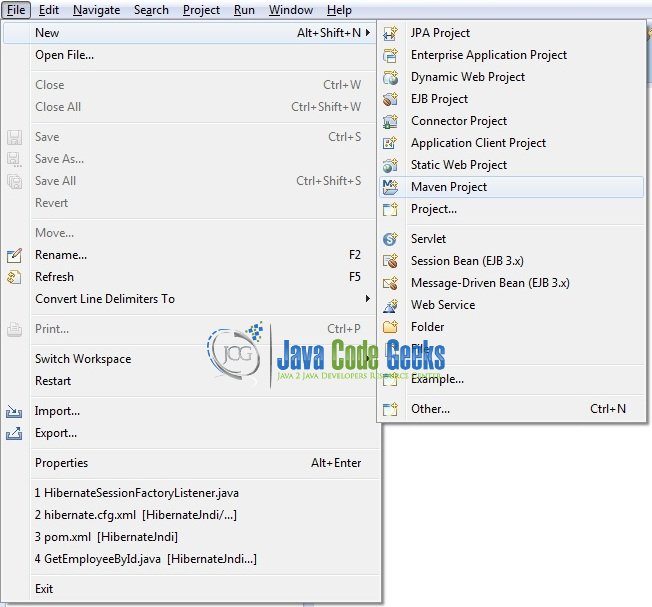
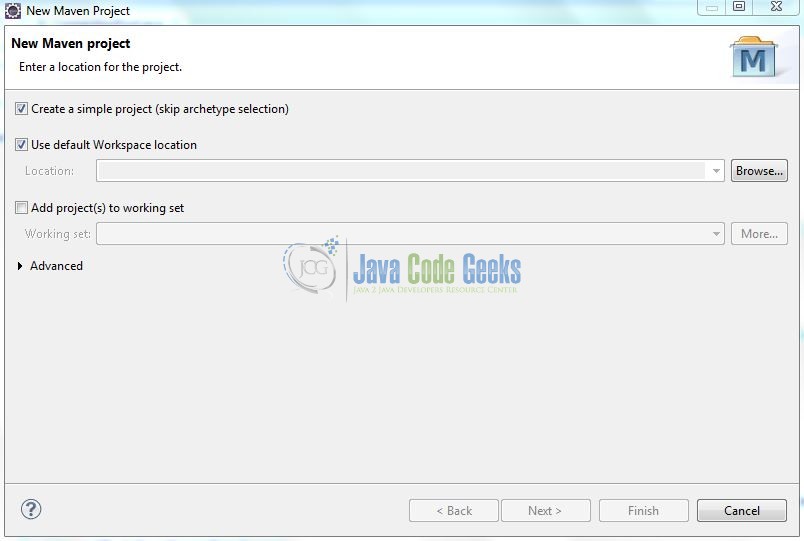
This section will demonstrate on how to create a Java-based Maven project with Eclipse. In Eclipse Ide, go to File -> New -> Maven Project.
In the New Maven Project window, it will ask you to select a project location. By default, ‘Use default workspace location’ will be selected. Select the ‘Create a simple project (skip archetype selection)’ checkbox and just click on next button to proceed.
It will ask you to ‘Enter the group and the artifact id for the project‘. We will input the details as shown in the below image. The version number will be by default: 0.0.1-SNAPSHOT.
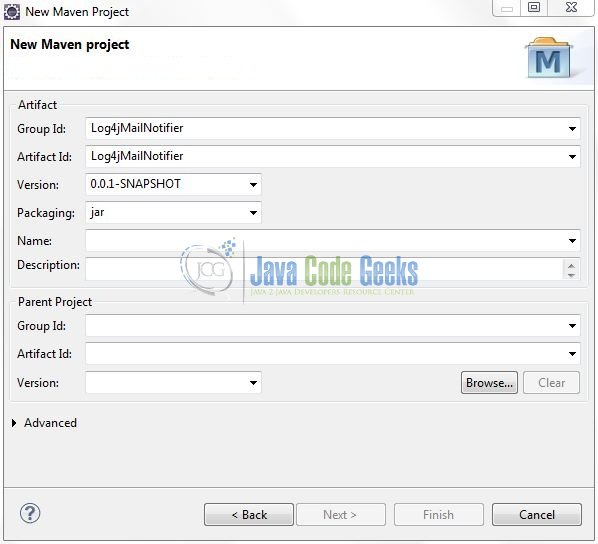
Click on finish and the creation of a maven project will be completed. If you observe, it has downloaded the maven dependencies and a pom.xml file will be created. It will have the following code:
pom.xml
<project xmlns="http://maven.apache.org/POM/4.0.0" xmlns:xsi="http://www.w3.org/2001/XMLSchema-instance" xsi:schemaLocation="http://maven.apache.org/POM/4.0.0 http://maven.apache.org/xsd/maven-4.0.0.xsd">
	<modelVersion>4.0.0</modelVersion>
	<groupId>Log4jMailNotifier</groupId>
	<artifactId>Log4jMailNotifier</artifactId>
	<version>0.0.1-SNAPSHOT</version>
</project>
We can start adding the dependencies that developers want like Log4j, Junit etc. Let’s start building the application!
3. Application Building
Below are the steps involved in developing this application.
3.1 Maven Dependencies
In this example, we are using the most stable Log4j version in order to set-up the logging framework. The updated file will have the following code:
pom.xml
<project xmlns="http://maven.apache.org/POM/4.0.0" xmlns:xsi="http://www.w3.org/2001/XMLSchema-instance"
	xsi:schemaLocation="http://maven.apache.org/POM/4.0.0 http://maven.apache.org/xsd/maven-4.0.0.xsd">
	<modelVersion>4.0.0</modelVersion>
	<groupId>Log4jMailNotifier</groupId>
	<artifactId>Log4jMailNotifier</artifactId>
	<version>0.0.1-SNAPSHOT</version>
	<dependencies>
		<!-- https://mvnrepository.com/artifact/javax.mail/mail -->
		<dependency>
			<groupId>javax.mail</groupId>
			<artifactId>mail</artifactId>
			<version>1.4.7</version>
		</dependency>
		<dependency>
			<groupId>log4j</groupId>
			<artifactId>log4j</artifactId>
			<version>1.2.17</version>
		</dependency>
	</dependencies>
	<build>
		<finalName>Log4jMailNotifier</finalName>
	</build>
</project>
3.2 Java Class Creation
Let’s create the required Java files. Right-click on src/main/java folder, New -> Package.
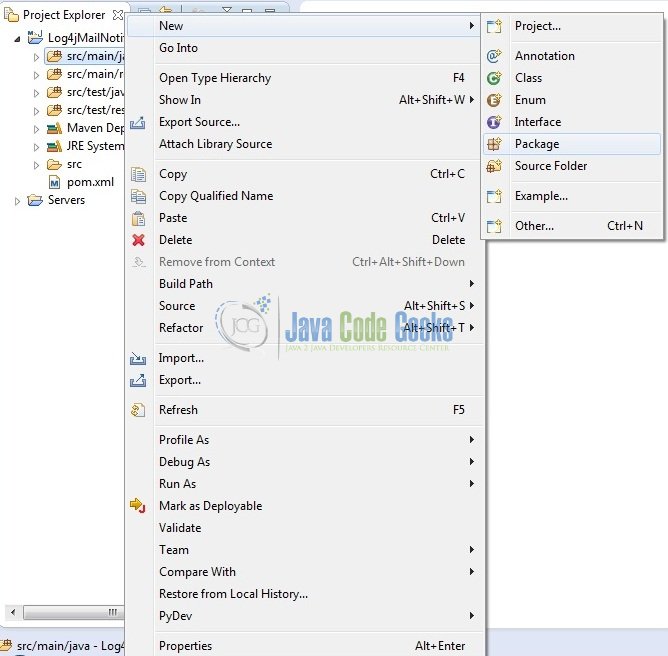
A new pop window will open where we will enter the package name as: com.jcg.log4j.mail.
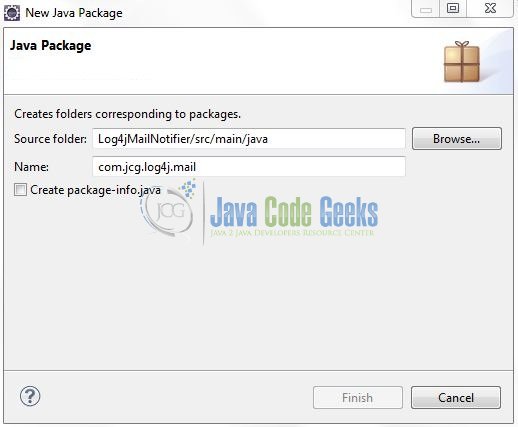
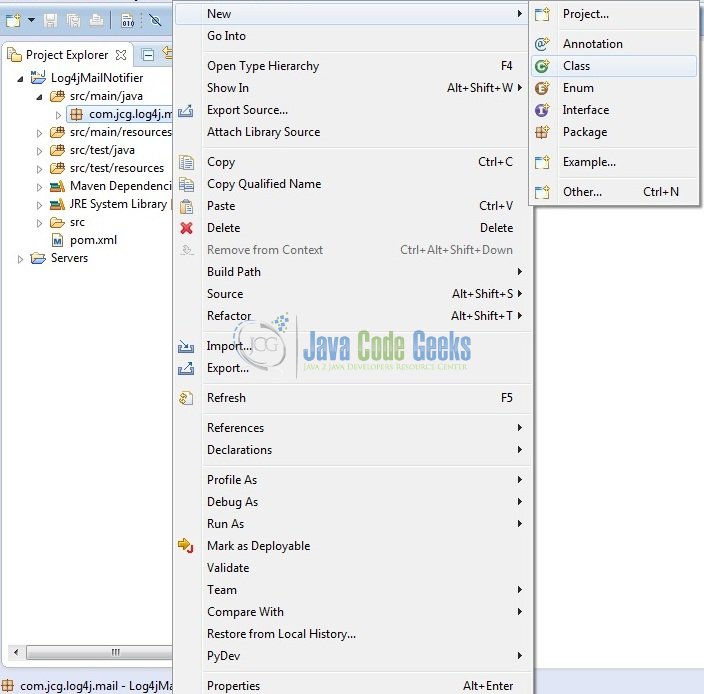
Once the package is created, we will need to create the implementation class. Right-click on the newly created package, New -> Class.
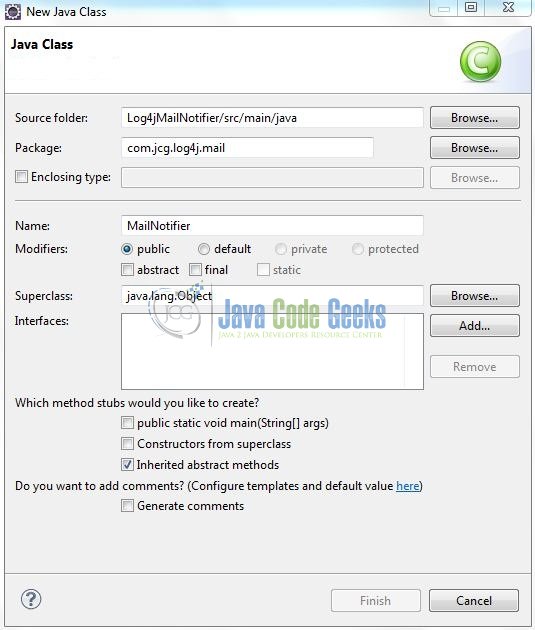
A new pop window will open and enter the file name as: MailNotifier. The implementation class will be created inside the package: com.jcg.log4j.mail.
3.2.1 Implementation of Utility Class
Let’s write a quick Java program that will generate an exception and the exception will be logged inside the catch block. Add the following code to it.
MailNotifier.java
package com.jcg.log4j.mail;

import org.apache.log4j.Logger;

public class MailNotifier {

	private static Logger logger = Logger.getLogger(MailNotifier.class);

	public static void main(String[] args) {
		try {
			// Generating Sample Exception
			throw new Exception("Generating Exception To Test Log4j Mail Notification...");
		} catch (Exception exObj) {
			logger.error("Sample Result?= " + exObj);
		}
	}
}
3.3 Log4j Configuration File
Log4j will be usually configured using a properties file or an XML file. So once the log statements are in place developers can easily control them using the external configuration file without modifying the source code. The log4j.xml file is a Log4j configuration file which keeps properties in key-value pairs. By default, the LogManager looks for a file named log4j.xml in the CLASSPATH.
To configure the logging framework, we need to implement a configuration file i.e. log4j.xml and put it into the src/main/resources folder. Configure the SMTPAppender and add the following code to it:
log4j.xml
<?xml version="1.0" encoding="UTF-8"?>
<!DOCTYPE log4j:configuration SYSTEM
          "http://logging.apache.org/log4j/1.2/apidocs/org/apache/log4j/xml/doc-files/log4j.dtd">
<log4j:configuration xmlns:log4j="http://jakarta.apache.org/log4j/">
	<appender name="mailAppender" class="org.apache.log4j.net.SMTPAppender">
		<!-- Email Configuration -->
		<param name="BufferSize" value="512" />
		<param name="SMTPProtocol" value="smtps" />
		<param name="SMTPHost" value="smtp.mail.yahoo.com" />
		<param name="SMTPPort" value="465" />
		<param name="SMTPUsername" value="<!-- Sender Email Address -->" />
		<param name="SMTPPassword" value="<!-- Sender Email Password -->" />
		<param name="From" value="<!-- Sender Email Address -->" />
		<param name="To" value="<!-- Receiver Email Address -->" />
		<param name="Subject" value="Testing Log4j Mail Notification" />

		<layout class="org.apache.log4j.PatternLayout">
			<param name="ConversionPattern" value="%-7p %d [%t] %c %x - %m%n" />
		</layout>

		<filter class="org.apache.log4j.varia.LevelRangeFilter">
			<param name="LevelMin" value="error" />
			<param name="LevelMax" value="fatal" />
		</filter>
	</appender>

	<root>
		<level value="INFO" />
		<appender-ref ref="mailAppender" />
	</root>
</log4j:configuration>
Do remember:
- To provide the correct
SMTPHost,SMTPPort, Authentication Details (i.e.SMTPUsernameandSMTPPassword),To(Comma separated list) andFromEmail Recipients, and the Email Subject - To provide the minimum and maximum logging level in the
LevelRangeFilter - The number of logging events delivered in an email depends on the value of
BufferSizeoption
4. Run the Application
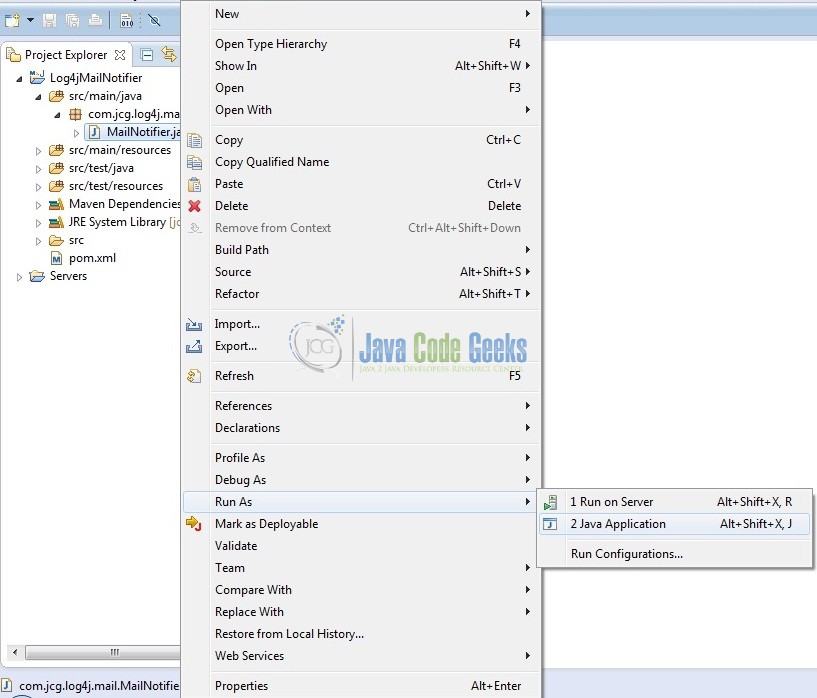
To run the application, Right click on the MailNotifier class, Run As -> Java Application. Developers can debug the example and see what happens after every step. Enjoy!
5. Project Demo
The code shows the following status as output where an error log will be generated and then it will be emailed using the Log4j SMTPAppender.

That’s all for this post. Happy Learning!!
6. Conclusion
That’s all for getting the developers started with the Log4j example, we will look into more features in the next posts. I hope this article served you whatever you were looking for. Developers can download the sample application as an Eclipse project in the Downloads section.
7. Download the Eclipse Project
This was an example of Log4j Email Configuration example.
You can download the full source code of this example here: Log4jMailNotifier
