1. Introduction
In this example we will download and install the JBoss WildFly application server. We will integrate it with NetBeans so that we can manage it from NetBeans. Finally, we will develop a web application and deploy it on the server to demonstrate the successful integration.
1.1 JBoss WildFly
In 1999, Marc Fleury implemented the EJB API from J2EE specification in a free software called Enterprise Java Beans Open Source Software (EJB-OSS). It was renamed to JBOSS and later JBoss because EJB was a trademark of Sun Microsystems. JBoss became a JBoss Application Server or simply JBoss AS. Currently, it’s developed by RedHat. JBoss AS was renamed to WildFly in 2014.
It’s written in Java and implements Java EE specification. The latest release as of this writing is 14.0.1, which is Java EE 8 certified. It’s a fast and lightweight server. It’s built on a modular service container that enables services on demand when needed by the application.
1.1.1 Download WildFly
WildFly is distributed in a single zip / tar file. Open your browser and visit http://www.wildfly.org/downloads/ to download the latest 14.0.1.Final version.
1.1.2 Requirements
Java SE 8 or later. Using the latest update is recommended.
1.1.3 Installing WildFly
Installation is super easy. Simply extract the downloaded file to a folder of your choice. I went with the default folder wildfly-14.0.1.Final.
1.2 NetBeans
NetBeans is an Integrated Development Environment (IDE). It’s free, open source and similar to Eclipse. It provides all necessary features and tools to develop Java applications easily and quickly. Besides Java it provides tools to develop HTML, PHP and C/C++ applications out of the box. Its code editor supports multiple languages such as Java, C/C++, XML, HTML, PHP, JavaScript, etc. The language support is extensible through plug-ins. It’s based on a plug-ins mechanism thus allows these features to be activated when needed.
NetBeans is now an Apache Software Foundationproject. NetBeans version 9.0 was released on 29th July. However it’s mainly focused on Java SE features. For this example, we will use NetBeans version 8.2. So go ahead and download the Java EE bundle from https://netbeans.org/downloads/
1.2.2 Integrating WildFly with NetBeans
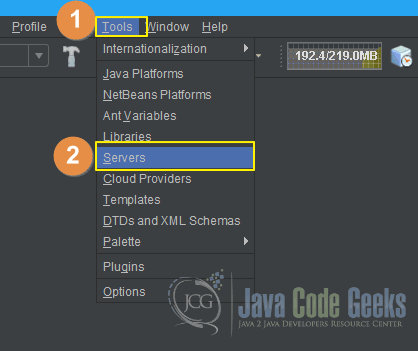
We will use the add server wizard to integrate WildFly server into NetBeans. Open NetBeans click on Tools option on the menu bar. Select Servers from the drop down menu:
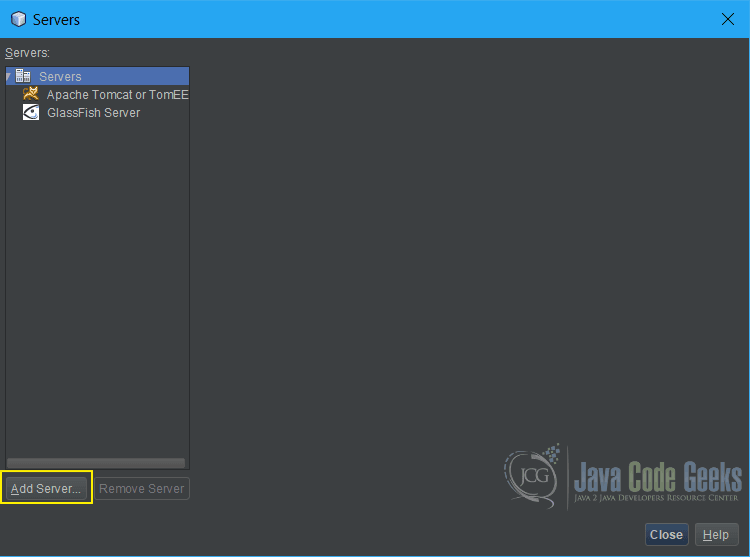
Press the “Add Server” button on the Servers pop-up window:
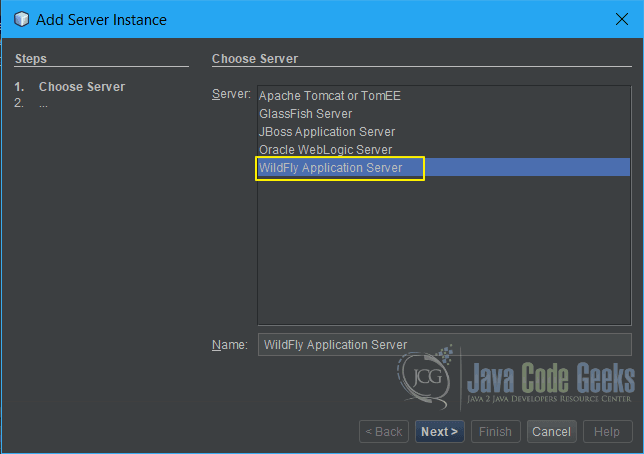
In Choose Server step, select WildFly Application Server from the servers list. Press Next:
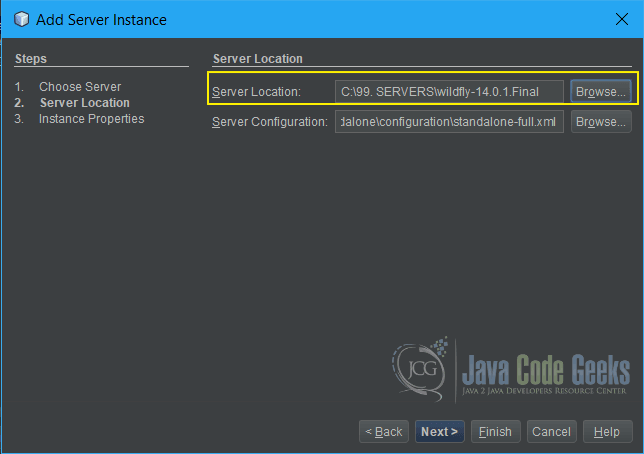
In Server Location step, press the Browse button then select the WildFly Server folder that you downloaded and extracted earlier:
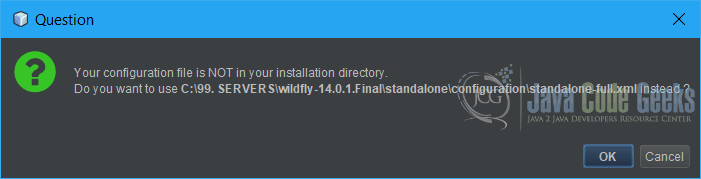
You should get a Configuration Question pop-up window, press OK then press Next:
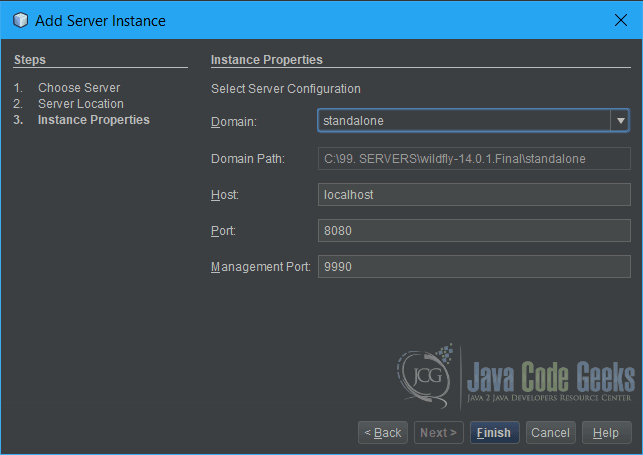
In the Instance Properties step. you can change the host name, port and management port. If you are not running any other servers on these ports, I would strongly recommend to stick with the defaults. Press Finish:
1.2.3 Running WildFly Server from NetBeans
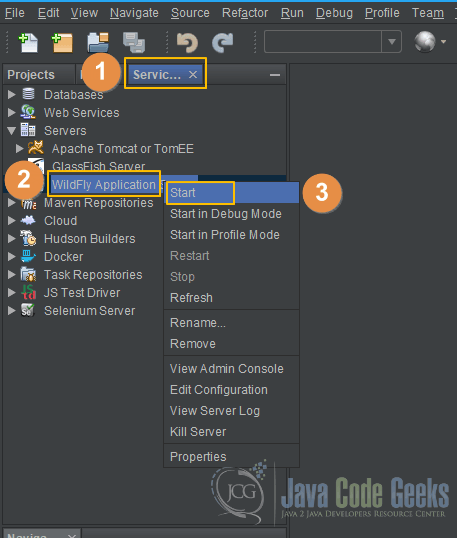
Let’s test drive our integration and make sure everything is working properly. Open the Services tab. Expand the Servers to see the list of servers, right click on the WildFly Application Server, select Start from the option.
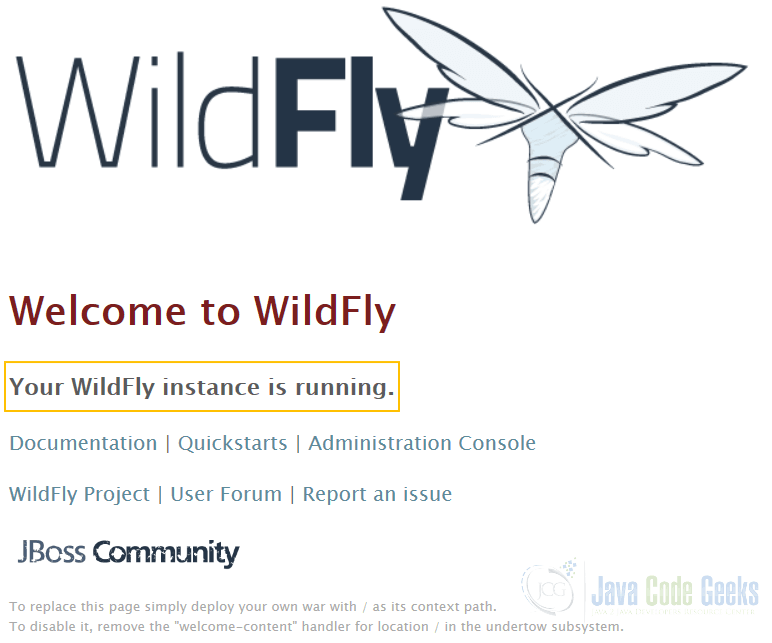
Check the output console and make sure there are no errors. Once the server starts successfully, open your favorite browser and type http://localhost:8080. You should see the following WildFly welcome page:
2. Develop and Deploy Web Application on WildFly Server
Now that we have successfully integrated WildFly with NetBeans next step is to create a web application and deploy it on WildFly server.
2.1 Technologies Used
For this example, we will use the following tools in a Windows 64bit platform:
- NetBeans – 8.2
- Java – 1.8.0_161
- JavaServer Faces Framework – 2.2
- WildFly Server – 14.0.1
2.2 Create a Web Application in NetBeans
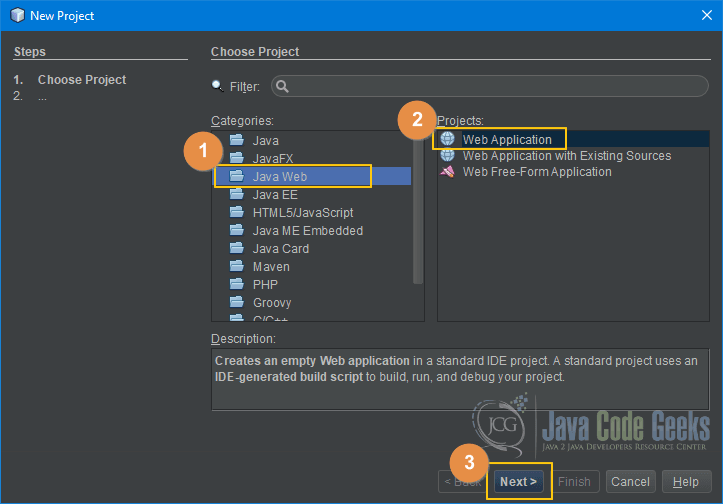
We will use the new project wizard to create a Java web application. To do so, click on New Project button on the main toolbar or press Control + Shift + N on windows (Cmd + Shift + N on Mac).
On the Choose Project window, select Java Web from Categories list and Web Application from Projects list. Press Next.
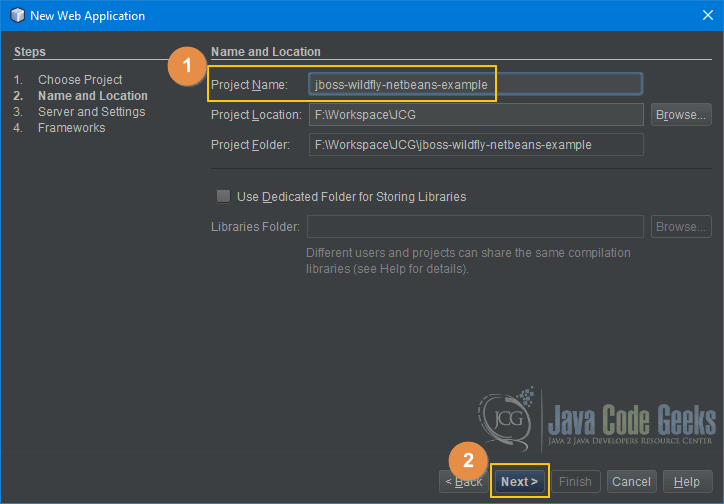
On Name and Location window, enter a project name and select a folder on your hard disk. Project Folder will be filled automatically based on name and location. Press Next.
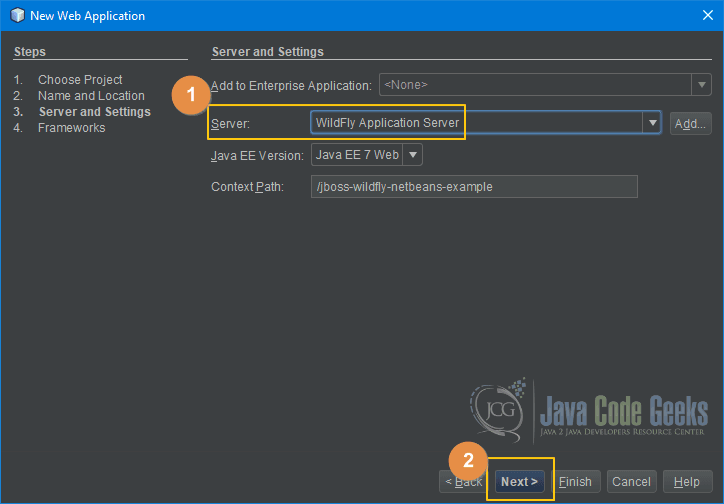
Select a WildFly Application Server from the Server dropdown list on Server and Settings window. Press Next.
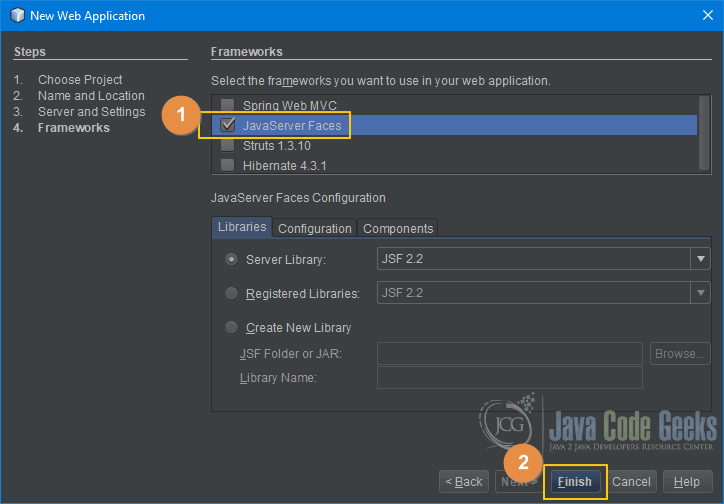
Select JavaServer Faces in the Frameworks windows. Press Finish.
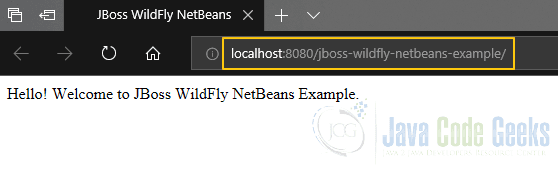
NetBeans will create the project and open the Index.xhtml file. Change the output message to something nice. In my case I changed it to “Hello! Welcome to JBoss WildFly NetBeans Example”. Here is the listing for Index.xhtml.
Index.xhtml
<?xml version='1.0' encoding='UTF-8' ?>
<!DOCTYPE html PUBLIC "-//W3C//DTD XHTML 1.0 Transitional//EN" "http://www.w3.org/TR/xhtml1/DTD/xhtml1-transitional.dtd">
<html xmlns="http://www.w3.org/1999/xhtml"
      xmlns:h="http://xmlns.jcp.org/jsf/html">
    <h:head>
        <title>JBoss WildFly NetBeans Example</title>
    </h:head>
    <h:body>
        Hello! Welcome to JBoss WildFly NetBeans Example.
    </h:body>
</html>
2.3 Deploying the Web Application on WildFly Server
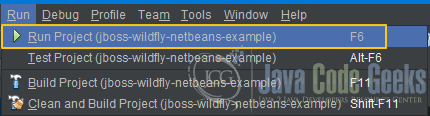
We don’t have to add or change any configuration to our web application as NetBeans has done that for us. Next step is to deploy the application on the server and run it. Just press F6 or click the Run option on the menu bar then select “Run Project (your project name)”.
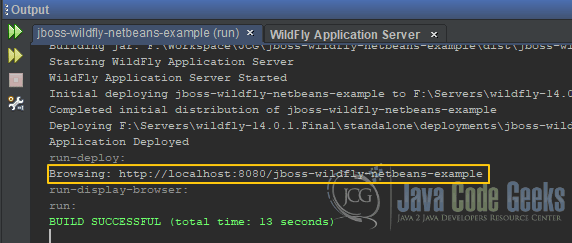
When you run the project, NetBeans will start the WildFly server and deploy the application on it. Check the output console page to make sure there are no errors and application is deployed successfully.
Once server started successfully, NetBeans will open up the default browser and point to the index page of our application. You should see the following:
2.4 Stop WildFly Server from NetBeans
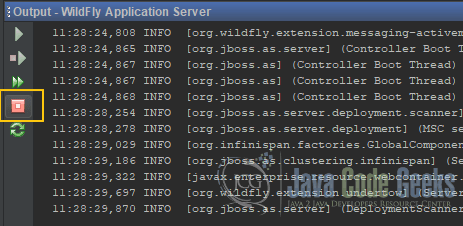
Press the Stop button (see picture below) to stop the WildFly server from NetBeans.
3. JBoss WildFly NetBeans – Summary
In this example, we downloaded and installed WildFly server. Integrated it with NetBeans so that we can manage the server from NetBeans. We developed a web application in NetBeans, deployed and ran it on WildFly server.
4. Download the Source Code
This was an example of JBoss WildFly with NetBeans.
You can download the full source code of this example: Download the NetBeans project
