This is an article about JBoss Wildly Change Port Configuration. JBoss WildFly runtime manages the applications deployed on its server. It used to be called as JBoss application server. In this article, setup of WildFly Change Port Configuration is presented and discussed.
1. Introduction
A JBoss WildFly instance can be deployed on the standalone server. The default port for the standalone server is 8080. The port can be changed in the Jboss wildfly configuration
2. JBoss Wildfly Change Port
2.1 Prerequisites
Java 7 or 8 is required on the machine where JBoss Wildfly is running. In addition, JBoss Wildfly need to be installed after the Java is installed.
2.2 Download
You can download Java 7 and Java 8 from the links Oracle site1 and site2 respectively. JBoss Wildfly can be downloaded from this link.
2.3 Setup
JDK environment variable can be set in JBoss Wildfly standalone.conf. This configuration file is in the bin folder. For example, The script below shows the environmental variables set for JBoss Wildfly.
environmental variables
JAVA_HOME=”/jboss/jdk1.8.0_73″
export JAVA_HOME
PATH=$JAVA_HOME/bin:$PATH
export PATH
JBOSS_HOME=”/jboss/wildfly-10.1.0.Final”
JAVA_OPTS= -server -Xms64m -Xmx512m -XX:MetaspaceSize=96M -XX:MaxMetaspaceSize=256m -Djava.net.preferIPv4Stack=true -Djboss.modules.system.pkgs=org.jboss.byteman -Djava.awt.headless=true
export JAVA_OPTS
2.4 Running the JBoss Wildfly
Wildfly server can be started with this command from wildfly-16.0.0.Final/bin:
start command
./standalone.sh
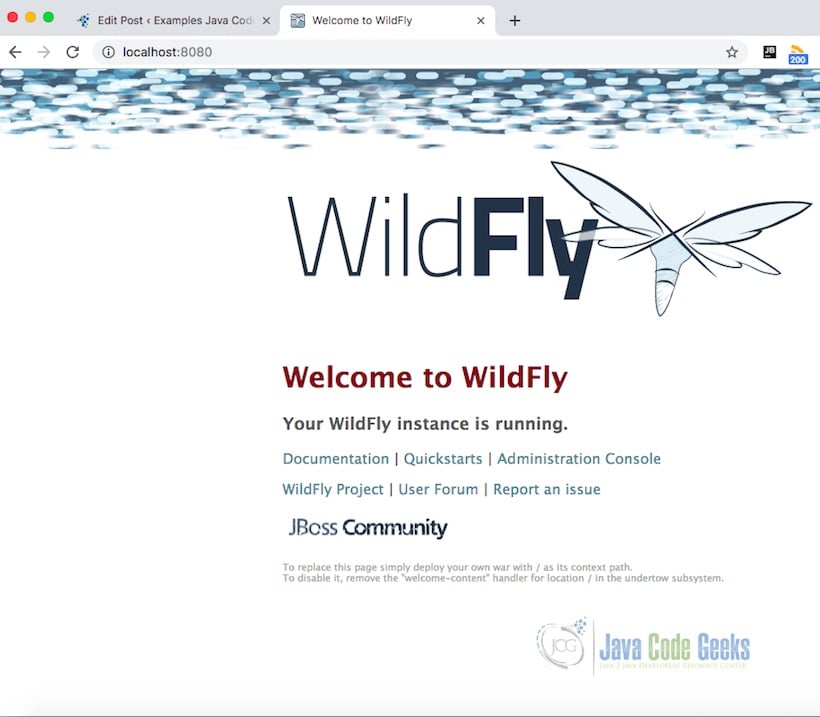
After the wildfly server starts and you can check in the browser using the url : http://localhost:8080/
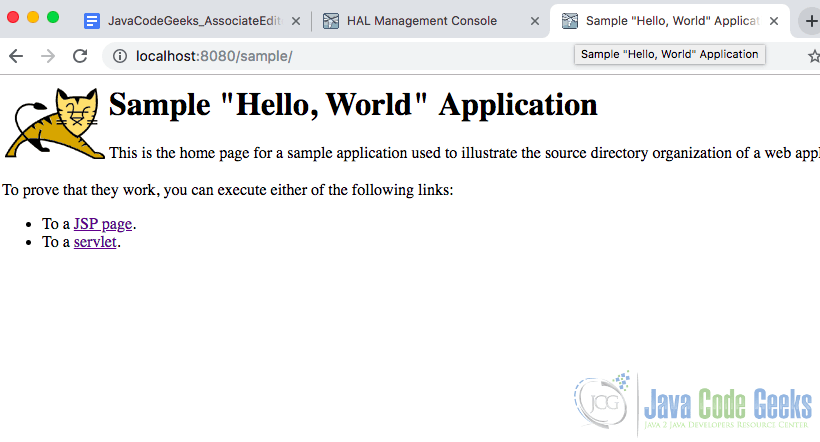
A sample war provided below in the download section can be deployed on to the server using the admin console. You can check the war deployed by using the link http://localhost:8080/sample
2.5 Port Change Configuration
The port change can be done in the socket binding element of the standalone.xml configuration file.
standalone.xml port configuration
<socket-binding-group name="standard-sockets" default-interface="public" port-offset="${jboss.socket.binding.port-offset:0}">
        <socket-binding name="management-http" interface="management" port="${jboss.management.http.port:9990}"/>
        <socket-binding name="management-https" interface="management" port="${jboss.management.https.port:9993}"/>
        <socket-binding name="ajp" port="${jboss.ajp.port:8009}"/>
        <socket-binding name="http" port="${jboss.http.port:8080}"/>
        <socket-binding name="https" port="${jboss.https.port:8443}"/>
        <socket-binding name="txn-recovery-environment" port="4712"/>
        <socket-binding name="txn-status-manager" port="4713"/>
        <outbound-socket-binding name="mail-smtp">
            <remote-destination host="localhost" port="25"/>
        </outbound-socket-binding>
    </socket-binding-group>
The http port number change should not conflict with https, ajp, management-https and other protocols. You can pick the port number 8443 + 20 = 8463. 8443 is the biggest port in the range 8000 – 9000. The changed element in the file is shown below.
standalone.xml port changed configuration
<socket-binding-group name="standard-sockets" default-interface="public" port-offset="${jboss.socket.binding.port-offset:0}">
        <socket-binding name="management-http" interface="management" port="${jboss.management.http.port:9990}"/>
        <socket-binding name="management-https" interface="management" port="${jboss.management.https.port:9993}"/>
        <socket-binding name="ajp" port="${jboss.ajp.port:8009}"/>
        <socket-binding name="http" port="${jboss.http.port:8463}"/>
        <socket-binding name="https" port="${jboss.https.port:8443}"/>
        <socket-binding name="txn-recovery-environment" port="4712"/>
        <socket-binding name="txn-status-manager" port="4713"/>
        <outbound-socket-binding name="mail-smtp">
            <remote-destination host="localhost" port="25"/>
        </outbound-socket-binding>
    </socket-binding-group>
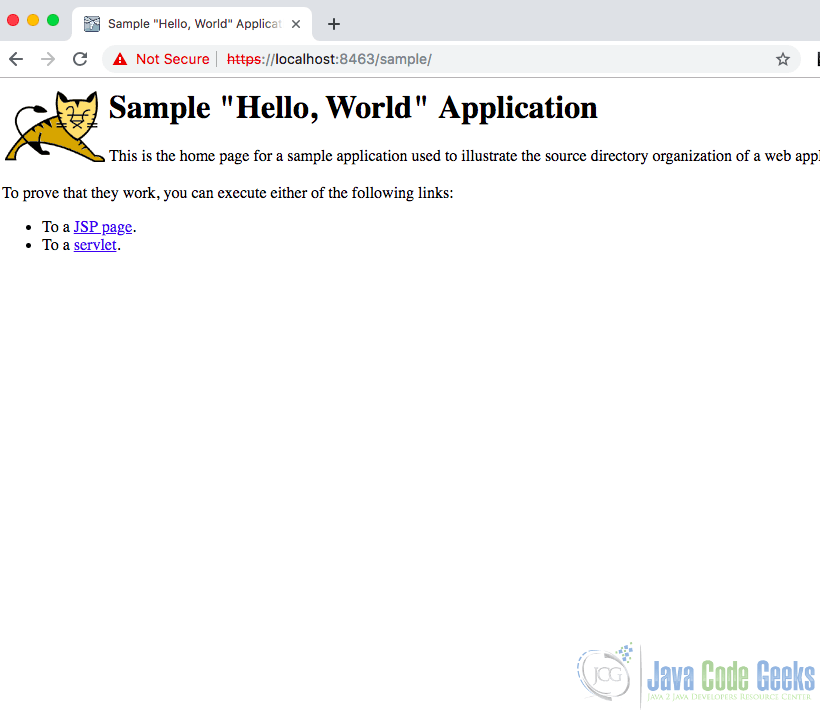
The Wildfly server is restarted and the link to the deployed sample war will be http://localhost:8463/sample
3 Download The Source Code
Sample war file can be used for deployment on JBoss WildFly Server
You can download the full source code of this example here: JBoss Wildfly Change Port Configuration Example
