Hello in this tutorial, I’ll should you how to create RESTful web services in python by using the Flask framework and PostgreSQL.
Flask is a micro-framework as it does not require any particular tools or libraries. It has no database layer, form validations, or any other third-party library that provides common functions.
1. Introduction
REST stands for Representational state transfer and it fits in the HTTP protocol designed worldwide for the users. RESTful is –
- Uniform interface for client-server communication
- Stateless in nature meaning each request coming from the client should contain all the information required by the server in order to process the incoming request
- Cacheable in nature
- Support the HATEOAS principle in order to drive the links from the server-side rather than client hardcoding it
- RESTful web services provide different HTTP request methods. Out of all these, the most common ones are –
- GET – Obtaining information about the entity
- POST – Creating a new entity
- PUT – Updating the existing entity (if found) or creating a new one
- DELETE – Deleting an entity
- Does not restrict user for a specific format of the request. However in general the request is provided in the JSON format
To start with this tutorial we will need to install Python and set up some of the python libraries. Let us go ahead and install them one by one.
1.1 Setting up Python
If someone needs to go through the Python installation on Windows, please watch this link. You can download the Python from this link.
1.2 Setting up Flask-SQLAchdemy
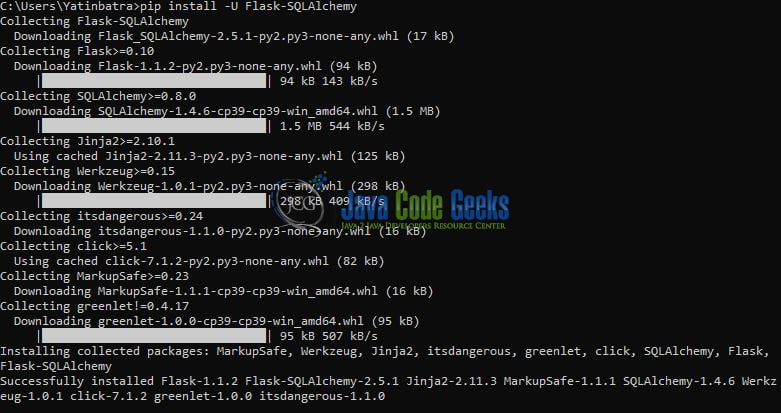
Once the python is successfully installed on your system you can install the Flask-SQLAchdemy using a simple pip command. You can fire the below command from the command prompt and it will successfully download the module from pypi.org and install it.
Installation command
pip install -U Flask-SQLAchdemy
Once you trigger this command the installation will be started as shown in Fig. 1.
1.3 Setting up Psycopg2
Once the python is successfully installed on your system you can install the psycopg2 using a simple pip command. You can fire the below command from the command prompt and it will successfully download the module from pypi.org and install it.
Installation command
pip install psycopg2
1.4 Setting up Postgres database
To start with the tutorial, I am hoping that you have the Postgres up and running in your local host environment. For easy setup, I have the database up and running on the docker environment. You can execute the below command to get the container running on docker in minutes.
Docker container run command
docker run -d -p 5433:5432 -e POSTGRES_PASSWORD=password --name postgres postgres
If everything goes well the container would be started successfully as shown in Fig. 2. You can use the docker ps -a command to confirm that the container is started successfully. For further information on docker basics, you can navigate to this tutorial.

Once the docker container is successfully started we need to create a database. Connect with the server on port 5433 using the pgAdmin tool and create a new database named – library. To create a database you will use the following SQL command.
Create database sql command
CREATE DATABASE library
2. Create a Web App with Python Flask and PostgreSQL
Before going any deeper in the practice I am assuming that you are aware of the Python and SQL basics. Let us dive in with the programming stuff now.
2.1 Creating a Configuration
Add the following code to the python script containing the configuration wherein we will specify the database identifier containing the user, password, host, port, and database name information (In the ideal case this information will be fetched from some configuration file and not directly hard coded here). This information will be used by the flask-sqlachemy module to work with the database from the python application.
- user – Identity user to work with the postgresql database. Default postgresql user is
postgres - password – Credential of the identity user
- host – Address of the database server. If running on localhost then you can either use localhost or 127.0.0.1
- port – The port number. Default postgresql port is
5432 - database – Database to which you want to connect. It can be left blank
The python script contains the create_app() method that returns the Flask app instance. You are free to change these details as per your configuration setup.
config.py
from flask import Flask


def create_app():
    app = Flask(__name__)
    app.config['SQLALCHEMY_TRACK_MODIFICATIONS'] = False
    # sql config params
    app.config['SQLALCHEMY_DATABASE_URI'] = 'postgresql://postgres:password@localhost:5433/library'
    return app
2.2 Creating a Database Model
To build a simple web application and manipulate the data we need to map the database columns with the request model. With libaray database in place we will use the Flask-SQLAlchemy extension in python to add the database layer capabilities. The file consists of the Flask-SQLAlchemy instance called db and will be used for database-related operations like create the table structure in the database and defining the data that we will store.
model.py
from flask_sqlalchemy import SQLAlchemy

from config import create_app

db = SQLAlchemy(create_app())


# model class to create table structure in db
class Book(db.Model):
    __tablename__ = 'books'

    id = db.Column(db.Integer, primary_key=True)
    title = db.Column(db.String(100), nullable=False)
    genre = db.Column(db.String())
    author = db.Column(db.String(), nullable=False)
    quantity = db.Column(db.Integer, nullable=False, default=0)

    def __init__(self, title, genre, author, quantity):
        self.title = title
        self.genre = genre
        self.author = author
        self.quantity = quantity

    def __repr__(self):
        return f'{self.id}'
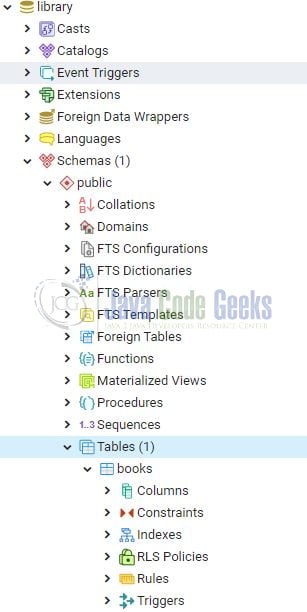
To automatically create the model structure we will need to run this file from the python console. Open the command prompt terminal and go to the project location. From the project, location write python and click enter. Once you enter the python console trigger the following commands to automatically create the table schema inside the library table based on the model specified above.
Db migrate commands
from model import db

db.create_all()

exit()
If everything goes well the table will be created and can be verified from the pgAdmin console as shown in Fig. 3.
2.3 Creating and Reading Entities
Now that we have the database and table connected with our flask application so let us implement the CRUD operations. In the below python script we will create the four HTTP operations i.e. POST, PUT, DELETE, and GET. The file consists of the –
- Flask app instance called
app Flask-SQLAlchemyinstance calleddband will be required for CRUD operations
Let us write some API resource implementation i.e.
save_book(): HTTP POST operation to save the new book in the tableget_books(…): HTTP GET operation to get all the books from the tablehandle_book(book_id): HTTP GET/PUT/DELETE/ operation on a book in the table
app.py
from flask import request, jsonify
from flask_sqlalchemy import SQLAlchemy

from config import create_app
from model import Book

app = create_app()
db = SQLAlchemy(app)


# creating the rest endpoints

# index
# url = http://127.0.0.1:5000/
@app.route('/', methods=['GET'])
def index():
    return {'message': 'Hello world!'}


# save new book
# url = http://127.0.0.1:5000/book
@app.route('/book', methods=['POST'])
def save_book():
    if request.is_json:
        print('Saving new book')
        data = request.get_json()
        new_book = Book(title=data['title'], genre=data['genre'], author=data['author'], quantity=data['quantity'])
        db.session.add(new_book)  # adding new data
        db.session.commit()  # persisting the data
        db.session.refresh(new_book)  # refresh the inserted object to get the primary key
        return {'message': f'Book {new_book.id} saved successfully'}  # returning response
    else:
        return {'message': 'Payload is incorrect'}


# get all books
# url = http://127.0.0.1:5000/books
@app.route('/books', methods=['GET'])
def get_books():
    print('Getting all books')
    books = Book.query.all()
    if not books:
        return {'items': [], 'count': 0, 'message': 'success'}  # returning empty response
    else:
        result = [
            {
                'id': b.id,
                'title': b.title,
                'genre': b.genre,
                'author': b.author,
                'quantity': b.quantity
            } for b in books]
        return {'items': result, 'count': len(books), 'message': 'success'}  # returning response


# get/update/book by id
# url = http://127.0.0.1:5000/book/
@app.route('/book/', methods=['GET', 'PUT', 'DELETE'])
def handle_book(book_id):
    print('Getting book id = {}'.format(book_id))
    book = Book.query.get_or_404(book_id)
    if request.method == 'GET':
        response = {
            'id': book.id,
            'title': book.title,
            'genre': book.genre,
            'author': book.author,
            'quantity': book.quantity
        }
        return {'message': 'success', 'book': response}  # returning response
    elif request.method == 'PUT':
        if request.is_json:
            print('Performing update')
            data = request.get_json()
            # updating the data
            db.session.query(Book).filter(Book.id == book_id).update({
                'title': data['title'],
                'genre': data['genre'],
                'author': data['author'],
                'quantity': data['quantity']
            })
            db.session.commit()  # persisting the data
            return {'message': f'Book {book_id} updated successfully'}  # returning response
        else:
            return {'message': 'Payload is incorrect'}
    elif request.method == 'DELETE':
        print('Performing delete')
        db.session.query(Book).filter(Book.id == book_id).delete()  # deleting the data
        db.session.commit()  # persisting the data
        return {'message': f'Book {book_id} deleted successfully'}  # persisting the data


# exception handler
@app.errorhandler(405)
def method_not_allowed(e):
    return jsonify({'message': 'Request method not supported'}), 405


# driver code
if __name__ == '__main__':
    app.run(debug=False)
Run this python script and let us try adding a new book using a tool like Postman.
4. Application Endpoints
Once the app.py is successfully started it would expose the following application endpoints which you can use for performing the different CRUD operations.
Application Endpoints
# save new book
# url = http://127.0.0.1:5000/book
# sample request body
# {
#    "title": "{{$randomJobTitle}}",
#   "genre": "{{$randomBsBuzz}}",
#    "author": "{{$randomFullName}}",
#   "quantity": "{{$randomInt}}"
# }


# get all books
# url = http://127.0.0.1:5000/books


# get/update/book by id
# url = http://127.0.0.1:5000/book/
You can also download the postman collection from the Downloads section. That is all for this tutorial and I hope the article served you with whatever you were looking for. Happy Learning and do not forget to share!
5. Summary
In this tutorial, we learned:
- Introduction to Flask micro-framework in python programming
- Sample program create a web application in python via flask and PostgreSQL
You can download the source code of this tutorial from the Downloads section.
6. Related articles
7. Download the Project
This was a python programming tutorial to understand the flask micro-framework in python programming with the help of a web application and PostgreSQL.
You can download the full source code of this example here: Create a Web App with Python Flask and PostgreSQL
