In the Mockito Tutorial for Beginners, we saw a general overview of the use of Mockito framework for Java unit tests. In this example, we will see how we can use the InitMocks initialization method, for an easier but expressive way of creating the mocks, specially useful when we have several dependencies to mock.
For this tutorial, we will use:
- Java 1.7.0
- Eclipse Mars 2, release 4.5.2.
- JUnit 4.
- Mockito 1.10.19.
You may skip project creation and jump directly to the beginning of the example below.
1. Project creation
Go to “File/New/Java Project”. You will be asked to enter a name for the project. Then, press “Next”, not “Finish”.
In the new window that has appeared, go to “Libraries” tab, select “Add library” button, and then select “JUnit”, as shown in the following images below:
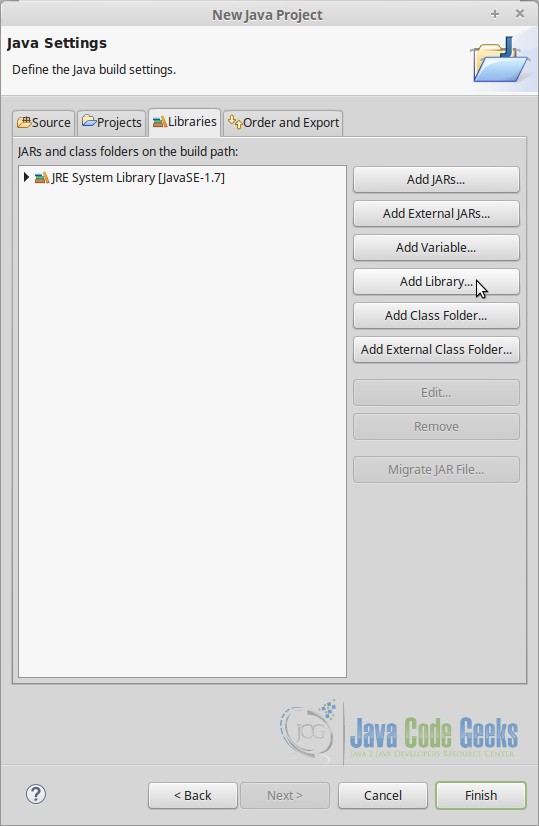
1. Adding libraries to the project
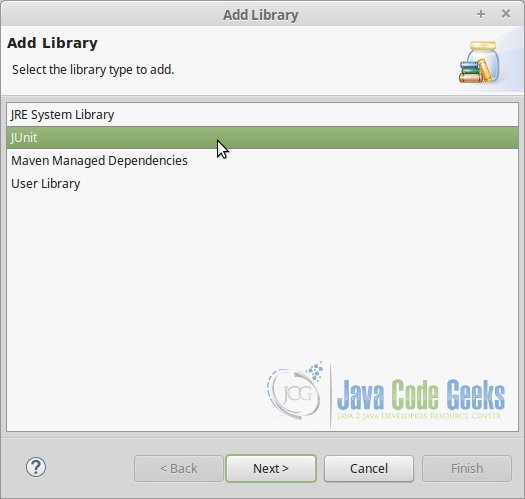
2. Adding JUnit as library
You can now finish the project creation.
Now, right click the folder icon in the Package Explorer, and select “New/Source Folder”, and enter the name you want to give to the test folder.
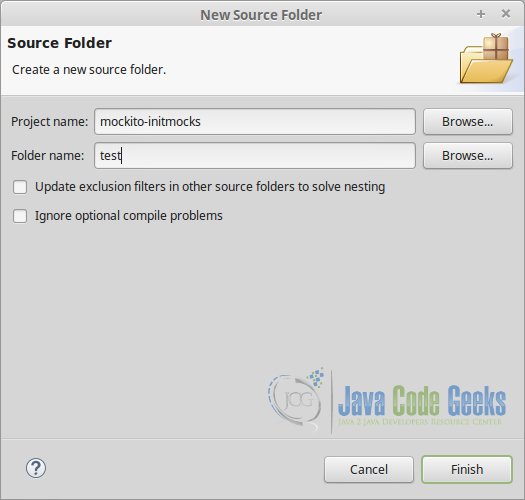
3. Creating folder for tests
1.2. Mockito installation
The easiest way to install Mockito is:
- Download it directly from Maven Repository.
- Place it inside your working directory, for example, in a lib directory in the directory root.
- Refresh the Package Explorer in Eclipse (F5).
- Now, a new lib directory should be displayed, with the Mockito JAR file inside it. Right click on it an select “Build Path/Add to Build Path” (shown in image below).
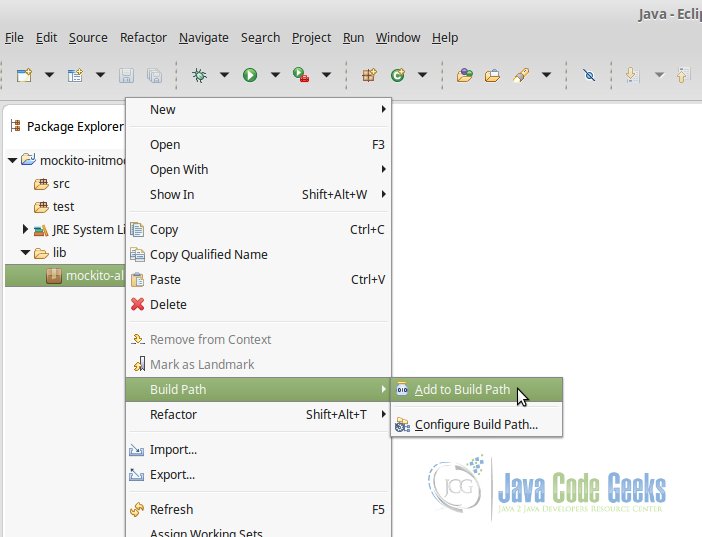
4. Adding Mockito to build path
2. Base code
Before starting mocking, let’s create a project.
Imagine that we want to develop a calculator. The simplest calculator possible, with add, subtract, multiply and divide operations.
But the problem is that we don’t know how we are going to perform those arithmetic operations yet. And there are several possibilities:
- With integer/float numbers.
- With strings. Commonly known as “String Calculator”.
- With a bit level implementation.
And there are combinable among the operations. So, each operation would be a dependency.
Let’s declare an interface for each of the arithmetic operations:
Adder.java
package com.javacodegeeks.initmocks.calculatorinterfaces;

/**
 * Adder interface definition.
 */
public interface Adder {

    /**
     * n1 + n2.
     *
     * @param n1 First number.
     * @param n2 Second number.
     * @return Result object.
     */
    public Object add(Object n1, Object n2);

}
Subtracter.java
package com.javacodegeeks.initmocks.calculatorinterfaces;

/**
 * Subtracter interface definition.
 */
public interface Subtracter {

    /**
     * n1 - n2.
     *
     * @param n1 First number.
     * @param n2 Second number.
     * @return Result object.
     */
    public Object subtract(Object n1, Object n2);

}
Multiplier.java
package com.javacodegeeks.initmocks.calculatorinterfaces;

/**
 * Multiplier interface definition.
 */
public interface Multiplier {

    /**
     * n1 * n2.
     *
     * @param n1 First number.
     * @param n2 Second number.
     * @return Result object.
     */
    public Object multiply(Object n1, Object n2);

}
Divisor.java
package com.javacodegeeks.initmocks.calculatorinterfaces;

/**
 * Divisor interface definition.
 */
public interface Divisor {

    /**
     * n1 / n2.
     *
     * @param n1 First number.
     * @param n2 Second number.
     * @return Result object.
     * @throws ArithmeticException If the divisor is 0.
     */
    public Object divide(Object n1, Object n2) throws ArithmeticException;

}
Note that both parameters and returning values are declared as Object, because we don’t know with what we are going to be dealing.
Of course, we need another class to handle those interfaces (and supposing that it has a main method, a menu, and all the required stuff):
CalculatorApplication.java
package com.javacodegeeks.initmocks.calculatorapplication;

import com.javacodegeeks.initmocks.calculatorinterfaces.*;

/**
 * Calculator main class.
 */
public class CalculatorApplication {

    private Adder adder;
    private Subtracter subtracter;
    private Multiplier multiplier;
    private Divisor divisor;

    /**
     * CalculatorApplication class constructor.
     *
     * @param calculator CalculatorInterface with methods to add, subtract,
     *     multiply and divide.
     */
    public CalculatorApplication(Adder adder, Subtracter subtracter,
            Multiplier multiplier, Divisor divisor) {
        this.adder = adder;
        this.subtracter = subtracter;
        this.multiplier = multiplier;
        this.divisor = divisor;
    }

    /**
     * Calls the adder to make the addition.
     *
     * @param n1 First number.
     * @param n2 Second number.
     * @return Result object.
     */
    public Object add(Object n1, Object n2) {
        Object result = this.adder.add(n1, n2);

        return result;
    }

    /**
     * Calls the subtracter to make the subtraction.
     *
     * @param n1 First number.
     * @param n2 Second number.
     * @return Result object.
     */
    public Object subtract(Object n1, Object n2) {
        Object result = this.subtracter.subtract(n1, n2);

        return result;
    }

    /**
     * Calls the multiplier to make the multiplication.
     *
     * @param n1 First number.
     * @param n2 Second number.
     * @return Result object.
     */
    public Object multiply(Object n1, Object n2) {
        Object result = this.multiplier.multiply(n1, n2);

        return result;
    }

    /**
     * Calls the divisor to make the division.
     *
     * @param n1 First number.
     * @param n2 Second number.
     * @return Result object.
     * @throws ArithmeticException If the divisor is 0.
     */
    public Object divide(Object n1, Object n2) throws ArithmeticException {
        Object result = this.divisor.divide(n1, n2);

        return result;
    }
}
Now, let’s going to test it.
3. Without InitMocks
To test CalculatorApplication class, we would do something similar to the following:
CalculatorApplicationTest.java
package com.javacodegeeks.initmocks.calculatorapplication;

import org.junit.Before;
import org.junit.Test;
import org.mockito.Mockito;

import com.javacodegeeks.initmocks.calculatorinterfaces.Adder;
import com.javacodegeeks.initmocks.calculatorinterfaces.Divisor;
import com.javacodegeeks.initmocks.calculatorinterfaces.Multiplier;
import com.javacodegeeks.initmocks.calculatorinterfaces.Subtracter;

public class CalculatorApplicationTest {

    private Adder adderMock;
    private Subtracter subtracterMock;
    private Multiplier multiplierMock;
    private Divisor divisorMock;
    private CalculatorApplication calculator;

    @Before
    public void setUp() {
        this.adderMock = Mockito.mock(Adder.class);
        this.subtracterMock = Mockito.mock(Subtracter.class);
        this.multiplierMock = Mockito.mock(Multiplier.class);
        this.divisorMock = Mockito.mock(Divisor.class);

        this.calculator = new CalculatorApplication(this.adderMock,
                this.subtracterMock, this.multiplierMock, this.divisorMock);

    }

    // ...
}
We have to create each mock manually. And, for this extremely small project, we have four interfaces. Imagine creating every mock every time in a large size project for, maybe, hundreds of interfaces.
4. With InitMocks
We have seen that the above method can be quite tedious when we have several interfaces. What InitMocks does is to make easier the mock creation process. Let’s see how it works:
CalculatorApplicationTestInitMocks.java
package com.javacodegeeks.initmocks.calculatorapplication;

import org.junit.Before;
import org.junit.Test;
import org.mockito.Mock;
import org.mockito.MockitoAnnotations;

import com.javacodegeeks.initmocks.calculatorinterfaces.Adder;
import com.javacodegeeks.initmocks.calculatorinterfaces.Divisor;
import com.javacodegeeks.initmocks.calculatorinterfaces.Multiplier;
import com.javacodegeeks.initmocks.calculatorinterfaces.Subtracter;

public class CalculatorApplicationTestInitMocks {

    @Mock
    private Adder adderMock;
    @Mock
    private Subtracter subtracterMock;
    @Mock
    private Multiplier multiplierMock;
    @Mock
    private Divisor divisorMock;

    private CalculatorApplication calculator;

    @Before
    public void setUp() {
        MockitoAnnotations.initMocks(this);

        this.calculator = new CalculatorApplication(this.adderMock,
                this.subtracterMock, this.multiplierMock, this.divisorMock);

    }

    // ...
}
First, we need to indicate each mock element with @Mock annotation (which, in addition, is really useful to identify the mock objects at first sight), as in lines 15, 17, 19 and 21. And, then, we just have to call MockitoAnnotations.initMocks(this) static method, passing the instance of the test class where the mock objects are defined, like in line 28. After that, the mocks will be ready to use them.
We can verify that is working writing one of the tests:
CalculatorApplicationTestInitMocks.java
// ...

@Test
public void testAdd() {
    int n1 = 1;
    int n2 = 2;
    int expected = n1 + n2;

    when(this.adderMock.add(n1, n2)).thenReturn(expected);

    Object actual = this.calculator.add(n1, n2);

    assertEquals(expected, (int)actual);
}

// ...
This test would work as expected.
5. Summary
In this example, we have seen how we can use the InitMocks initialization method, and in which scenario is particularly helpful: when we have a lot of mock objects to initialize, for which a manual creation could be quite tedious.
6. Download the Eclipse Project
This was an example of InitMocks with Mockito.
You can download the full source code of this example here: MockitoInitMocksExample
