In this tutorial, we will learn about Amazon Machine Images, or AWS AMI in short, and its types. First, we’ll see the ways to find an AMI on AWS. Next, we will discuss shared and paid AMIs. Lastly, we’ll demonstrate how to create our own AMI and deregister it when not needed.
1. Introduction
An Amazon Machine Image (AMI) contains relevant packages, configuration, and other software to set up an EC2 instance on the AWS cloud and is required to launch an instance.
An AMI provides the following information :
- A template defining the root volume of the instance (for example, an operating system).
- Permissions controlling the authorities of all / specific AWS accounts to use AMIs for launching instances.
- A block device definition providing the root volume to be attached to the instance post-launch.
A single AMI may be used to launch several identical instances with the same configuration. Alternatively, different AMIs can be used to launch instances with distinct configurations.
2. AWS Machine Images Types
We can select an AMI to launch an instance based on the following attributes:
- Operating System – Linux, Windows, etc.
- Region – Europe, US – West, etc.
- Architecture – architecture of the Operating System (e.g. 32-bit (i386), 64-bit (x86_64), or 64-bit ARM (arm64)).
- Storage – Amazon EBS or instance store.
- Launch Permissions – public, explicit, or implicit.
Let’s discuss the last two in more detail.
2.1. Storage
AMIs are categorized based on the storage used for the root device of the instance they launch, as shown below:
- Storage backed by Amazon EBS volume, created from an Amazon EBS snapshot, and
- Storage backed by an instance store volume created from Amazon S3.
2.2. Launch Permissions
AMIs are also categorized based on the following launch permissions:
- public – All AWS accounts are granted launch permissions.
- explicit – Only specific AWS accounts are granted launch permissions.
- implicit – Only the owner of the AMI is granted launch permissions.
3. Finding an AMI
Before we launch an instance, we need to find and select an AMI. We should make the selection as per our requirements based on the attributes as discussed in the previous section.
There are different ways to find an AMI and in this tutorial, we will demonstrate the Amazon EC2 console to find AMIs.
3.1. Using the Launch Wizard
We can use the launch wizard to explore through the available AMIs by searching for the desired AMI and selecting one to launch an instance.
Let’s follow the steps and demonstrate the use of the launch wizard to find our desired AMI.
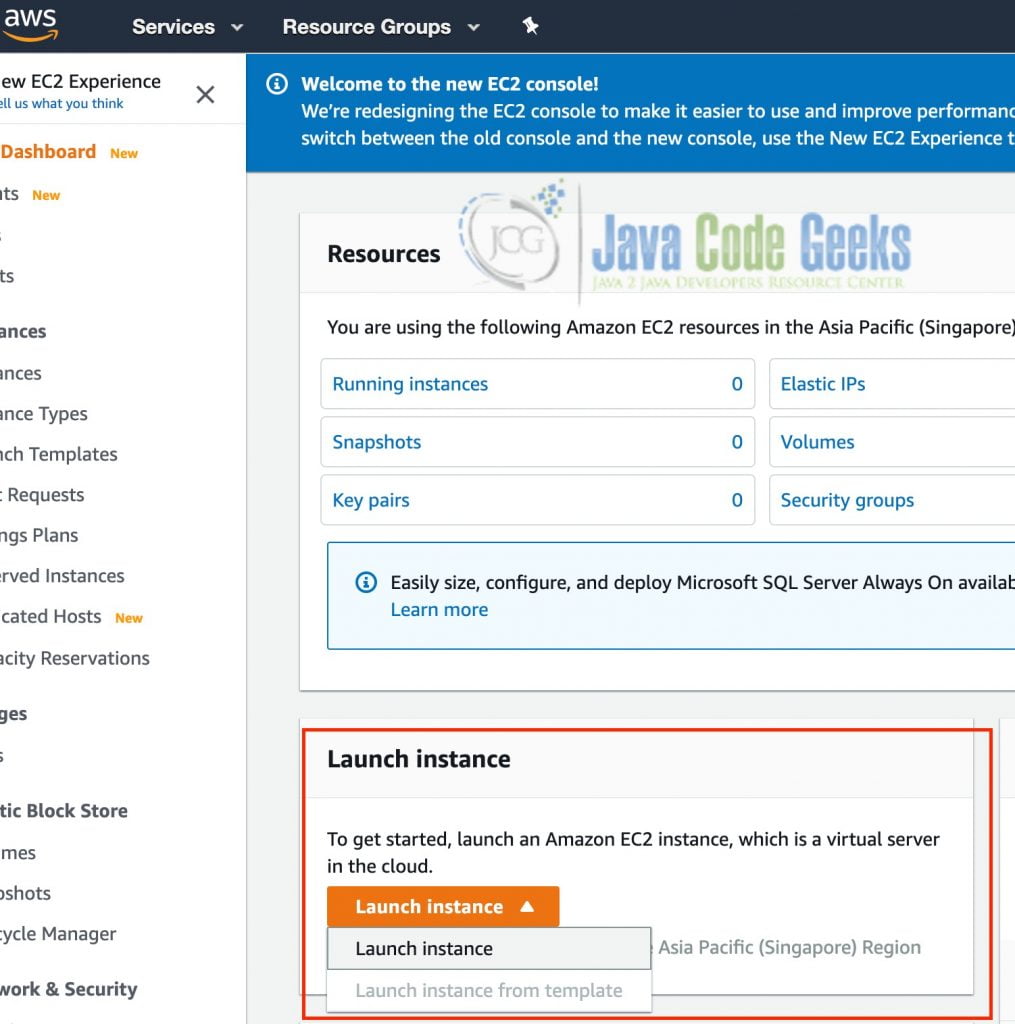
1. Access the Amazon EC2 console at https://console.aws.amazon.com/ec2/
2. In the launch instance section, click on the “Launch Instance” dropdown and hit the “Launch instance” button.
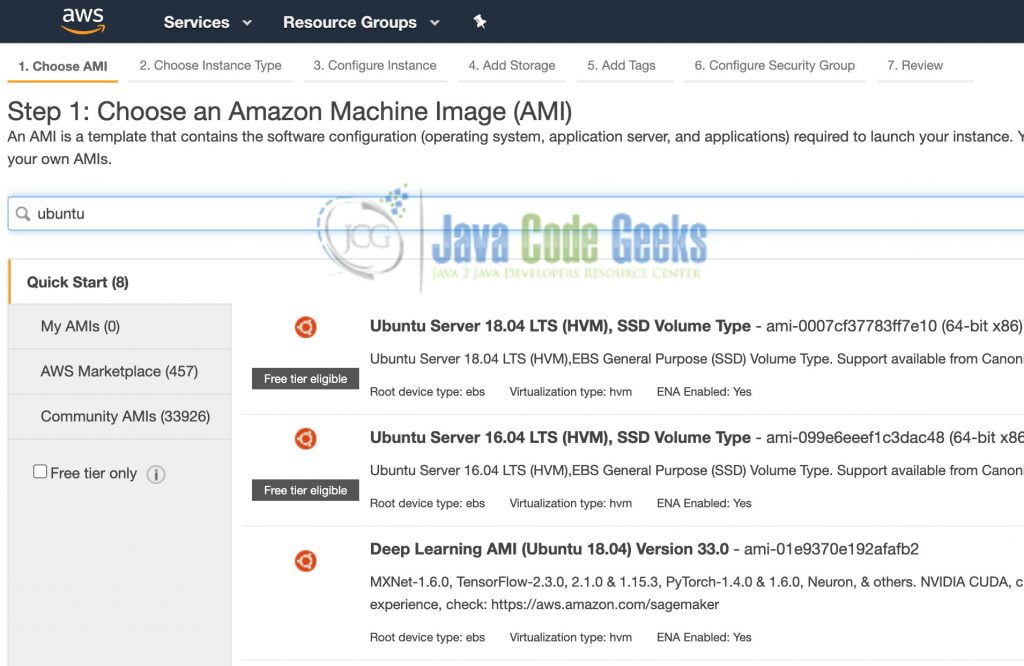
3. The next page requires you to select an AMI. We can select an AMI either from the AWS Marketplace (paid AMIs) or from the community (built by and for the public).
Also, any previously created AMI by us will be available in the “My AMIs” tab.
3.2. Using the Images Menu
We can also browse through the available AMIs from the “Images” page on the Amazon EC2 console. Let’s see the steps to do so.
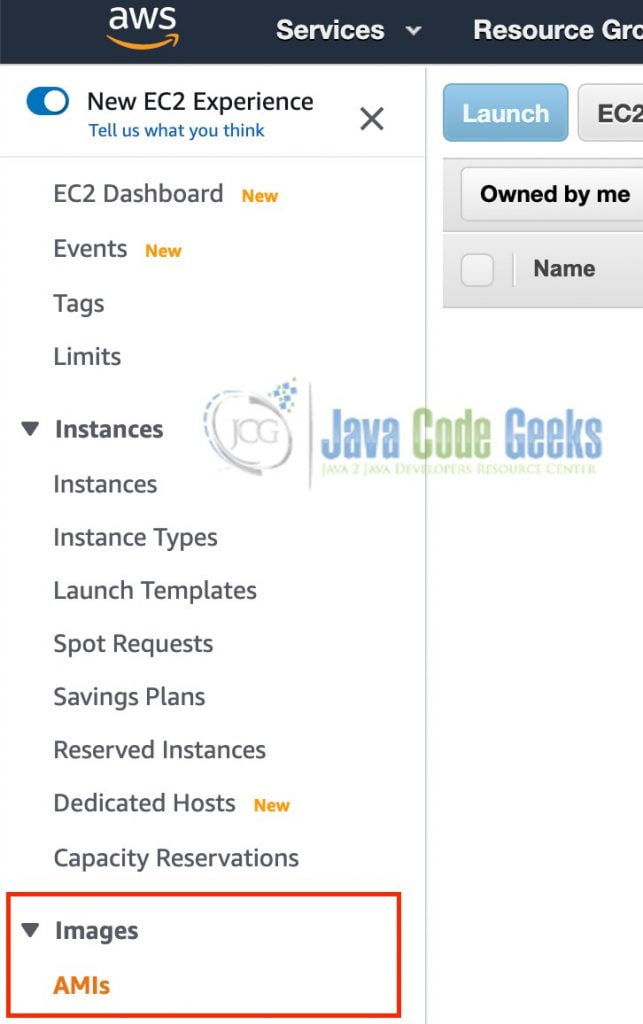
1. Access the Amazon EC2 console at https://console.aws.amazon.com/ec2/
2. On the left navigation pane, in the “Images” menu, click AMIs.
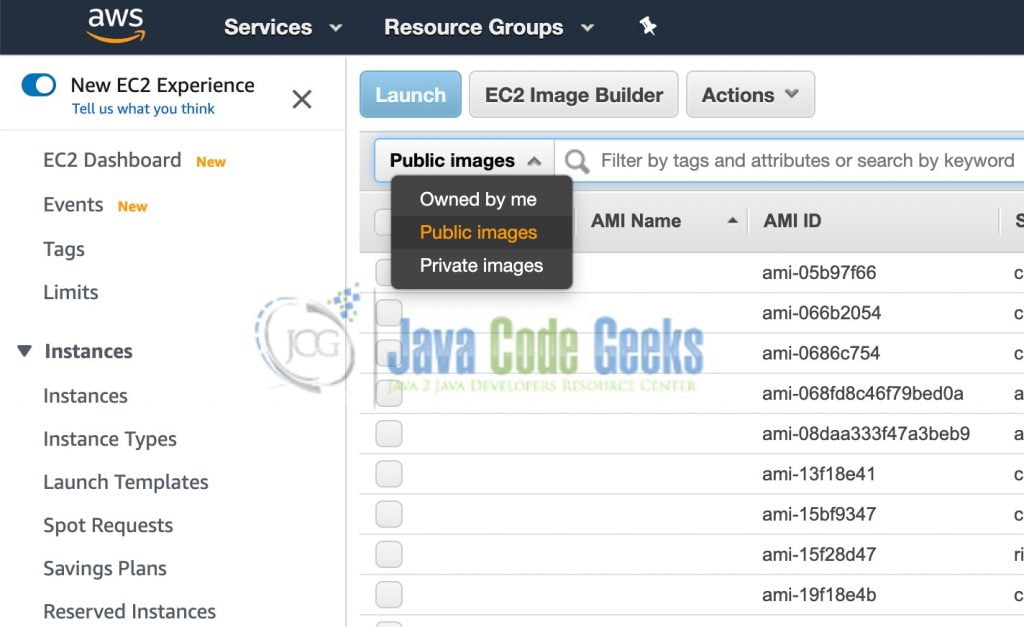
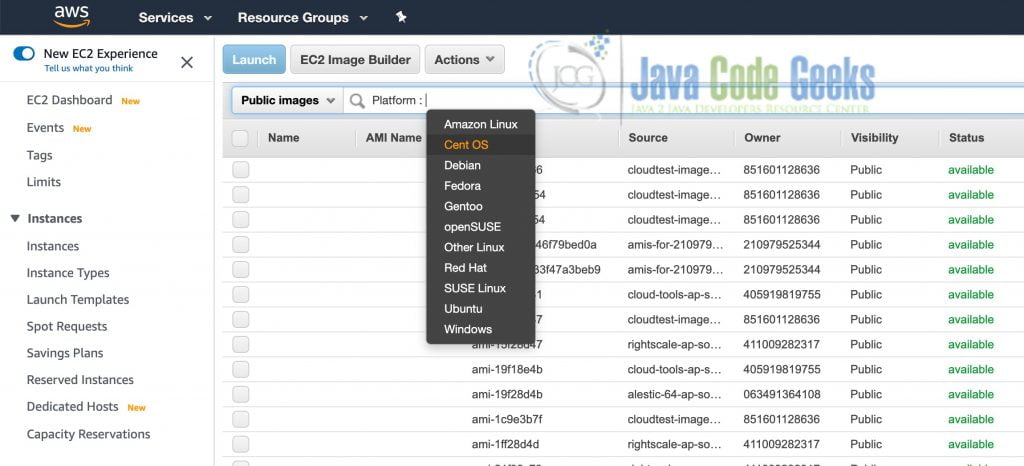
3. First, we need to select the source of the AMIs. Therefore, to list all the images provided by AWS, select the “Public images” from the dropdown.
4. Next, we can search for the AMI of interest by clicking on the search bar, selecting the desired resource attribute (e.g. Platform), and filter AMIs based on different values (e.g. CentOS). The below image illustrates this.
4. Shared AMIs
A shared AMI, as the name says, is an image created by a developer and shared publicly to be used by other developers. We can also create our own AMIs and share it on AWS.
Note: Shared AMIs should be treated like any foreign code to be used within our project. Therefore, they should be retrieved from a trusted source and used very carefully.
4.1 Finding a Shared AMI
To locate a shared AMI, we can use the EC2 console. We can use the same steps as discussed in Section 3.2 to find an AMI. Additionally, we can also search for a privately or publicly shared AMI.
To search and list all the privately shared AMIs, choose Private images in the drop-down next to the search bar.
Alternatively, by clicking on Public images in the drop-down, we can list all publicly shared AMIs. Also, we can further refine our search based on other requirements.
It is important to note that the AMIs are specific to a region. Therefore, we must search for an AMI in the Region from which it has been shared.
4.2 Sharing an AMI
It is possible to share our AMI and let other AWS accounts launch an instance out of it. We can choose to share our AMI with all AWS accounts or only a few specific accounts. Let’s see how to do that.
4.2.1 Share a Public AMI
We can follow the following steps to share our AMI and make it available on the “Community AMIs” section in the “Launch Instance Wizard“.
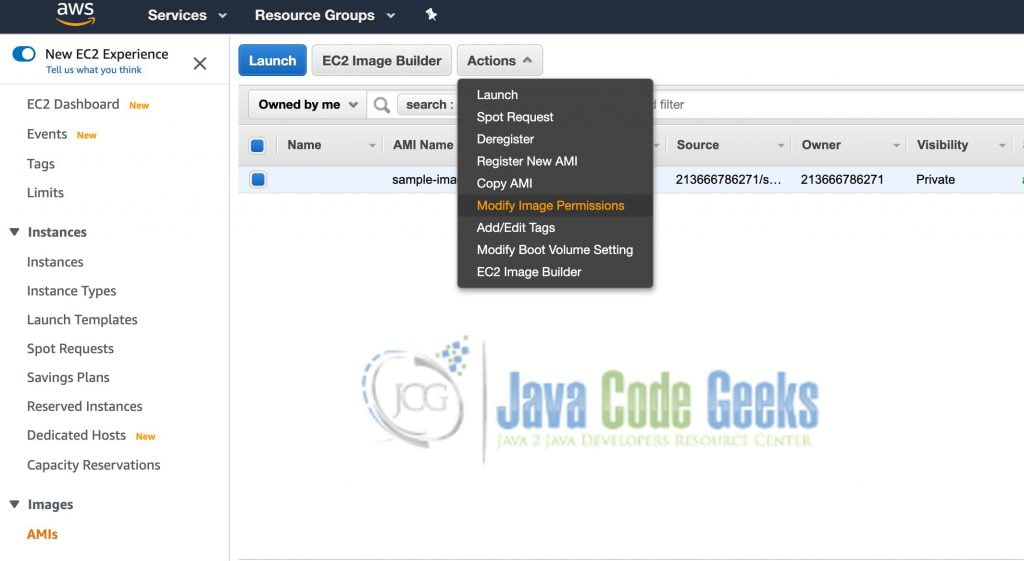
1. Follow steps 1 and 2 as mentioned in Section 3.2.
2. Select the AMI that we want to share, followed by clicking on “Modify Image Permissions” in the “Actions” drop-down.
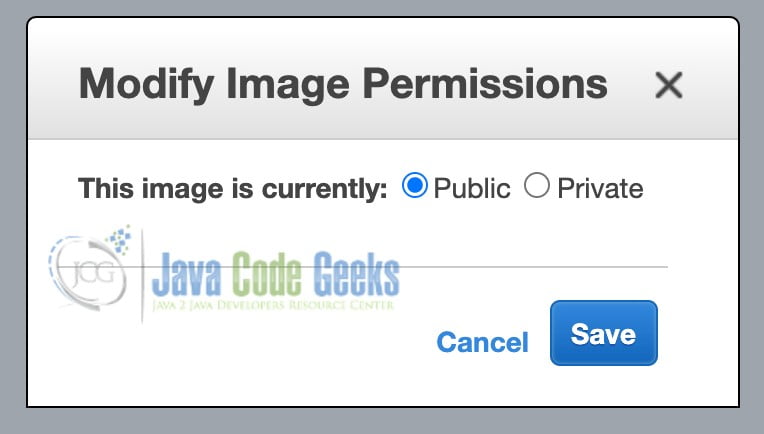
3. Select “Public” and click “Save“.
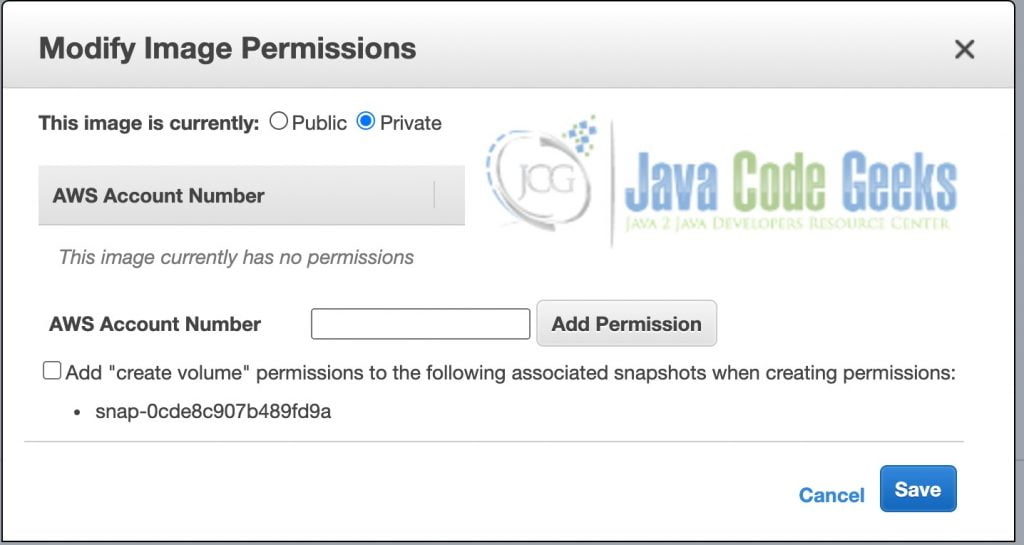
4. It is important to note that, if we wish to share the AMI to a specific AWS account only, we need to select “Private“, followed by choosing the “AWS Account Number” field and then clicking on “Add Permissions”.
5. Paid AMIs
AWS supports developers to charge other AWS users for using their AMIs. The owner can sell his AMI on AWS Marketplace (an online store to buy software that runs on AWS and is well integrated with Amazon EC2). Likewise, another AWS user may also choose to buy this AMI, in the marketplace.
5.1. Find a Paid AMI
The steps to find a Paid AMI are quite similar to finding any other AMI and there is no difference between launching a paid AMI or any other AMI.
1. Access the Amazon EC2 console at https://console.aws.amazon.com/ec2/
2. On the left navigation pane, in the “Images” menu, click on “AMIs“.
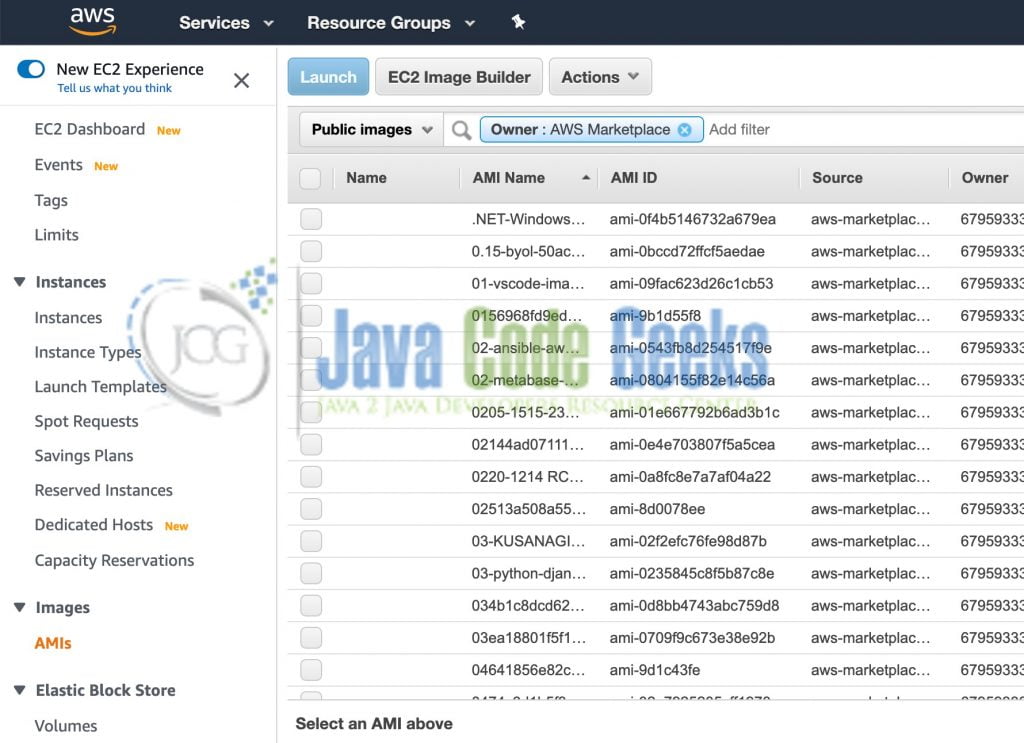
3. In the dropdown, select the “Public images” as the first filter.
4. Use the search bar to select the Owner as AWS Marketplace.
The screenshot below lists the paid images with the source “aws-marketplace” after applying the filter.
6. Create Your Own AMI
AWS also provides support to create our own AMI. We might want to create an AMI out of an existing running EC2 instance in order to launch other instances in the future.
Follow the below steps to create an AMI from a running EC2 instance:
1. Access the Amazon EC2 console at https://console.aws.amazon.com/ec2/
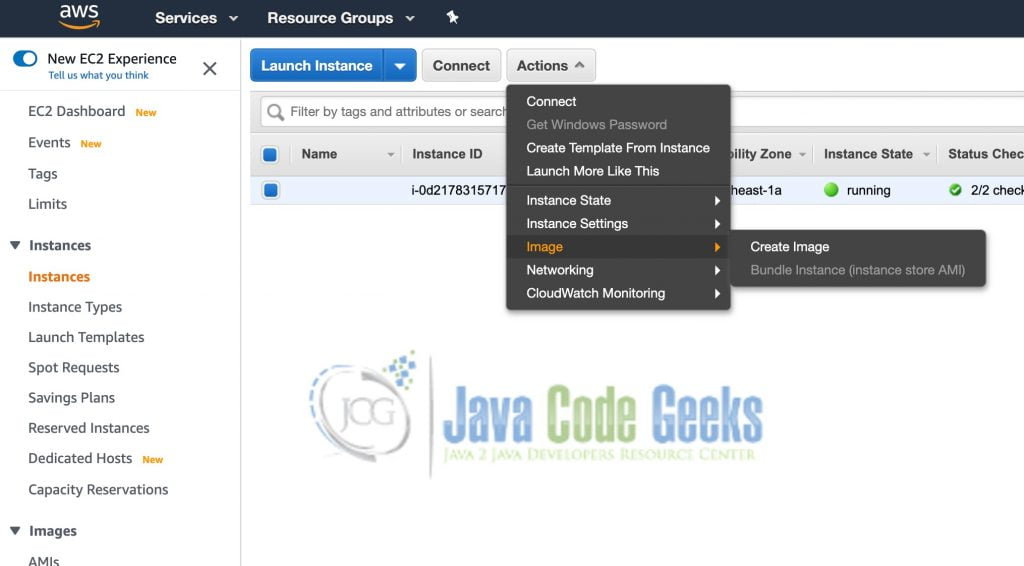
2. Click “Running instances” on the EC2 dashboard to view the running instances.
3. Select the instance, click on the “Actions” dropdown, and lastly click on the “Create Image” under the “Image” sub-menu as shown below.
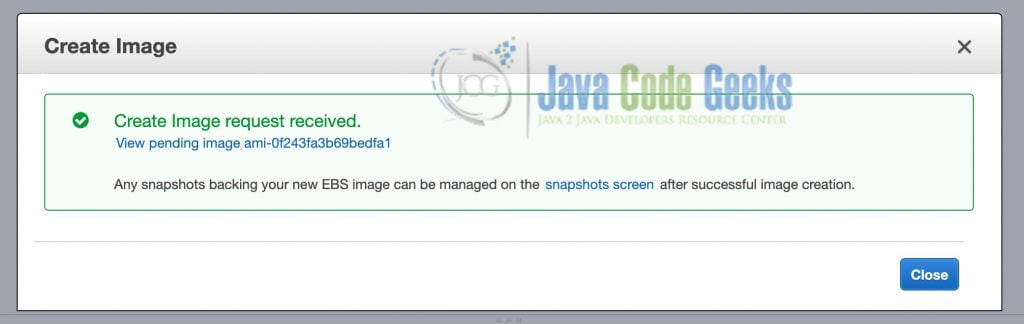
4. The previous step will open a dialog box with a few input fields. AWS auto-selects the settings for the default volume attached to the instance. We may change the volume size and the type as required. We can also attach a new volume to our AMI.

5. Click on Create Image. This will start creating the AMI in the background and a message will be displayed as shown in the snapshot below.
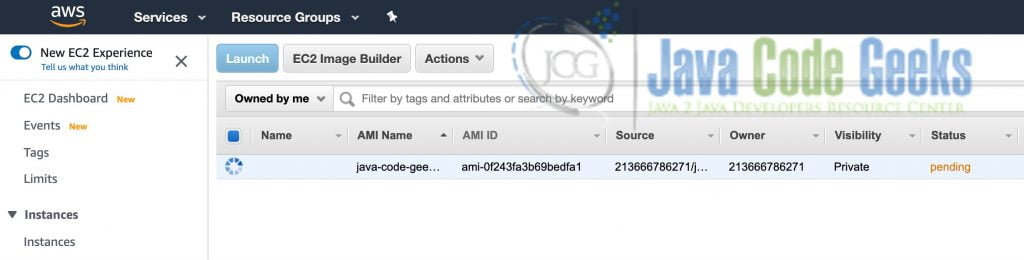
6. We can click on the image id to see that our AMI is getting created. It gets listed in the “Owned by me” list in the “AMIs” section under “Images“.
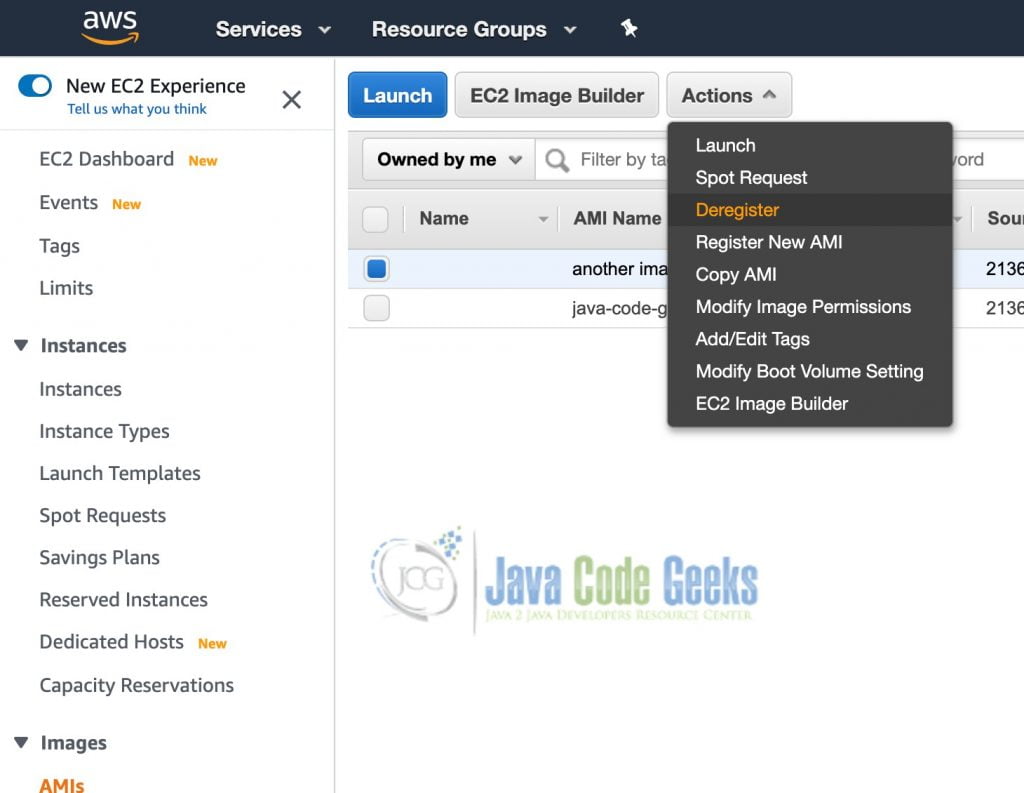
7. Deregister Your AMI
When we no longer need an AMI, we can deregister it easily by following the below steps.
1. Access the Amazon EC2 console at https://console.aws.amazon.com/ec2/
2. On the left navigation pane, in the “Images” menu, click on “AMIs“.
3. Select “Owned by me” in the dropdown, then select the image we wish to deregister and click “Actions“.
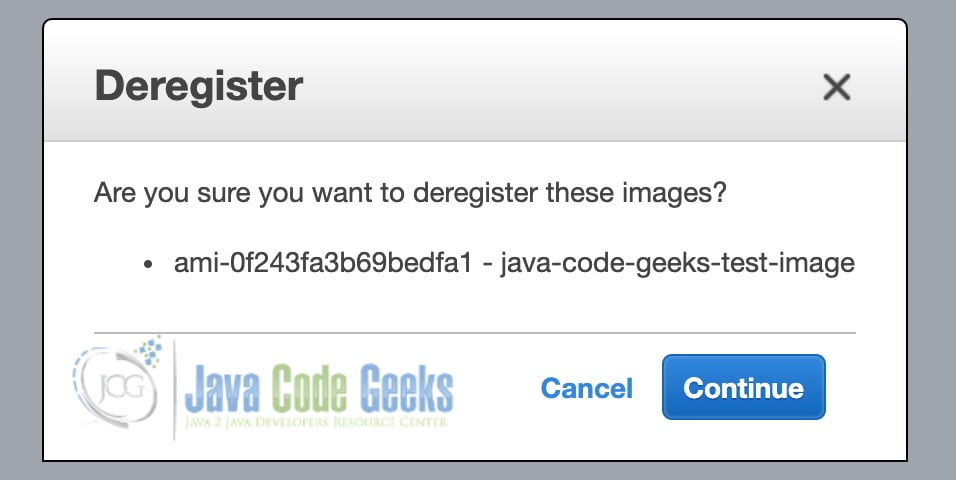
4. In the “Actions” dropdown, click “Deregister“. This will prompt us with a dialog box with an option to continue.
5. Click on the Continue button and it will deregister the AMI. Hence, the AMI will no more be visible under the “Owned by me” list in the “AMIs” section under “Images“.
8. Summary
In this article, we learned about the Amazon Machine Images (AMIs). At first, we saw the different types of AMIs followed by ways to find an AMI in AWS. After that, we discussed shared and paid AMIs. Lastly, we created our own AMI using an existing running EC2 instance and also demonstrated how to deregister an AMI.
