Events represents a response to user’s interaction with input controls, such as press of a button or touch of the screen. Android framework places each occurring Event into a queue, which is based on FIFO (first-in first-out) logic. When an Event happens an Event Listener, which is involved with the View object, should be registered. Then, the registered Event Listener should implement a corresponding callback method (Event Handler), in order to handle the Event.
Some of the most used Event Handlers with the respective Event Listeners are:
onClick()–onClickListener(): for clicking or focusing upon aViewcomponent.onLongClick()–onLongClickListener(): for clicking or holding or focusing upon aViewcomponent, for more than one second.onTouch()–onTouchListener(): performing a touch action, including motion gesture on the screen.OnKey()–onKeyListener(): presses or releases a hardware key on the device.onFocusChange()–onFocusChangeListener(): for navigation onto or away from an item.
In this example we will indicate different ways of onClickListener registration and the pros and cons of each situation. The different approaches that we will show are:
- Implement the
Event Listenerinterface into theActivityclass - Using an anonymous inner
Event Listenerclass - Using a separate
Event Listenerclass - Declare it into the layout XML file.
For this tutorial, we will use the following tools in a Windows 64-bit platform:
- JDK 1.7
- Eclipse 4.2 Juno
- Android SDK 4.4
1. Create a New Android Application Project
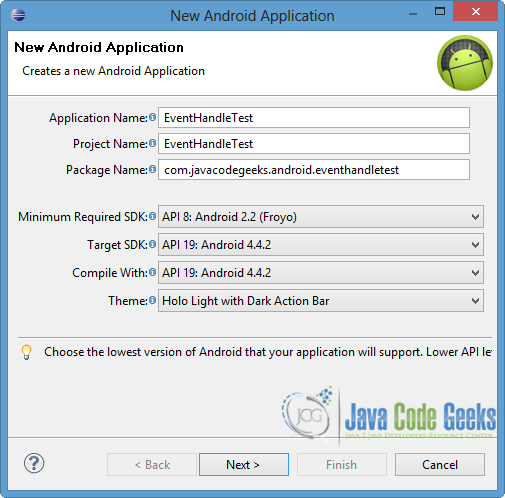
Open Eclipse IDE and go to File → New → Project → Android Application Project.
Specify the name of the application, the project and the package and then press Next button.
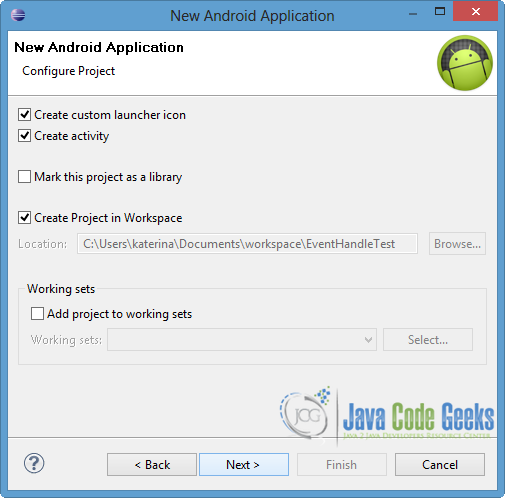
In the next window, the “Create Activity” option should be checked. The new created activity will be the main activity of your project. Then click Next.
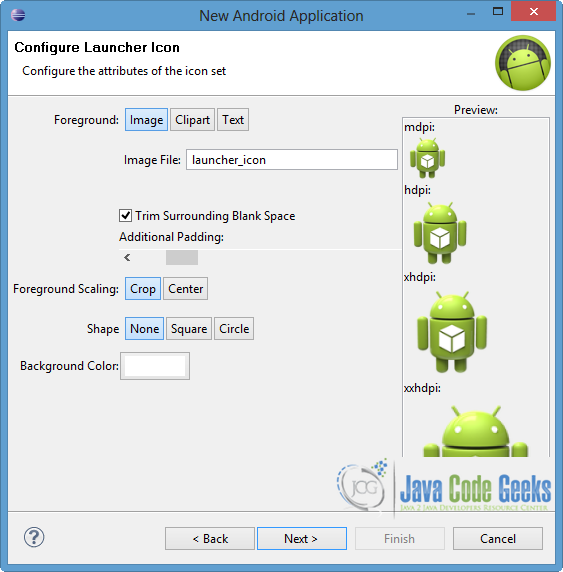
In “Configure Launcher Icon” window you should choose the icon you want to have in your app. We will use the default icon of android, so click Next.
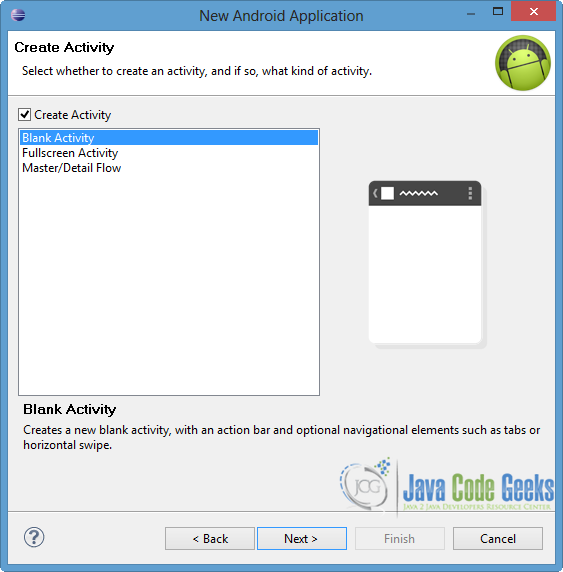
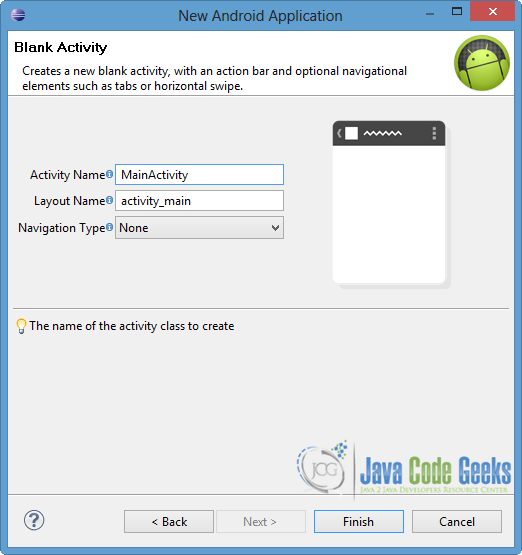
Choose the “Blank Activity” option and press Next.
You have to specify a name for the new Activity and a name for the layout description of your app. The .xml file for the layout will automatically be created in the res/layout folder. Finally, press Finish.
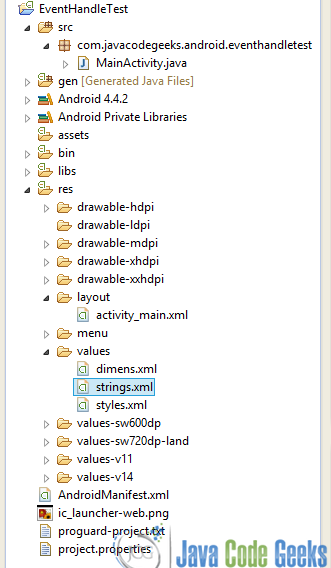
Now, you can see the final structure of the created project in the image below.
2. Create the layouts
We will create two different layouts because we will make two Activities, in order to show the different ways for Event Listener.
The first layout will be the one that has already been created. So open res/layout/activity_main.xml, go to the xml tab and paste the following.
activity_main.xml:
<RelativeLayout xmlns:android="http://schemas.android.com/apk/res/android"
    xmlns:tools="http://schemas.android.com/tools"
    android:layout_width="match_parent"
    android:layout_height="match_parent"
    tools:context=".MainActivity" >

    <TextView
        android:layout_width="wrap_content"
        android:layout_height="wrap_content"
        android:id="@+id/text"
        android:layout_marginBottom="20dp"
        android:text="@string/text_msg"
        android:textAppearance="?android:attr/textAppearanceLarge" />

    <Button
        android:layout_width="match_parent"
        android:layout_height="wrap_content"
        android:id="@+id/buttonMain"
        android:layout_below="@id/text"
        android:text="@string/text_btnMain" />

     <Button
         android:id="@+id/nextBtn"
         android:layout_width="wrap_content"
         android:layout_height="wrap_content"
         android:layout_alignParentRight="true"
         android:layout_below="@+id/buttonMain"
         android:layout_marginTop="100dp"
         android:text="@string/text_next" />

</RelativeLayout>
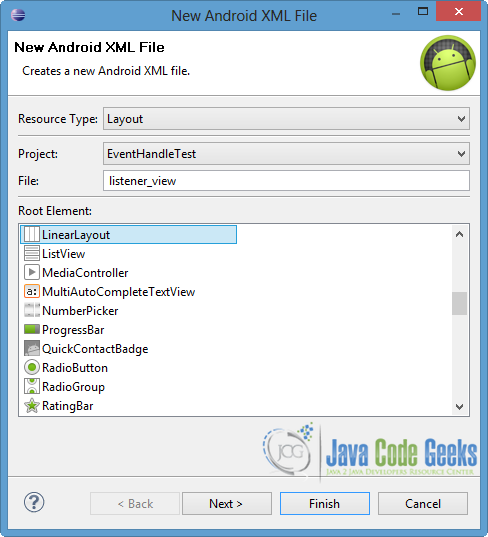
The other layout will be used for another Activity class. Right click on res/layout directory → New → Android XML File, in order to create the XML layout file. Then specify the name and select LinearLayout as root element, as shown in the next picture. Then click Finish.
Now open res/layout/listener_view.xml file to the xml tab and paste the code below.
listener_view.xml:
<?xml version="1.0" encoding="utf-8"?>
<LinearLayout xmlns:android="http://schemas.android.com/apk/res/android"
    android:layout_width="match_parent"
    android:layout_height="match_parent"
    android:orientation="vertical" >

    <TextView
        android:layout_width="wrap_content"
        android:layout_height="wrap_content"
        android:id="@+id/text2"
        android:layout_marginBottom="20dp"
        android:text="@string/text2_msg"
        android:textAppearance="?android:attr/textAppearanceLarge" />

    <Button
        android:layout_width="match_parent"
        android:layout_height="wrap_content"
        android:id="@+id/button1"
        android:text="@string/text_btn1" />

    <Button
        android:layout_width="match_parent"
        android:layout_height="wrap_content"
        android:layout_marginTop="10dp"
        android:id="@+id/button2"
        android:onClick="clickButton2"
        android:text="@string/text_btn2" />

    <Button
        android:layout_width="match_parent"
        android:layout_height="wrap_content"
        android:layout_marginTop="10dp"
        android:id="@+id/button3"
        android:text="@string/text_btn3" />


</LinearLayout>
As you can notice in the highlighted line, we declare the handler method that will be enabled when the user is going to press the button2. The other Buttons are used for the other approaches of Event Listener.
Also, we should define the appropriate strings in the strings.xml file, so open res/values/strings.xml file, go to the respective xml tab and paste the following code.
strings.xml:
<?xml version="1.0" encoding="utf-8"?>
<resources>

    <string name="app_name">EventHandleTest</string>
    <string name="action_settings">Settings</string>
    <string name="text_msg">Listener Interface or Next...</string>
    <string name="text2_msg">Select a way for Event Handling</string>
    <string name="text_btn1">Inner Listener Class Button</string>
    <string name="text_btn2">onClick Button</string>
    <string name="text_btnMain">Listener Interface Button</string>
    <string name="text_btn3">Listener in Separate Class Button</string>
    <string name="text_next">Go to next Activity</string>

</resources>
3. Code the Event Listener Interface Activity
At this point we show the situation where the Activity class implements an Event Listener interface. This is the easiest way of the other approaches and it is recommended for a single control of that Listener. It has a poor scale for multiple controls, because Listener can not take arguments. Also a big range of multiple controls requires a further programming, in order to check which control fires the Event.
As we mentioned before, we will use onClickListener as an example of Event Listener approaches.
Open src/com.javacodegeeks.android.eventhandletest/MainActivity.java and paste the following code.
MainActivity.java:
package com.javacodegeeks.android.eventhandletest;

import android.os.Bundle;
import android.app.Activity;
import android.content.Intent;
import android.view.View;
import android.view.View.OnClickListener;
import android.widget.Button;
import android.widget.TextView;
import android.widget.Toast;

public class MainActivity extends Activity implements OnClickListener {

	private TextView text;

	@Override
	protected void onCreate(Bundle savedInstanceState) {
		super.onCreate(savedInstanceState);
		setContentView(R.layout.activity_main);

		text = (TextView) findViewById(R.id.text);

		Button listenerBtn = (Button) findViewById(R.id.buttonMain);
		listenerBtn.setOnClickListener(this);

		Button nextBtn = (Button) findViewById(R.id.nextBtn);
		nextBtn.setOnClickListener(this);
	}

	@Override
	public void onClick(View v) {
		switch (v.getId()) {
		case R.id.buttonMain:
			text.setText("Listener implementation in the Activity!");
			Toast.makeText(this, "Implements onClickListener",
					Toast.LENGTH_SHORT).show();
			break;

		case R.id.nextBtn:
			try{
				Intent intent = new Intent(this, ListenerActivity.class);
				startActivity(intent);
			}catch(Exception ex) {
				ex.printStackTrace();
			}
			break;

		default:
			break;
		}
	}

}
As you can see in the code above, the MainActivity extends Activity as well as implements OnClickListener. The layout of this Activity includes two different Buttons, so we should check which one is pressed. After the declaration of the Buttons, setOnClickListener() method is called for each one. To handle the event, onClick() must be overridden. Notice that we need to make a check into the Handler Event callback, because multiple controls exist. So, when the Button with id nextBtn is pressed, a new Intent is initialized in order to lead the user to a new Activity.
4. Register an Event Listener to a custom Activity
We will create a custom Activity to show the other Event Listener approaches. We mention some characteristics for each approach:
4.1. Using an anonymous inner Event Listener class
The implementation of an anonymous inner Listener class is used for a single control into the Activity class. The advantage of this way is that the Event Handler can access the private data of the Activity as well as take more arguments at its callback. On the other hand, it works poorly for multiple controls with long code in the Event Handler callback , because it is difficult the maintenance of the code.
4.2. Using a separate Event Listener class
Another way is to use a class that implements an Event Listener and it is separated form the Activity. With this approach we can pass as many arguments as we want. In addition, it promotes the independence of the classes and the reusability of the code. In contrast, this approach requires a reference of the Activity to the separated class and the definition of public code in that Activity.
4.3. Using a layout XML file
The last approach we are going to show doesn’t require an implementation of Event Listener interface. We should define the Event Handler in the layout of the Activity and more specifically into the android:onClick attribute of the View component. After that, we should implement the respective function into the Activity. This way focuses on the “XML strategy” for a more consequent mode and provides different methods for different multiple controls. The main disadvantage of this approach is that it isn’t clear for the developers which handler corresponds to which control. Also, the handler method takes only the View argument while it returns void and that can’t be changed.
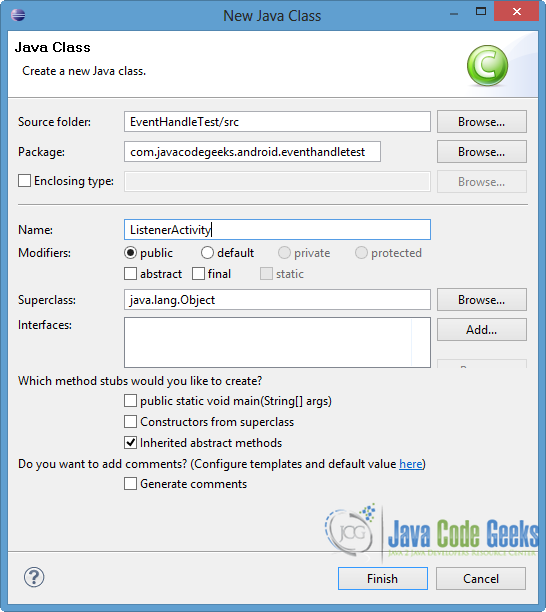
Now lets create the Activity that will includes the above approaches. Right click on src/com.javacodegeeks.android.eventhandletest → New → Class. Specify the name of the class and press Finish button.
Open src/com.javacodegeeks.android.eventhandletest/ListenerActivity.java and paste the code below.
ListenerActivity.java:
package com.javacodegeeks.android.eventhandletest;

import android.app.Activity;
import android.os.Bundle;
import android.view.View;
import android.view.View.OnClickListener;
import android.widget.Button;
import android.widget.TextView;
import android.widget.Toast;

public class ListenerActivity extends Activity {
	private TextView text;
	private Button button1, button3;

	@Override
	protected void onCreate(Bundle savedInstanceState) {
		super.onCreate(savedInstanceState);
		setContentView(R.layout.listener_view);

		text = (TextView) findViewById(R.id.text2);

		// anonymous inner Listener Class
		button1 = (Button) findViewById(R.id.button1);
		button1.setOnClickListener(new OnClickListener() {

			@Override
			public void onClick(View arg0) {
				// TODO Auto-generated method stub
				text.setText("Inner Listener Class Way!");
				Toast.makeText(getApplicationContext(), "Into the ListenerActivity Class",
						Toast.LENGTH_SHORT).show();
			}
		});
		button3 = (Button) findViewById(R.id.button3);
		button3.setOnClickListener(new ListenerImplement(this));

	}

	public void clickButton2(View view) {
		text.setText("onClick - XML Way!");
		Toast.makeText(getApplicationContext(), "Function that was declared in XML",
				Toast.LENGTH_SHORT).show();
	}

	public void setTheText(String myText) {
		text.setText(myText);
		Toast.makeText(getApplicationContext(), "Calls ListenerImplement Class",
				Toast.LENGTH_SHORT).show();
	}

}
The button1 uses the anonymous inner onClickListener, because the Event Listener is initialized into the setOnClickListener() method, as shown above. Also notice that the clickButton2() handler method was defined in the listener_view.xml layout, as you can see in Section 2. For the separate Listener class, have a look to the highlighted line in order to see how it is declared. Notice that ListenerImplement class can take as many arguments as we want.
To create this class right click on src/com.javacodegeeks.android.eventhandletest → New → Class. Name the class ListenerImplement as and press Finish button.
Now open src/com.javacodegeeks.android.eventhandletest/ListenerImplement.java and paste the following.
ListenerImplement.java:
package com.javacodegeeks.android.eventhandletest;

import android.view.View;
import android.view.View.OnClickListener;

public class ListenerImplement implements OnClickListener {

	private ListenerActivity calledActivity;

	public ListenerImplement(ListenerActivity previousActivity) {
		this.calledActivity = previousActivity;
	}
	@Override
	public void onClick(View arg0) {
		// TODO Auto-generated method stub
		this.calledActivity.setTheText("Into the ListenerImpementation Class!");
	}

}
As ListenerImplement class implements an Event Listener, the handler callback should be overridden. Pay attention that we call setTheText() method of the reference of ListenerActivity. That method should be public as you can ascertain in the previous code.
5. Define the custom Activity
We should define the ListenerActivity in the AndroidManifest.xml file of our project. So open AndroidManifest.xml file, go to the respective xml tab and paste the following.
AndroidManifest.xml:
<?xml version="1.0" encoding="utf-8"?>
<manifest xmlns:android="http://schemas.android.com/apk/res/android"
    package="com.javacodegeeks.android.eventhandletest"
    android:versionCode="1"
    android:versionName="1.0" >

    <uses-sdk
        android:minSdkVersion="8"
        android:targetSdkVersion="19" />

    <application
        android:allowBackup="true"
        android:icon="@drawable/ic_launcher"
        android:label="@string/app_name"
        android:theme="@style/AppTheme" >
        <activity
            android:name="com.javacodegeeks.android.eventhandletest.MainActivity"
            android:label="@string/app_name" >
            <intent-filter>
                <action android:name="android.intent.action.MAIN" />

                <category android:name="android.intent.category.LAUNCHER" />
            </intent-filter>
        </activity>

        <activity
            android:name="com.javacodegeeks.android.eventhandletest.ListenerActivity"
            android:label="@string/app_name" >
        </activity>
    </application>

</manifest>
6. Run the application
Now we are ready to run our application, so right click on our project → Run as → Android Application. The AVD will appear with the app loaded, as you can see in the picture below.
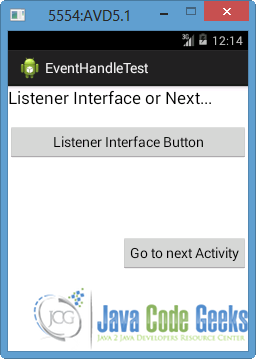
If we click “Listener Interface button”, callback method is enabled and the case with id buttonMain will be chosen. So, the TextView will change and a Toast will be appeared, as you can see below.

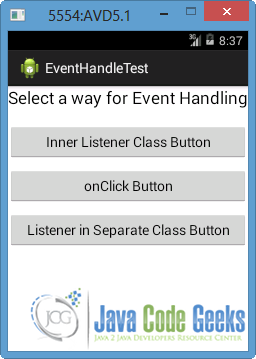
Now lets press the “Go to the next Activity” button. As MainActivity implements onClickListener, nextBtn will be chosen in the handler method, so the ListenerActivity will launch.
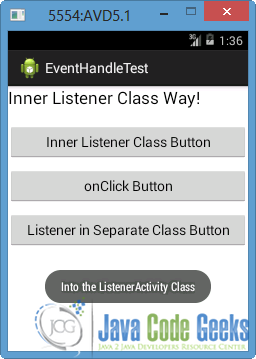
If we press “Inner Listener Class Button”, the Listener of the button1 will be set as an anonymous inner class. As you can see in the next picture, the appropriate messages will be derived.
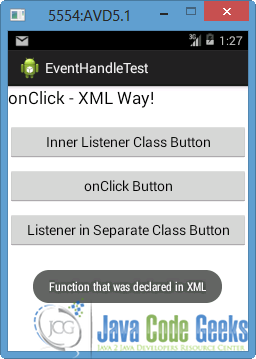
Now we click “onClick Button”. That’s the approach of using a layout XML file, so clickButton2() handler method will be called and the TextView will change.
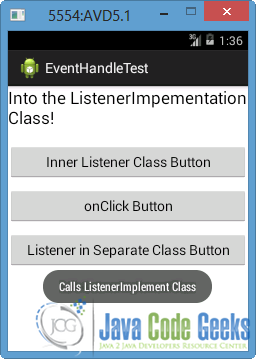
Finally lets press “Listener in Separate Class Button”. The ListenerImplement class will be initialized and it will call the public setTheText() method of ListenerActivity. A TextView will change and a Toast will launch, as you can notice in the picture below.
Download Eclipse Project
This was an example of Event Handling Controls in Android. Download the Eclipse Project of this example: EventHandleTest.zip
