In this article we will discuss the concept of a JobRepository used in the Spring Batch framework. It is an interface with SimpleJobRepository being its simplest implementation floated by the framework. Of course, as with most things in Spring, one can have a customized implementation of a JobRepository as well. To demonstrate the concept of a JobRepository, we will cook up a simple example based on XML configuration. It will be a maven project. Tools used in the example are as follows.
- Eclipse Helios
- Maven 2.2.1
- Spring 4.0.5.RELEASE
- Spring Batch 3.0.4.RELEASE
- JDBC 4.0.5.RELEASE
- HSQL 1.8.0.7
- Apache Commons 1.4
This article has been organized as shown below. And as always, the example code is available for download at the end of the article.
Table Of Contents
1. Introduction
Spring Batch is a widely used open-source batch processing framework. It incorporates many of the properties that Spring offers. Besides, it exposes a lot of features like easy job configurations, transaction management, logging, job-scheduling to name a few. As stated above, this article focuses on using and configuring a JobRepository. It is an entity that offers the persistence mechanism in the framework.
When a Job is configured there are a number of things at play. Say for instance, how many Jobs have been configured? What are the Steps in each of these Jobs? What is the status of the Job execution? Should the Job be launched, restarted or stopped? And many more. Where would these details be stored. Hence, we have the JobRepository. Technically, it is just an interface. SimpleJobRepository being its simplest implementation offered by the framework. To automate and support ease of creation of SimpleJobRepository, an AbstractJobRepositoryFactoryBean has been introduced.
Two of its subclasses are MapJobRepositoryFactoryBean and JobRepositoryFactoryBean. As stated above, in this article we will detail these two beans and demonstrate the use of the JobRepositoryFactoryBean with an HSQL datasource through an XML configuration driven example.
2. Spring Batch Basics
The above section gives a fair summary of what this text is going to be all about. But before we begin, let’s take a quick look at few of the concepts involved. This should ease up on following through the example code in the later sections.
2.1 Job
As defined in the Spring Batch documentation, a job encapsulates the whole idea of batch processing. Say, we want to read all the records from a given database table, process the records and insert them into another table. And then call some stored procedure on that table. All of these Steps, or chunks of execution tasks constitute a Job.
A Job is basically an interface. It has many different implementations but SimpleJob is one of its simplest implementations provided by the Spring Batch framework. When using XML configuration, it is simply defined by using the tags as shown in the XML configuration snippet below. The framework abstracts way the fact that we are basically creating an instance of SimpleJob. A Job consists of one or more steps.
XML Job Configuration
<job id="myJob">
    <step id="firstStep" next="secStep"/>
    <step id="secStep" />
</job>
1.2 JobRepository
As the name suggests it is a repository that offers a persistence mechanism for all the meta-data related to the execution of the Job. All the CRUD operations pertaining to the implementations of Job, Step, JobLauncher are stored in this repository. When configuring these framework features, by default a jobRepository bean is looked for. But since JobRepository is an interface, one can have a customized implementation of the repository as well to be used with the framework features. Its simplest implementation floated by the framework is the SimpleJobRepository. Also note that the batch framework abstracts away many of the nitty-gritty details of the implementations of the JobRepository. The following shows a simple example of configuring a jobRepository.
JobRepository Configuration
<job-repository id="jobRepository"
    data-source="dataSource"
    transaction-manager="transactionManager"
    table-prefix="JCG_BATCH_"
    max-varchar-length="1000"/>
- “id” is the only mandatory attribute in the above configuration. The other attributes, if not explicitly specified pick up the default values
- ‘data-source’ can be configured to point to the database to be used for storing batch meta-data entities.
- ‘transaction-manager’ refers to the entity used to handle transaction management. Most often, using a Spring Batch provided
Resourceless TransactionManagerserves the purpose well. - ‘table-prefix’. The Spring Batch meta-data are stored in tables that are named with ‘SPRING_BATCH_’ as the prefix. If one wants them modified to use some other prefix then this attribute value maybe supplied. Note that this attribute can modify only the table name prefixes, it does not affect the column names in the tables.
- ‘max-varchar-length’ defaults to 2500 characters, which is the maximum allowed size of varchar characters in the meta-data tables. In the above configuration, it has been restricted to a 1000.
While we are at it, it makes sense to look at the AbstractJobRepositoryFactoryBean class. It is a FactoryBean that automates the creation of a SimpleJobRepository. It declares abstract methods for DAO object implementations. It has two well-known subclasses.
2.2.1 MapJobRepositoryFactoryBean
MapJobRepositoryFactoryBean automates the creation of SimpleJobRepository using non-persistent in-memory DAO implementation. Hence, this is used when one does not want to persist the domain objects into a database, say for just writing some test-cases or rapid prototyping. This helps to speed-up batch processing as writing to the database consumes time. But there are a few things to note when using this in-memory Map version of the jobRepository.
- It is volatile; hence cannot be persisted across job runs.
- It does not allow restarts between JVM instances due to the point above.
- It is unsuitable for use in multi-threaded jobs or partitioned steps.
- It also cannot guarantee that two jobs with the same parameters would be launched simultaneously.
- It does not require a transaction manager as rollback semantics are defined in it but a Resourceless TransactionManager maybe used for testing purposes
- Following example shows the setting-up of an in-memory jobRepository
In-Memory JobRepository Configuration<bean id="jobRepository" class="org.springframework.batch.core.repository.support.MapJobRepositoryFactoryBean"> <property name="transactionManager" ref="transactionManager"/> </bean> - It requires a database to be configured. Supports most of the standard RDBMS databases.
- It tries to figure out the type of the database from the datasource supplied but for non-standard databases used, one might have to explicitly specify the database type. One might also have to provide an implementation of all its methods and manually wire it up.
- The following snippet shows a possible configuration.
JobRepository Configuration<bean id="jobRepository" class="org.springframework.batch.core.repository.support.JobRepositoryFactoryBean"> <property name="dataSource" ref="dataSource" /> <property name="transactionManager" ref="transactionManager" /> <property name="databaseType" value="hsql" /> </bean>
2.2.2. JobRepositoryFactoryBean
JobRepositoryFactoryBean automates the creation of a SimpleJobRepository by using a JDBC DAO implementation that persist the batch meta-data in a database. Hence, this requires the configuration of a database. Following are a few of its salient features.
2.3 Step
A Step is where the actual execution happens. It is a sequential phase of a batch job. A Job can have one or many Steps. The execution of the Step can be processed in chunks or in a tasklet — concepts which have been detailed below.
2.3.1 Chunk-Oriented Processing
Chunk-Oriented Processing is the most common implementation of a Step. It involves reading data from an input source, processing it by the application of some business logic and then finally writing out the chunks of processed data within a transaction boundary. Note that processing is an optional part of chunk-oriented processing. The following is an example snippet of this sort of processing.
Chunk-Oriented Processing
<job id="sampleJob" job-repository="jobRepository">
<step id="step1">
<tasklet transaction-manager="transactionManager">
<chunk reader="itemReader" processor="itemProcessor" writer="itemWriter" commit-interval="10"/>
</tasklet>
</step>
</job>
2.3.2 Tasklet Processing
Tasklet Processing is used when the Step does not involve reading (and processing) and writing data but just one unit of work, say making a remote procedure call, executing some method etc. Tasklet is a simple interface that has just one method execute() which is repeatedly called by the TaskletStep until it either encounters a RepeatStatus.FINISHED status or an exception indicating a failure. Following presents an example of configuring a TaskletStep.
TaskletStep Configuration
<job id="myJob" xmlns="http://www.springframework.org/schema/batch" restartable="true"> <step id="step1" allow-start-if-complete="true"> <tasklet ref="myTasklet"> </tasklet> </step> </job>
3. Example
Now that we have brushed over the basics of Spring Batch concepts, we should be good to delve into the following example code. This will be a simple Job that has just one TaskletStep. We will use an in-memory database– HSQL. We will create a table in this database and simply read the records in this table in our TaskletStep. Also, as stated above we will use the JobRepositoryFactoryBean with this HSQL database as the datasource for persisting the batch meta-data.
3.1 Project Set-Up
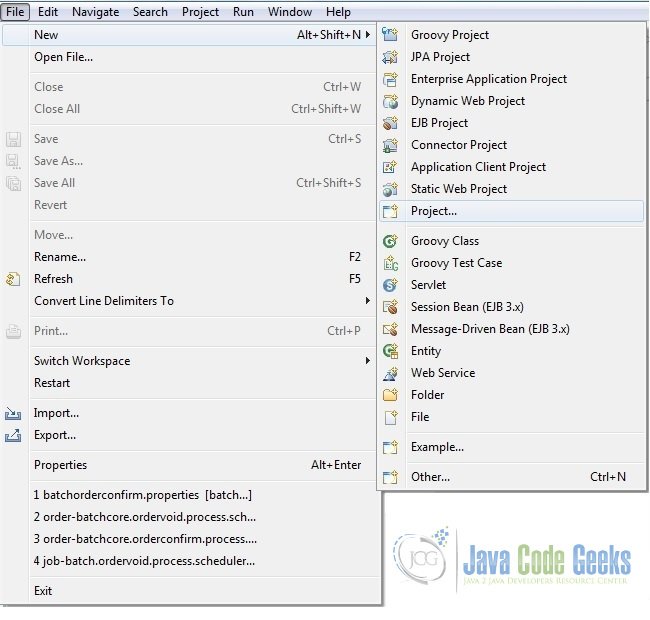
- Fire up Eclipse from a suitable location and create a Maven project. Supply the project name as shown in the screenshots below.

Fig.1 Create Project 
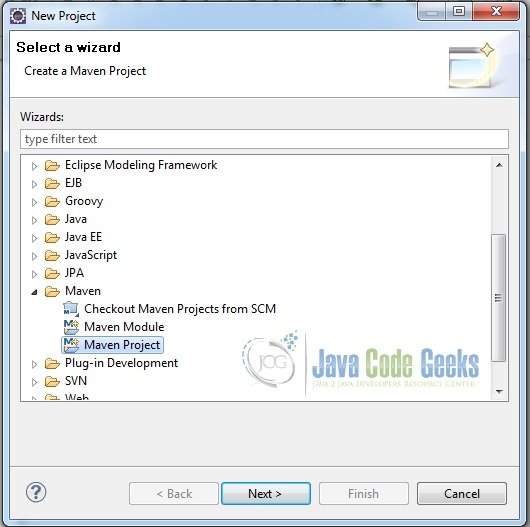
Fig.2 Choose the Creation of a Maven Project 
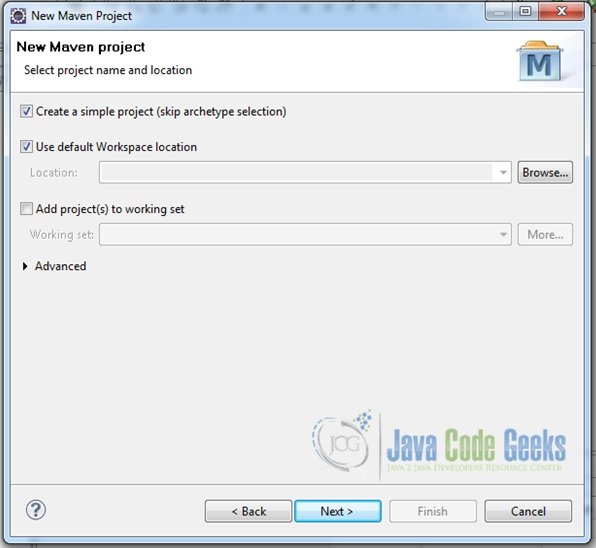
Fig.3 Skip ArcheType Selection 
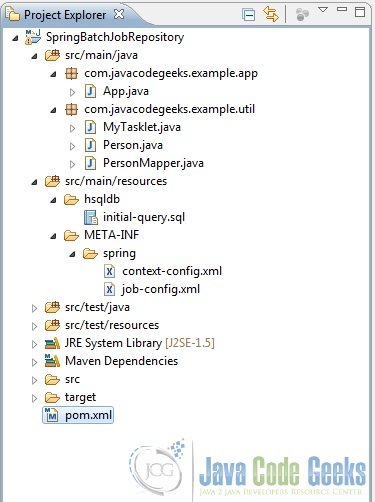
Fig.4 Provide Project Details - Add some folders and files to it so that we have the following final project structure.

Fig.5 Final Project Structure

3.2 Maven Dependencies
Open the pom.xml file and add the following dependencies to it.
pom.xml
<project xmlns="http://maven.apache.org/POM/4.0.0" xmlns:xsi="http://www.w3.org/2001/XMLSchema-instance" xsi:schemaLocation="http://maven.apache.org/POM/4.0.0 http://maven.apache.org/xsd/maven-4.0.0.xsd">
<modelVersion>4.0.0</modelVersion>
<groupId>com.javacodegeeks.example</groupId>
<artifactId>SpringBatchJobRepository</artifactId>
<version>0.0.1-SNAPSHOT</version>
<properties>
<spring.version>4.0.5.RELEASE</spring.version>
<spring.batch.version>3.0.4.RELEASE</spring.batch.version>
<spring.jdbc.version>4.0.5.RELEASE</spring.jdbc.version>
<hsql.version>1.8.0.7</hsql.version>
<commons.version>1.4</commons.version>
</properties>
<dependencies>
<dependency>
<groupId>org.springframework</groupId>
<artifactId>spring-context-support</artifactId>
<version>${spring.version}</version>
</dependency>
<dependency>
<groupId>org.springframework.batch</groupId>
<artifactId>spring-batch-core</artifactId>
<version>${spring.batch.version}</version>
</dependency>
<dependency>
<groupId>hsqldb</groupId>
<artifactId>hsqldb</artifactId>
<version>${hsql.version}</version>
</dependency>
<dependency>
<groupId>org.springframework</groupId>
<artifactId>spring-jdbc</artifactId>
<version>${spring.jdbc.version}</version>
</dependency>
<dependency>
<groupId>commons-dbcp</groupId>
<artifactId>commons-dbcp</artifactId>
<version>${commons.version}</version>
</dependency>
</dependencies>
</project>
3.3 HSQL Database
In this example we will be using HSQL, which is an in-memory database for persistence of the batch meta-data and also for our job. In the initial-query.xml file we will create a simple table and insert a few records in it. The TaskletStep in our Job will read from this HSQL table and print out some statements.
pom.xml

DROP TABLE person IF EXISTS;
CREATE TABLE person (
firstName VARCHAR(20),
lastName VARCHAR(20),
school VARCHAR(20),
rollNumber int);
INSERT INTO person VALUES ('Henry','Donald','Little Garden',1234901);
INSERT INTO person VALUES ('Eric','Osborne','Little Garden',1234991);
3.4 POJOs
Now, we will write our POJO classes. One is a simple Person.java class that simply has a few attributes and the other is PersonMapper.java which simply maps the attributes in the Person.java class with the fields read from our HSQL database table set above.
Person.java
package com.javacodegeeks.example.util;
public class Person {
String firstName,lastName,school;
int rollNumber;
public String getFirstName() {
return firstName;
}
public void setFirstName(String firstName) {
this.firstName = firstName;
}
public String getLastName() {
return lastName;
}
public void setLastName(String lastName) {
this.lastName = lastName;
}
public String getSchool() {
return school;
}
public void setSchool(String school) {
this.school = school;
}
public int getRollNumber() {
return rollNumber;
}
public void setRollNumber(int rollNumber) {
this.rollNumber = rollNumber;
}
@Override
public String toString(){
return "Welcome, "+ firstName+" "+ lastName+" to "+ school+"!";
}
}
PersonMapper.java
package com.javacodegeeks.example.util;
import java.sql.ResultSet;
import java.sql.SQLException;
import org.springframework.jdbc.core.RowMapper;
public class PersonMapper implements RowMapper {
public Person mapRow(ResultSet rs, int rowNum) throws SQLException {
Person person = new Person();
person.setFirstName(rs.getString("firstName"));
person.setLastName(rs.getString("lastName"));
person.setSchool(rs.getString("school"));
person.setRollNumber(rs.getInt("rollNumber"));
return person;
}
}
3.5 TaskletStep
Next, we will write the following code that defines the TaskletStep to be executed from our Job. It is a pretty simple Tasklet that just reads from the database table and prints out some statements.
MyTasklet.java
package com.javacodegeeks.example.util;
import java.util.ArrayList;
import java.util.List;
import javax.sql.DataSource;
import org.springframework.batch.core.StepContribution;
import org.springframework.batch.core.scope.context.ChunkContext;
import org.springframework.batch.core.step.tasklet.Tasklet;
import org.springframework.batch.repeat.RepeatStatus;
import org.springframework.jdbc.core.JdbcTemplate;
public class MyTasklet implements Tasklet{
private DataSource dataSource;
private String sql="select firstName,lastName,school,rollNumber from PERSON";
public RepeatStatus execute(StepContribution contribution,
ChunkContext chunkContext) throws Exception {
List personList = new ArrayList();
JdbcTemplate myTemplate = new JdbcTemplate(getDataSource());
personList = myTemplate.query(sql, new PersonMapper());
for(Person p: personList){
System.out.println(p.toString());
}
return RepeatStatus.FINISHED;
}
public DataSource getDataSource() {
return dataSource;
}
public void setDataSource(DataSource dataSource) {
this.dataSource = dataSource;
}
}
3.6 Context Configuration
In the below section we will set up the basic context of our application. A few things to note here:
- We are using the
JobRepositoryFactoryBeanwired with our HSQL database to be used as the dataSource. Note how the databaseType has been specified to ‘HSQL‘. If it were a db2 database instead, the type would have been ‘db2‘ etc. - A
ResourcelessTransactionManageris used here. - Also, note how the creation of the batch meta-data tables and our PERSON table have been invoked.
context-config.xml
<?xml version="1.0" encoding="UTF-8"?>
<beans xmlns="http://www.springframework.org/schema/beans"
xmlns:xsi="http://www.w3.org/2001/XMLSchema-instance"
xmlns:jdbc="http://www.springframework.org/schema/jdbc"
xsi:schemaLocation="http://www.springframework.org/schema/beans
http://www.springframework.org/schema/beans/spring-beans.xsd
http://www.springframework.org/schema/beans
http://www.springframework.org/schema/beans/spring-beans.xsd
http://www.springframework.org/schema/jdbc
http://www.springframework.org/schema/jdbc/spring-jdbc.xsd">
 <bean id="jobRepository"
	class="org.springframework.batch.core.repository.support.JobRepositoryFactoryBean">
		<property name="dataSource" ref="dataSource" />
		<property name="transactionManager" ref="transactionManager" />
		<property name="databaseType" value="hsql" />
  	</bean>
<bean id="jobLauncher"
class="org.springframework.batch.core.launch.support.SimpleJobLauncher">
<property name="jobRepository" ref="jobRepository" />
</bean>
<bean id="transactionManager"
class="org.springframework.batch.support.transaction.ResourcelessTransactionManager" />
<bean id="dataSource" class="org.apache.commons.dbcp.BasicDataSource"
lazy-init="true" destroy-method="close">
<property name="driverClassName" value="org.hsqldb.jdbcDriver" />
<property name="url"
value="jdbc:hsqldb:file:src/main/resources/hsqldb/batchcore.db;shutdown=true;" />
<property name="username" value="sa" />
<property name="password" value="" />
</bean>
<!-- Create meta-tables -->
<jdbc:initialize-database data-source="dataSource">
<jdbc:script location="classpath:hsqldb/initial-query.sql" />
<jdbc:script location="org/springframework/batch/core/schema-drop-hsqldb.sql" />
<jdbc:script location="org/springframework/batch/core/schema-hsqldb.sql" />
</jdbc:initialize-database>
</beans>
3.7 Job Configuration
Okay, we are almost there. Here we are going to set-up our simple Job that has just one TaskletStep. It is pretty simple and should be easy to follow.
job-config.xml
<?xml version="1.0" encoding="UTF-8"?>
<beans xmlns="http://www.springframework.org/schema/beans"
xmlns:batch="http://www.springframework.org/schema/batch"
xmlns:task="http://www.springframework.org/schema/task"
xmlns:xsi="http://www.w3.org/2001/XMLSchema-instance"
xmlns:context="http://www.springframework.org/schema/context"
xmlns:jdbc="http://www.springframework.org/schema/jdbc"
xsi:schemaLocation="http://www.springframework.org/schema/beans
http://www.springframework.org/schema/beans/spring-beans.xsd
http://www.springframework.org/schema/beans
http://www.springframework.org/schema/beans/spring-beans.xsd
http://www.springframework.org/schema/batch
http://www.springframework.org/schema/batch/spring-batch.xsd
http://www.springframework.org/schema/context
http://www.springframework.org/schema/context/spring-context.xsd
http://www.springframework.org/schema/jdbc
http://www.springframework.org/schema/jdbc/spring-jdbc.xsd
http://www.springframework.org/schema/task
http://www.springframework.org/schema/task/spring-task.xsd">
<job id="myJob" xmlns="http://www.springframework.org/schema/batch" restartable="true">
		<step id="step1" allow-start-if-complete="true">
			<tasklet ref="myTasklet">
			</tasklet>
		</step>
</job>
<bean id="myTasklet" class="com.javacodegeeks.example.util.MyTasklet">
<property name="dataSource" ref="dataSource"></property>
</bean>
</beans>
3.8 Application Run
Now that we are done with our set-up let’s run the application. We will invoke the JobLauncher and launch our Job.
App.java
package com.javacodegeeks.example.app;

import org.springframework.batch.core.Job;
import org.springframework.batch.core.JobExecution;
import org.springframework.batch.core.JobParameters;
import org.springframework.batch.core.launch.JobLauncher;
import org.springframework.context.ApplicationContext;
import org.springframework.context.support.ClassPathXmlApplicationContext;

public class App {
	public static void main(String[] args) {
		String[] str = {"META-INF/spring/context-config.xml","META-INF/spring/job-config.xml"};
		ApplicationContext ctx = new ClassPathXmlApplicationContext(str);
		Job job = (Job) ctx.getBean("myJob");
		JobLauncher jobLauncher = (JobLauncher) ctx.getBean("jobLauncher");
		try{
			JobExecution execution = jobLauncher.run(job, new JobParameters());
			System.out.println("Job Execution Status: "+ execution.getStatus());
		}catch(Exception e){
			e.printStackTrace();
		}
	}
}
3.9 Output
Finally, just run the App.java as a Java Application. If everything has been followed along so far, one should see the following output on the console.
Output
INFO: Executing SQL script from class path resource [hsqldb/initial-query.sql]
Jul 29, 2015 8:03:44 AM org.springframework.jdbc.datasource.init.ScriptUtils executeSqlScript
INFO: Executed SQL script from class path resource [hsqldb/initial-query.sql] in 17 ms.
Jul 29, 2015 8:03:44 AM org.springframework.jdbc.datasource.init.ScriptUtils executeSqlScript
INFO: Executing SQL script from class path resource [org/springframework/batch/core/schema-drop-hsqldb.sql]
Jul 29, 2015 8:03:44 AM org.springframework.jdbc.datasource.init.ScriptUtils executeSqlScript
INFO: Executed SQL script from class path resource [org/springframework/batch/core/schema-drop-hsqldb.sql] in 10 ms.
Jul 29, 2015 8:03:44 AM org.springframework.jdbc.datasource.init.ScriptUtils executeSqlScript
INFO: Executing SQL script from class path resource [org/springframework/batch/core/schema-hsqldb.sql]
Jul 29, 2015 8:03:44 AM org.springframework.jdbc.datasource.init.ScriptUtils executeSqlScript
INFO: Executed SQL script from class path resource [org/springframework/batch/core/schema-hsqldb.sql] in 3 ms.
Jul 29, 2015 8:03:44 AM org.springframework.batch.core.launch.support.SimpleJobLauncher run
INFO: Job: [FlowJob: [name=myJob]] launched with the following parameters: [{}]
Jul 29, 2015 8:03:44 AM org.springframework.batch.core.job.SimpleStepHandler handleStep
INFO: Executing step: [step1]
Welcome, Henry Donald to Little Garden!
Welcome, Eric Osborne to Little Garden!
Jul 29, 2015 8:03:44 AM org.springframework.batch.core.launch.support.SimpleJobLauncher run
INFO: Job: [FlowJob: [name=myJob]] completed with the following parameters: [{}] and the following status: [COMPLETED]
Job Execution Status: COMPLETED
4. Conclusion
This brings us to the end of this article. Here, we demonstrated the concept of a jobRepository with a simple example. As promised, the example code is available for download below.
You can download the full source code of this example here : SpringBatchJobRepository
