With this tutorial we shall show you how to convert Objects to xml and vice versa, using Spring’s Object/XML Mapping support. Object/XML Mapping, or O/X mapping for short, is the act of converting an XML document to and from an object. This conversion process is also known as XML Marshalling, or XML Serialization. Within the field of O/X mapping, a marshaller is responsible for serializing an object (graph) to XML. In similar fashion, an unmarshaller deserializes the XML to an object graph. This XML can take the form of a DOM document, an input or output stream, or a SAX handler.
Spring’s OXM can be used for a wide variety of situations. In the following example, we will implement the interfaces it provides to marshal the information of a simple Spring Bean as an XML file and then unmarshal the xml file back to an Object. We will use the Castor implementation, although there are other implementations, such as JAXBMarshaller, XMLBeansMarshaller, JibxMarshaller, XStreamMarshaller, as described in the Spring Framework reference. In addition, we will show you how to use Castor XML mapping framework through Spring. Castor XML mapping is an open source XML binding framework. It allows you to transform the data contained in a java object model into/from an XML document. By default, it does not require any further configuration, though a mapping file can be used to have more control over the behavior of Castor.
Our preferred development environment is Eclipse. We are using Eclipse Juno (4.2) version, along with Maven Integration plugin version 3.1.0. You can download Eclipse from here and Maven Plugin for Eclipse from here. The installation of Maven plugin for Eclipse is out of the scope of this tutorial and will not be discussed. We are also using Spring version 3.2.3 and the JDK 7_u_21.
Let’s begin.
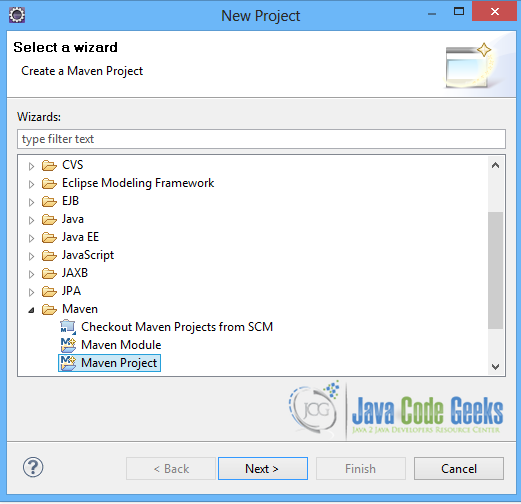
1. Create a new Maven project
Go to File -> Project ->Maven -> Maven Project.
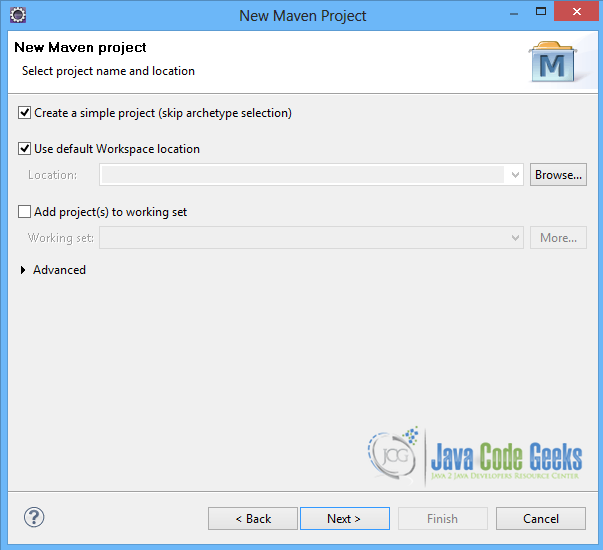
In the “Select project name and location” page of the wizard, make sure that “Create a simple project (skip archetype selection)” option is checked, hit “Next” to continue with default values.
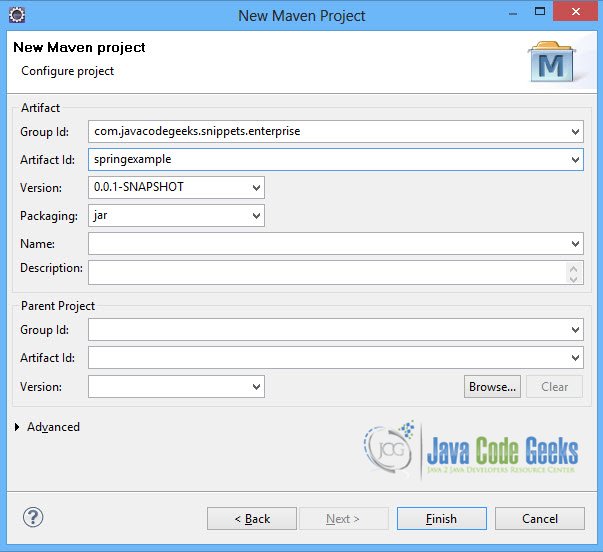
In the “Enter an artifact id” page of the wizard, you can define the name and main package of your project. We will set the “Group Id” variable to "com.javacodegeeks.snippets.enterprise" and the “Artifact Id” variable to "springexample". The aforementioned selections compose the main project package as "com.javacodegeeks.snippets.enterprise.springexample" and the project name as "springexample". Hit “Finish” to exit the wizard and to create your project.
The Maven project structure is shown below:
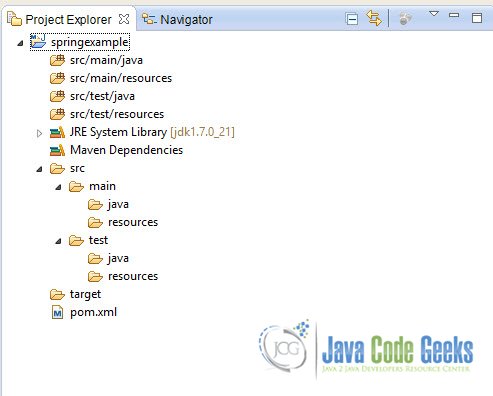
- It consists of the following folders:
- /src/main/java folder, that contains source files for the dynamic content of the application,
- /src/test/java folder contains all source files for unit tests,
- /src/main/resources folder contains configurations files,
- /target folder contains the compiled and packaged deliverables,
- the pom.xml is the project object model (POM) file. The single file that contains all project related configuration.
2. Add Spring 3.2.3 dependency
- Locate the “Properties” section at the “Overview” page of the POM editor and perform the following changes:
Create a new property with name org.springframework.version and value 3.2.3.RELEASE. - Navigate to the “Dependencies” page of the POM editor and create the following dependencies (you should fill the “GroupId”, “Artifact Id” and “Version” fields of the “Dependency Details” section at that page):
Group Id : org.springframework Artifact Id : spring-web Version : ${org.springframework.version}
Alternatively, you can add the Spring dependencies in Maven’s pom.xml file, by directly editing it at the “Pom.xml” page of the POM editor, as shown below:
pom.xml:
<project xmlns="http://maven.apache.org/POM/4.0.0"; xmlns:xsi="http://www.w3.org/2001/XMLSchema-instance"
	xsi:schemaLocation="http://maven.apache.org/POM/4.0.0 http://maven.apache.org/xsd/maven-4.0.0.xsd">
	<modelVersion>4.0.0</modelVersion>
	<groupId>com.javacodegeeks.snippets.enterprise</groupId>
	<artifactId>springexample</artifactId>
	<version>0.0.1-SNAPSHOT</version>

	<dependencies>
		<dependency>
			<groupId>org.springframework</groupId>
			<artifactId>spring-core</artifactId>
			<version>${spring.version}</version>
		</dependency>
		<dependency>
			<groupId>org.springframework</groupId>
			<artifactId>spring-context</artifactId>
			<version>${spring.version}</version>
		</dependency>
	</dependencies>

	<properties>
		<spring.version>3.2.3.RELEASE</spring.version>
	</properties>
</project>
As you can see Maven manages library dependencies declaratively. A local repository is created (by default under {user_home}/.m2 folder) and all required libraries are downloaded and placed there from public repositories. Furthermore intra – library dependencies are automatically resolved and manipulated.
3. Add OXM dependencies
Add the spring-oxm dependency, as well as the dependencies needed for Castor.
pom.xml
<project xmlns="http://maven.apache.org/POM/4.0.0" xmlns:xsi="http://www.w3.org/2001/XMLSchema-instance"
	xsi:schemaLocation="http://maven.apache.org/POM/4.0.0 http://maven.apache.org/xsd/maven-4.0.0.xsd">
	<modelVersion>4.0.0</modelVersion>
	<groupId>com.javacodegeeks.snippets.enterprise</groupId>
	<artifactId>springexample</artifactId>
	<version>0.0.1-SNAPSHOT</version>

	<dependencies>
		<dependency>
			<groupId>org.springframework</groupId>
			<artifactId>spring-core</artifactId>
			<version>${spring.version}</version>
		</dependency>
		<dependency>
			<groupId>org.springframework</groupId>
			<artifactId>spring-context</artifactId>
			<version>${spring.version}</version>
		</dependency>
		<dependency>
			<groupId>org.springframework</groupId>
			<artifactId>spring-oxm</artifactId>
			<version>${spring.version}</version>
		</dependency>
		<dependency>
			<groupId>org.codehaus.castor</groupId>
			<artifactId>castor</artifactId>
			<version>1.2</version>
		</dependency>
		<dependency>
			<groupId>xerces</groupId>
			<artifactId>xercesImpl</artifactId>
			<version>2.8.1</version>
		</dependency>
	</dependencies>

	<properties>
		<spring.version>3.2.3.RELEASE</spring.version>
	</properties>
</project>
4. Convert Object to XML using the Marshaller and Unmarshaller
In order to convert an Object to xml and vice versa we first need to create a simple Spring bean. This bean will be the object to be used for conversion. The CustomerInfo.java class holds some specific information for a customer.
CustomerInfo.java
package com.javacodegeeks.snippets.enterprise;

public class CustomerInfo {

	private String name;
	private long id;
	private boolean valid;

	public String getName() {
		return name;
	}
	public void setName(String name) {
		this.name = name;
	}
	public long getId() {
		return id;
	}
	public void setId(long id) {
		this.id = id;
	}
	public boolean isValid() {
		return valid;
	}
	public void setValid(boolean valid) {
		this.valid = valid;
	}

	@Override
	public String toString() {
		return "CustomerInfo [name=" + name + ", id=" + id + ", valid=" + valid + "]";
	}

}
The Converter.java class is the class that uses the Marshaler and UnMarshaler interfaces provided by Spring to convert between a CustomerInfo object and an XML file. It has two methods, saveCustomerInfo() method, that saves the CustomerInfo object to the file info.xml file, and loadCustomerInfo() method, that loads the object from the file again.
Converter.java
package com.javacodegeeks.snippets.enterprise;

import java.io.FileInputStream;
import java.io.FileOutputStream;
import java.io.IOException;

import javax.xml.transform.stream.StreamResult;
import javax.xml.transform.stream.StreamSource;

import org.springframework.oxm.Marshaller;
import org.springframework.oxm.Unmarshaller;

public class Converter {
	private static final String FILE_NAME = "info.xml";
	private CustomerInfo info = new CustomerInfo();
	private Marshaller marshaller;
	private Unmarshaller unmarshaller;

	public void setMarshaller(Marshaller marshaller) {
		this.marshaller = marshaller;
	}

	public void setUnmarshaller(Unmarshaller unmarshaller) {
		this.unmarshaller = unmarshaller;
	}

	public void saveCustomerInfo() throws IOException {
		FileOutputStream os = null;
		try {
			System.out.println("--- Marshaller ---");
			os = new FileOutputStream(FILE_NAME);
			info.setName("John");
			info.setId(234l);
			info.setValid(true);
			this.marshaller.marshal(info, new StreamResult(os));
			System.out.println("CustomerInfo " + info + " saved to info.xml file. ");
		} finally {
			if (os != null) {
				os.close();
			}
		}
	}

	public void loadCustomerInfo() throws IOException {
		FileInputStream is = null;
		try {
			System.out.println("--- Unmarshaller ---");
			is = new FileInputStream(FILE_NAME);
			this.info = (CustomerInfo) this.unmarshaller
					.unmarshal(new StreamSource(is));
			System.out.println("Info loaded from xml : " + info);
		} finally {
			if (is != null) {
				is.close();
			}
		}
	}

}
In applicationContext.xml we define the converterBean. It requires both a marshaller and unmarshaller property to be set. We use Castor impementation, as we explained above. Castor does not require any further configuration by default, so the bean definition is rather simple. The CastorMarshaller implements both Marshaller and Unmarshaller, so we can refer to the castorMarshaller bean in both the marshaller and unmarshaller property of the application.

applicationContext.xml
<beans xmlns="http://www.springframework.org/schema/beans"
	xmlns:xsi="http://www.w3.org/2001/XMLSchema-instance" xmlns:p="http://www.springframework.org/schema/p"
	xmlns:aop="http://www.springframework.org/schema/aop" xmlns:context="http://www.springframework.org/schema/context"
	xmlns:jee="http://www.springframework.org/schema/jee" xmlns:tx="http://www.springframework.org/schema/tx"
	xmlns:task="http://www.springframework.org/schema/task"
	xsi:schemaLocation="http://www.springframework.org/schema/aop http://www.springframework.org/schema/aop/spring-aop-3.2.xsd http://www.springframework.org/schema/beans http://www.springframework.org/schema/beans/spring-beans-3.2.xsd http://www.springframework.org/schema/context http://www.springframework.org/schema/context/spring-context-3.2.xsd http://www.springframework.org/schema/jee http://www.springframework.org/schema/jee/spring-jee-3.2.xsd http://www.springframework.org/schema/tx http://www.springframework.org/schema/tx/spring-tx-3.2.xsd http://www.springframework.org/schema/task http://www.springframework.org/schema/task/spring-task-3.2.xsd">


	<bean id="converterBean" class="com.javacodegeeks.snippets.enterprise.Converter">
		<property name="marshaller" ref="castorMarshaller" />
		<property name="unmarshaller" ref="castorMarshaller" />
	</bean>
	<bean id="castorMarshaller" class="org.springframework.oxm.castor.CastorMarshaller" >
	</bean>

</beans>
In App.java class we load the converterBean and call the two methods.
App.java
package com.javacodegeeks.snippets.enterprise;

import java.io.IOException;

import org.springframework.context.ConfigurableApplicationContext;
import org.springframework.context.support.ClassPathXmlApplicationContext;

public class App {

	public static void main(String[] args) {

			ConfigurableApplicationContext context = new ClassPathXmlApplicationContext("applicationContext.xml");
			Converter converter = (Converter) context.getBean("converterBean");
			try {
				converter.saveCustomerInfo();
				converter.loadCustomerInfo();
			} catch (IOException e) {
				e.printStackTrace();
			}
			context.close();
	}
}
The result is an xml file, info.xml.
info.xml
<?xml version="1.0" encoding="UTF-8"?>
<customer-info valid="true" id="234"><name>John</name></customer-info>
Output
--- Marshaller ---
CustomerInfo CustomerInfo [name=John, id=234, valid=true] saved to info.xml file.
--- Unmarshaller ---
CustomerInfo created : CustomerInfo [name=John, id=234, valid=true]
5. Castor XML Mapping
Now, let’s see how we can define relationships between the Object and the xml file, using the Castor XML mapping. Although it is possible to rely on Castor’s default marshalling behavior, as we did in the previous step, it might be necessary to have more control over it. This can be accomplished using a Castor mapping file. The mapping can be set using the mappingLocation resource property, indicated in applicationContext.xml file below.
applicationContext.xml
<beans xmlns="http://www.springframework.org/schema/beans"
	xmlns:xsi="http://www.w3.org/2001/XMLSchema-instance" xmlns:p="http://www.springframework.org/schema/p"
	xmlns:aop="http://www.springframework.org/schema/aop" xmlns:context="http://www.springframework.org/schema/context"
	xmlns:jee="http://www.springframework.org/schema/jee" xmlns:tx="http://www.springframework.org/schema/tx"
	xmlns:task="http://www.springframework.org/schema/task"
	xsi:schemaLocation="http://www.springframework.org/schema/aop http://www.springframework.org/schema/aop/spring-aop-3.2.xsd http://www.springframework.org/schema/beans http://www.springframework.org/schema/beans/spring-beans-3.2.xsd http://www.springframework.org/schema/context http://www.springframework.org/schema/context/spring-context-3.2.xsd http://www.springframework.org/schema/jee http://www.springframework.org/schema/jee/spring-jee-3.2.xsd http://www.springframework.org/schema/tx http://www.springframework.org/schema/tx/spring-tx-3.2.xsd http://www.springframework.org/schema/task http://www.springframework.org/schema/task/spring-task-3.2.xsd">


	<bean id="converterBean" class="com.javacodegeeks.snippets.enterprise.Converter">
		<property name="marshaller" ref="castorMarshaller" />
		<property name="unmarshaller" ref="castorMarshaller" />
	</bean>
	<bean id="castorMarshaller" class="org.springframework.oxm.castor.CastorMarshaller" >
		 <property name="mappingLocation" value="classpath:mapping.xml" />
	</bean>

</beans>
The mapping file is used to configure the mapping between the object and the xml file. It consists of a mapping element where all configuration is set. The class element contains all the information used to map a Java class into an XML document. The map-to element is used to specify the name of the element that should be associated with the given class. The field element is used to describe a property of a Java object we want to marshal/unmarshal. The bind-xml element is used to describe how a given Java field should appear in an XML document (for example, as an element or an attribute). It is used both for marshalling and unmarshalling.
The mapping file to be used is the one below:
mapping.xml
<mapping>
	<class name="com.javacodegeeks.snippets.enterprise.CustomerInfo">

		<map-to xml="info" />

		<field name="name" type="string">
			<bind-xml name="name" node="attribute" />
		</field>

		<field name="id" type="long">
			<bind-xml name="id" node="element" />
		</field>

		<field name="valid" type="boolean">
			<bind-xml name="valid" node="element" />
		</field>
	</class>
</mapping>
After running the App.java class again the info.xml file is updated, as shown below:
mapping.xml
<?xml version="1.0" encoding="UTF-8"?>
<info name="John"><id>234</id><valid>true</valid></info>
This was a tutorial of Spring’s Object/XML Mapping.
Download the Eclipse project of this tutorial : SpringOXMExample.zip
