In this example we are going to get started with Java API for RESTful Web Services (JAX-RS), a set of APIs to developer REST services. JAX-RS is part of the Java EE. REST (REpresentational State Transfer) is a simple stateless architecture that generally runs over HTTP.
REST-style architectures conventionally consist of clients and servers. Clients initiate requests to servers; servers process requests and return appropriate responses. Requests and responses are built around the transfer of representations of resources. A resource can essentially be any coherent and meaningful concept that may be addressed. A representation of a resource is typically a document that captures the current or intended state of a resource.
The client begins sending requests when it is ready to make the transition to a new state. While one or more requests are outstanding, the client is considered to be in transition. The representation of each application state contains links that may be used the next time the client chooses to initiate a new state-transition.
Jersey, is a reference implementation to develope RESTful web service based on the JAX-RS (JSR 311) specification.
In this tutorial, we show you how to develop a Hello world REST Web application with Jersey.
These are the tools we are going to use on a Windows 7 platform:
- JDK 1.7
- Maven 3.1.0
- Eclipse 4.3 Kepler
- Jersey 1.9
Because we are going to use Maven to build our project we shall use the Eclipse Maven plugin to create our project. In Eclipse 4.3 Kepler Maven Plugin comes as standard with the IDE. Finally, we are going to deploy our application on Tomcat.
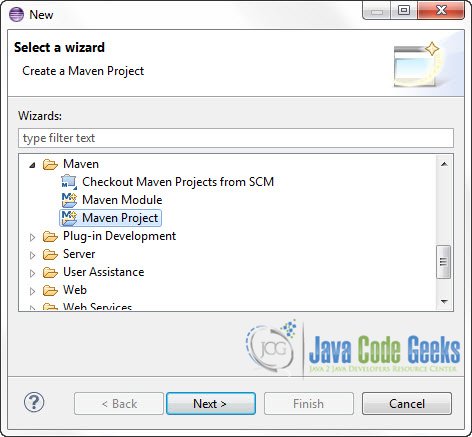
1. Create a new Maven project
Go to File -> Project ->Maven -> Maven Project.
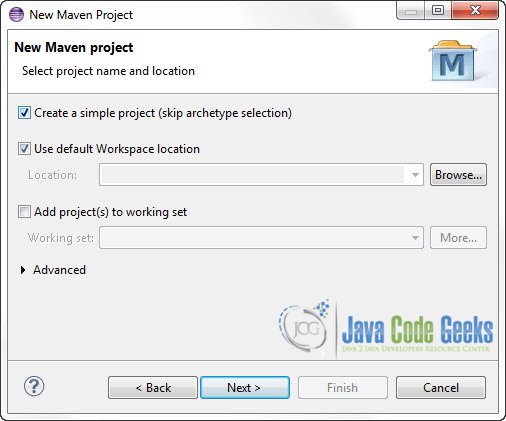
In the “Select project name and location” page of the wizard, make sure that “Create a simple project (skip archetype selection)” option is checked, hit “Next” to continue with default values.
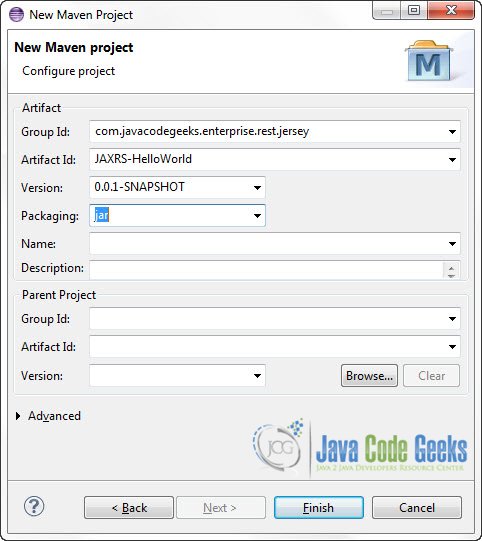
In the “Enter an artifact id” page of the wizard, you can define the name and main package of your project. We will set the “Group Id” variable to "com.javacodegeeks.enterprise.rest.jersey" and the “Artifact Id” variable to "JAXRS-HelloWorld". The aforementioned selections compose the main project package as "com.javacodegeeks.snippets.enterprise.rest.jersey.JAXRS-HelloWorld" and the project name as "JAXRS-HelloWorld". Hit “Finish” to exit the wizard and to create your project.
The basic Maven project structure consists of the following folders:
- /src/main/java folder, that contains source files for the dynamic content of the application,
- /src/test/java folder contains all source files for unit tests,
- /src/main/resources folder contains configurations files,
- /target folder contains the compiled and packaged deliverables,
- the pom.xml is the project object model (POM) file. The single file that contains all project related configuration.
In our example we are going to use Tomcat to deploy our Web Service. So we need to export out Project in WAR format. As we’ve discussed in JAX-WS Web Services On Tomcat , there are many ways you can generate the WAR file from a Web Application, but we are going to use our IDE for that. So, first of all we need to convert our simple Java project to a Dynamic Web Application. Generating the WAR file is not the only reason you should convert your project, as you can use many Java EE tools that Eclipse offers.
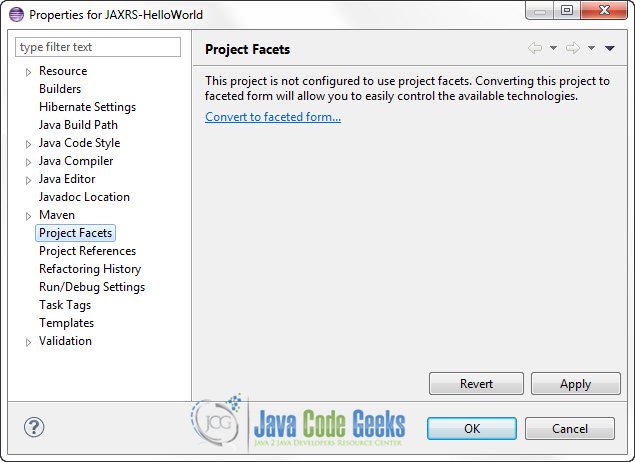
2. Change Project Facet.
Go to the Package Explorer and Right Click on the Project. Go to “Properties”. In the menu on the left go to “Project Facets”, click on the link “Convert to faceted form…”
In the next Window Select “Java” and “Dynamic Web Module”:
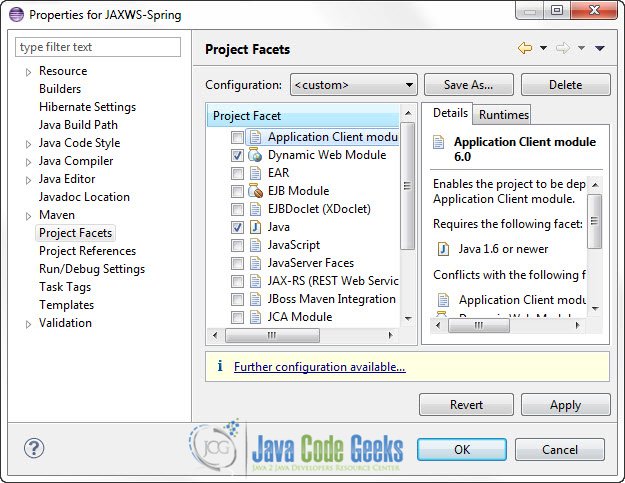
You may also click on “Further configuration available…” link and select ” Generate web.xml deployment descriptor” and “WebContent” as the content directory. Click OK. The click Apply and OK to close the “Properties” window:

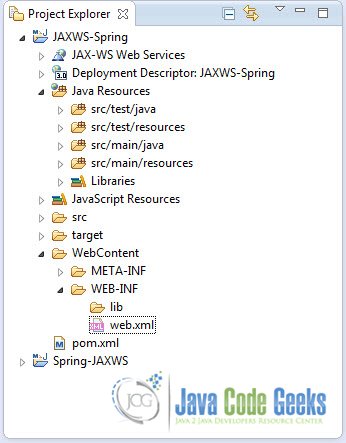
This will convert your Project to a Dynamic Web Module with an auto generated “web.xml” file. This is the project structure
3. Resolve project dependencies in pom.xml
Go to the Package Explorer, navigate to “pom.xml” file and paste the following code. This will obtain the Jersey Server library (jersey-server) :
pom.xml:
<project xmlns="http://maven.apache.org/POM/4.0.0" xmlns:xsi="http://www.w3.org/2001/XMLSchema-instance" xsi:schemaLocation="http://maven.apache.org/POM/4.0.0 http://maven.apache.org/xsd/maven-4.0.0.xsd">
  <modelVersion>4.0.0</modelVersion>
  <groupId>com.javacodegeeks.enterprise.rest.jersey</groupId>
  <artifactId>JAXRS-HelloWorld</artifactId>
  <version>0.0.1-SNAPSHOT</version>

  <repositories>
		<repository>
			<id>maven2-repository.java.net</id>
			<name>Java.net Repository for Maven</name>
			<url>http://download.java.net/maven/2/</url>
			<layout>default</layout>
		</repository>
	</repositories>

	<dependencies>

		<dependency>
			<groupId>com.sun.jersey</groupId>
			<artifactId>jersey-server</artifactId>
			<version>1.9</version>
		</dependency>

	</dependencies>

</project>
4. REST Service
Go to the Package Explorer, under “Java Resources/src/main/java” and create a new Package “com.javacodegeeks.enterprise.rest.jersey“. In this package we are going to create our JAX-RS Service Endpoint.
HelloWorldREST.java:
package com.javacodegeeks.enterprise.rest.jersey;

import javax.ws.rs.DefaultValue;
import javax.ws.rs.GET;
import javax.ws.rs.Path;
import javax.ws.rs.PathParam;
import javax.ws.rs.QueryParam;
import javax.ws.rs.core.Response;

@Path("/helloWorldREST")
public class HelloWorldREST {

	@GET
	@Path("/{parameter}")
	public Response responseMsg( @PathParam("parameter") String parameter,
			@DefaultValue("Nothing to say") @QueryParam("value") String value) {

		String output = "Hello from: " + parameter + " : " + value;

		return Response.status(200).entity(output).build();
	}
}
There are some thing to notice here:
- We use
@Path("/helloWorldREST")annotation in the class definition. This means thatHelloWorldRESTREST service can be reached in the URL.../helloWorldREST. - In that URL, all GET requests are going to be handled by
responseMsgmethod which is annotated with@GET. - In this example we explore two ways to pass parameters in a GET request in REST services. One of them is URI path parameters. We define this parameter with
@Path("/{parameter}")annotation onresponseMsgmethod. For example, to pass “JavaCodeGeeks” as the value of a path parameter, calledparameter, we should follow.../helloWorldREST/JavaCodeGeeksURL. Now, to parse that parameter we have to declare an argument to the method that will handle the request, in our case that isresponseMsg. The way to parse path parameters is by using@PathParamannotation in the argument of the method. In this case the parameter will be parsed as aString. If you try to follow.../helloWorldRESTURL you will getHTTP Status 405 - Method Not Allowed, asresponseMsgwill only handle requests in the form of.../helloWorldREST/{any_value} - The second way to pass parameter is Query parameters. For example, to pass “Enjoy” as a value of a query parameter, called
value, one should follow.../helloWorldREST/{any_value}?value=EnjoyURL. Now, to parse that parameter we have to declare an argument to the method that will handle the request, in our case that isresponseMsg. The way to parse query parameters is by using@QueryParamannotation in the argument of the method. In this case the parameter will be parsed as aString. If you try to follow.../helloWorldREST/{any_value}thevalueparameter cannot be parsed and you would get aHTTP 400 (Client Error)error. This is why you can use@DefaultValue, to define a default value for the parameter and thus the service will be always available even if the request URI does not contain the corresponding query string. - If all parameters are parsed correctly, the URI path parameter will be available to responseMsg through parameter variable, and query parameter will be available to responseMsg through value variable.
@QueryParam and @PathParam can only be used on the following Java types:
- All primitive types except char
- All wrapper classes of primitive types except Character
- Have a constructor that accepts a single String argument
- Any class with the static method named valueOf(String) that accepts a single String argument
- Any class with a constructor that takes a single String as a parameter
- List<T>, Set<T>, or SortedSet<T>, where T matches the already listed criteria. Sometimes parameters may contain more than one value for the same name. If this is the case, these types may be used to obtain all values.
5. web.xml
In our “web.xml” file, we register “com.sun.jersey.spi.container.servlet.ServletContainer“ as our servlet container. Additionally, we need to define “com.sun.jersey.config.property.packages“ parameter, the value of which dictates in which package jersey will look for the web service classes. This value must point to our resources classes. The URL pattern property defines the base URL your application will be placed into.
web.xml:
<?xml version="1.0" encoding="UTF-8"?>
<web-app xmlns:xsi="http://www.w3.org/2001/XMLSchema-instance" xmlns="http://java.sun.com/xml/ns/javaee" xsi:schemaLocation="http://java.sun.com/xml/ns/javaee http://java.sun.com/xml/ns/javaee/web-app_3_0.xsd" id="WebApp_ID" version="3.0">
<display-name>Restful Web Application</display-name>
<servlet>
<servlet-name>jersey-helloworld-serlvet</servlet-name>
<servlet-class>
com.sun.jersey.spi.container.servlet.ServletContainer
</servlet-class>
<init-param>
<param-name>com.sun.jersey.config.property.packages</param-name>
<param-value>com.javacodegeeks.enterprise.rest.jersey</param-value>
</init-param>
<load-on-startup>1</load-on-startup>
</servlet>
<servlet-mapping>
<servlet-name>jersey-helloworld-serlvet</servlet-name>
<url-pattern>/rest/*</url-pattern>
</servlet-mapping>
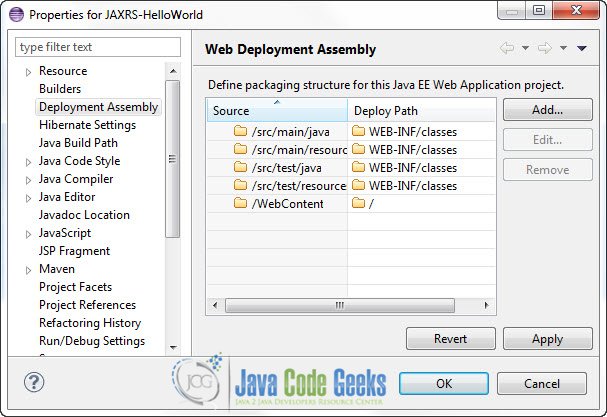
</web-app>8. Set Deployment Assembly
In order to make the appropriate libraries available to Tomcat, in the /WEB-INF/lib folder when extracting the WAR file, go to the Package Explorer, Right click on the Project -> Properties -> Deployment Assembly -> Click Add:
On the next window click on “Java Build Path Entries” and click “Next”
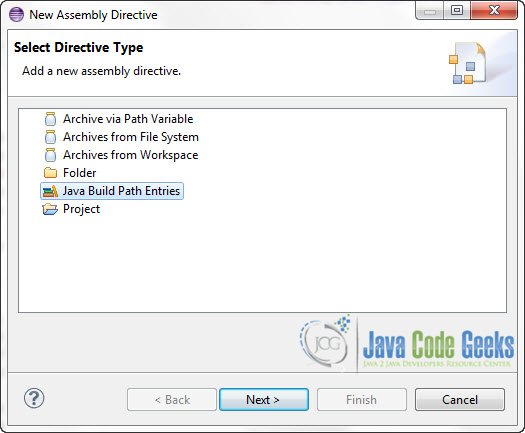
The select “Maven Dependencies” :
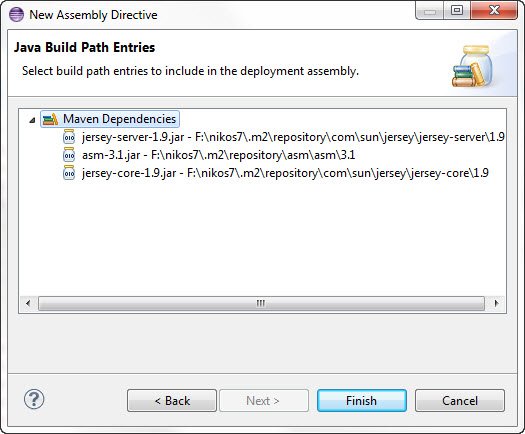
And click “Finish”. Now when you export the WAR file, all of these libraries will be placed in the /WEB-INF/lib folder and thus they become visible to Tomcat.
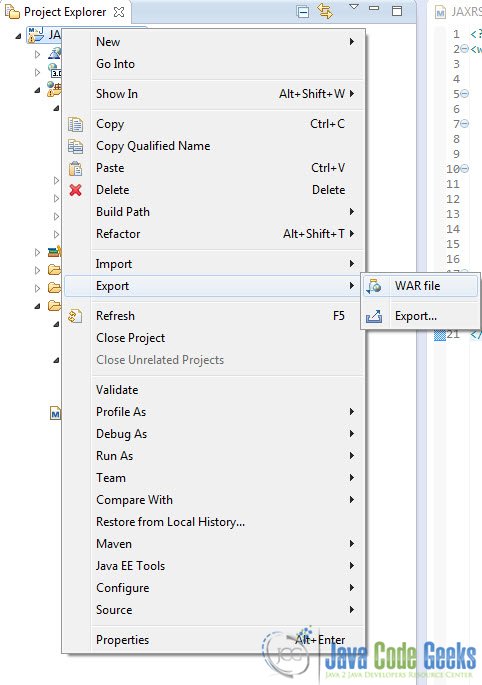
9. Export WAR file
Now, go to the Package explorer and Right Click on the Project -> Export -> WAR file :
After exporting the WAR file you have to copy it to CATALINA_BASE/webapps folder. There are quite a few ways to create the WAR file. You can use Maven, Ant, or even the jar command line tool.
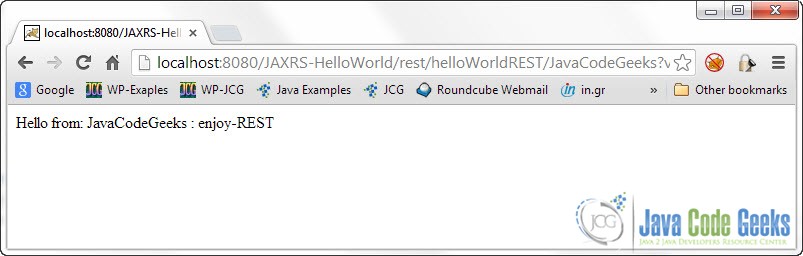
Now you can start Tomcat. Then put the following URL in your Web Browser :
http://localhost:8080/JAXRS-HelloWorld/rest/helloWorldREST/JavaCodeGeeks?value=enjoy-REST
This is what you will get:
This was a Jersey Hello World Example. Download the Eclipse Project of this example : JAXRS-HelloWorld.zip

I have followed all the steps above and getting the 404 when running the war file in apache tomcat.
Hi, i did all and when i start apache throws me this:
GRAVE: Servlet [jersey-servlet] in web application [/ProjectRestName] threw load() exception
java.lang.ClassNotFoundException: com.sun.jersey.spi.container.servlet.ServletContainer
Can you tell me why?
Please copy the jersey-servlet-1.XX.jar to the JAXRS-HelloWorld\WEB-INF\lib folder or include it in your pom file and build the war again.