1. Introduction
Security is an important aspect of web-services. Security can be ensured at several different application layers. The Oracle document here propounds different mechanisms of implementing security. In this article we are going to keep it simple and demonstrate how transport layer security could be introduced. So we are going to cook-up a simple jax-rs application that entertains some GET requests and implement security features in the tomcat container where it is deployed. Those needing a reference on Tomcat could check out the hyper-link. The example code is available for download at the end of the write-up.
2. Project Set-Up
We will create a Maven web-app project from Eclipse. Steps are as listed below.
- Fire up Eclipse from a suitable workspace/folder
- Click on New->File->Project…
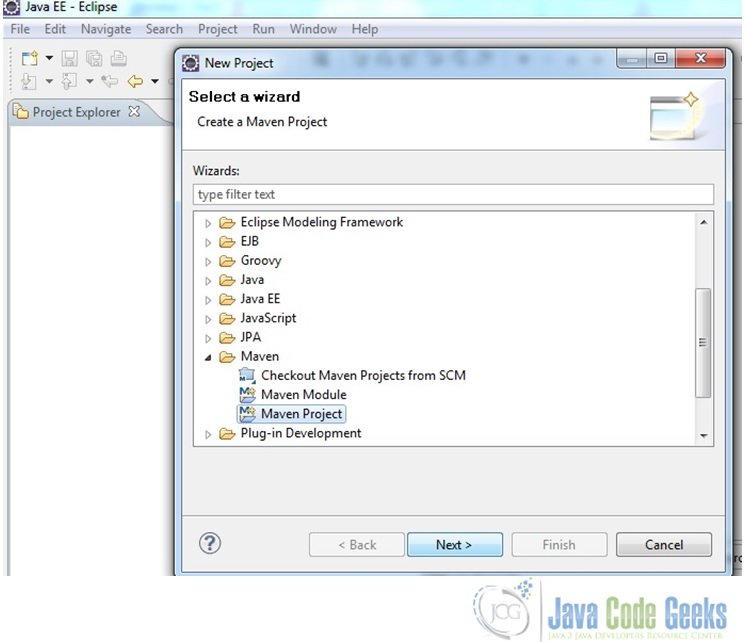
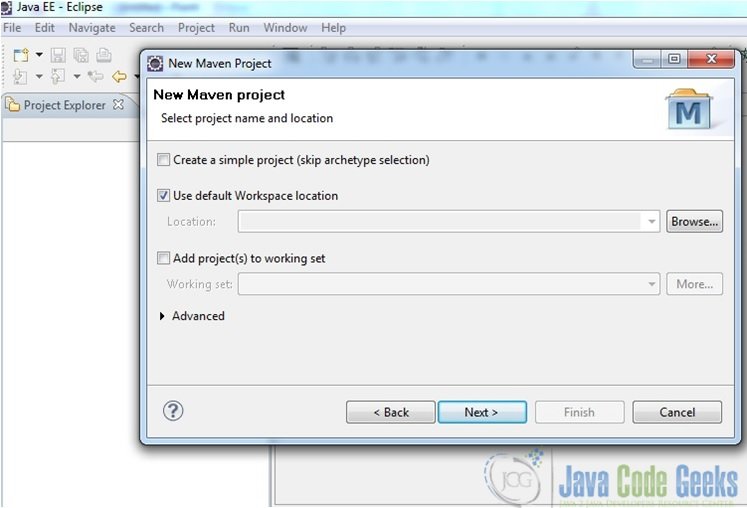
- Choose the creation of a Maven project and follow the wizard as shown in the screenshots below

Fig.1 Create Maven project 
Fig.2 Choose archetype 
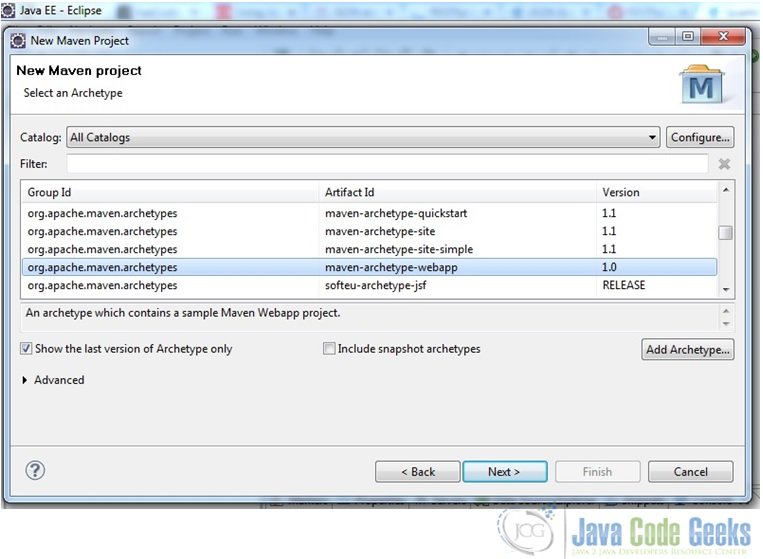
Fig. 3 Choose maven-archetype-webapp 
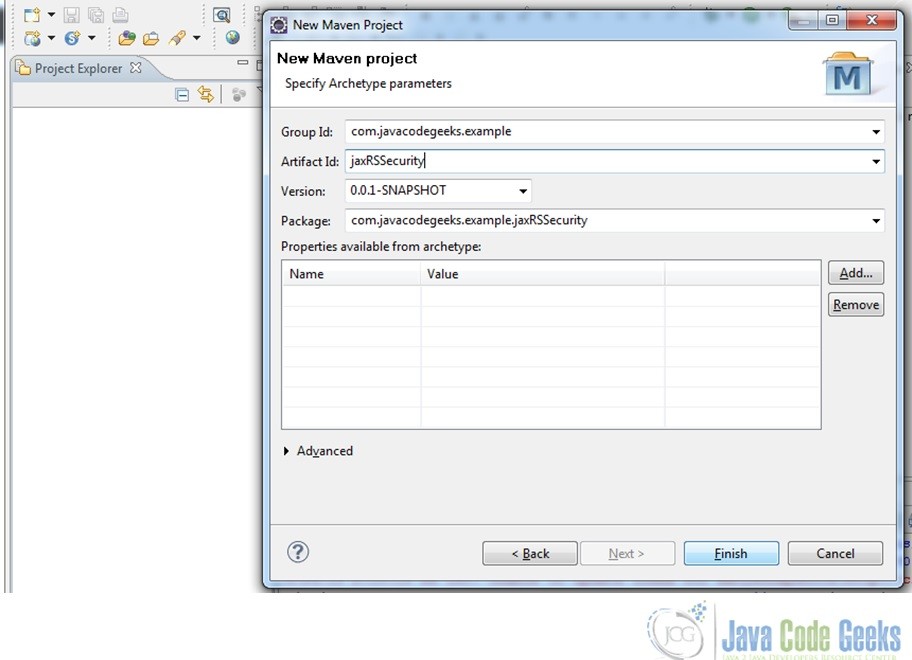
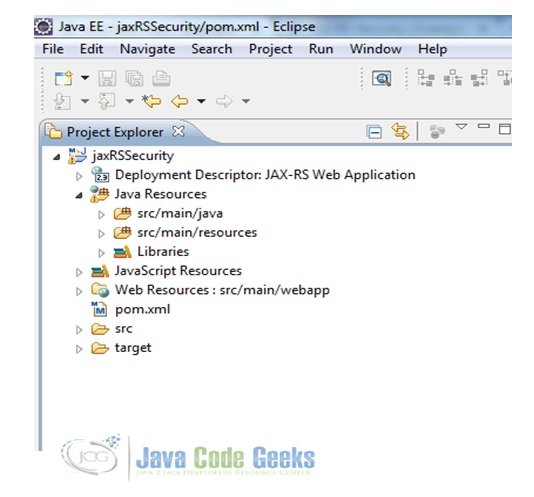
Fig. 4 Supply package name etc - Once the project is created, just add folder ‘src/main/java’ to it by clicking on Java Resources->New->Source Folder to have a final project structure as follows

Fig. 5 Final Project Structure
3. Add Maven Dependencies
We will use Jersey implementation of jax-RS version 1.19 and Jersey-json so that the application serves out data in JSON format.
pom.xml
<project xmlns="http://maven.apache.org/POM/4.0.0" xmlns:xsi="http://www.w3.org/2001/XMLSchema-instance"
  xsi:schemaLocation="http://maven.apache.org/POM/4.0.0 http://maven.apache.org/maven-v4_0_0.xsd">
  <modelVersion>4.0.0</modelVersion>
  <groupId>com.javacodegeeks.example</groupId>
  <artifactId>jaxRSSecurity</artifactId>
  <packaging>war</packaging>
  <version>0.0.1-SNAPSHOT</version>
  <name>jaxRSSecurity Maven Webapp</name>
  <url>http://maven.apache.org</url>
  <properties>
  	<jersey.version>1.19</jersey.version>
    <maven.plugin.version>2.2</maven.plugin.version>
    <jdk.version>1.6</jdk.version>
  </properties>
  <dependencies>
    <dependency>
    	<groupId>com.sun.jersey</groupId>
    	<artifactId>jersey-servlet</artifactId>
    	<version>${jersey.version}</version>
    </dependency>
     <dependency>
     <groupId>com.sun.jersey</groupId>
     <artifactId>jersey-json</artifactId>
     <version>${jersey.version}</version>
    </dependency>
    <dependency>
      <groupId>junit</groupId>
      <artifactId>junit</artifactId>
      <version>3.8.1</version>
      <scope>test</scope>
    </dependency>
  </dependencies>
  <build>
    <finalName>jaxRSSecurity</finalName>
    <plugins>
      <plugin>
      <groupId>org.apache.maven.plugins</groupId>
      <artifactId>maven-compiler-plugin</artifactId>
      <version>${maven.plugin.version}</version>
        <configuration>
          <source>${jdk.version}</source>
          <target>${jdk.version}</target>
        </configuration>
      </plugin>
    </plugins>
  </build>
</project>
4. Java Code
4.1 Create a resource class
In our case we will just create a POJO class with a few attributes
Student.java
package com.javacodegeeks.model;

import org.codehaus.jackson.annotate.JsonIgnore;

public class Student {
 String firstName, lastName;
 String school;
 int id;

public String getFirstName() {
	return firstName;
}
public void setFirstName(String firstName) {
	this.firstName = firstName;
}
public String getLastName() {
	return lastName;
}
public void setLastName(String lastName) {
	this.lastName = lastName;
}
public String getSchool() {
	return school;
}
public void setSchool(String school) {
	this.school = school;
}
public int getId() {
	return id;
}
public void setId(int id) {
	this.id = id;
}
@Override
public String toString(){
	return firstName+" "+lastName+"is a student of "+school;
}
}
4.2 Service Class
The following class exposes two GET requests.
Services.java
package com.javacodegeeks.util;

import java.util.ArrayList;
import java.util.List;

import javax.ws.rs.GET;
import javax.ws.rs.Path;
import javax.ws.rs.PathParam;
import javax.ws.rs.Produces;
import javax.ws.rs.core.MediaType;
import com.javacodegeeks.model.Student;

@Path("/rest")
public class Services {

	@GET
	@Path("/student/list")
	@Produces(MediaType.APPLICATION_JSON)
	public List studentList(){
		List studentList = new ArrayList();
		Student st1 = new Student();
		st1.setFirstName("Emily");
		st1.setLastName("Watson");
		st1.setSchool("Edinburgh High School");
		studentList.add(st1);

		Student st2 = new Student();
		st2.setFirstName("Sarah");
		st2.setLastName("Williams");
		st2.setSchool("MountainView High School");
		studentList.add(st2);
		return studentList;
	}


	@GET
	@Path("/student/{id}")
	@Produces(MediaType.APPLICATION_JSON)
	public Student studentById(@PathParam("id") int id){
		Student student = new Student();
		student.setFirstName("Andrew");
		student.setLastName("Jones");
		student.setSchool("St.Mary's");
		student.setId(id);
		return student;
	}
}
4.3 Add Security Features
Next, we will make changes to the web.xml to put some security restrictions in place. The goal is to employ Basic Authentication and seek a username and password when a request is made to access ../student/list data.
web.xml
<!DOCTYPE web-app PUBLIC
 "-//Sun Microsystems, Inc.//DTD Web Application 2.3//EN"
 "http://java.sun.com/dtd/web-app_2_3.dtd" >

<web-app>
  <display-name>JAX-RS Web Application</display-name>
  <servlet>
	<servlet-name>jersey-json-example-serlvet</servlet-name>
	<servlet-class>com.sun.jersey.spi.container.servlet.ServletContainer</servlet-class>
	<init-param>
		<param-name>com.sun.jersey.config.property.packages</param-name>
		<param-value>com.javacodegeeks.util</param-value>
	</init-param>
<!-- This is to pass the resource data as JSON to the client-->
	<init-param>
		<param-name>com.sun.jersey.api.json.POJOMappingFeature</param-name>
		<param-value>true</param-value>
	</init-param>
	<load-on-startup>1</load-on-startup>
  </servlet>

  <servlet-mapping>
	<servlet-name>jersey-json-example-serlvet</servlet-name>
	<url-pattern>/*</url-pattern>
  </servlet-mapping>

  <!-- This is where security features are being enabled -->
  <security-constraint>
    <display-name>Restricted GET Request</display-name>
    <web-resource-collection>
        <web-resource-name>Restricted GET request to student data</web-resource-name>
<!-- Restricting access only to this URL for the GET method -->
        <url-pattern>/rest/student/list</url-pattern>
        <http-method>GET</http-method>
    </web-resource-collection>
    <auth-constraint>
        <role-name>client</role-name>
    </auth-constraint>
    <user-data-constraint>
<!-- In production environment it is advised to set the guarantee as CONFIDENTIAL -->
        <transport-guarantee>NONE</transport-guarantee>
    </user-data-constraint>
</security-constraint>

<!-- Using Basic authentication -->
<login-config>
  <auth-method>BASIC</auth-method>
</login-config>

 <security-role>
     	<description>Normal operator user</description>
     	<role-name>client</role-name>
   	</security-role>

</web-app>
5. Changes to Tomcat
As stated above we are using Tomcat 7. Now for the user to be authenticated we will specify the role ‘client’ (which is the role chosen in our web.xml above) and some username and password in our container. This username and password will have to be supplied to access the restricted resource.
5.1 Enable authentication
In most Tomcat installations, the authentication feature comes enabled. Make sure that we have the following configuration enabled in the server.xml file under the Tomcat installation directory->conf
    <!-- Use the LockOutRealm to prevent attempts to guess user passwords
           via a brute-force attack -->
      <Realm className="org.apache.catalina.realm.LockOutRealm">
        <!-- This Realm uses the UserDatabase configured in the global JNDI
             resources under the key "UserDatabase".  Any edits
             that are performed against this UserDatabase are immediately
             available for use by the Realm.  -->
        <Realm className="org.apache.catalina.realm.UserDatabaseRealm"
               resourceName="UserDatabase"/>
      </Realm>
5.2 Setting up Roles and Users
Now the ‘UserDatabase’ referred in the realm refers to the tomcat-users.xml file under the Tomcat installation directory->conf. So we are going to set up a role ‘client’ with a certain username and password as shown below. Also note that in Tomcat 7 to view the deployment status, ‘manager-status’, ‘manager-gui’ etc. are some of the predefined roles but they are not assigned by default. Hence, we will change our tomcat-users.xml as shown below. This will enable access to the ‘Manager Status’ by supplying the username and password as ‘tomcat’.
tomcat-users.xml
<tomcat-users>
<role rolename="tomcat"/>
  <role rolename="role1"/>
  <role rolename="client"/>
  <user username="tomcat" password="tomcat" roles="tomcat,manager-gui,manager-status"/>
  <user username="both" password="tomcat" roles="tomcat,role1"/>
  <user username="role1" password="tomcat" roles="role1"/>
  <user username="user1" password="password" roles="client" />
</tomcat-users>
6. Build the Project, Deploy and Run
- Now we will build our Maven project with the following command
mvn clean install -e
- Deploy the project on Tomcat, that is, simply pick the
warfile created by the above command in the ‘target’ folder of the project sayjaxRSSecurity.warand place it under the ‘webapps’ folder of the Tomcat. Just note that if there are any otherwarfiles in the folder just remove it. - Next just start-up Tomcat. In Windows, go to the bin->startup.bat
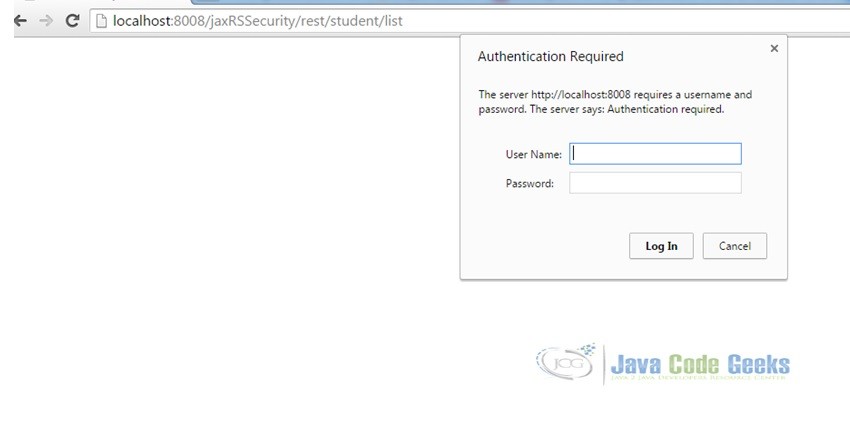
- Once the war is deployed successfully, open a browser and go to the URL where tomcat is running say,
http://localhost:8008/jaxRSSecurity/rest/student/list - A dialogue box will prompt the username and password, just supply the values configured in
tomcat-users.xmland it should display the output as shown in the screenshots below
Fig. 6 Password prompt - Output:
[{"firstName":"Emily","lastName":"Watson","school":"Edinburgh High School","id":0},{"firstName":"Sarah","lastName":"Williams","school":"MountainView High School","id":0}] - Notice that on hitting the other
GETrequest athttp://localhost:8008/jaxRSSecurity/rest/student/123there is no prompt for authentication as this URL was not restricted in ourweb.xmlfile. - Output
{"firstName":"Andrew","lastName":"Jones","school":"St.Mary's","id":123}
7. Conclusion
This brings us to the end of the article.
Download the Eclipse project of this tutorial:
You can download the full source code of this example here : jaxRSSecurity

Thank you for this simple but elegant tutorial.