1. Introduction
When working with the command line, mostly every day no matter what operating system you are using, it is useful to have some tools/plugins that will make your work much easier. Tools and plugins, like fzf, are designed to facilitate your work through just a simple command instead of multiple instructions.
Statistically using autocomplete will reduce typing by 25%.
For example, auto-completion will save you most of the time when writing commands which could be considered a basic thing to have in your terminal. Having auto-completion tools is not about being lazy and not manually typing each line of code. Automating your process is the key to increasing your productivity.
2. What is the fzf command?
This is the best and most powerful command interactive Unix filter for command-line that can be used with any list, files, command history, processes, hostnames, bookmarks, git commits, and many more.
Link to the fzf GitHub project, you can find here.
3. How to install it?
This command is available to install on the following platforms: Unix, macOS, and even Windows.
fzf project consists of the following components:
- fzf executable
- fzf-tmux script for launching fzf in a tmux pane
- shell extension
- Vim/NeoVim plugin
3.1. Install fzf on Unix
To install this tool on Unix you have multiple options.
The first option is an external package manager called: HomeBrew (this is available for Unix and macOS). If you have this package manager you can run this command:
brew install fzf
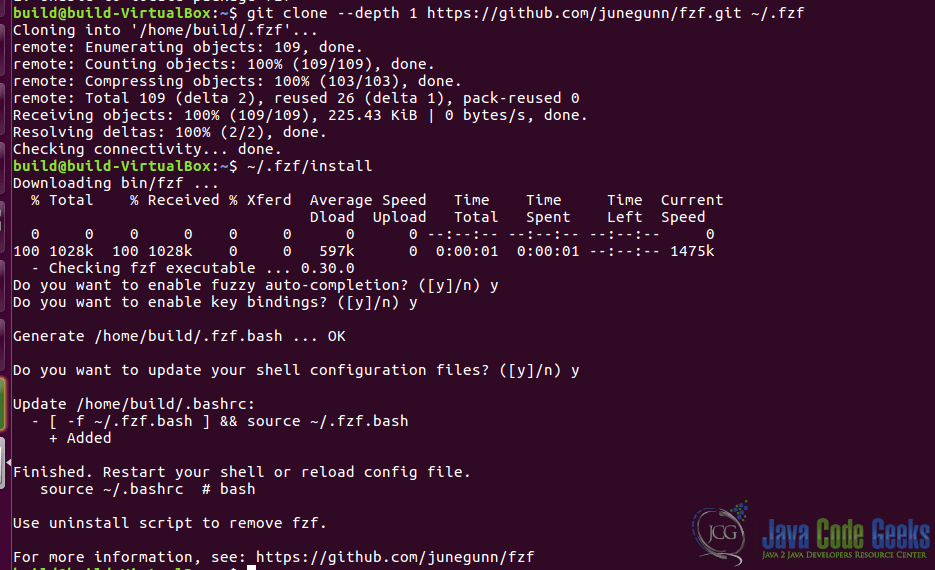
The second option is cloning the git repository:
git clone --depth 1 https://github.com/junegunn/fzf.git ~/.fzf
~/.fzf/install
As a result of successful installation from the git repo you will see this output:
The third option is with using the default package manager that Linux System offers or another package manager that you have, depending on the Linux distribution:
sudo apk add fzf
3.2. Install fzf on macOS
Installing on macOS you can use the above-mentioned package manager HomeBrew and run this command:
brew install fzf
Another way to install it on macOS is through MacPorts and running this command:
sudo port install fzf
3.3. Install fzf on Windows
On windows, there are pre-build binaries and you can download them from here. For this operating system, there are some limitations as the official documentation noted.
NOTE: If you want to install just the fzf executable you can just simply download it from here.
4. Shell key bindings
There are some shell key bindings that you can use to leverage the features of this tool.
- CTRL + T – list files and folders in the current directory
- CTRL + R – search history of shell commands
- ALT + C – change directory
5. Filename autocomplete
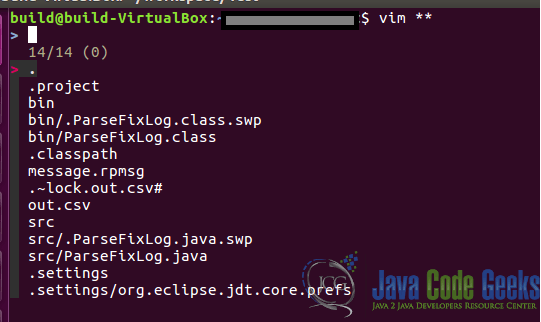
Particularly to use the autocomplete feature for filenames, you will have just type vim (or vim ** in case the previous command doesn’t work) and TAB. A new panel will show up in your command line showing all the existing files from your current directory. To navigate between results you have to use the up and down arrows. After you choose one you have to press ENTER. The new directory will be selected to be used for vim command.
6. Kill command autocomplete
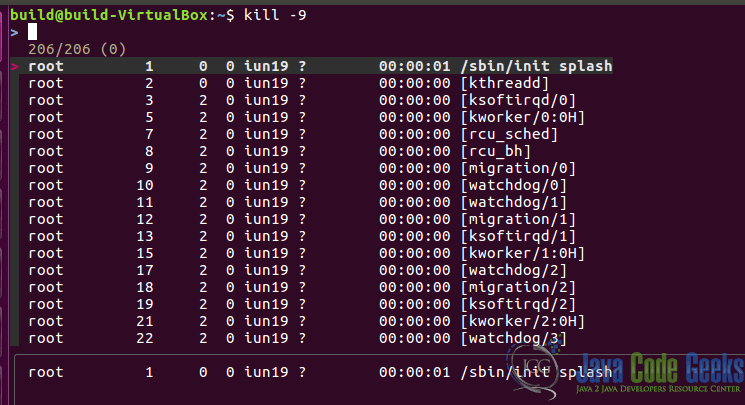
Killing a process is similar to the searching files presented in the previous section. You just have to type kill -9 (or kill -9 ** in case the previous command doesn’t work) and TAB. A new panel will be open in the current command line showing all the active processes. After you select a value you have to press ENTER. That newly selected value will be used in the kill command.
7. Using different search modes
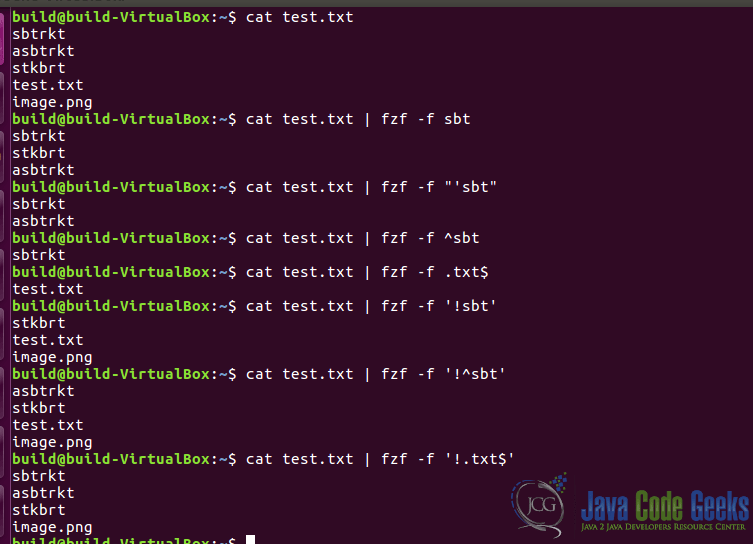
This command besides the above things mentioned has some searching criteria syntax that will help you to customize your search.
- fuzzy match the pattern word to lookup:
cat test.txt | fzf -f sbt - match exactly the given word:
cat test.txt | fzf -f "'sbt" - items that start with the given word: cat test.txt | fzf -f ^sbt
- items that end with that given word: cat test.txt | fzf -f .txt$
- negation that given items don’t include the given word: cat test.txt | fzf -f ‘!sbt’
- items don’t start with the given word: cat test.txt | fzf -f ‘!^sbt’
- items don’t end with the given word:
cat test.txt | fzf -f '!.txt$’
The -f stands for filter command.
You can provide multiple patterns to lookup separated by a bar character which acts as an OR operator.
You can also check the documentation of this command by typing: man fzf in your terminal.
8. Final words
Just to sum up the content of this article, basically, it will cover the fzf command, how to install it and how to use it. Besides that, we present some basic examples for each functionality that this command has. You will be familiar with that command to be able to properly use it and give you an overview of its power of it. Using this tool will mostly improve your productivity while using the command line.
