In this example, we will show how to use the @AliasFor annotation in Spring.
1. Introduction
Annotations are decorators that provide metadata about classes, methods, parameters or fields. Depending on the annotation, metadata may be processed at compile-time and/or runtime. Examples of annotations include:
- JUnit annotations (@Test, @Before, @After)
- JPA annotations (@Entity, @Table, @Id)
- Spring Framework annotations (@Controller, @Configuration, @Autowired)
Meta-annotations are annotations that are applied to other annotations. This gives us the ability to create composed annotations. For example, the @RestController annotation is meta-annotated with @Controller and @ResponseBody.
An annotation can have zero, one, or more attributes. In Spring, the @AliasFor annotation gives us the ability to use one attribute as an alias to another attribute.
The @AliasFor annotation is used in the following cases:
- Applying @AliasFor on a pair of attributes within a single annotation, allowing us to use the attributes interchangeably
- Applying @AliasFor on an attribute in a composed annotation, in effect, overriding the attribute in the meta-annotation
In this article, we will provide examples for both cases listed above.
1.1 Tools Used in this Example
- Eclipse IDE for Enterprise Java Developers Version: 2019-06 (4.13.0)
- Spring Tools 4 – for Spring Boot
- Postman 7.15.0
Spring Tools 4 for Spring Boot is a set of plugins for Eclipse that support building and running Spring Boot applications. You can add Spring Tools 4 to your existing Eclipse installation by going to the Eclipse Marketplace and searching for “Spring Tools 4”.
You can download Postman here.
2. Spring @AliasFor Annotation Example
2.1 Create Aliases Within an Annotation
We can use @AliasFor on a pair of attributes within a single annotation. This will allow us to use the attributes interchangeably. This makes sense in certain situations. For example, path is an alias for value (and the reverse) in the @RequestMapping annotation. Since the value attribute can be omitted when declaring its parameter, @RequestMapping(“/students”) is a shortcut for @RequestMapping(path = “/students”).
2.1.1 Create the Spring Boot Project
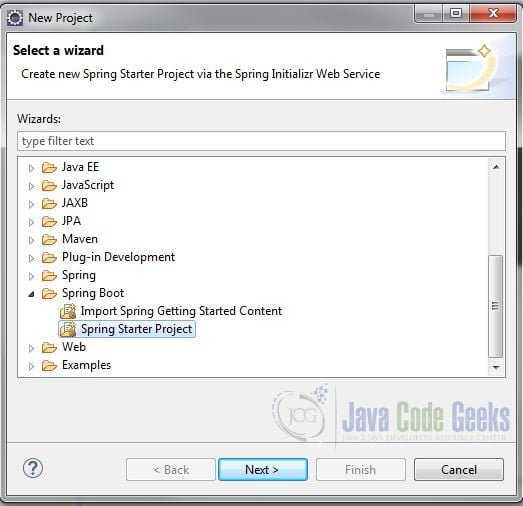
In the New Project – Select a Wizard dialog box, expand Spring Boot and select Spring Starter Project. Click “Next”.
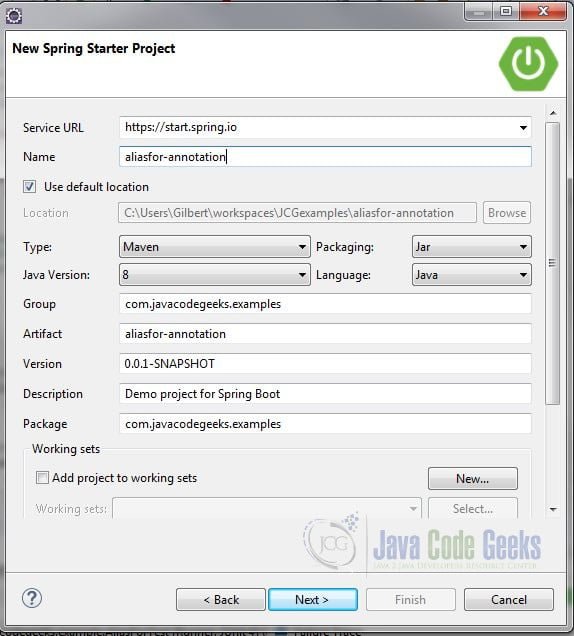
In the New Spring Starter Project dialog box, enter a name for the project. Also, enter the group, artifact and package information. Accept all the other default values. Click “Next”.
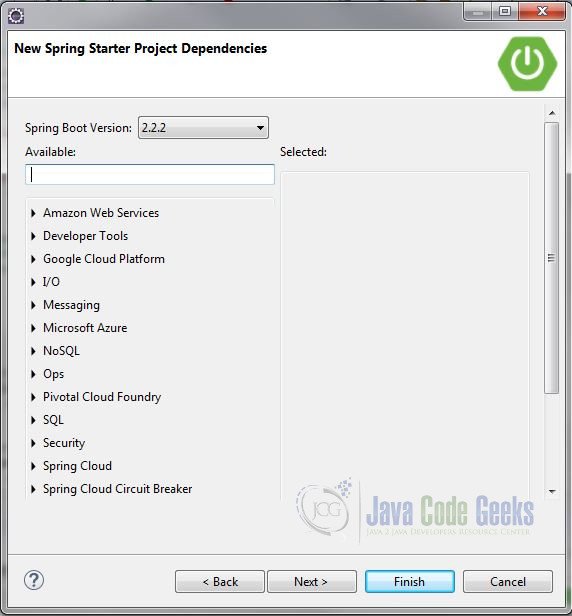
In the New Spring Starter Project Dependencies dialog window, click “Finish”. (We will not require any dependencies for this example.)
2.1.2 Create the Annotation Class
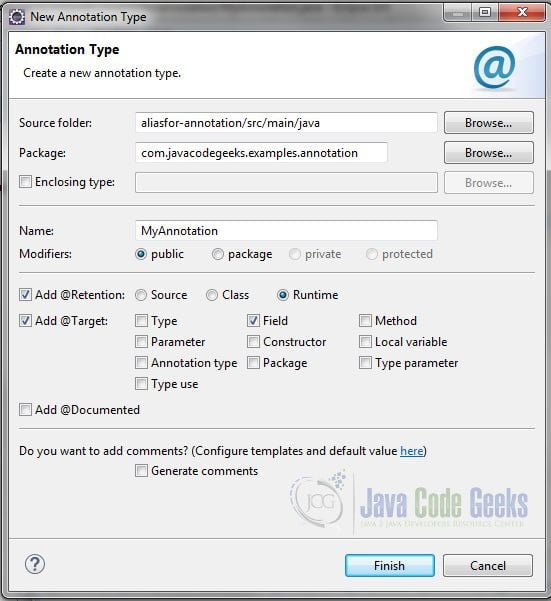
Create a new package com.javacodegeeks.examples.annotation. Right-click the package and select New -> Annotation. In the New Annotation Type window, enter MyAnnotation for the name. Check the Add @Retention checkbox and select the Runtime radio button. Also, check the Add @Target checkbox and check the Field checkbox. Click Finish.
Add the following code to MyAnnotation:
MyAnnotation.java
import org.springframework.core.annotation.AliasFor;

@Retention(RUNTIME)
@Target(FIELD)
public @interface MyAnnotation {

	@AliasFor("name")
	String value() default "";

	@AliasFor("value")
	String name() default "";
}
2.1.3 Create the Bean Class
Let’s create a Spring bean with two properties and apply our annotation to both. Create a class MyBean in com.javacodegeeks.examples and add the following code:
MyBean.java
import com.javacodegeeks.examples.annotation.MyAnnotation;

public class MyBean {

	@MyAnnotation(value = "Hello")
	private String prop_a;

	@MyAnnotation(name = "World!")
	private String prop_b;
}
The first property is annotated using the value attribute while the second property is annotated using the name attribute. Since these attributes are interchangeable, the result is the same. We will see this later in our JUnit test.
2.1.4 Create the Configuration Class
Next, we will create a Spring configuration class so that we can register MyBean in the Spring IoC container. Create a package com.javacodegeeks.examples.configand a class MyConfigwith the following code:
MyConfig.java
import org.springframework.context.annotation.Bean;
import org.springframework.context.annotation.Configuration;

import com.javacodegeeks.examples.MyBean;

@Configuration
public class MyConfig {

	@Bean
	public MyBean myBean() {
		return new MyBean();
	}
}
2.1.5 Create the JUnit Test Case
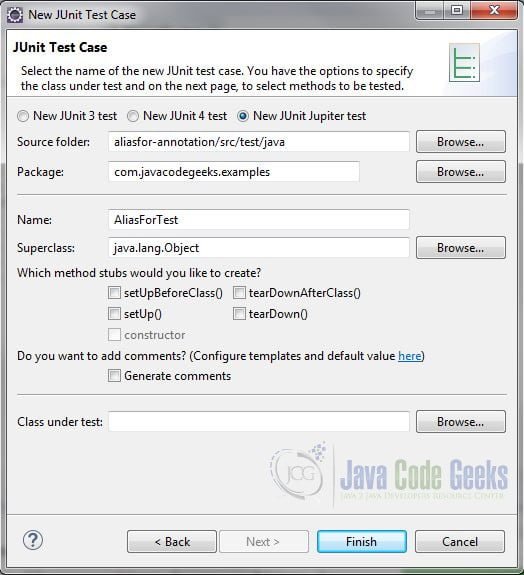
Right-click the com.javacodegeeks.examples package under src/test/java and select New -> Other -> JUnit Test Case. Click Next.
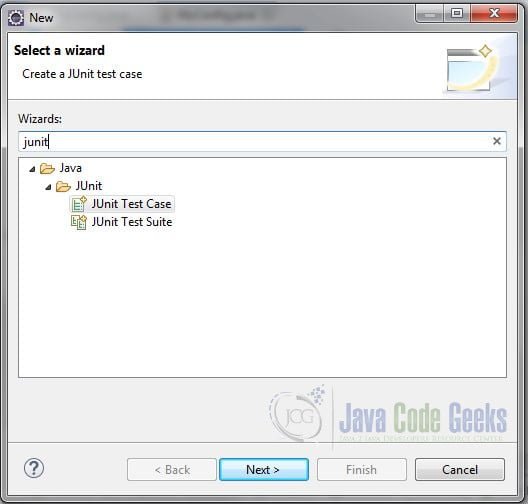
Enter AliasForTest as the name and click Finish.
Remove the stubbed-in test and add the following code:
AliasForTest.java
import static java.util.Objects.requireNonNull;
import static org.junit.jupiter.api.Assertions.*;

import java.lang.reflect.Field;

import org.junit.jupiter.api.Test;
import org.springframework.beans.factory.annotation.Autowired;
import org.springframework.boot.test.context.SpringBootTest;
import org.springframework.context.ConfigurableApplicationContext;
import org.springframework.core.annotation.AnnotationUtils;

import com.javacodegeeks.examples.annotation.MyAnnotation;

@SpringBootTest
class AliasForTest {

	@Autowired
	private ConfigurableApplicationContext context;

	@Test
	void testAtributeValues() {
		MyBean bean = context.getBean(MyBean.class);
		Class objectClass = requireNonNull(bean).getClass();
		for (Field field : objectClass.getDeclaredFields()) {
			if (field.isAnnotationPresent(MyAnnotation.class)) {
				System.out.println("\nfield name: "+field.getName());
				MyAnnotation annotationOnBean = AnnotationUtils.findAnnotation(field, MyAnnotation.class);
				System.out.println("attribute \"value\": "+annotationOnBean.value());
				System.out.println("attribute \"name\": "+annotationOnBean.name());
				assertTrue(annotationOnBean.value().equals(annotationOnBean.name())
					, "The value and name attributes are not the same");
			}
		}
	}
}
At the class level:
- The
@SpringBootTestannotation is used to bootstrap the IoC container. - The
ConfigurableApplicationContextis injected using@Autowired. It will be used as our handle to the container.
The test method performs the following:
- Retrieves
MyBeanfrom the context - Obtains the
Classobject that represents the bean while ensuring it is not null - Iterates over the array of
Fieldobjects of theClassobject - Check if
Fieldis annotated withMyAnnotation - Find and retrieve the annotation from
Fieldusing theAnnotationUtils.findAnnotationstatic utility method.
Once we have a handle on the annotation, we print out the values of the value and name attributes. We then assert that both values are the same.
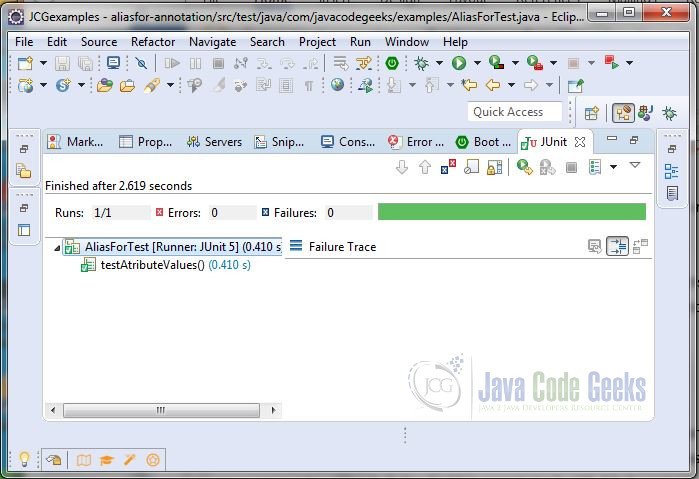
Right-click the test class and select Run As -> JUnit Test. You will see the following in the console output.
Started AliasForTest in 1.354 seconds (JVM running for 2.938)

field name: prop_a
attribute "value": Hello
attribute "name": Hello

field name: prop_b
attribute "value": World!
attribute "name": World!
You can see that the values for the name and value attributes are the same. You will also see that the test passed.
2.2 Create Aliases in a Composed Annotation
2.2.1 Download the Archive
Begin by downloading the zip from the download section and extracting it to a folder of your choice.

2.2.2 Import the Spring Boot REST Starter Project
Click File -> Import… and select Projects from Folder or Archive. Click Next.
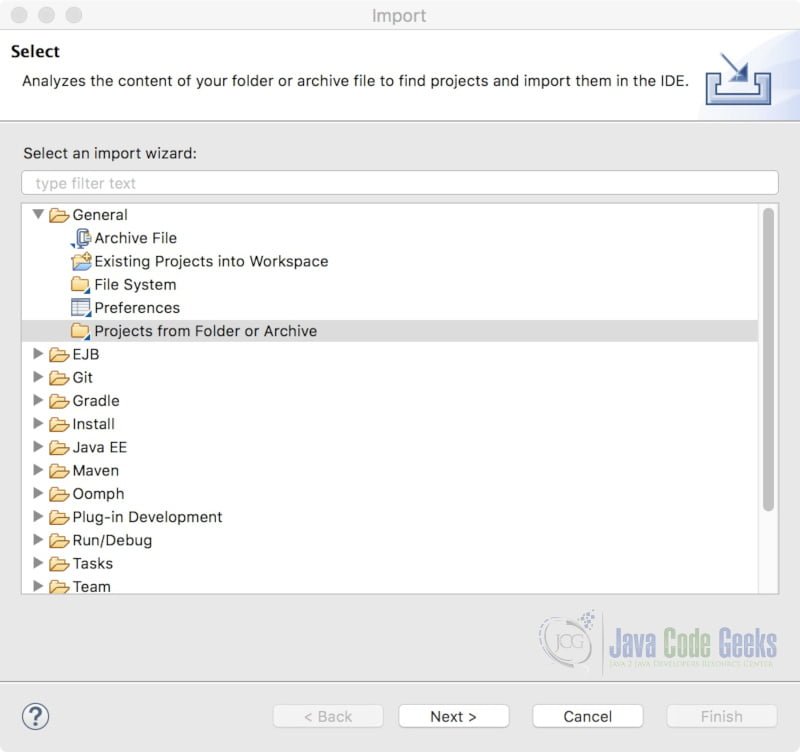
Click on the Archive… button and select the REST-API-Starter.zip file from the folder where the archive was extracted. Select the Eclipse project from the list and click Finish.

After importing the project, you may have to update it. Right-click REST-API-Starter and select Maven -> Update Project.. and select the project from the list. Click OK.
2.2.3 Create the Composed Annotation
Suppose you have a REST API application with CRUD operations for several resources. When a resource is not found, you would like to return the HTTP status code 4O4 (Not Found). Further, suppose you are using the @ResponseStatus annotation for this purpose. Instead of specifying the status every time you use the annotation (with @ResponseStatus(HttpStatus.NOT_FOUND), you can create a composed annotation that hardcodes the status code but still allows you to specify the reason attribute of the @ResponseStatus annotation.
Create a new package com.javacodegeeks.example.annotation and Annotation Type NotFoundResponseStatus. Check the Add @Retention checkbox and select the Runtime radio button. Also, check the Add @Target checkbox and check the Type and Method checkboxes. Click Finish and add the following code:
NotFoundResponseStatus.java
import static java.lang.annotation.ElementType.METHOD;
import static java.lang.annotation.ElementType.TYPE;
import static java.lang.annotation.RetentionPolicy.RUNTIME;

import java.lang.annotation.Retention;
import java.lang.annotation.Target;

import org.springframework.core.annotation.AliasFor;
import org.springframework.http.HttpStatus;
import org.springframework.web.bind.annotation.ResponseStatus;

@Retention(RUNTIME)
@Target({ TYPE, METHOD })
@ResponseStatus(code = HttpStatus.NOT_FOUND)
public @interface NotFoundResponseStatus {

	@AliasFor(annotation = ResponseStatus.class)
	public abstract String reason() default "";
}
Notice that we added a meta-annotation – @ResponseStatus – and hardcoded the code attribute to HttpStatus.NOT_FOUND. We also added an alias for the reason attribute, which, in essence, overrides the reason attribute of the @ResponseStatus annotation.
2.2.4 Update the RestController Class
The default status returned by @ResponseStatus is HttpStatus.INTERNAL_SERVER_ERROR (500). Let’s verify this. Open StudentController.java from the com.javacodegeeks.example.controller package and remove the HttpStatus.NOT_FOUND parameter from the following line:
StudentController.java
@RestController
@RequestMapping("/students")
public class StudentController {

	private final StudentRepository repository;

	@Autowired
	public StudentController(StudentRepository repository) {
		this.repository = repository;
	}

	@SuppressWarnings("serial")
	@ResponseStatus
	class StudentNotFoundException extends RuntimeException {

		public StudentNotFoundException() {
			super("Student does not exist");
		}
	}
more code...
}
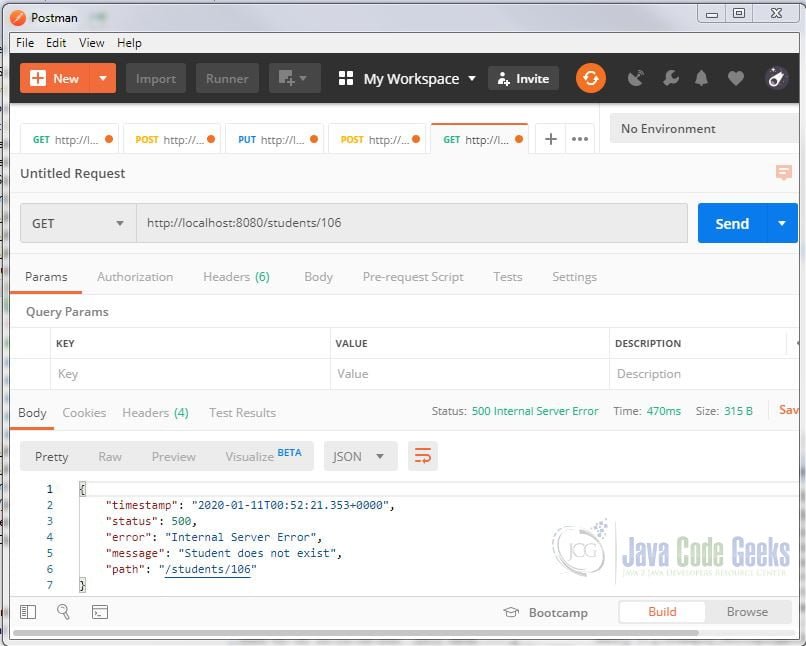
Save the change and start the application. Now start Postman and close the “Create New” dialog box. The top portion of the window is where you select the HTTP method and enter the request URL. The bottom portion of the window is where the response will be displayed.
Open a New Tab. Enter the request URL http://localhost:8080/students/106 and click Send. You will see that the default error code is used.
2.2.5 Update the Annotation on Exception Class
Let’s replace the @ResponseStatus with our composed annotation @NotFoundResponseStatus on the StudentNotFoundException class and remove the constructor. (Assigning the reason attribute in @NotFoundResponseStatus makes the constructor superfluous.) Edit StudentController as follows:
StudentController.java
	@RestController
@RequestMapping("/students")
public class StudentController {

	private final StudentRepository repository;

	@Autowired
	public StudentController(StudentRepository repository) {
		this.repository = repository;
	}

	@SuppressWarnings("serial")
	@NotFoundResponseStatus(reason = "Student not Found")
	class StudentNotFoundException extends RuntimeException {}
more code...
}
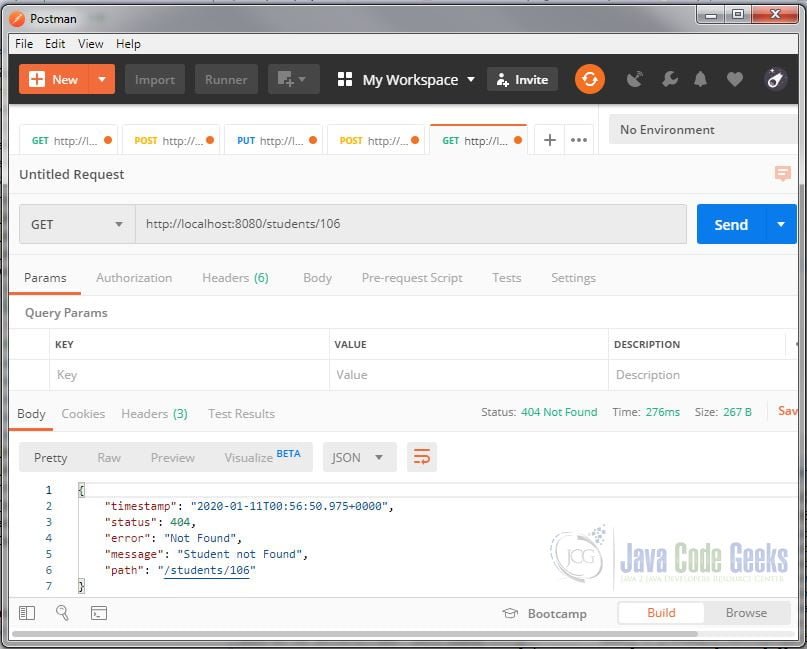
Save the changes and restart the application. Now run the previous test in Postman. You will see that the exception is now returning our hardcoded status code along with our specified reason.
3. Spring @AliasFor – Summary
In this post, we showed how to use the @AliasFor annotation within a single annotation to allows us to use a pair of attributes interchangeably. We also showed how to use @AliasFor in a composed annotation to override attributes in a meta-annotation.
4. Download the Source Code
This was a Spring @AliasFor Annotation Example.
You can download the full source code of this example here:
Spring @AliasFor Annotation Example
