Java MongoDB Example
MongoDb is the leading NoSQL database system which has become popular due to its dynamic schema nature and the advantages over the Big Data like high performance, horizontal scalability, replication etc. Unlike the traditional database systems which provide their own Jdbc-compliant drivers, MongoDb comes with its own in-Jdbc driver called Mongo Java Driver. That means developers cannot use the standard Jdbc API to interact with the MongoDb from Java. In this tutorial, we will show how to implement the MongoDb in Java.
Table Of Contents
1. Introduction
MongoDb is a document-oriented NoSQL database used for high volume data storage and provides high performance, high availability and automatic scaling.
1.1 What is MongoDb?
- MongoDB is a NoSQL database where each db contains collections which in turn contains documents. Each document has a different number of fields, size, and content. Each documentation in MongoDB is stored in a JSON-like format (i.e. Binary JSON (BSN)
- The documents in MongoDB doesn’t need to have a schema defined beforehand. Instead, the fields (i.e. records) can be created on the go
- Data model available within the MongoDB allows developers to represent hierarchical relationships, store arrays, and other more complex structures more easily
- This NoSQL solution often comes with embedding, auto-sharding, and onboard replication for better scalability and high availability
1.2 What is NoSQL?
NoSQL Db is used to refer a non-SQL or the non-relational database concepts.
- Provides a mechanism for storage and retrieval of the data other than the tabular relational model used in the relational databases
- Offers flexibility since records are not restricted to the identical column names and types defined across the entire table
- Do not use the standard
SQLlanguage to query the data and provides no strict schema - With NoSQL, ACID (Atomicity, Consistency, Isolation, Durability) properties of the database transactions are not guaranteed
- Offers scalability and high-performance for handling the huge volumes of data
1.3 Why MongoDb?
- As a NoSQL type database, MongoDb stores the data in the form of a document. Thus, MongoDb offers more flexibility
- This database supports search by field-name, range queries, and the regular expressions. It often provides queries to return the particular fields inside the documents
- MongoDb offers Indexes in order to improve the search performance within the NoSQL database
- To offer horizontal scalability, MongoDb uses sharding by splitting the data across the numerous MongoDb occurrences
- Replication: MongoDb can give high availability with the replica sets
1.4 Advantages Over Relational Database
The table below describes the differences between the MongoDb and a Relational Database
| Relational Database (RDBMS) | MongoDb | Difference |
| Table | Collection | A relational database table has rows and columns that are used to store the data. This construction is called Collection in MongoDb. A Collection has documents which has fields (in a key-value pair). |
| Row | Document | The row in a relational database represents a set of related data in a table, while in MongoDb the same data is stored in the form of documents (i.e. in a Binary JSON format). |
| Column | Field | The column in a relational database is a set of value of a particular type, while these are called as Fields in MongoDb. |
| Joins | Embedded documents | Sometimes, the data is spread across multiple tables in a relational database and to show the entire data, a SQL Join is suggested. While in case of MongoDb, this same data will be stored in a single collection, but partitioned by the documents. Thus, there is no term as Joins in the NoSQL database. |
| Primary Key | _id | In MongoDb, the primary key is automatically set to the _id field. |
1.5 Download and Install MongoDb
You can watch this video in order to download and install the MongoDb database on your Windows Operating system.
Now, open up the Eclipse Ide and let’s see how to access the MongoDb using the Java Driver and how to perform the common CRUD (Create, Read, Update, and Delete) operations.
2. Java MongoDb Example
Here is a step-by-step guide for the CRUD operations using the MongoDb Java driver.
2.1 Tools Used
We are using Eclipse Kepler SR2, JDK 8, MongoDb and Maven. Having said that, we have tested the code against JDK 1.7 and it works well.
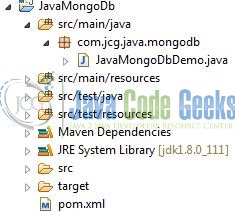
2.2 Project Structure
Firstly, let’s review the final project structure, in case you are confused about where you should create the corresponding files or folder later!
2.3 Project Creation
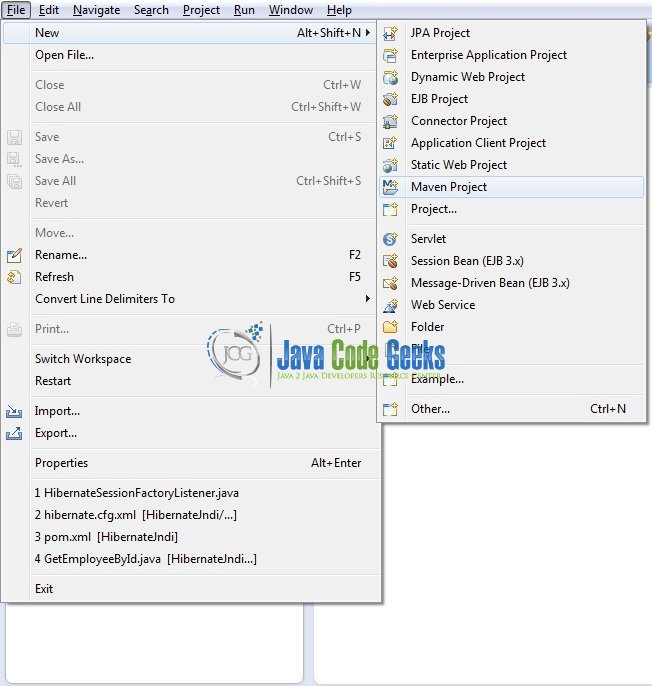
This section will demonstrate on how to create a Java-based Maven project with Eclipse. In Eclipse IDE, go to File -> New -> Maven Project.
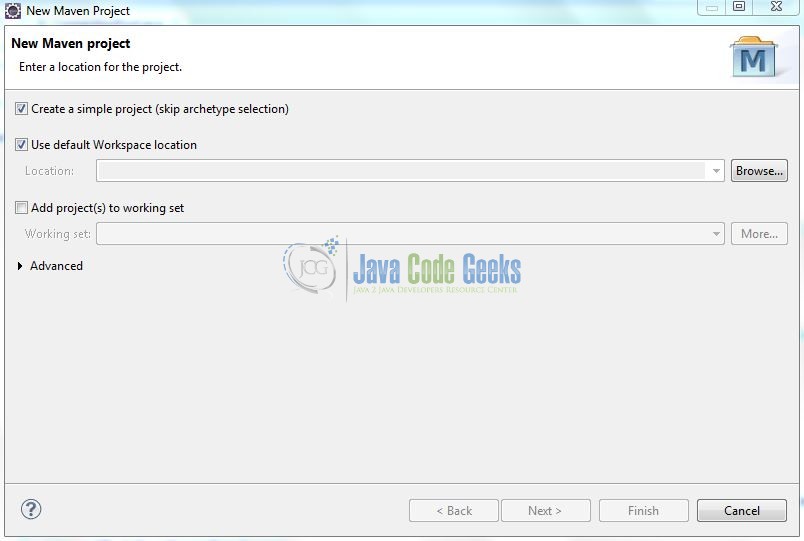
In the New Maven Project window, it will ask you to select a project location. By default, ‘Use default workspace location‘ will be selected. Select the ‘Create a simple project (skip archetype selection)‘ checkbox and just click on next button to proceed.
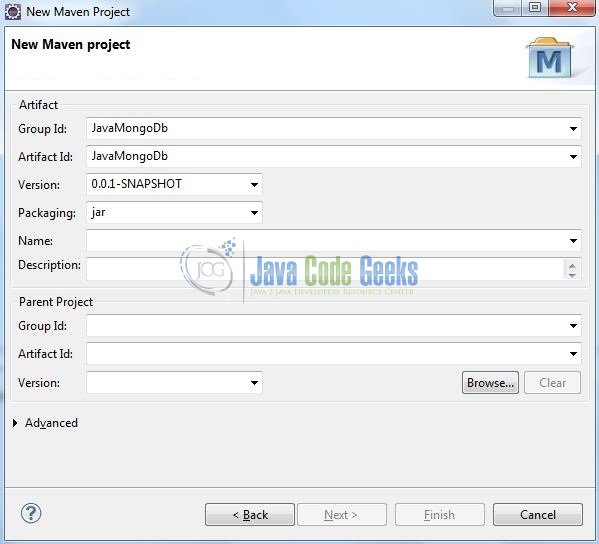
It will ask you to ‘Enter the group and the artifact id for the project’. We will input the details as shown in the below image. The version number will be by default: 0.0.1-SNAPSHOT.
Click on finish and the creation of a maven project will be completed. If you observe, it has downloaded the maven dependencies and a pom.xml file will be created. It will have the following code:
pom.xml
<project xmlns="http://maven.apache.org/POM/4.0.0" xmlns:xsi="http://www.w3.org/2001/XMLSchema-instance" xsi:schemaLocation="http://maven.apache.org/POM/4.0.0 http://maven.apache.org/xsd/maven-4.0.0.xsd">
	<modelVersion>4.0.0</modelVersion>
	<groupId>JavaMongoDb</groupId>
	<artifactId>JavaMongoDb</artifactId>
	<version>0.0.1-SNAPSHOT</version>
</project>
We can start adding the dependencies that developers want like MongoDb Java Driver, Junit etc. Let’s start building the application!
3. Application Building
Below are the steps involved in developing this application.
3.1 Maven Dependencies
In this example, we are using the most stable MongoDb Java Driver Version (i.e. mongo-java-driver-3.5.0) in order to make the database connectivity. The updated file will have the following code:
pom.xml
<project xmlns="http://maven.apache.org/POM/4.0.0" xmlns:xsi="http://www.w3.org/2001/XMLSchema-instance"
	xsi:schemaLocation="http://maven.apache.org/POM/4.0.0 http://maven.apache.org/xsd/maven-4.0.0.xsd">
	<modelVersion>4.0.0</modelVersion>
	<groupId>JavaMongoDb</groupId>
	<artifactId>JavaMongoDb</artifactId>
	<version>0.0.1-SNAPSHOT</version>
	<dependencies>
		<!-- https://mvnrepository.com/artifact/org.mongodb/mongo-java-driver -->
		<dependency>
			<groupId>org.mongodb</groupId>
			<artifactId>mongo-java-driver</artifactId>
			<version>3.5.0</version>
		</dependency>
	</dependencies>
	<build>
		<finalName>${project.artifactId}</finalName>
	</build>
</project>
MongoDb Java driver is an all-in-one jar, which embeds the core driver and BSON. BSON, short for Binary JSON, is a binary-encoded serialization of the JSON-like documents.
3.2 Java Class Creation
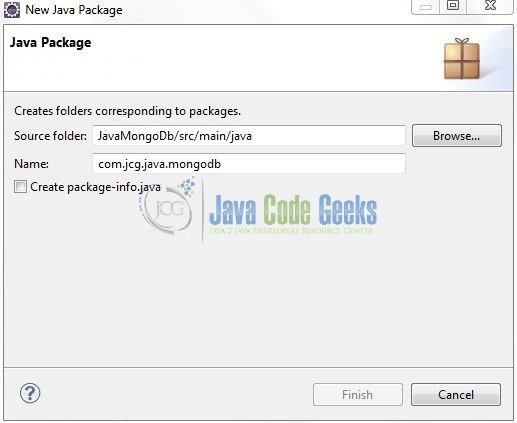
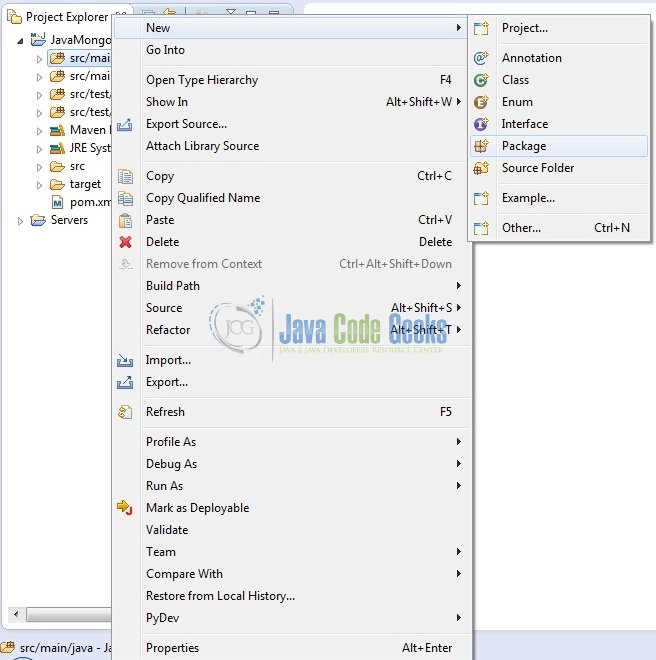
Let’s create the required Java files. Right-click on src/main/java folder, New -> Package.
A new pop window will open where we will enter the package name as: com.jcg.java.mongodb.
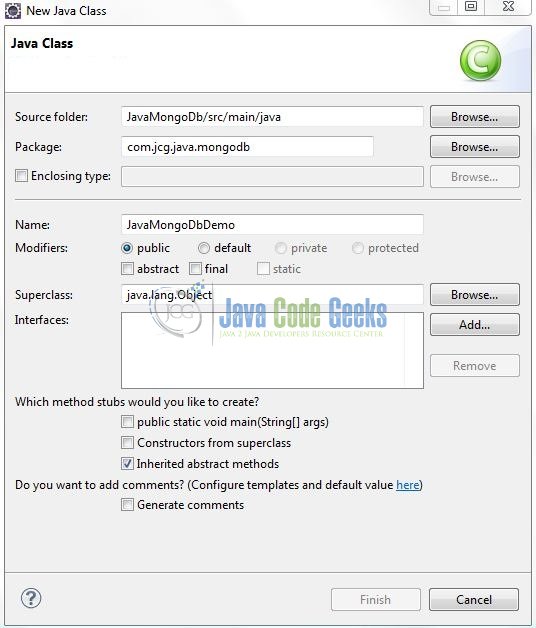
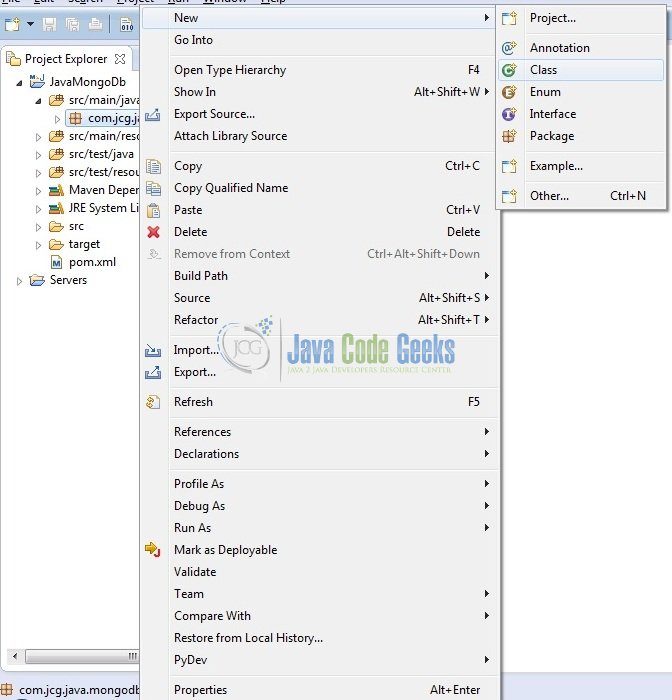
Once the package is created, we will need to create the implementation class. Right-click on the newly created package, New -> Class.
A new pop window will open and enter the file name as: JavaMongoDbDemo. The implementation class will be created inside the package: com.jcg.java.mongodb.
3.2.1 Implementation of Utility Class
In this class, we will be establishing a connection with the db for performing the db operations by using the MongoDb Java Driver. We need to perform the following steps:
- Using the
com.mongodb.MongoClientclass instance to make a db connection. TheMongoClientclass is thread-safe which means only one instance is needed even if multiple threads are being used - Retrieving the db and the collection (i.e. table) details
- Performing the CRUD (i.e. Create, Read, Update, and Delete) operations on the retrieved collection’s documents (i.e. records)
- Finally calling the
close()to release all the resources associated with the instance ofMongoClient.
Add the following code to it:
JavaMongoDbDemo.java
package com.jcg.java.mongodb;

import java.util.Date;
import java.util.LinkedList;

import com.mongodb.BasicDBObject;
import com.mongodb.DB;
import com.mongodb.DBCollection;
import com.mongodb.DBCursor;
import com.mongodb.MongoClient;
import com.mongodb.MongoException;

public class JavaMongoDbDemo {

	static String array_names[] = {"John", "Tim", "Brit", "Robin", "Smith", "Lora", "Jennifer", "Lyla", "Victor", "Adam"};
	static String array_address[][] ={{"US", "FL", " Miami"}, {"US", "FL", " Orlando"}, {"US", "CA", "San Diego"}, {"US", "FL", " Orlando"}, {"US", "FL", " Orlando"},
		{"US", "NY", "New York"}, {"US", "NY", "Buffalo"}, {"US", "TX", " Houston"}, {"US", "CA", "San Diego"}, {"US", "TX", " Houston"}};

	// This Helper Method Is Used To Build The Random Friend's Data
	private static String[] pickFriends() {
		int numberOfFriends = (int) (Math.random() * 10);
		LinkedList<String> friends = new LinkedList<String>();
		int random = 0;
		while(friends.size() < numberOfFriends) {
			random = (int) (Math.random()*10);
			if(!friends.contains(array_names[random])) {
				friends.add(array_names[random]);
			}
		}
		String arr[] = {};
		return  friends.toArray(arr);
	}

	// This Helper Method Is Used To Build The Random Address
	private static String[] pickAddress() {
		int random = (int) (Math.random() * 10);
		return array_address[random];
	}

	@SuppressWarnings("deprecation")
	public static void main(String[] args) {
		try {
			// Connecting To The MongoDb Server Listening On A Default Port (i.e. 27017).
			MongoClient mongoClntObj = new MongoClient("localhost", 27017);

			// Get MongoDb Database. If The Database Doesn't Exists, MongoDb Will Automatically Create It For You
			DB dbObj = mongoClntObj.getDB("mongodbdemo");

			// Get MongoDb Collection. If The Collection Doesn't Exists, MongoDb Will Automatically Create It For You
			DBCollection collectionObj = dbObj.getCollection("jcg");

			/**** INSERT OPERATION ****/
			// Creating The MongoDb Documents To Store Key-Value Pair
			BasicDBObject documentObj;
			String address[];
			for(int i = 0 ; i < array_names.length ; i++) {
				documentObj = new BasicDBObject();
				documentObj.append("name", array_names[i]);
				documentObj.append("age", (int)(Math.random() * 60));
				documentObj.append("joined_date", new Date());
				documentObj.append("friends", pickFriends());
				address = pickAddress();
				documentObj.append("address", new BasicDBObject("country",address[0]).append("state", address[1]).append("city", address[2]));
				collectionObj.insert(documentObj);
			}

			// Get MongoDb Collections Count
			System.out.println("Total Number Of MongoDb Collection?=  "+ collectionObj.getCount());

			/**** READ OPERATION ****/
			// ------------------------------------ Get All Documents ------------------------------------
			DBCursor cursorObj = collectionObj.find();
			try {
				while(cursorObj.hasNext()) {
					System.out.println(cursorObj.next());
				}
			} finally {
				cursorObj.close();
			}

			// ------------------------------------ Get Documents By Query ------------------------------------
			BasicDBObject selectQuery = new BasicDBObject("age", new BasicDBObject("$gt", 40));
			cursorObj = collectionObj.find(selectQuery);
			System.out.println("\nPersons With Age Greater Than 40 Years?= "+ cursorObj.count());

			/**** UPDATE OPERATION ****/
			// Update Documents Found By The Query i.e. Update The Documents Having 'Age > 40'
			BasicDBObject ageDocument = new BasicDBObject();
			ageDocument.put("age", 20);

			BasicDBObject updateObj = new BasicDBObject();
			updateObj.put("$set", ageDocument);

			collectionObj.update(selectQuery, updateObj, false, true);

			// Find & Display
			cursorObj = collectionObj.find(selectQuery);
			System.out.println("Persons With Age > 40 After Update?= "+ cursorObj.count());

			// ------------------------------------ Get All Documents Again ------------------------------------
			cursorObj = collectionObj.find();
			try {
				while(cursorObj.hasNext()) {
					System.out.println(cursorObj.next());
				}
			} finally {
				cursorObj.close();
			}

			/**** DELETE OPERATION ****/
			// Dropping Collection From The MongoDb Database
			if(dbObj.collectionExists("jcg")) {
				collectionObj.drop();
			}
			System.out.println("\n Collection Successfully Dropped From The Database");

			// Dropping The MongoDb Database
			dbObj.dropDatabase();
			System.out.println("\n Database Successfully Dropped");

			/**** DONE ****/
			mongoClntObj.close();
			System.out.println("\n! Demo Completed !");
		} catch (MongoException mongoExObj) {
			mongoExObj.printStackTrace();
		}
	}
}
Do note, by default MongoDb server, is always running in a trusted mode and it doesn’t require an authentication.
4. Run the Application
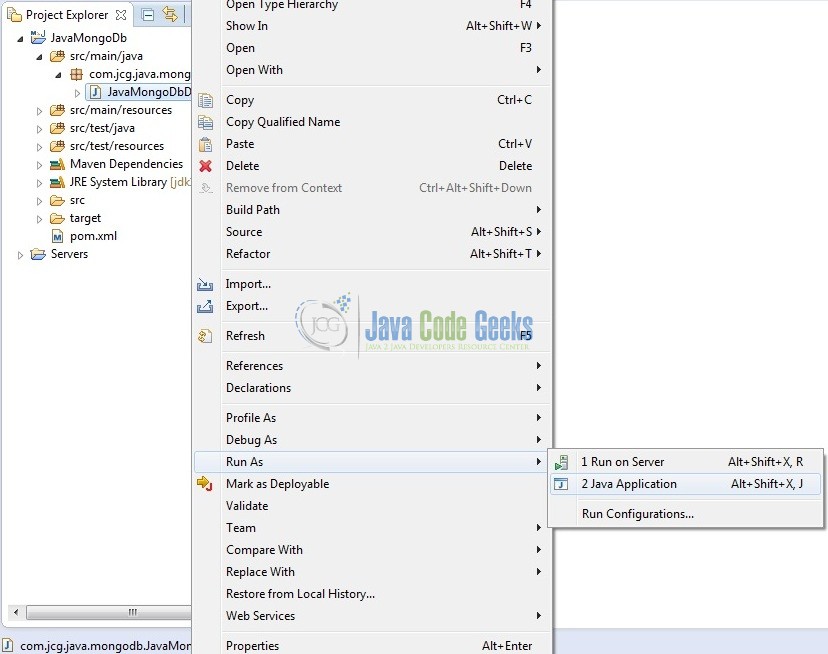
To run the application, Right click on the JavaMongoDbDemo class, Run As -> Java Application. Developers can debug the example and see what happens after every step. Enjoy!
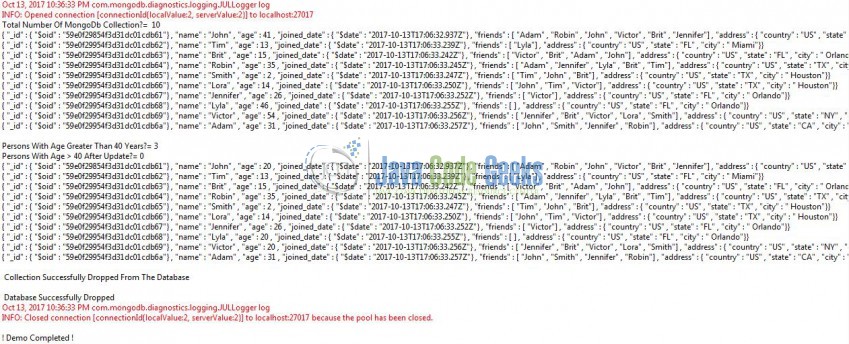
5. Project Demo
The code shows the following status as output:
That’s all for this post. Happy Learning!!
6. Conclusion
That’s all for getting the developers started with the MongoDB Java Driver. We will look into more features in the next posts. I hope this article served you whatever you were looking for and developers can download the sample application as an Eclipse project in the Downloads section.
7. Download the Eclipse Project
This was an example of MongoDb and Java.
You can download the full source code of this example here: JavaMongoDb



Amazing article, so simplified that even a newbie can understand! Kudos Yatin Batra! I tried the code sample and it works perfectly in Eclipse.
Hope you are doing excellent Manish. Thank You & I am glad that you really liked the tutorial. More tutorials to follow! :)
Great article. Your effort is appreciated.