Hello readers, in this tutorial, we will learn how to connect the Servlet with the Mongo database. For this tutorial, we’ll have a login form to validate the user’s login credentials in the Mongo database.
Table Of Contents
1. Introduction
If you have installed the MongoDB application (version 3.6) on Windows or Ubuntu operating system and you wish to learn the usage of Mongo database with JSP and Servlet then follow the below steps. It is very simple, but before moving further let’s take a look at the Servlet’s, JSP, and the Mongo database.
1.1 What is Servlet?
Servlet is a Java program which exists and executes in the J2EE servers and is used to receive the HTTP protocol request, process it and send back the response to the client. Servlets make use of the Java standard extension classes in the packages javax.servlet and javax.servlet.http. Since Servlets are written in the highly portable Java language and follow a standard framework, they provide a means to create the sophisticated server extensions in a server and operating system in an independent way.
Typical uses for HTTP Servlets include:
- Processing and/or storing the data submitted by an
HTMLform - Providing dynamic content i.e. returning the results of a database query to the client
- Managing state information on top of the stateless
HTTPi.e. for an online shopping cart system which manages the shopping carts for many concurrent customers and maps every request to the right customer
As Servlet technology uses the Java language, thus web applications made using Servlet are Secured, Scalable, and Robust.
1.2 What is JSP?
Java Server Pages is a technology used to develop the web-pages by inserting the Java code in the HTML pages. The JSP pages are easier to maintain because developers can separate the designing and the development phase. The following are the advantages of using JSP over Servlet:
- JSP provides an extension to the Servlet technology
- JSP can easily separate the business logic from the presentation logic
- JSP provide Action tags, JSTL tags, Custom tags, and the Implicit objects that helps a developer write less code than Servlet
1.3 What is MongoDB?
- MongoDB is a high-performance NoSQL database where each database has collections which in turn has documents. Each document has a different number of fields, size, content, and is stored in a JSON-like format (i.e. Binary JSON (BSN))
- The documents in MongoDB doesn’t need to have a schema defined beforehand. Instead, the fields (i.e. records) can be created on the go
- Data model available within the MongoDB allows developers to represent the hierarchical relationships, store arrays, and other more complex structures easily
- This NoSQL solution often comes with embedding, auto-sharding, and onboard replication for better scalability and high availability
1.3.1 Why MongoDB?
- As a NoSQL type database, MongoDB stores the data in the form of a document. Thus, MongoDB offers more flexibility
- This database supports search by field-name, range queries, and the regular expressions. It often provides queries to return the particular fields inside the documents
- MongoDB offers indexes to improve the search performance within the NoSQL database
- To offer horizontal scalability, MongoDB uses sharding by splitting the data across the many MongoDB occurrences
- Replication: MongoDB can give high availability with the replica sets
Now, open up the Eclipse Ide, and we will create a simple application using the Servlet and JSP with the Mongo database.
2. MongoDB and JSP/Servlet Example
Here is a step-by-step guide for implementing this tutorial.
2.1 Tools Used
We are using Eclipse Kepler SR2, JDK 8 and Maven. Having said that, we have tested the code against JDK 1.7 and it works well.
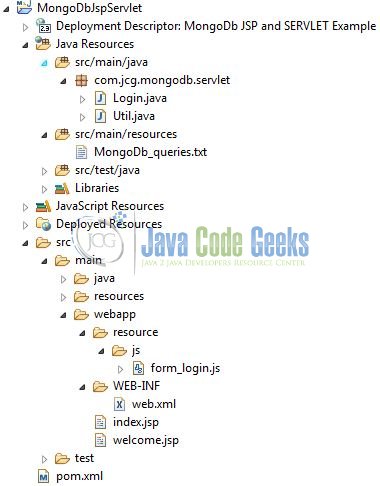
2.2 Project Structure
Firstly, let’s review the final project structure if you are confused about where you should create the corresponding files or folder later!
2.3 Project Creation
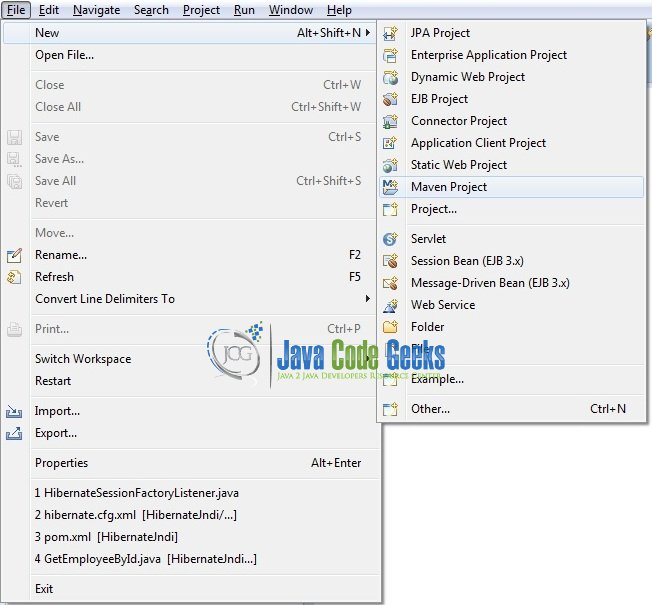
This section will show how to create a Java-based Maven project with Eclipse. In Eclipse Ide, go to File -> New -> Maven Project.
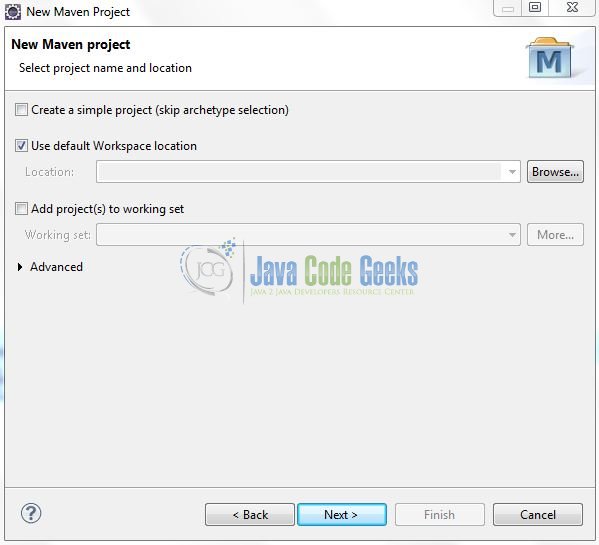
In the New Maven Project window, it will ask you to select project location. By default, ‘Use default workspace location’ will be selected. Just click on next button to proceed.
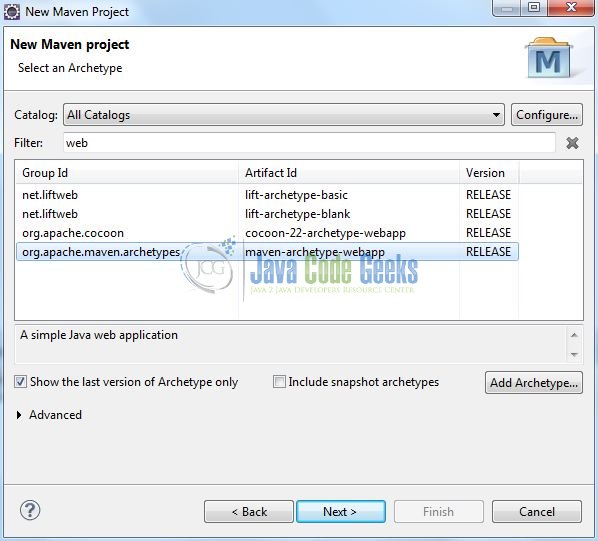
Select the ‘Maven Web App’ Archetype from the list of options and click next.
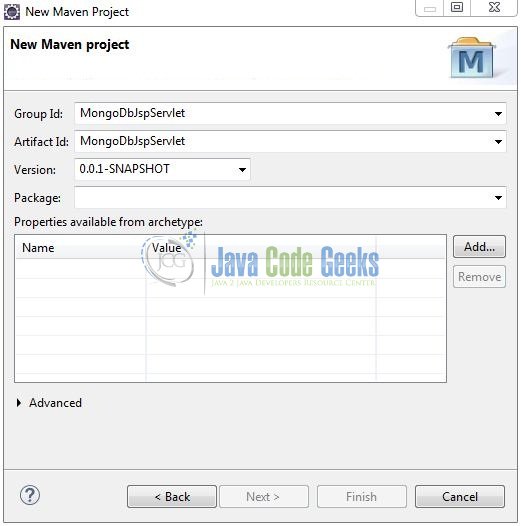
It will ask you to ‘Enter the group and the artifact id for the project’. We will enter the details as shown in the below image. The version number will be by default: 0.0.1-SNAPSHOT.
Click on Finish and the creation of a maven project is completed. If you see, it has downloaded the maven dependencies and a pom.xml file will be created. It will have the following code:
pom.xml
<project xmlns="http://maven.apache.org/POM/4.0.0" xmlns:xsi="http://www.w3.org/2001/XMLSchema-instance" xsi:schemaLocation="http://maven.apache.org/POM/4.0.0 http://maven.apache.org/xsd/maven-4.0.0.xsd">
	<modelVersion>4.0.0</modelVersion>
	<groupId>MongoDbJspServlet</groupId>
	<artifactId>MongoDbJspServlet</artifactId>
	<version>0.0.1-SNAPSHOT</version>
	<packaging>war</packaging>
</project>
Let’s start building the application!
3. Application Building
Let’s create an application to understand the basic building blocks of this tutorial.
3.1 Database & Table Creation
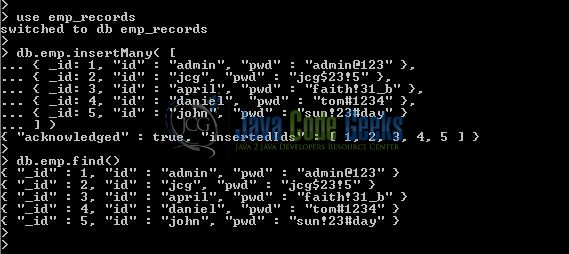
To begin with the implementation, we will need to create a sample database and collection. The below script creates a database called emp_records with a collection of emp. Open the Mongo terminal and execute the script.
Database & Collection creation script
> use emp_records

> db.emp.insertMany( [
	{ _id: 1, "id" : "admin", "pwd" : "admin@123" },
	{ _id: 2, "id" : "jcg", "pwd" : "jcg$23!5" },
	{ _id: 3, "id" : "april", "pwd" : "faith!31_b" },
	{ _id: 4, "id" : "daniel", "pwd" : "tom#1234" },
	{ _id: 5, "id" : "john", "pwd" : "sun!23#day" }
] )

> db.emp.find()
The script gives the below output.
3.2 Maven Dependencies
Here, we specify the dependencies for the MongoDB and the Servlet API. The rest dependencies will be automatically resolved by the Maven framework and the updated file will have the following code:
pom.xml
<project xmlns="http://maven.apache.org/POM/4.0.0" xmlns:xsi="http://www.w3.org/2001/XMLSchema-instance"
	xsi:schemaLocation="http://maven.apache.org/POM/4.0.0 http://maven.apache.org/maven-v4_0_0.xsd">
	<modelVersion>4.0.0</modelVersion>
	<groupId>MongoDbJspServlet</groupId>
	<artifactId>MongoDbJspServlet</artifactId>
	<packaging>war</packaging>
	<version>0.0.1-SNAPSHOT</version>
	<name>MongoDbJspServlet Maven Webapp</name>
	<url>http://maven.apache.org</url>
	<dependencies>
		<!-- https://mvnrepository.com/artifact/org.mongodb/mongo-java-driver -->
		<dependency>
			<groupId>org.mongodb</groupId>
			<artifactId>mongo-java-driver</artifactId>
			<version>3.6.3</version>
		</dependency>
		<!-- https://mvnrepository.com/artifact/javax.servlet/javax.servlet-api -->
		<dependency>
			<groupId>javax.servlet</groupId>
			<artifactId>javax.servlet-api</artifactId>
			<version>4.0.0</version>
		</dependency>
	</dependencies>
	<build>
		<finalName>${project.artifactId}</finalName>
	</build>
</project>
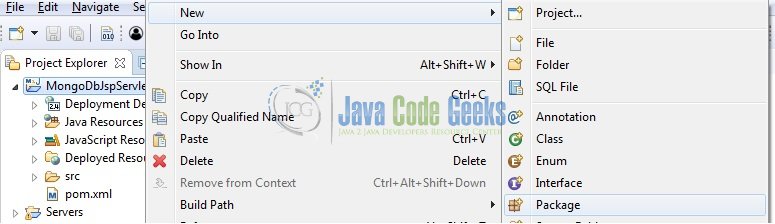
3.3 Java Class Creation
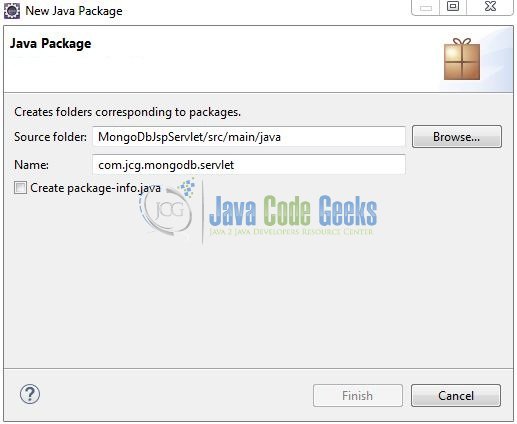
Let’s create the required Java files. Right-click on src/main/java folder, New -> Package.
A new pop window will open where we will enter the package name as: com.jcg.mongodb.servlet.
Once the package is created in the application, we will need to create the Controller and the Database classes. Right-click on the newly created package: New -> Class.

A new pop window will open and enter the file name as: Login. The servlet controller class will be created inside the package: com.jcg.mongodb.servlet.

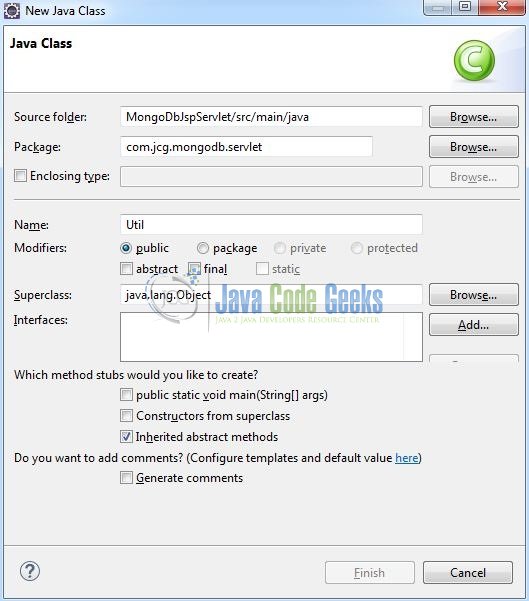
Repeat the step (i.e. Fig. 9) and enter the filename as: Util. The Dao class to read the cookies will be created inside the package: com.jcg.mongodb.servlet.
3.3.1 Implementation of Controller Class
Here is an example which shows how to access the Mongo database using Servlet. This class will fetch the login_id and login_pwd parameters from the request and passes it to the searchUserInDb() method for the successful validation. Let’s see the simple code snippet that follows this implementation.
Login.java
package com.jcg.mongodb.servlet;

import java.io.IOException;

import javax.servlet.ServletException;
import javax.servlet.annotation.WebServlet;
import javax.servlet.http.HttpServlet;
import javax.servlet.http.HttpServletRequest;
import javax.servlet.http.HttpServletResponse;

@WebServlet("/loginServlet")
public class Login extends HttpServlet {

	private static final long serialVersionUID = 1L;

	// This method is called by the servlet container to process a 'post' request
	public void doPost(HttpServletRequest req, HttpServletResponse resp) throws IOException, ServletException {
		handleRequest(req, resp);
	}

	public void handleRequest(HttpServletRequest req, HttpServletResponse resp) throws IOException, ServletException {

		// Reading post parameters from the request
		String param1 = req.getParameter("login_id"),
				param2 = req.getParameter("login_pwd");

		// Checking for null and empty values
		if(param1 == null || param2 == null || "".equals(param1) || "".equals(param2)) {
			req.setAttribute("error_message", "Please enter login id and password");
			req.getRequestDispatcher("/index.jsp").forward(req, resp);
		} else {
			boolean isUserFound = Util.searchUserInDb(param1, param2);
			if(isUserFound) {
				req.getRequestDispatcher("/welcome.jsp").forward(req, resp);
			} else {
				req.setAttribute("error_message", "You are not an authorised user. Please check with administrator.");
				req.getRequestDispatcher("/index.jsp").forward(req, resp);
			}
		}
	}
}
3.3.2 Implementation of Database Class
The following code snippet shows the database connectivity implementation and validates the inputted login credentials with the database. If the credentials are successfully validated, a success response is sent otherwise an error. Do remember, to change the Database URL and Port no. according to the settings in your environment.
Util.java
package com.jcg.mongodb.servlet;

import java.util.ArrayList;
import java.util.List;

import org.bson.Document;

import com.mongodb.BasicDBObject;
import com.mongodb.MongoClient;
import com.mongodb.client.FindIterable;
import com.mongodb.client.MongoCollection;
import com.mongodb.client.MongoDatabase;

public class Util {

	// Method to make a connection to the mongodb server listening on a default port
	private static MongoClient getConnection() {
		int port_no = 27017;
		String url = "localhost";

		MongoClient mongoClntObj = new MongoClient(url, port_no);
		return mongoClntObj;
	}

	// Method to search a user in the mongodb
	public static boolean searchUserInDb(String loginId, String loginPwd) {
		boolean user_found = false;
		String db_name = "emp_records",
				db_collection_name = "emp";

		// Get the mongodb connection
		MongoDatabase db = getConnection().getDatabase(db_name);

		// Get the mongodb collection.
		MongoCollection col = db.getCollection(db_collection_name);

		// Get the particular record from the mongodb collection
		List obj = new ArrayList();
		obj.add(new BasicDBObject("id", loginId));
		obj.add(new BasicDBObject("pwd", loginPwd));

		// Form a where query
		BasicDBObject whereQuery = new BasicDBObject();
		whereQuery.put("$and", obj);
		System.out.println("Sql query is?= " + whereQuery.toString());

		FindIterable cursor = col.find(whereQuery);
		for(Document doc : cursor) {
			System.out.println("Found?= " + doc);
			user_found = true;
		}
		return user_found;
	}
}
3.4 Creating JSP Views
Servlet supports many types of views for different presentation technologies. These include – JSP, HTML, XML etc. So let us write a simple view in MongoDbJspServlet/src/main/webapp/. To make the form works with Java servlet, we need to specify the following attributes for the <form> tag:
method="post": To send the form data as an HTTP POST request to the server. Generally, form submission should be done in HTTP POST methodaction="Servlet Url ": Specifies the relative URL of the servlet which is responsible for handling the data posted from this form
3.4.1 Index Page
This page contains the form to input the login credentials and displays an error message if the credentials are not validated or the service is not responding. Add the following code to it:
index.jsp
<!DOCTYPE html PUBLIC "-//W3C//DTD HTML 4.01 Transitional//EN" "http://www.w3.org/TR/html4/loose.dtd">
<html>
<head>
    <title>MongoDb Servlet Example</title>
    <meta http-equiv="Content-Type" content="text/html; charset=UTF-8">

    <!-- jQuery Files -->
    <script type="text/javascript" src="https://ajax.googleapis.com/ajax/libs/jquery/3.3.1/jquery.min.js"></script>
    <script type="text/javascript" src="resource/js/form_login.js"></script>

    <!-- CSS File -->
    <link rel="stylesheet" href="https://maxcdn.bootstrapcdn.com/bootstrap/3.3.7/css/bootstrap.min.css">
</head>
<body>
    <div id="mongoDbServlet" class="container">
        <h1 align="center" class="text-primary">MongoDb Jsp and Servlet Example</h1>
        <hr />

        <!------ MONGODB JSP & SERVLET EXAMPLE ------>
        <div id="login_form">
            <form id="user_login_form" name="loginForm" method="post" action="loginServlet">
                <!----- LOGIN FORM ------>
                <div class="input-group">
                    <span class="input-group-addon"><i class="glyphicon glyphicon-user"></i></span>
                    <input type="text" class="form-control" id="login_id" placeholder="Enter login id ..." name="login_id" maxlength="6">
                </div>
                <div> </div>
                <div class="input-group">
                    <span class="input-group-addon"><i class="glyphicon glyphicon-lock"></i></span>
                    <input type="password" class="form-control" id="login_pwd" placeholder="Enter password ..." name="login_pwd">
                </div>

                <!----- SUBMIT BUTTON ------>
                <div> </div>
                <button id="submit_btn" type="submit" class="btn btn-primary">Confirm identity</button>
            </form>
        </div>

        <h4 id="errMsg" class="text-danger" align="center">${error_message}</h4>
    </div>
</body>
</html>
3.4.2 Success Page
This page displays a success message if the login credentials are successfully validated. Add the following code to it:
welcome.jsp
<!DOCTYPE html PUBLIC "-//W3C//DTD HTML 4.01 Transitional//EN" "http://www.w3.org/TR/html4/loose.dtd">
<html>
<head>
    <title>MongoDb Servlet Example</title>
    <meta http-equiv="Content-Type" content="text/html; charset=UTF-8">

    <!-- CSS File -->
    <link rel="stylesheet" href="https://maxcdn.bootstrapcdn.com/bootstrap/3.3.7/css/bootstrap.min.css">
</head>
<body>
    <div id="mongoDbServlet" class="container">
        <h2 align="center" class="text-success">Welcome user!</h2>
    </div>
</body>
</html>
3.5 Deployment Descriptor
In web.xml file we have declared the servlet to receive all kind of the requests and specifies the default page (i.e. index.jsp). Add the following code to it:
web.xml
<?xml version="1.0" encoding="UTF-8"?>
<web-app
	xmlns="http://java.sun.com/xml/ns/javaee"
	xmlns:xsi="http://www.w3.org/2001/XMLSchema-instance"
	xsi:schemaLocation="http://java.sun.com/xml/ns/javaee        http://java.sun.com/xml/ns/javaee/web-app_3_0.xsd"
	version="3.0">

	<display-name>MongoDb JSP and SERVLET Example</display-name>

	<servlet>
      <servlet-name>Login</servlet-name>
      <servlet-class>com.jcg.mongodb.servlet.Login</servlet-class>
   </servlet>
   <servlet-mapping>
      <servlet-name>Login</servlet-name>
      <url-pattern>/Login</url-pattern>
   </servlet-mapping>

	<!-- Welcome File List -->
	<welcome-file-list>
		<welcome-file>index.jsp</welcome-file>
	</welcome-file-list>
</web-app>
4. Run the Application
As we are ready with all the changes, let us compile the project and deploy the application on the Tomcat7 server. To deploy the application on Tomat7, right-click on the project and navigate to Run as -> Run on Server.

Tomcat will deploy the application in its web-apps folder and shall start its execution to deploy the project so that we can go ahead and test it in the browser.
5. Project Demo
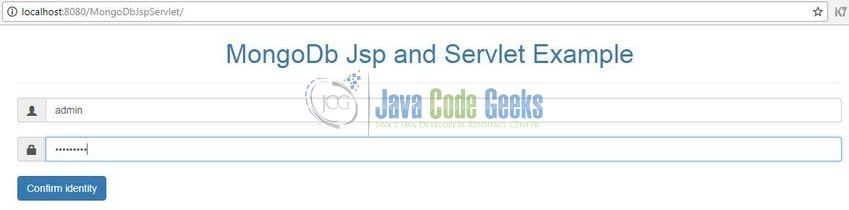
Open your favorite browser and hit the following URL. The output page will be displayed.
http://localhost:8080/MongoDbJspServlet/
Server name (localhost) and port (8080) may vary as per your tomcat configuration. Developers can debug the example and see what happens after every step. Enjoy!
Here, if the login credentials are successfully validated, the users will get a success message as shown in Fig. 14.

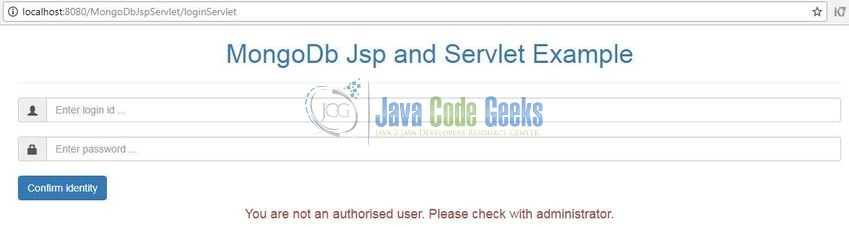
If the server URL is not responding, the user will get an error message as shown in Fig. 15.
That’s all for this post. Happy Learning!!
6. Conclusion
In this section, developers learned how to create a simple application using the Servlet and JSP with the Mongo database. Developers can download the sample application as an Eclipse project in the Downloads section.
7. Download the Eclipse Project
This was an example of MongoDB and Servlet/JSP.
You can download the full source code of this example here: MongoDbJspServlet
