1. Introduction
GIT is a popular versioning system accepted and used throughout the world. GIT based versioning can be managed using either command line or GUI tools available for every operating system. However, developers have highly preferred to use command line tools for hassle-free versioning. This article is a one-stop guide for almost every GIT command that you would need to know in order to work with GIT based versioning system in your project.
2. GIT Terminologies
Before we move on to the commands, there are certain terms related to GIT that you need to be aware of. You can skip to the commands directly in case you are already aware about the terminologies.
Repository: A collection of files that make up a project is termed as a repository. Any folder in your local storage can be converted to a GIT repository and shared across the team.
Branch: A branch is like a named copy of the repository. Developers use branches to make changes in the files. These changes are later combined into the main branch (called master branch by default).
Clone: Cloning is to create a local copy of the files that are stored online on some remote server. A cloned copy is used to easily edit the files using a custom IDE or tool.
Fork: Forking a repository is to create a copy of the repository of another user into your account and freely edit the files without the risk of affecting the main repository.
Commit: In a cloned repository, once the changes are completed, developer marks the changes as complete by committing the relevant files.
Push: The changes that the developer commits resides in the local repository. They are ready to be moved to the remote branch of the repository. This process of pushing the committed local changes is called “PUSH”.
Pull: A pull allows to grab the latest changes that have been added into the remote repository of a particular branch.
Pull request: A pull request is used to request owner or authorised developer of a specific branch to take up changes of a particular branch into the requested branch.
Merge: On approving the pull request, the code from one branch combines into the other branch. This process is popularly known as Merge. The pull request is often called as merge request owing to this terminology.
Fetch: Fetch is slightly different from a Pull request. In a Fetch request, the latest changes are downloaded onto the local repository but not merged into the files.
3. GIT Commands
The commands have been executed on Mac Bash. In case of Windows, GIT comes with a custom bash tool that can be used to work with the files using GIT commands. At few instances, output of the commands are edited in order to provide better clarity.
3.1 GIT Configuration
The below commands store the name and email to be used while committing the files. In the remote repositories, numerous people work together on the repository. These parameters help to identify the author of the changes that are being pushed to the remote repository.
1 2 | $ git config --global user.name "Java Code Geeks"$ git config --global user.email "your.email@domain.com" |
These global settings will be put in a file named .gitconfig. The settings will be used for every project that you maintain using GIT based versioning. The settings can be overwritten using the same command at any point of time without affecting the repositories. The config could be checked at any point of time by using the below command:
1 | $ git config user.name |
The user.name could be replaced by any relevant parameter that needs to be checked. It is also possible to view all the configuration list. The execution of the related command is shown below:
01 02 03 04 05 06 07 08 09 10 11 12 13 14 15 16 17 18 19 20 21 22 23 24 25 26 27 28 29 30 31 32 33 34 | $ git config --listcore.excludesfile=~/.gitignorecore.legacyheaders=falsecore.quotepath=falsemergetool.keepbackup=truepush.default=simplecolor.ui=autocolor.interactive=autorepack.usedeltabaseoffset=truealias.s=statusalias.a=!git add . && git statusalias.au=!git add -u . && git statusalias.aa=!git add . && git add -u . && git statusalias.c=commitalias.cm=commit -malias.ca=commit --amendalias.ac=!git add . && git commitalias.acm=!git add . && git commit -malias.l=log --graph --all --pretty=format:'%C(yellow)%h%C(cyan)%d%Creset %s %C(white)- %an, %ar%Creset'alias.ll=log --stat --abbrev-commitalias.lg=log --color --graph --pretty=format:'%C(bold white)%h%Creset -%C(bold green)%d%Creset %s %C(bold green)(%cr)%Creset %C(bold blue)<%an>%Creset' --abbrev-commit --date=relativealias.llg=log --color --graph --pretty=format:'%C(bold white)%H %d%Creset%n%s%n%+b%C(bold blue)%an <%ae>%Creset %C(bold green)%cr (%ci)' --abbrev-commitalias.d=diffalias.master=checkout masteralias.spull=svn rebasealias.spush=svn dcommitalias.alias=!git config --list | grep 'alias\.' | sed 's/alias\.\([^=]*\)=\(.*\)/\1\ => \2/' | sortinclude.path=~/.gitcincludeinclude.path=.githubconfiginclude.path=.gitcredentialdiff.exif.textconv=exifcredential.helper=osxkeychainuser.name=Abhishek Kothariuser.email=abk.edu@gmail.com |
Further, one can remove a specific configuration value by unsetting the relevant configuration variable. In order to do so, one needs to be in a GIT repository directory. The command to unset a specific argument is mentioned below:
1 | $ git config --unset user.name |
3.2 Initialising a GIT repository
The first step towards configuring your project versioning is to initialise the project directory as a GIT repository. Initialising of a repository basically creates a folder with the name .git. The folder would contain the complete details of the branches being cloned or created in the particular folder.
1 2 3 | $ cd /path-to-your-project/$ git initInitialized empty Git repository in /path-to-your-project/.git/ |
Here the “path-to-your-project” is your corresponding project directory where your command line tool needs to point to. Once initialised, files can be added to the local repository or pulled into the local repository folder from a remote repository. An initialised GIT repository can handle versioning for all the types of files unless it is specified to be ignored. The files can be ignored based on their type or names as required. It is necessary to create the file .gitignore in the project folder to help identify the files to be ignored from versioning.
For instance, consider a Java project under development. During commit, one would prefer to avoid the class files from being committed. In such a case one could use the command given below:
1 | echo *.class >> .gitignore |
The command will create the file as well as store *.class in it. This content in the file would mean that all the files with an extension .class will be ignored when the files are pushed to the repository.
3.3 Adding files to the index of local repository & committing them
With GIT repository once initialised, the developer has two options:
- Add the files and push the files to a repository on remote server
- Clone a remote repository in case a project already exists on the remote server
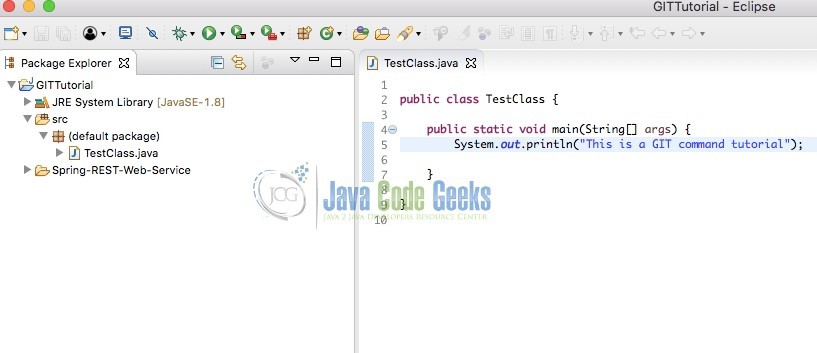
Here, a demo Java project has been created using Eclipse IDE in the folder containing the initialised repository. The project currently contains a single Java class – TestClass.java as shown in figure below.
The first step to push these changes to remote repository is to add the files to index and later commit them.
In order to add all the initial files to the index, the below command can be used.
1 | $ git add * |
On executing the above command, there would be no feedback. However, in the backend, the files are ready to be committed. The files can now be committed to the repository.
1 | $ git commit |
On executing the git commit command, a command line editor screen appears as shown below:
Comments related to the commit need to be entered here to keep track of changes being committed.
01 02 03 04 05 06 07 08 09 10 11 12 13 14 15 16 17 18 | # Please enter the commit message for your changes. Lines starting# with '#' will be ignored, and an empty message aborts the commit.## On branch master## Initial commit## Changes to be committed:# new file: bin/TestClass.class# new file: src/TestClass.java## Untracked files:# .classpath# .project# .settings/#On exiting the editor window, below output should be visible. |
1 2 3 4 5 | $ git commit[master (root-commit) 355ac54] Initial Commit 2 files changed, 9 insertions(+) create mode 100644 bin/TestClass.class create mode 100644 src/TestClass.java |
Now, let us consider the scenario where one tries to ignore the class files. As per the command output shown above, the java as well as class files are committed to the repository. Now, one more class is created as shown in the figure below:
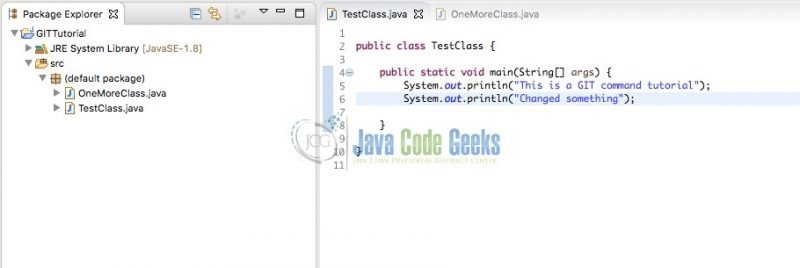
In addition to adding a new class, the previous class has also been changed. Let us now ignore the class files using .gitignore and commit the files once again.
01 02 03 04 05 06 07 08 09 10 11 12 13 | #Important to remove the cached class files from the list$ git rm --cached *.classrm 'bin/TestClass.class'$ echo *.class>>.gitignore$ cat .gitignore*.class$ git add *MacBook-Air:GITTutorial abhishekkothari$ git add *MacBook-Air:GITTutorial abhishekkothari$ git commit [master 6b4f94c] Removed class from commit 3 files changed, 5 insertions(+) delete mode 100644 bin/TestClass.class create mode 100644 src/OneMoreClass.java |
As it can be seen, the class file has been deleted from the remote repository and the java file TestClass.java is re-committed to push the relevant changes.
3.4 Connecting remote repository to local repository and branching
In order to work over a project with a team, it is necessary to store the local files into a remote repository that is shared across the team. The remote repository can be connected to the local repository using the below command:
1 | $ git remote add origin https://github.com/datsabk/GITTutorial.git |
The last argument is the remote URL. It could be the URL of any GIT repository created online using web repositories sites like Github. In order to connect to a remote repository, it is mandatory to create a remote repository online. The command line tools can only copy the local files to the already created repository. Once the remote repository is connected to the local repository, it is possible to view the versions in the corresponding repository at any point of time.
1 | $ git remote -v |
The above command lists out various branches of the project that exist in the remote repository. It should be noted that it shows only the branches which are pushed to the remote repository. If other developers have created local branches and connected them to the local repository, it is not shown until the branch is pushed to the remote repository.
In order to switch to a new branch it is necessary to create the new branch. master branch is created by default in every new repository. In order to work in an isolated branch, one can checkout the master files and create a new branch. In order to do so, we need to checkout a new branch as shown in the command below:
1 | git checkout -b newbranchname |
There could be a need to connect the project to a different repository. In such a case, the below command can be used to remove the remote origin:
1 | $ git remote remove origin |
This command would merely disconnect the local repository from the remote repository. The files that were pushed to the remote repository already will stay intact.
3.5 Push and pull the code to and from the remote repository
1 | $ git push -all origin |
Once the project is ready to be shared among the team, the relevant files can be pushed to the online repository. The above command pushes all the files of the project to the remote repository. By default the files are pushed into the master branch unless a new working branch has been created. It is possible to push the files to a specific branch using the respective branch name as shown below:

1 | $ git push origin newbranch |
Here, newbranch will be the name of branch onto which the files are to be pushed. When working in a team, the need arises when one needs to get the changes done by the other developers into our local workspace. In such a case, one can pull the changes of a particular branch into our local repository using the command below:
1 | $ git pull branch-name |
The command will pull the changes from the mentioned branch and merge them with the current version of local repository files. A GIT pull can be used when one prefers to merge the changes into the latest files before proceeding with the merge request. On occasions, there are conflicts when the files are pulled into the current repository. In such a case one would need to check the differences between the files and commit the correct changes to resolve the conflict. GIT differences can be viewed using the command as below:
1 | $ git diff |
The command will list the differences between every file that has faced conflicts. Whenever there are conflicts, the file would contains changes pertaining to both the files. <<<<<<<<<< would indicate the local file changes while >>>>>>>>>>> would indicate the remote file code. These indicators need to be removed after finalising the code.
3.6 Clone a specific remote repository
1 | $ git clone remote-repository-url |
This command copies all the files from the remote repository to the current directory. This command is generally used when one needs to start working on a project that is already built and pushed to the repository. An example of using it is shown below:
1 | $ git clone https://github.com/datsabk/GITTutorial.git |
Here, https is the specified protocol. Depending on the support from the GIT remote repository server, one can use SSH as well as HTTP protocol. In order to use SSH, one can simply specify the URL as shown below:
1 | git clone ssh://user@host:ssh-port/path/to/foobar.git |
In case the protocol is not specified, GIT defaults to the SSH protocol and asks the password accordingly. In addition to cloning a remote repository, it is also possible to rename a repository while cloning.
1 | $ git clone https://github.com/datsabk/GITTutorial.git gittutorial |
3.7 Merge a branch/changes from a branch to current repository
Once the code reaches a logical end, the developer commits the files into the local repository. These files need to be pushed to the remote repository later for the team to pull the changes. When the code changes are ready to combine with the main branch or a specific child branch, the developer raises a merge request or pull request(as known in GIT terms) for merging the code. In order to raise the merge request using command line, one needs to execute a simple command:
1 | $ git request-pull newbranchname https://github.com/datsabk/GITTutorial.git master |
This command will raise a merge request to request the changes from branch newbranchname to the master branch. The next task is to merge the changes successfully into the expected branch. The below command will merge the changes committed in the mentioned branch-name to the current branch on execution.
1 | $ git merge branch-name |
If the requirement is to merge the changes from newbranch into master, the command needs to be executed with current branch as master branch and the branch-name in the above code as newbranch. The final command will look like:
1 | git merge newbranch |
3.8 Reset the branch and overwrite the committed files
1 | $ git reset --hard HEAD |
The above command resets the committed files of the branch to the previous HEAD revision. A HEAD revision is the last version of file that was pushed to the remote repository. The command is used to give a fresh start to a specific task usually. Reset can come in handy even when a file is missed out during commit. In such a scenario, one can choose to do a soft reset using the below command.
1 | $ git reset --soft HEAD^ |
In the above command, ^ sign indicates the previous commit state. Thus, once can revert the files to the last committed version and amend the commit. Once the files are reset, add the corresponding file to the index once again using the command $git add file.ext. Later, the collection of files can be re-committed to fix the commit.
There can also be a need arising where one needs to remove the changes that were done so far and start afresh with the file. In such a scenario, the below command comes in handy.
1 | $ git checkout HEAD filename |
The command checkouts the file from the remote repository and overwrites the local file version with it. The command is used to get the latest version of a specific file to avoid conflicts during merge. git checkout could also be used to create a new branch using below command.
1 | $ git checkout new-branch |
3.9 Logging information for GIT
1 | $ git log |
The command provides a log of events that have been done. Output is similar to the one shown below after three stages of commit while executing the previously discussed commands:
01 02 03 04 05 06 07 08 09 10 11 12 13 14 15 16 17 18 | $ git logcommit 467f12d8a0f7741247643e5e9c8e2f6a7406cecc (HEAD -> newbranch)Author: Abhishek Kothari Date: Sat Feb 17 18:07:09 2018 +0530 Added one more changecommit 6b4f94c5d2506d6e64d3435f746518489faf1a39 (master)Author: Abhishek Kothari Date: Sat Feb 17 01:55:54 2018 +0530 Removed class from commitcommit 355ac5412ee7529b8e0a96c138b67c2489f7a04fAuthor: Abhishek Kothari Date: Sat Feb 10 16:47:47 2018 +0530 Initial Commit |
The output includes the respective transaction ID, Author details as configured using the config commands. The log could be customised further using the command line argument --pretty
1 2 3 4 | $ git log --pretty=oneline467f12d (HEAD -> newbranch) Added one more change6b4f94c (master) Removed class from commit355ac54 Initial Commit |
The log can also be obtained in a highly detailed format by using the argument --decorate=value. The --decorate flag takes 4 different values short, full, auto, no. The names are self explanatory. A sample full decorated log is shown below:
01 02 03 04 05 06 07 08 09 10 11 12 13 14 15 16 17 18 | $ git log --decorate=fullcommit 467f12d8a0f7741247643e5e9c8e2f6a7406cecc (HEAD -> refs/heads/newbranch)Author: Abhishek Kothari Date: Sat Feb 17 18:07:09 2018 +0530 Added one more changecommit 6b4f94c5d2506d6e64d3435f746518489faf1a39 (refs/heads/master)Author: Abhishek Kothari Date: Sat Feb 17 01:55:54 2018 +0530 Removed class from commitcommit 355ac5412ee7529b8e0a96c138b67c2489f7a04fAuthor: Abhishek Kothari Date: Sat Feb 10 16:47:47 2018 +0530 Initial Commit |
4. Most Popular Git Commands – Summary
GIT has been a popular versioning system for almost every type of software project. This article covers all the commands that would be needed in order to use versioning in any project. These commands cover the complete workflow starting from creation of a repository to pushing the files onto remote repository. These commands can be executed using bash as well as windows command line once the necessary environment variables are configured for the command line.

Hi, maybe did you miss -b in command git checkout to create a new branch? Here when you say ” git checkout could also be used to create a new branch using below command.
$ git checkout new-branch”