In this example we shall learn how to rename a Git branch.
1. Pre-requisites
To see this example in action, Git should be installed. It can be downloaded from here.
2. Git Branch
Git branches aren’t like SVN branches which most of us use. The main purpose of SVN branches is to capture large-scale development effort which is again very occasional. On the other hand, Git branches are an integral part of one’s everyday workflow.
A Git branch represents an independent line of development and this serve as an abstraction for the edit/stage/commit process. One can think of them as a way to request a brand new working directory, staging area, and project history. And all the new commits are recorded in the history for the current branch.
In lehman’s terms, purpose of creating is to keep master branch clean, without any changes. Each time, that a feature is to be developed, a separate branch shall be created for it, which will be later copied to master branch.
3. Renaming Git Branch
To understand this example, we shall first create a Git repository, then will create its branch, and finally will rename it.
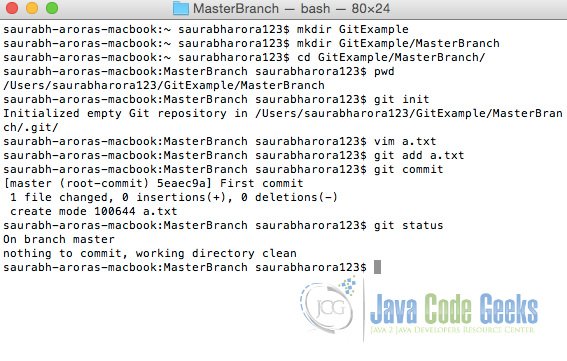
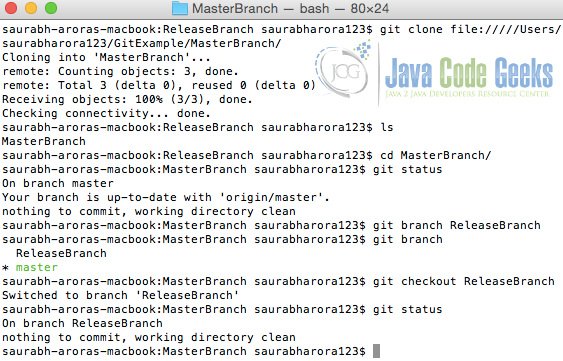
First step, we shall be creating a directory for our master branch.

Once the directory has been created we shall be initializing our branch with git init command.

Post initialization of master branch, we shall add some files and shall commit the same using git commit command.
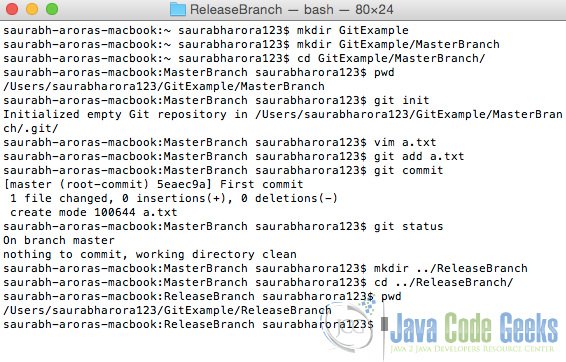
Now that our master branch is ready, we shall create a directory where we shall be creating a new branch.
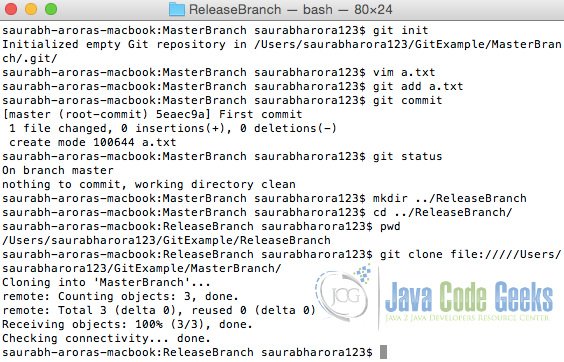
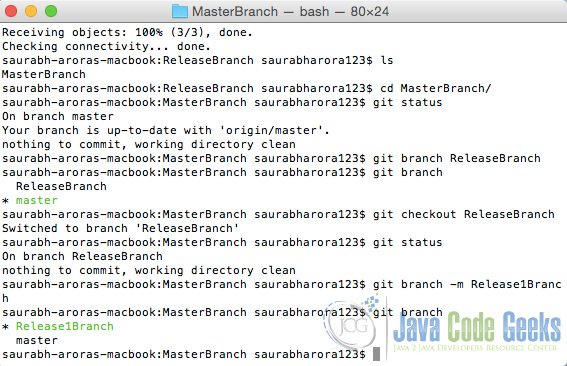
And here we shall be cloning the original master branch using git clone command.

And now we shall be creating a new branch using command git branch <branch_name>. Available branches can be seen using command git branch.
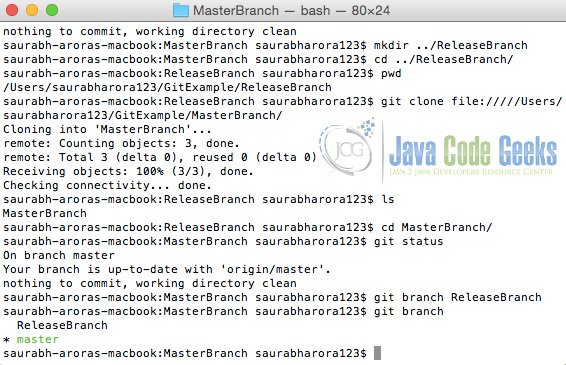
Till now we have successfully created our new branch, it’s time to switch to it. We shall use command git checkout <branch_name> to switch to it. Information on current branch can be seen using command git status.
And then a thought came that we should rename our branch to a more appropriate name. For this we shall be using command git branch -m <new_branch_name> to rename existing branch.
4. Conclusion
In this example, we learnt basics of git branch command and how to rename existing git branches.
