1. Introduction
Git is an open source distributed version control system designed to handle everything from small to large projects with speed and efficiency. Three-tree architecture is the key concept. Here are the three trees:
- Repository tree – The place to store the committed files. It can be local or remote. The remote repository is used to track the same project but is stored somewhere else.
- Working tree – The tree of actual files that you are currently working on. It normally contains the check out files and any local changes that you have made but not yet committed.
- Staging index tree – It acts as an interface between a repository and a working tree. It prepares the committing files.

This diagram shows my open source project – Deadlock-demo‘s local and remote repositories.
In this example, I will demonstrate how to manage remote branches via EGit.
2. Technologies and Tools Used
- Java 1.8.101 (1.8.x will do fine)
- Maven 3.3.9 (3.3.x will do fine)
- Eclipse Mars (Any Java IDE would work)
- Git 2.16.*
3. Use Cases
Deadlock-Demo is my open source project hosted in GitHub at https://github.com/maryzheng01/Deadlock-demo. It has a default master branch. In this example, I created two remote branches from the master:
- https://github.com/maryzheng01/Deadlock-demo/tree/Branch-Bug101-Alex
- https://github.com/maryzheng01/Deadlock-demo/tree/Branch-Bug101-Mary
EGit is the Git integration for the Eclipse IDE. Click here for more details. I will demonstrate below use cases with EGit:
- Clone the
masterbranch to a local repository. - Modify the working files and then push the changes to the remote
masterbranch. - Switch the working files to
Branch-Bug101-Maryand push the changes to the remoteBranch-Bug101-Mary. - Repeat step 3 for
Branch-Bug101-Alex. - Merge the changes from
Branch-Bug101-MarytoBranch-Bug101-Alexand push the changes to the remoteBranch-Bug101-Alex.
4. Clone from a Remote Repository
In this step, I will clone the source codes from a master branch via EGit:
- Click Window->Perspective ->Open Perspective ->Other…->Git to switch to
Gitperspective. - In
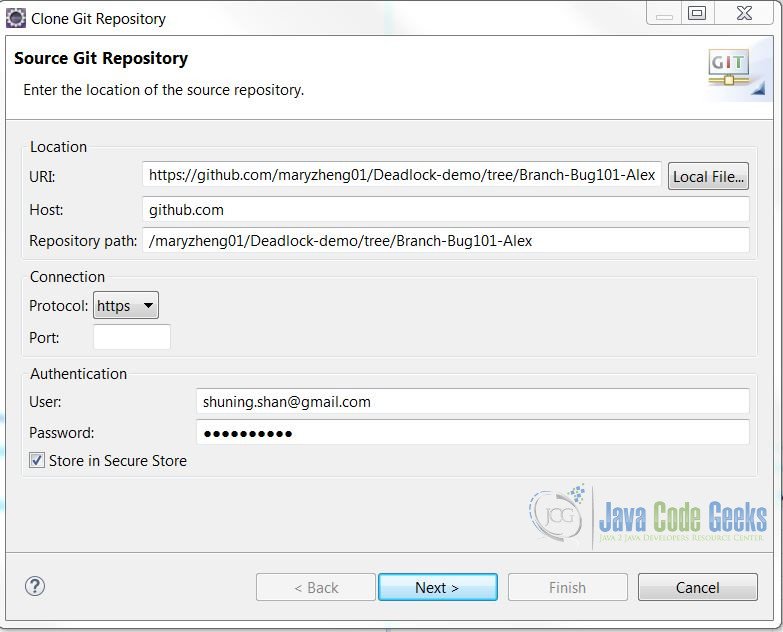
Gitperspective window, click the cloning icon to clone from a remote repository. - Enter the remote repository data as the screenshot below (replace the login with your credentials) and then click
Nextbutton.
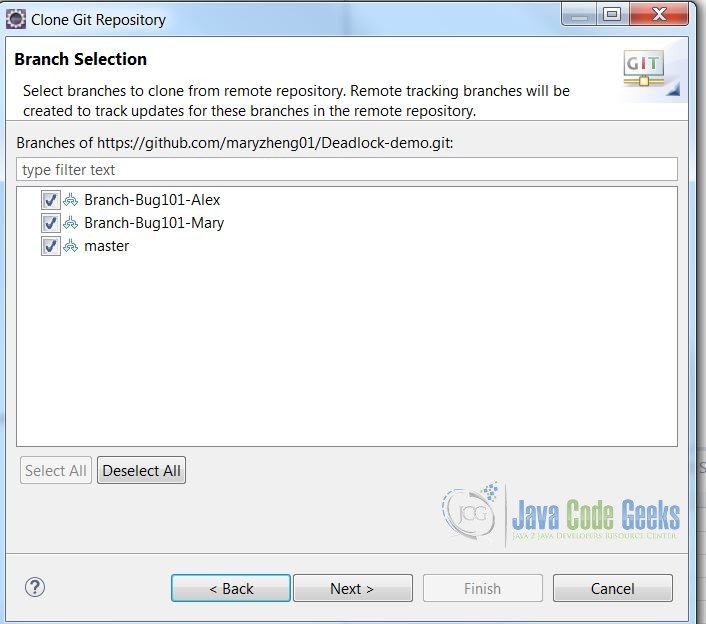
Figure 2 Git Clone - Check all three remote branches, and then click the
Nextbutton.
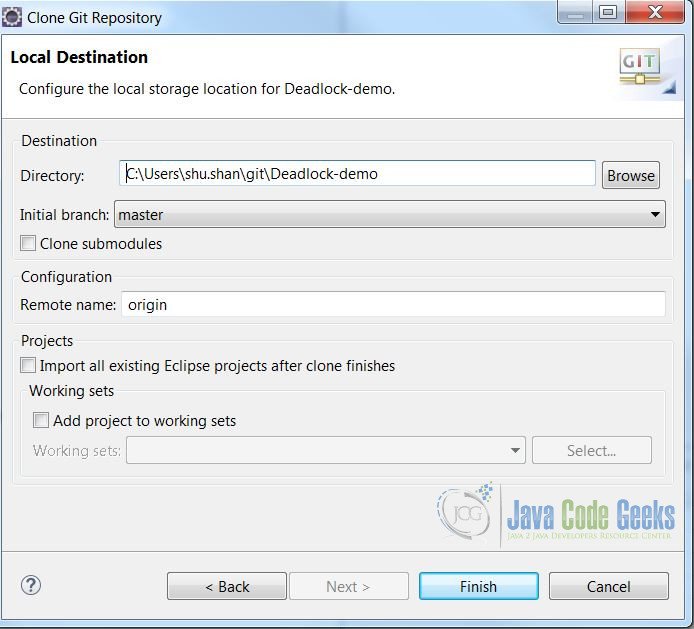
Figure 3 Clone – Branch - Set the local repository location; leave all others as the default value. Click
Finish.
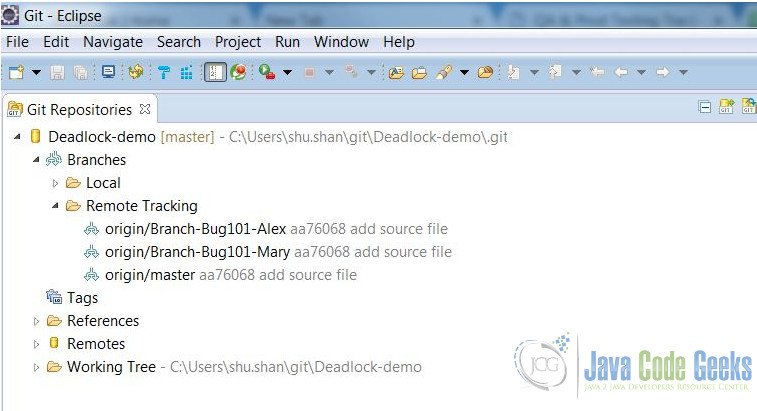
Figure 4 Clone – Local Repo - You can expand the
Remote Trackingfolder to list the remote repositories.
Figure 5 Cloned
5. Modify and Commit the Changes
In this step, I will show you how to modify, commit, and push the changes to the remote repository.
- In
GitPerspective, right-click theDeadlock-Demoproject and selectImport Projects...
Figure 6 Import - Modify the source files and save the changes.
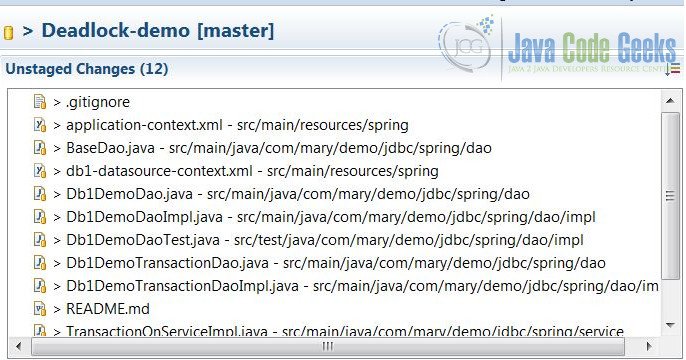
- Select
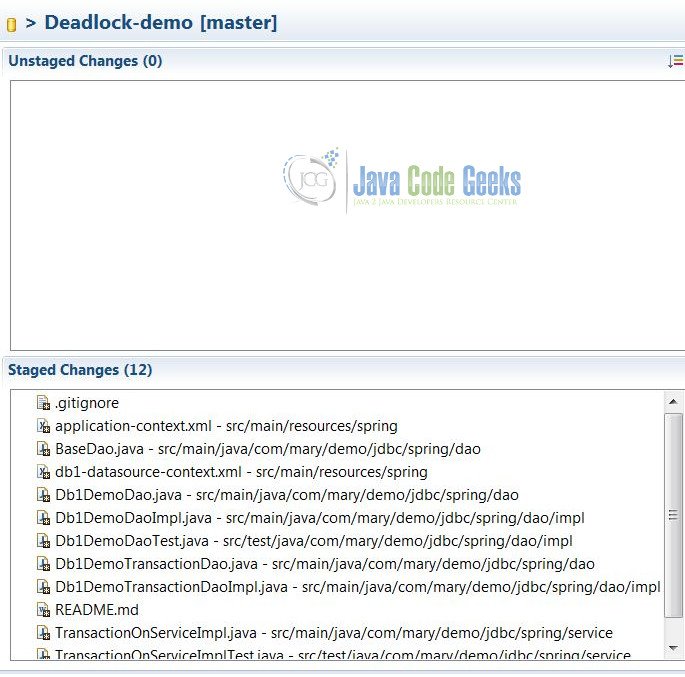
Deadlock-Demo, right-click to select Team->Commit… - Drag and drop the files from
Unstaged ChangestoStaged Changes.
Figure 7 Modified 
Figure 8 Staged - Click the
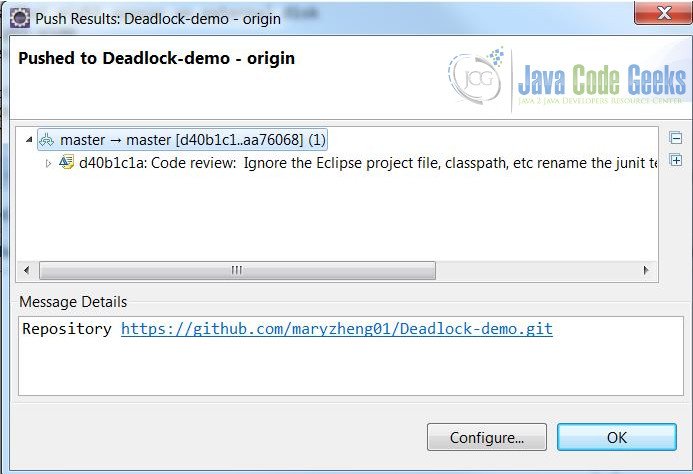
Commit and Pushbutton and clickOKto confirm.
Figure 9 Commit - Verify by checking the GitHub repository.

Figure 10 Verify from GitHub


6. Switch to a Different Branch
EGit provides an easy way to switch to a different branch. In this step, I will show you how to switch to a different branch.

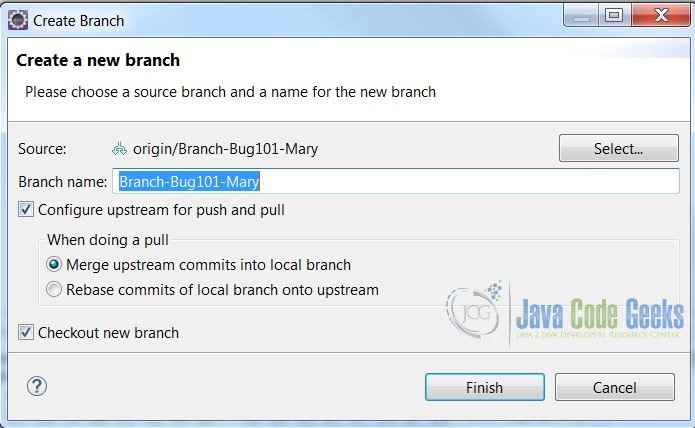
First, you select the Deadlock-Demo project. Then right-click and select Team->Switch to->New Branch…
Select Branch-Bug101-Maryand then click Finish.
Modify the source codes, save them, and follow step 5 to commit to the remote branch.
Repeat these steps for Branch-Bug101-Alex.
7. Merge between Branches
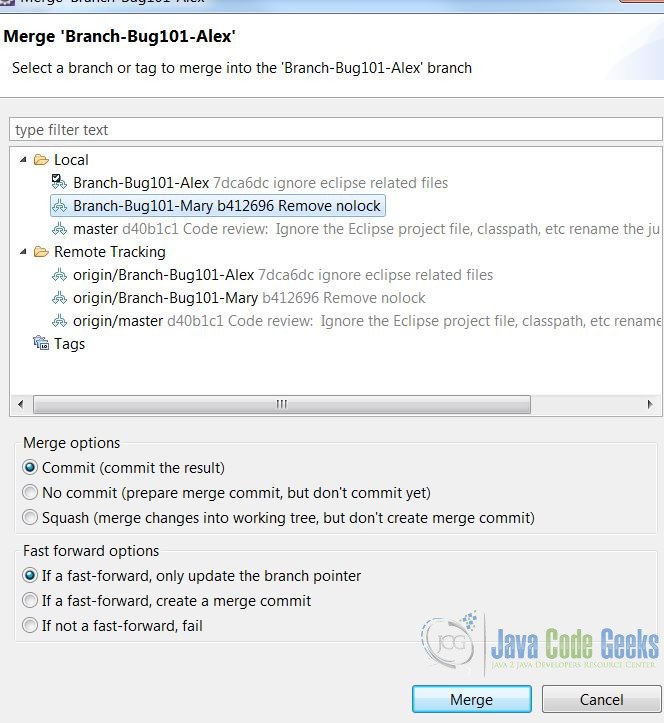
In this step, I will demonstrate how to merge the changes from Branch-Bug101-Mary to Branch-Bug101-Alex.
First, follow step 5 to switch to Branch-Bug101-Alex. Select it and right-click Team->Merge…
Select the source Branch-Bug101-Mary, leave others as the default value, and then click Merge.
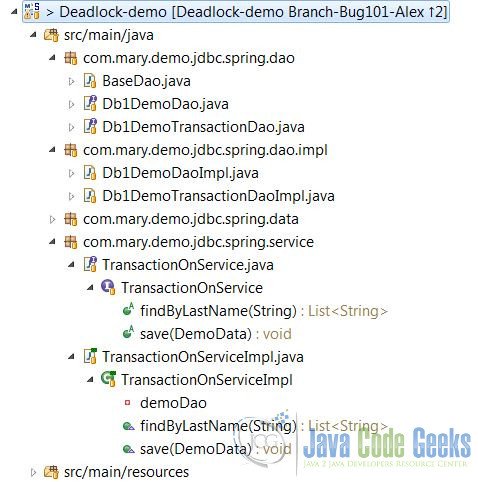
It will pop a new window for merge results.
It pops out a new window for the merge result.

After you merge, you will see that there is an up arrow with a number 2 right next to the project. It indicates that there are two commits that can be pushed to upstream.
Select Branch-Bug101-Alex, right-click Team->Push to Upstream.

8. Summary
In this example, I showed how to clone a project from a remote repository, then update them and commit the changes back to the remote repository. I also demonstrated how to switch to a different branch and how to merge the changes between two branches via EGit. These steps are part of a Git branching workflow.
